7 Practical Tips on How to Resize an Image Without Quality Loss
Now let’s talk about how to resize images in a way that preserves satisfying image quality.
1. Start With a High-Resolution Image
This may seem obvious, but the quality of the photo that you want to resize should be as high as possible. A high-resolution image contains a large amount of visual information encoded in its millions of pixels.
To make the size of an image smaller, similar pixels are basically merged. Starting with more pixels means the algorithm has a richer source from which to select and blend. This results in a sharper, resized version.
To upscale an image, new pixels are created to fill the gaps. If you start with a low-resolution image (few pixels), the software has very little data to work with. It must guess what those new pixels should be, often leading to a blurry or blocky result.
It’s worth noting that this is only true for raster images, such as JPEG/JPG, PNG, GIF, BMP, and TIFF since they are made of a fixed number of pixels. Vector files like SVG are built using mathematical equations, lines, and curves. That’s why they can be resized without any loss of quality and are ideal for graphics such as logos, icons, or illustrations.
2. Don’t Ignore the Aspect Ratio
If possible, preserve the original aspect ratio. Otherwise, your image might get weirdly stretched or distorted. Circles will turn into ovals, faces and other objects will become unnaturally stretched.
In most online image resizers, aspect ratio is maintained automatically. You simply enter a new value for either the width or height, and the other side gets adjusted accordingly.
Some image editors don’t do that, though. For instance, if you’re in Photoshop, you’ll need to check the “Lock the aspect ratio” option. Or, if you’re using the built-in resizing tool on Mac, you’ll need to enable the “Scale proportionally” option.
But what if you actually need to change both the pixel dimensions and the aspect ratio?
Say, the size of your image is 6720 × 4480 pixels, but the website where you need to post it requires the size to be 720 × 720 px. So, you’ll need to scale it down dramatically and change its aspect ratio – turn a rectangle into a square.
Is that possible?
Yes! There are three options to choose from:
First, you can crop the photo.
This goes without saying, but it’s better to use a dedicated crop tool, which allows you to set the cropping area as necessary and change the image size.
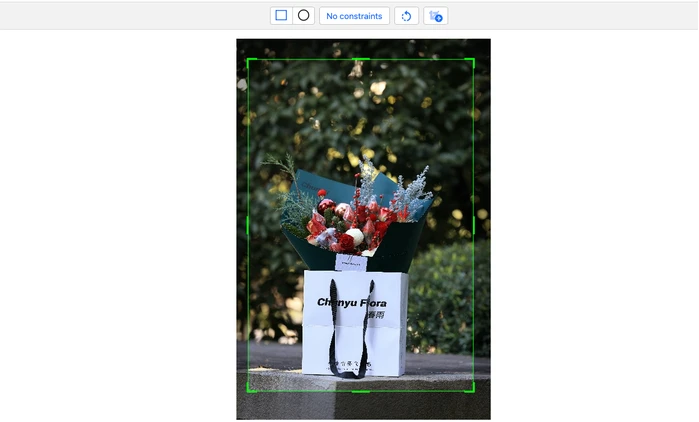
Let’s use the Watermarkly Crop Tool as an example to show how this works.
Upload the image to the Watermarkly’s photo cropper.
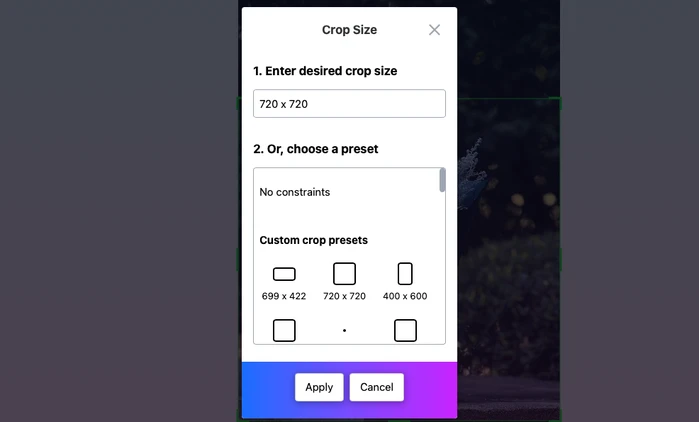
Open the settings menu. Enter the desired image size and click Apply.
Adjust the size and the position of the cropping area to your liking.
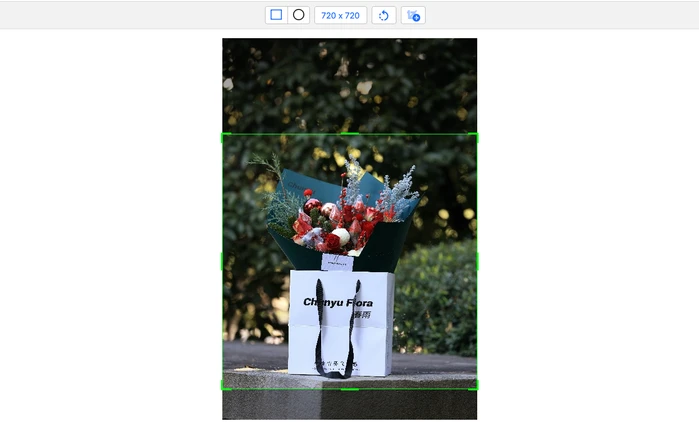
Click Next Step > Crop Images.
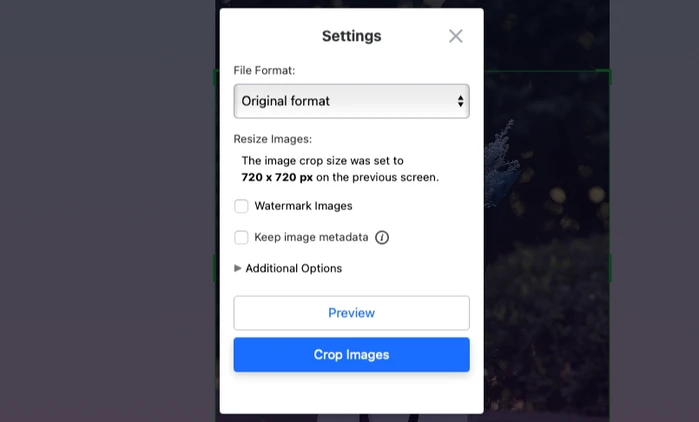
Once the processing is done, download the cropped and resized image.
Open the downloaded image at 100% to check whether the quality after resizing is satisfactory.
Of course, cropping works best when there’s enough space around your main subject. For example, in product photography, when all the attention is focused on a single object. But If you have a full-body portrait and there’s little space at the bottom or the top, you will inevitably cut off the person’s legs or head.
Fortunately, cropping isn’t the only option. You can go for another method to change the aspect ratio and resize an image without losing quality.
Second option is to generate pixels around the image to obtain the required image size and aspect ratio.
Here, the image size and aspect ratio will be changed without getting rid of any part of the original image.
How?
The resizing tool will take the pixels from the original image, blur and add them along the sides of the original image.
This option is also available in Watermarkly. Here’s what you need to do.
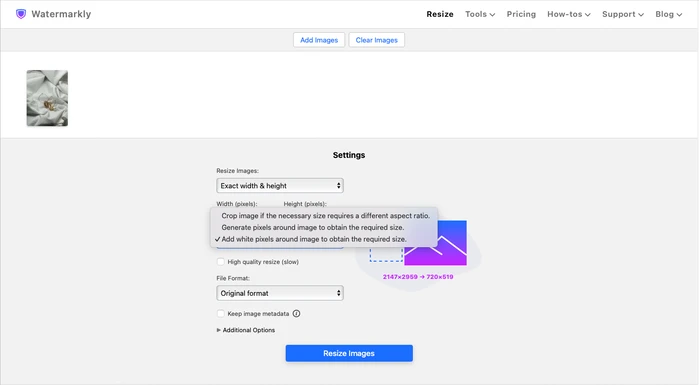
Upload your image into the Watermarkly’s Photo Resizer. Choose the “Exact width & height” option. Enter the size in pixels and then select “Generate pixels around…”.
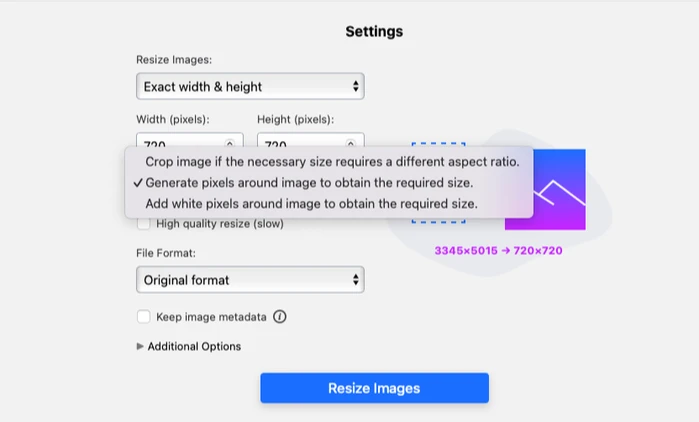
Click the Resize Image button, then download the resized image.
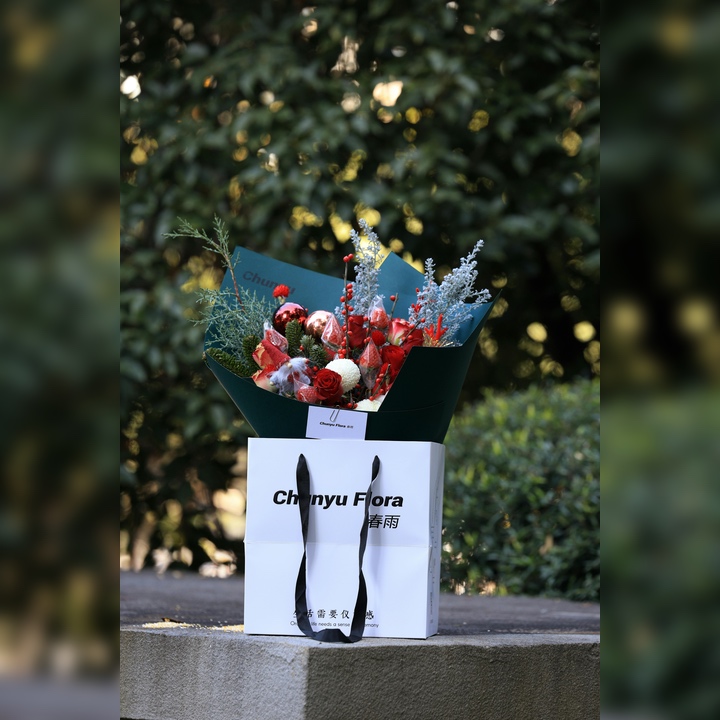
The central part of the image will be resized without any loss of quality. Only the edges will be blurred – vertically or horizontally – depending on how the aspect ratio is changed.
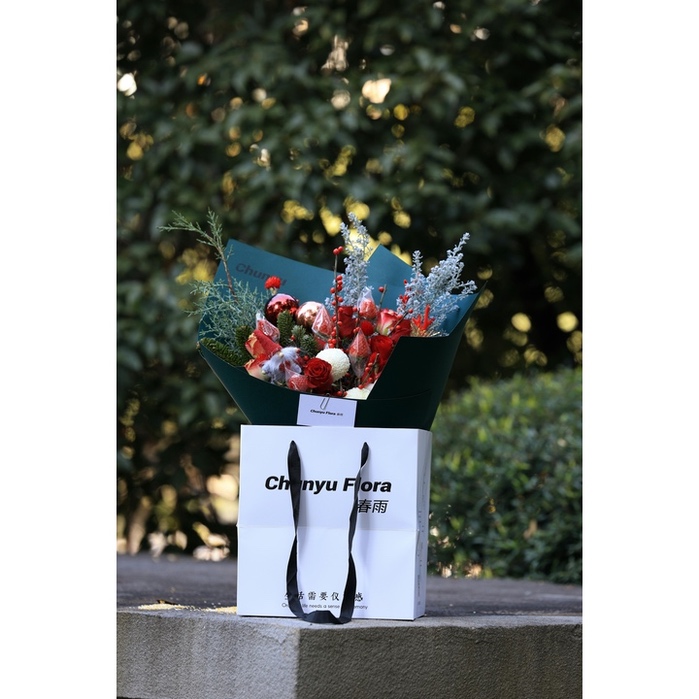
The third option is to add white pixels around the image when changing the aspect ratio.
This method is similar to the previous one. But instead of generated pixels, you simply add white margins around the edges.
Of course, here, it’s much more obvious that the original image remained completely intact. Hence, some people might like it, others might not. Nevertheless, it does allow you to resize an image without losing quality and fit it into the necessary aspect ratio.
Do you want to add white margins?
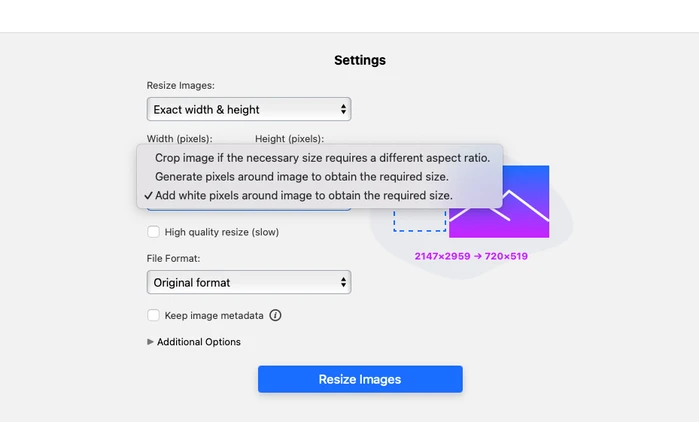
Then choose “Exact width & height” in Watermarkly’s Photo Resizer. Enter the necessary pixel dimensions, then select the “Add white pixels…” option.
After resizing, your image will look like this:
As you can see, the aspect ratio of an image is highly important. But it’s not the only thing that you need to pay attention to.
3. Select the Appropriate Interpolation Method
Interpolation is a process used for resizing images. When upscaling, interpolation creates new pixels by estimating their color based on surrounding pixels. When downscaling, interpolation determines which pixels to keep and how to blend them so the image doesn’t lose too much detail.
Common interpolation methods include Nearest Neighbor, Bilinear, Bicubic and Lanczos.
You can choose one of three methods mentioned above – Nearest Neighbor, Bilinear, or Bicubic – in the "Resample" settings of many image editors. You’ll find this option in advanced tools like Adobe Photoshop, and popular free alternatives like Photopea.
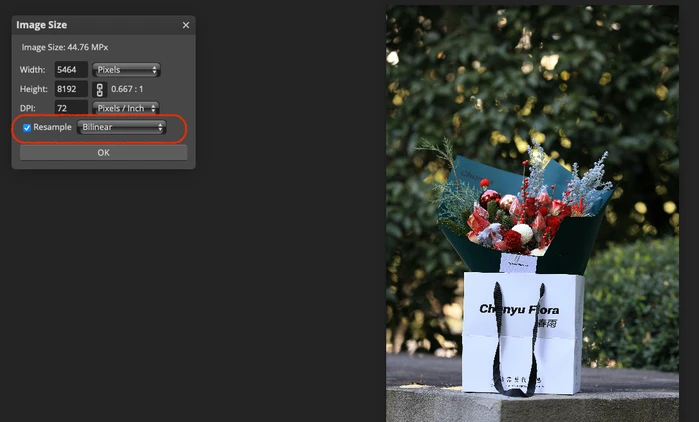
If your goal is to resize an image with minimal quality loss, then choose Bicubic:
- It uses information from 16 surrounding pixels instead of just 4 (bilinear) or 1 (nearest neighbor).
- It produces smoother gradients, sharper edges, and more realistic textures.
- It’s the standard for photography and professional image editing.
Nearest Neighbor works faster, but can produce images that look more pixelated because it simply copies the closest original pixel to fill the new pixel space without any smoothing.
Bilinear produces smoother results than Nearest Neighbor, but blurrier than Bicubic.
However, the real winner in the competition for resizing without quality loss is the Lanczos method:
- It uses a more advanced mathematical filter.
- It’s excellent at preserving fine details.
- It provides results that are sharp, crisp and clear.
Lanczos can be especially helpful when reducing the size of images containing text.
The main downside of this method is that not all apps and image editors support it.
But you’ll be glad to know that this is the only interpolation method that is used in Watermarkly’s free image resizer. So, this is something you won’t have to worry about!
4. Change the Image Size Gradually
Generally speaking, it’s not a good idea to change the image size drastically – by more than 2x.
But if that’s what you need, it’s better to split the resizing process into stages in order to get a resized image without losing quality.
Why?
When you resize an image drastically in one step – for example downsizing it 8× or upscaling it 8× – the algorithm has to do a lot of work and guessing all at once. As a result, fine details, edges and textures can get distorted or blurred.
Interpolation algorithms preserve quality most faithfully when scaling by smaller factors – generally no more than double or half the original size in one step.
For example, resizing in multiple passes (e.g., three steps of 1.5x each) will almost always produce a better final image than scaling in one dramatic 4x enlargement.
Some Photoshop or GIMP users prefer to increase the size only by 10–20% at a time when upscaling. The process takes longer, but the resulting image is noticeably clearer.
You can also find online tools that do that automatically. For example, if you scale an image more than 2x at once in Watermarkly’s image resizer, the app will resize your image in multiple passes.
5. Upscale Image Using AI Tools
AI-based upscaling is the best choice when you need to make an image MUCH bigger. There are several key reasons why:
- AI synthesizes new, context-aware details. Traditional resizing methods (like Bicubic interpolation) work mathematically by blending and averaging the colors of existing pixels. AI models, having been trained on vast datasets of millions of images, can intelligently synthesize plausible new details that fit the context.
- AI better preserves structures and textures. One of AI's key strengths is its ability to maintain structural integrity during enlargement. It excels at preserving sharp edges, geometric shapes, and realistic fine textures – e.g., individual strands of hair, or fabric weaves.
- AI allows you to make more extreme enlargements. While traditional methods often produce visible blurriness or artifacts after a ~2x scale, AI algorithms can effectively upscale images by factors of 4x, 6x, or more. This is why AI tools are used in restoring old photos, remastering old video footage, upscaling textures in video games, etc.
However, AI upscaling isn’t perfect. It can sometimes "hallucinate" details: generate incorrect textures, or fine facial features like eyelashes or pores. It can even alter a person’s appearance completely or add elements that weren’t in the original image.
For moderate enlargement (up to 2x), try Lanczos or Bicubic.
For significant enlargement (beyond 2x), go for AI-based upscaling.
6. Focus On the Main Subject
Say, you want to make an image smaller, and there are no specific pixel dimensions that you need. In this case, it might be better to crop your image without resizing it. For example, you took some product photos, and there's a lot of white space around the main subject. Or maybe there are some distractions in the background.
So, crop your image!
Get rid of all that extra space and distractions. As a result, you will get a sharp image of a smaller size where all the attention is focused on the main subject.
It’s important to note that in some cases, cropping can produce sharper and clearer images than if you simply change the pixel dimensions. Here’s a clear example of it.
Cropping is also very useful when posting screenshots, as it makes the text easier to read.
7. Make Resizing the Last Step of Post-Processing
To achieve the highest possible quality in the final downsized version, it’s recommended to leave the resizing step for the very end of the editing process. In other words, If you need to do more than just resize an image – for instance, add text to a photo, write your name with the copyright symbol, or insert a logo as a watermark - it’s best to apply these elements to the high-resolution original.
Why?
Sharp edges in text or logos contain high-frequency detail. If you add text to a low-resolution image, it will get blurry. You’ll get fuzzy edges and inconsistent stroke weights that appear thicker or thinner than intended.
But when you add a watermark or logo to a high-resolution image, it can be scaled down effectively. Sharp edges and subtle details like nuanced shapes will be preserved well.
So, your workflow should look like this:
- Start with the highest resolution available.
- Do all the editing: color grading, skin retouching, add text, graphics or a watermark, etc.
- Save the edited version at high resolution.
- Change the size of your edited image.
- Export the resized copy.
That’s right. It’s better to save the high-resolution image with all the changes first, then change its size and save the resized version as a copy.
This way, you’ll always be able to get back to the master file of high quality, if needed.