
How to Resize Photos for Instagram in 2026
by ![]() Lina Thorne • Updated · Posted in Photo Editing
Lina Thorne • Updated · Posted in Photo Editing
For photographers in 2026, Instagram remains one of the most important platforms for showcasing their work, expressing their creative vision, and connecting with both existing and potential clients. Even if you already have a personal website or use Pinterest to share your portfolio, a strong Instagram presence can still give you additional visibility and help you attract new opportunities.
Your Instagram grid works like a mini portfolio — a fast, visual introduction to your style. In just 10 to 15 seconds, potential followers or clients can get a sense of your aesthetic, technical skills, genre, and consistency. In many ways, an Instagram profile now functions like a mini website, with a bio, CTA, link in bio, highlights, contact buttons, pinned posts, and collaboration tools. That is exactly why it makes sense to keep your profile polished and professional.
At the same time, Instagram comes with its own visual rules.
The platform has specific requirements for image size, aspect ratio, and orientation, and those standards do not always match the way photographers naturally shoot or edit their work.
This is why so many creators eventually start looking for the best way to resize photos for Instagram without sacrificing composition or image quality.
A few common problems come up again and again:
- Instagram generally favors vertical images, which can be frustrating for landscape photographers whose work is mostly horizontal.
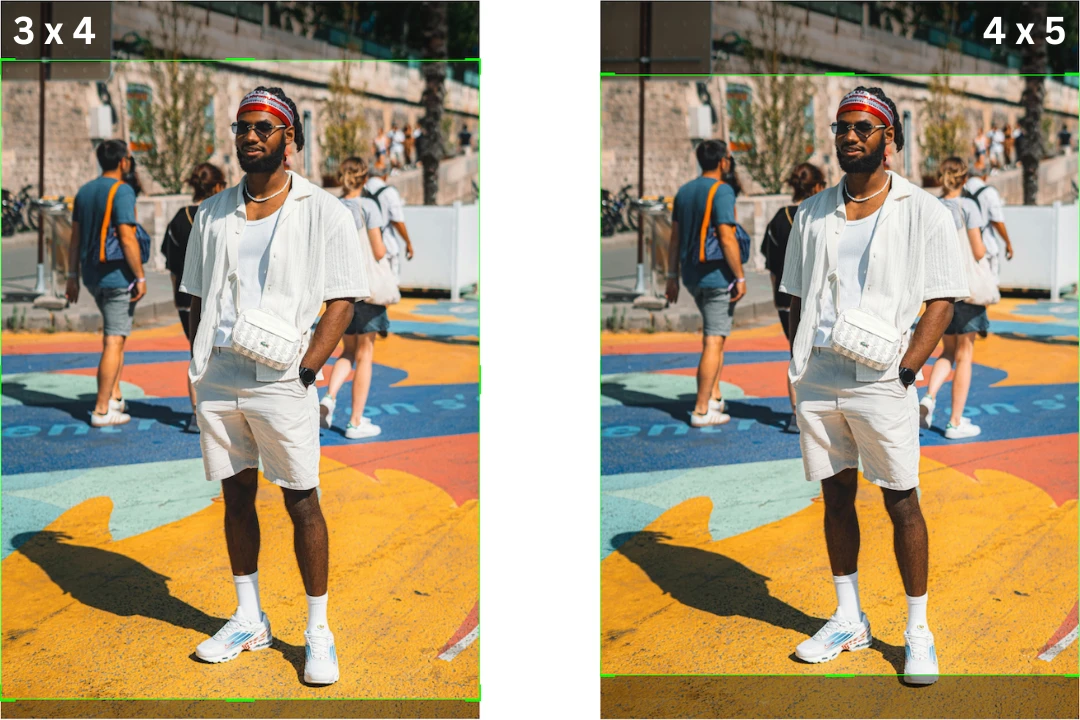
- Portrait images often look best in a 4:5 or 3:4 ratio, while most cameras capture photos in a 2:3 format by default.
- Tight portraits can be cropped awkwardly during upload, forcing you to choose between keeping the face, hands, or other important details in the frame.
- Photos may appear blurry, soft, or slightly pixelated after publishing, especially when the file was exported with the wrong dimensions or compressed too heavily.
These issues can be especially discouraging for beginner photographers, but they are completely manageable once you understand how to resize photos for Instagram the right way.
In this guide, we will break down Instagram’s current image requirements, explain what causes quality loss after upload, and show you how to prepare your images so they look sharp, well-composed, and professional in the feed.
Actual Instagram Image Sizes in 2026
Before we get into how to resize photos for Instagram, it helps to understand which image sizes actually work best on the platform right now.
If you use Instagram regularly, you have probably already noticed that the platform no longer treats the square format as the default visual standard. After Instagram shifted profile previews to a taller vertical layout, many older posts started to look awkwardly cropped on the grid. Over time, the platform introduced more flexibility, but the overall direction is clear: Instagram now strongly favors vertical content because it takes up more screen space, feels more natural on mobile, and tends to capture attention more effectively.
That is why, if you want your images to look clean both in the feed and on your profile, you need to think not only about upload dimensions, but also about how the preview will appear inside the grid.
Choosing the right format from the start helps you avoid awkward crops, cut-off details, and unnecessary quality loss.
For most Instagram photo posts in 2026, the best working format is 3:4, or 1080 × 1440 pixels. This is currently the most grid-friendly option because Instagram profile previews are displayed in that taller vertical ratio. In practical terms, it gives photographers more control over composition and makes it more likely that the image will appear on the grid exactly as intended.
This can be especially helpful in portrait photography, where the extra height of a 3:4 frame often makes it easier to keep the full silhouette in view and avoid unwanted cropping.
Instagram’s official photo guidance also allows uploads up to a 3:4 aspect ratio.
For single-image posts and carousels, you can still use older Instagram-friendly formats if they suit the image better. A 4:5 portrait post at 1080 × 1350 pixels remains a strong choice for vertical photography. 1:1 square posts use 1080 × 1080 pixels, while 1.91:1 landscape images use 1080 × 566 pixels. Instagram continues to support these formats, but they may be cropped differently in the profile grid preview, so they are not always the safest option if maintaining a consistent layout is important.
If you are preparing a carousel, it is usually best to keep all slides in exactly the same dimensions and aspect ratio. Mixing formats within one carousel can lead to inconsistent display and may make the sequence feel less polished.
For Stories and Reels, the standard format is still 9:16, or 1080 × 1920 pixels. That full-screen vertical layout remains the best choice for immersive mobile viewing. If your image or cover design includes text, logos, or other important details, keep them close to the center of the frame. Instagram does not always show the full frame in every preview, so anything placed too close to the edges may get cut off depending on placement.
As for your profile photo, the safest choice is still a square image, ideally 320 × 320 pixels or larger. Since Instagram displays profile pictures as circles, it is best to keep your face or logo centered. Text usually does not work well here, because at that size it tends to become too small to read clearly.
How to Resize Photos for Instagram Using a Crop Tool
To keep your photos looking sharp and crisp on Instagram, most professional photographers follow a fairly simple workflow.
First, they crop the image in advance to fit an Instagram-friendly aspect ratio, usually 3:4 or 4:5, while making sure the most important and visually appealing elements stay in the frame. This is typically done in editing software like Lightroom or Photoshop.
Next, they export the image at dimensions that match Instagram’s requirements or come close to them. Once the aspect ratio is set correctly, it is often enough to define just one side of the image and let the software calculate the other automatically.
Finally, they create and save an export preset so the same settings can be applied quickly during batch processing.
This approach solves two important problems.
First, it gives you full control over cropping.
Your image will not be trimmed in unexpected way after upload, and the viewer’s attention will stay exactly where you want it. A well-planned crop can work equally well for a section of a horizontal image or for a portrait, while still preserving the overall visual balance and aesthetic value of the photo.
Second, if you upload a file that is already optimized for Instagram, the platform has less processing to do. In many cases, this means less aggressive compression and a better chance of preserving detail, clarity, and overall image quality.
That is why resizing photos for Instagram with a crop tool is such a practical solution. At the same time, you do not necessarily need expensive or complex photo editing software to do it. If your goal is simply to resize images for Instagram, there are easier and more affordable tools available, including free online options designed specifically for this task.
Here is how you can resize photos for Instagram using Watermarkly’s image cropper:
- Upload your photos to the app.
- Choose the appropriate Instagram preset.
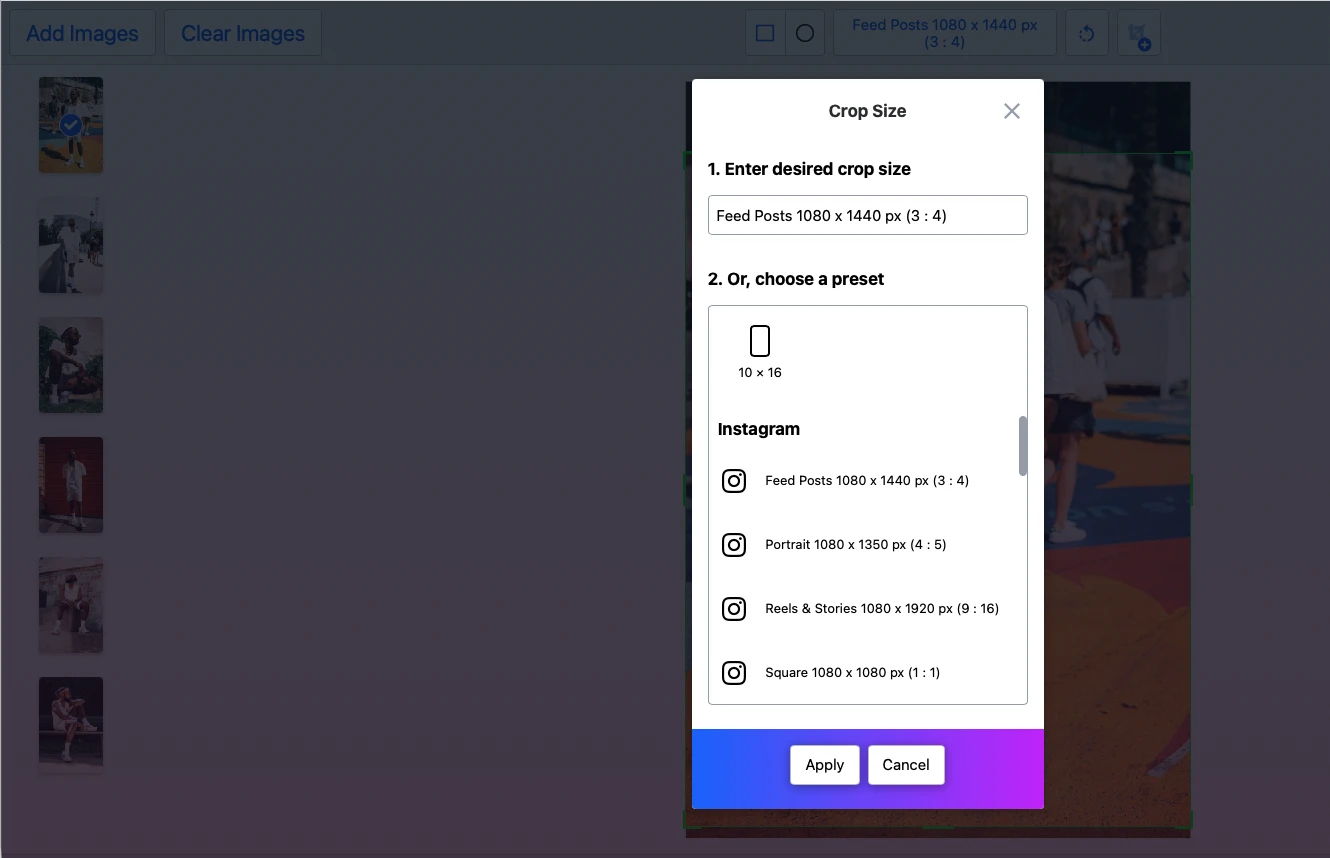
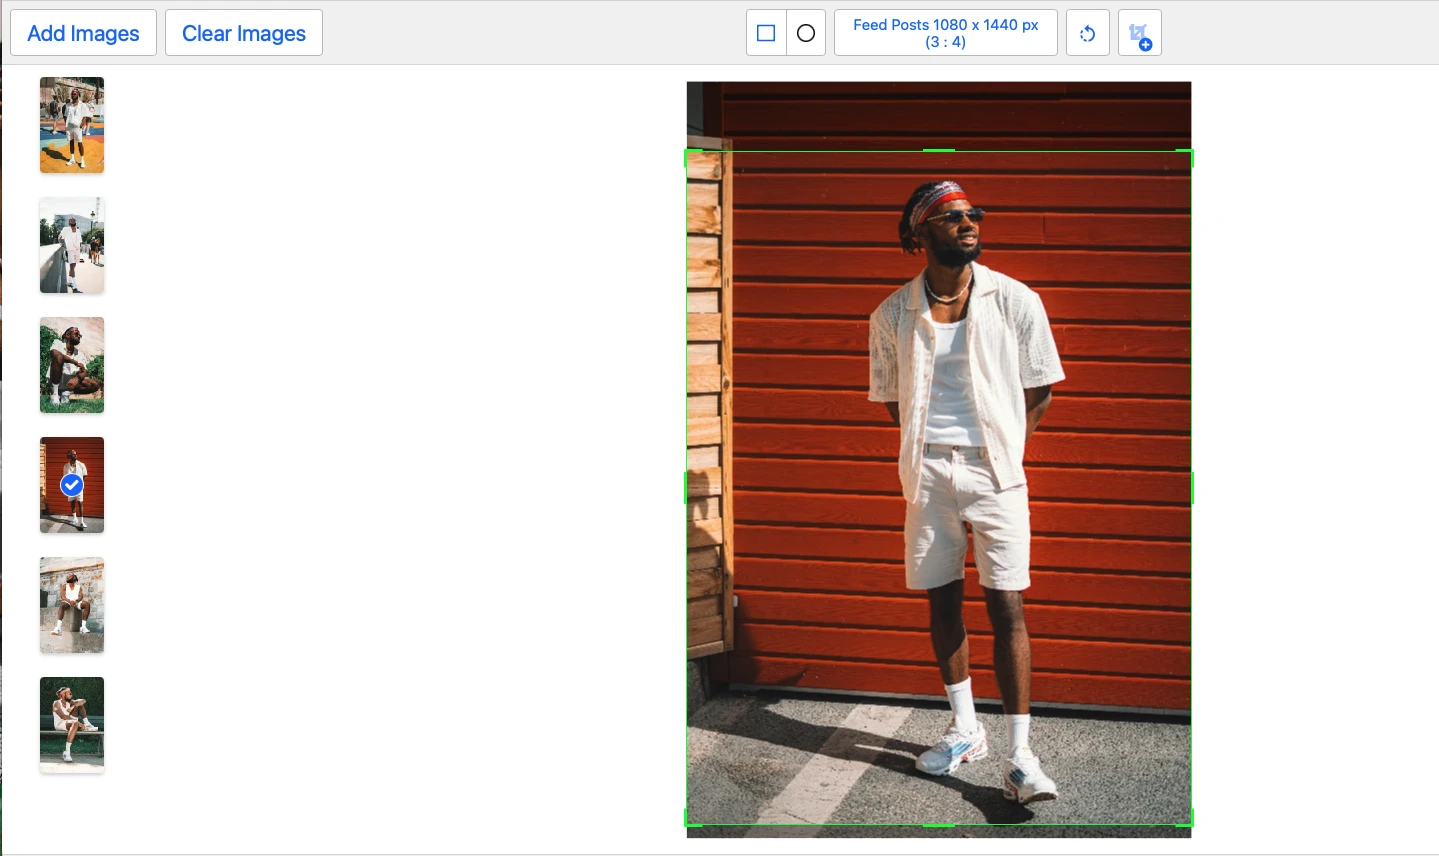
- Adjust the crop area on each image so the main subject stays in focus.
- Click Next Step and select Crop Images.
- Save the processed files.
Since the preset already includes the correct aspect ratio and pixel dimensions, you do not need to configure any additional export settings. As you can see, resizing photos for Instagram can take just a few clicks.
Another useful advantage is that the app saves your resize settings automatically, which makes future batches even faster and more convenient to process.
It is also worth noting that some photographers like to experiment with image dimensions after choosing the correct aspect ratio. The idea is that a frame exported at slightly larger pixel dimensions than Instagram strictly requires may appear a bit sharper when viewed more closely or zoomed in. This approach is easy to test with a similar online cropping tool as well, although the workflow is slightly different:
- Upload your images.
- Select one of the fixed aspect ratios.
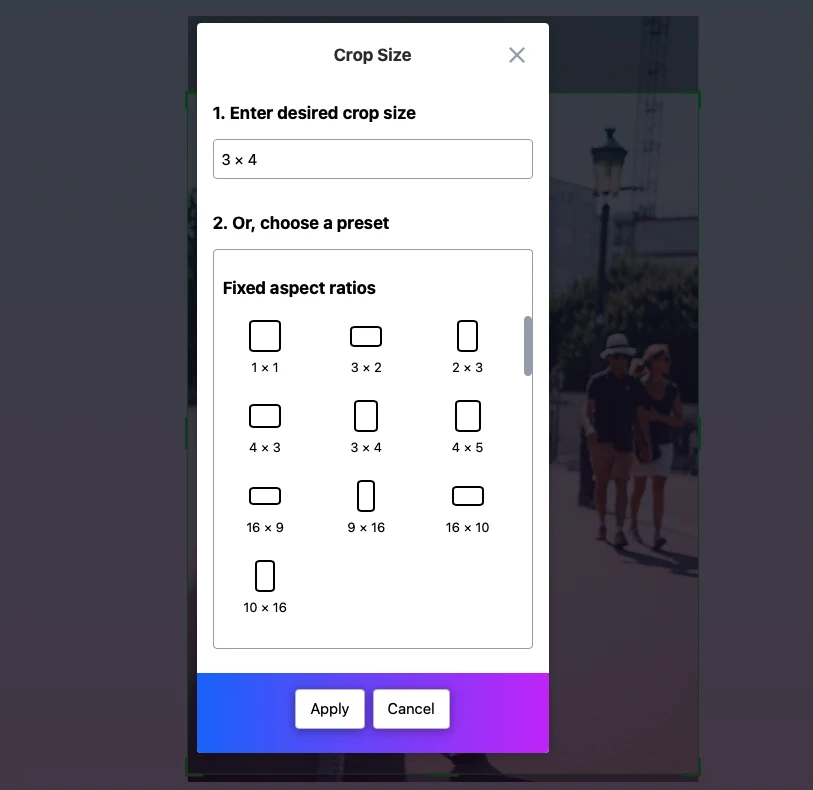
- Click Next Step and open Settings.
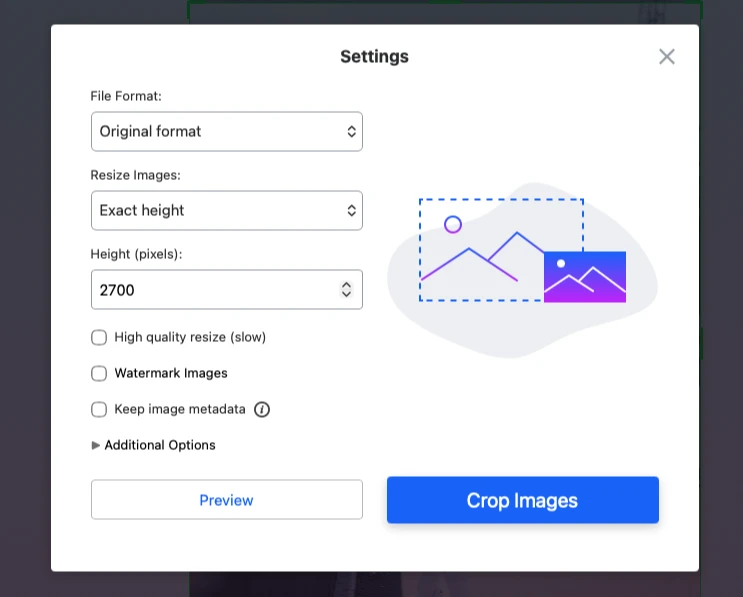
- Go to the Resize Images menu and enter your preferred value for Exact Width or Exact Height in pixels.
- Click Crop Images and download your photos.
This way, after cropping to the correct proportions, you can resize your photo for Instagram in whatever way you find most effective for your workflow and visual preferences.
How to Resize Photos for Instagram Using a Resize Tool
If you are not ready to crop your photo and lose part of the composition, there is another option that allows you to resize a photo for Instagram while keeping the entire image visible. The idea is to add a white border around the photo, which changes its proportions and makes it fit Instagram’s preferred format without cutting anything out.
You can do this in Watermarkly’s photo resizer:
- Upload your photos to the resizing app.
- In the settings, choose Exact Width & Height.
- Enter the required pixel dimensions.
- Enable the option “Add white pixels around the image…”
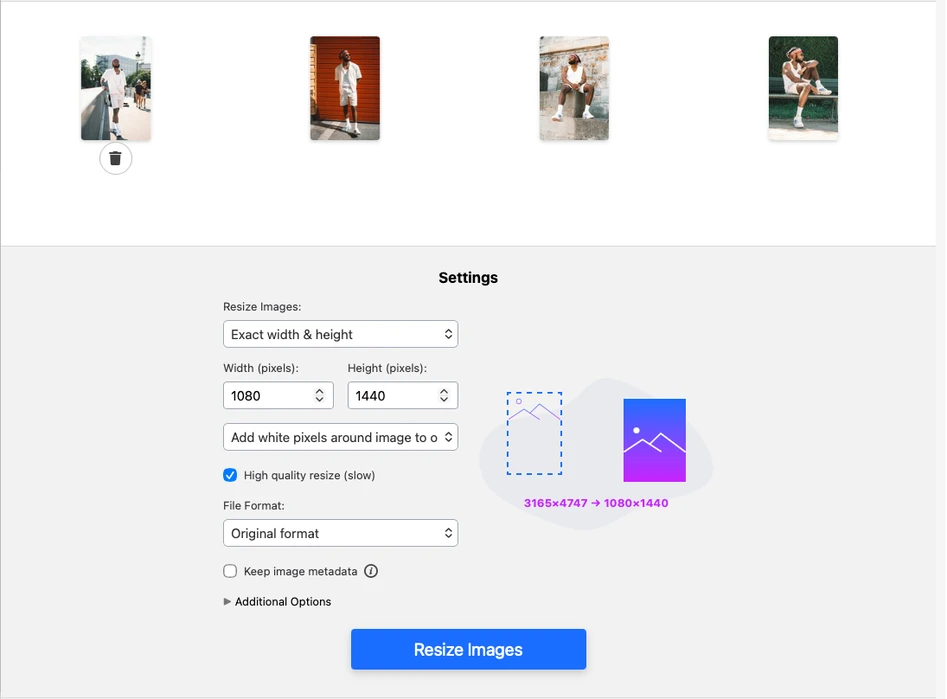
- Click Resize Images and save the resized copies.
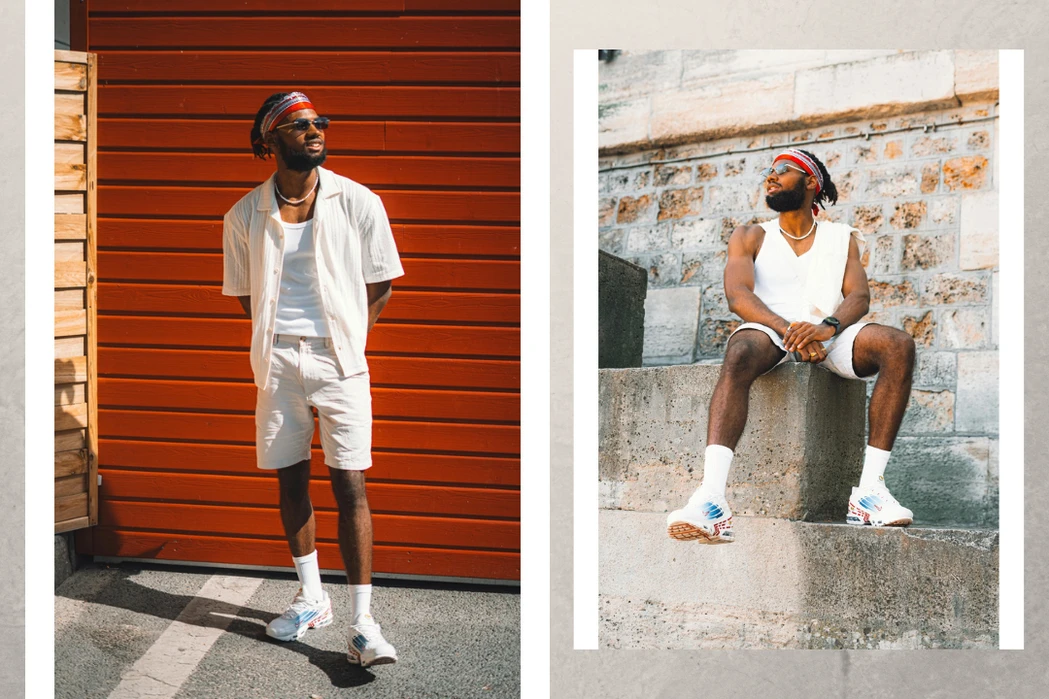
This method can be especially useful when every detail of the composition matters and you want to preserve the image exactly as it was shot. That said, not every photographer likes the look of white borders.
How to Resize Photos for Instagram Using an Expanding Tool
This method can work well for images with a simple or uniform background, such as studio portraits. The goal is still to make the entire photo fit Instagram’s preferred format, but instead of adding white borders, you extend the background by generating new pixels with AI.
For example, here is how this can work with Pixa’s AI uncrop tool:
- Open the Pixa Uncrop tool.
- Upload the image you want to expand.
- Choose the required aspect ratio.
- Click Generate.
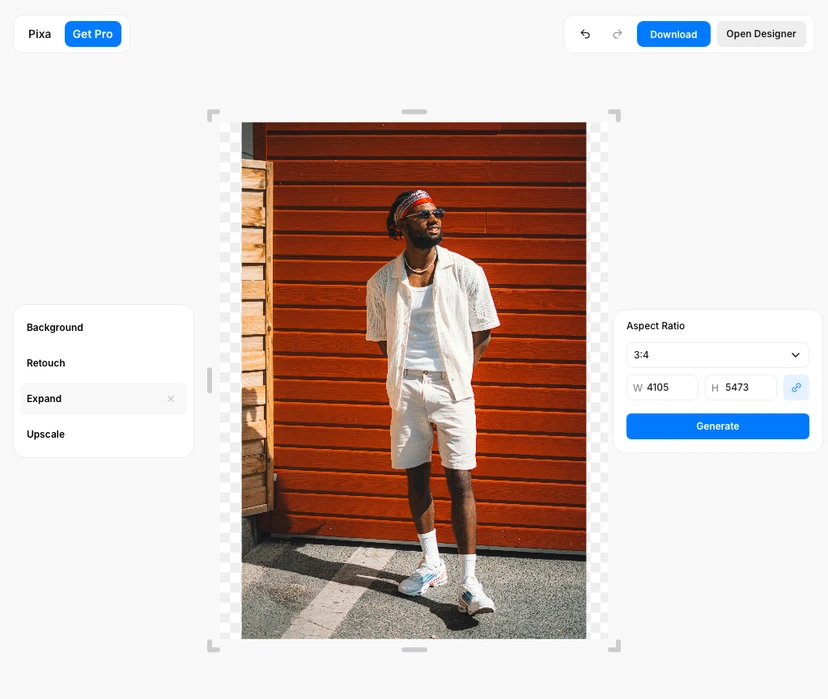
If the tool works well, the background will be extended smoothly and without obvious visual flaws.
This can be a useful solution, but at the moment it still comes with quite a few limitations. Free tools do not always produce reliable results, often restrict the final export resolution, and may require registration before you can download anything. So if this approach to resizing a photo for Instagram feels right for your workflow, it is usually worth looking at paid tools rather than relying on free ones.
What Else Can Ruin Image Quality on Instagram
Even if you resized your photos for Instagram correctly and your files already have the right aspect ratio and pixel dimensions, the final image may still look softer or blurrier than the original. If that happens, it is worth looking at what else might be causing the drop in quality after upload.
In addition to optimizing image size, there are a few other factors worth paying attention to, since they can also affect final image quality on Instagram.
File Format
Your files should be exported as JPEG at a High or Maximum quality setting, usually somewhere around 80–95%, or as PNG. In most cases, JPEG works best for photographs, while PNG is a better option for graphics, designs, or images that include a lot of text.
If you mainly shoot on an iPhone and your photos are saved in HEIC format, it is better to convert them to JPEG before uploading images to Instagram. This gives you more control over brightness, color, and sharpness before posting — control you may lose if Instagram handles the conversion automatically.
Color Profile
Make sure your images are exported in the sRGB color profile. It is the safest color space for web and social media use, and that matters on Instagram because your photo passes through several layers of processing, including the app itself, the mobile operating system, and the display settings of different devices. Wider-gamut profiles such as Adobe RGB, Display P3, or files with no embedded color profile at all may be displayed inconsistently, which can lead to unwanted shifts in saturation, contrast, or hue.
The main advantage of sRGB is predictability. If you convert your image to sRGB before uploading, you stay in control of how the colors are rendered instead of leaving that conversion to Instagram or the viewer’s device. In practice, this helps reduce unpleasant surprises such as dull reds, oversaturated greens, or slightly unnatural skin tones after publishing.
Sharpening
Be careful not to over-sharpen your images before uploading. Excessive sharpening can make Instagram’s compression more noticeable, especially around edges, skin texture, and fine details. A moderate, natural-looking level of sharpening usually works better than trying to make the file look extra crisp before posting.
File Transfer Method
If you edit your photos on a desktop, it is best to transfer the exported files to your phone using AirDrop, Google Drive, or Dropbox. These methods help preserve the original image quality and reduce the risk of unwanted compression or resizing, which often happens when images are sent through messaging apps or email.
Conclusion
Resizing photos for Instagram in 2026 is not just about matching the correct pixel dimensions. It is also about choosing the right aspect ratio, controlling the crop, and preparing your files in a way that helps preserve sharpness and composition after upload.
For most photographers, the safest choice for regular posts is now 3:4 at 1080 × 1440 pixels, since this format works especially well with Instagram’s current vertical grid preview. At the same time, 4:5, 1:1, and 1.91:1 formats still have their place depending on the subject, framing, and visual style of the image.
If you are comfortable adjusting the composition, cropping is usually the most practical solution. If you want to keep the full frame intact, adding borders may work better. And if the background is simple enough, AI expansion can sometimes help — although it is still less predictable than traditional methods.
In the end, the best way to resize photos for Instagram is the one that preserves both the quality of the image and the intention behind the shot. Once you understand how Instagram handles proportions, previews, and compression, it becomes much easier to make your photos look polished and professional on the platform.