How to Reduce Photo File Size on iPhone. Choose the Right Format
Before you learn how to reduce photo file size on iPhone of the photos that you’ve already taken, you need to make sure that your future photos will be in High Efficiency format (HEIF). This is important because once you choose this format, your iPhone photos will have good quality, yet a manageable file size.
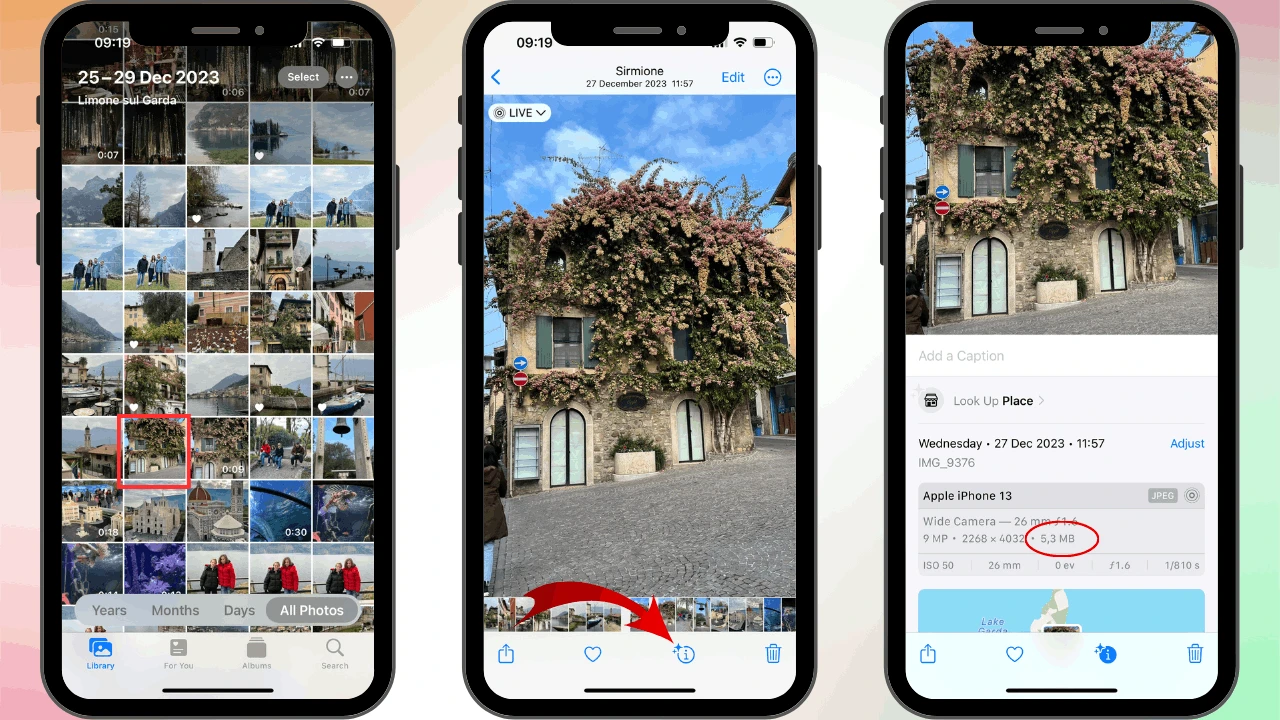
Naturally, this format is set for photos by default in the Camera settings of all the iOS devices that have been released in the past few years. However, there’s another option available – “Most Compatible”. If you select it, your photos will be in JPEG. It is indeed a more popular format but it produces photos of a larger file size than HEIF. It is possible that this option is selected in your Camera settings at the moment.
HEIF, which stands for High Efficiency Image File Format, is a container format that is used to store images and image sequences. It was developed by the Moving Picture Experts Group (MPEG) as a more efficient alternative to the traditional JPEG format. Nowadays it is primarily used on Apple devices. HEIF and HEIC are pretty much the same format.
The main advantage that HEIF has over JPEG is its improved compression. HEIF uses advanced data compression methods like HEVC (High Efficiency Video Coding). Thanks to these methods, HEIF images tend to have a smaller file size, yet excellent image quality compared to JPEG. This allows you to store more images on your device or share them online faster. Apple opted for this format as a way to solve the issue of their constantly improving cameras taking images of high quality yet large file size.
Does HEIF have any drawbacks? Yes, of course.
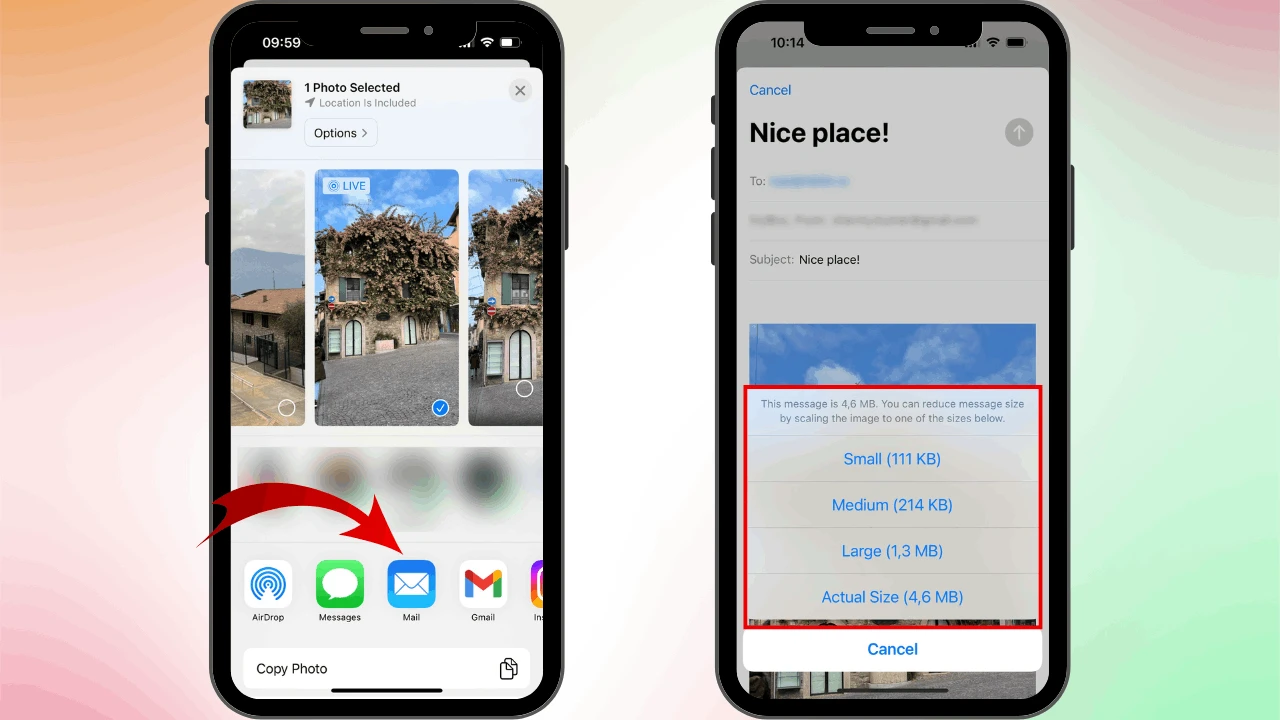
Even though this format is gaining popularity, it still doesn’t offer the same level of compatibility that the JPEG format does. However, it’s worth mentioning that there are solutions to this problem. First of all, iPhone automatically converts photos to JPEG, when you export or share them with someone. Secondly, there is a wide selection of free online image converters that you can use to convert your photos to JPG. For instance, “HEIC to JPG”.
Additional benefits of HEIF format:
- Supports various types of data: HEIF supports not only regular photos, but also animation, video, 360-degree photos, etc. It even allows you to store several images in a single file. With this format, you will have a lot of flexibility and freedom; especially if you need to work with different multimedia content.
- Smaller file size: Thanks to improved and efficient compression that this format utilizes, HEIF images don’t usually occupy a lot of memory space; even if you have quite a few of them. For instance, 10 HEIF images will require much less space than 10 JPEG images. It means that you can store more photos on your device.
- Extended metadata: HEIF images have a vast variety of metadata. For instance, you can learn when and where a HEIF image was taken, what device was used, etc. This can be very useful if you need to organize your images or search for a certain photo in your Gallery.
- Transparency support: HEIF allows you to save images with transparent pixels, which is especially important when working with illustrations, logos and other graphic elements.
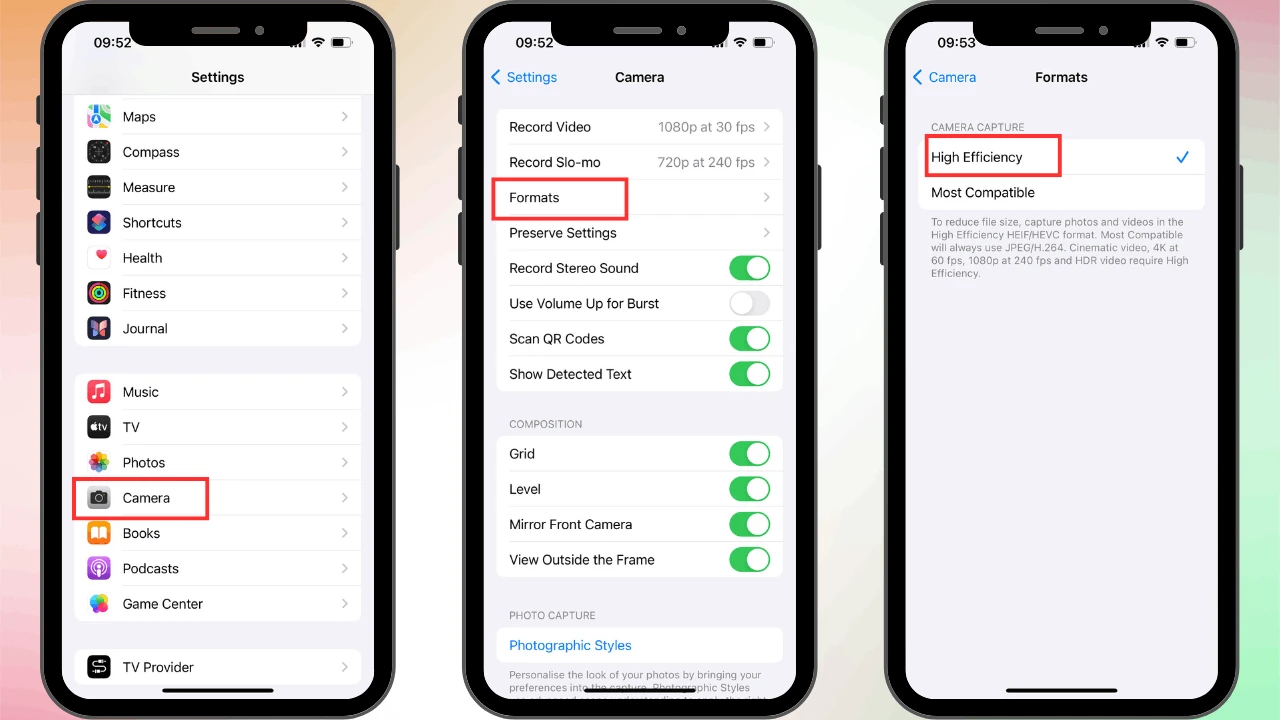
How to reduce photo file size on iPhone by choosing the HEIF format:
- Go to Settings
- Tap on Camera > Formats
- Enable the “High Efficiency” option at the top.
Please note that if the Most Compatible Option was selected before and some or all of your photos are currently in JPEG, this switch to a different format won’t have any effect on them. They won’t get compressed automatically. It’s important to make this switch from JPEG to HEIF, so that the photos that you take in the future will have a smaller file size.
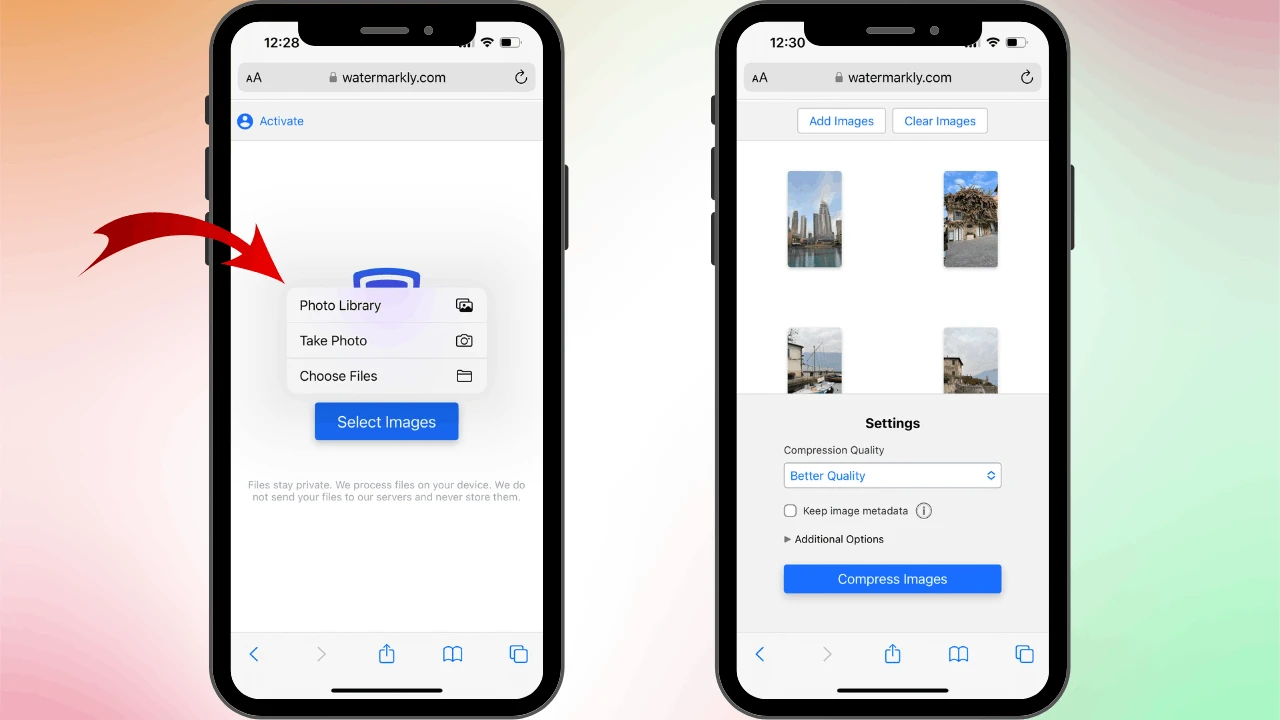
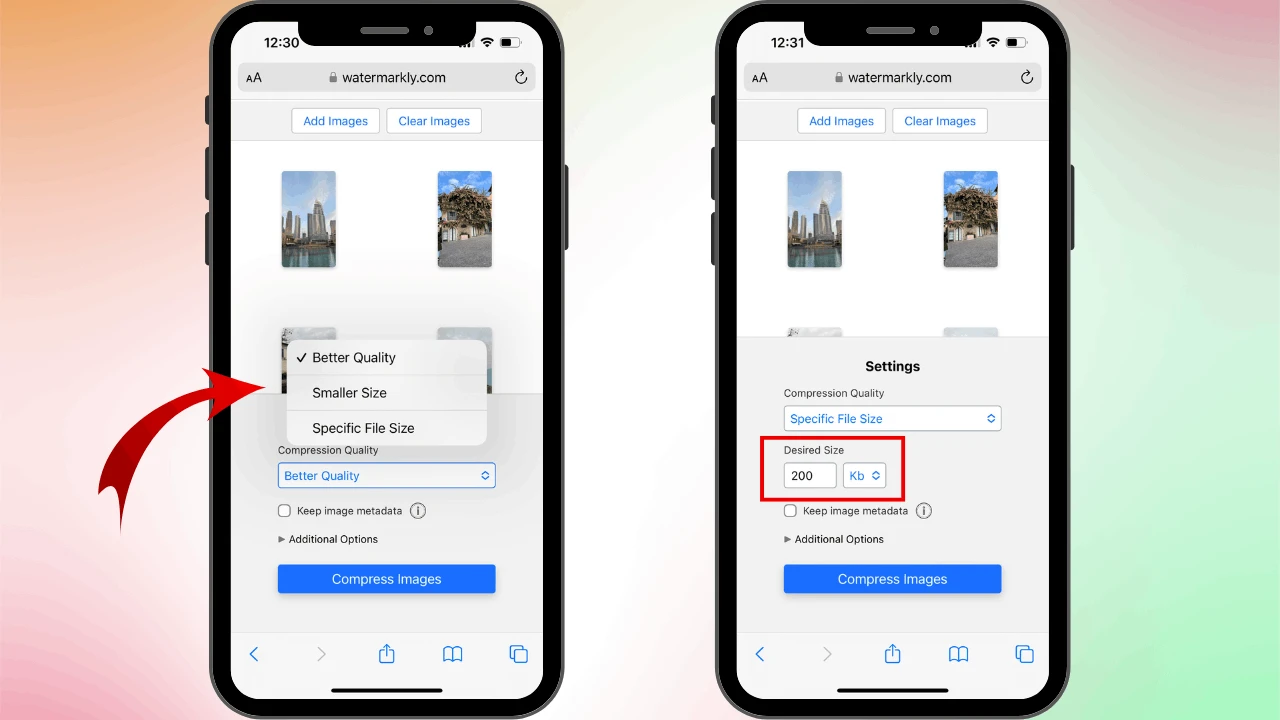
Free Image Compressor