How to Crop a Photo on Mac

If you want to become a better photographer, it is important to work on your compositional skills and try to frame your shots properly in camera. But you probably already know that getting a perfect shot right away can be quite challenging. This is especially true if you do reportage or street photography because these two genres tend to involve a lot of things that you cannot control.

When you are out and about on the street and you see a beautiful scene, you don’t always have the time to frame your shot – you just press the shutter button and take a photo as quickly as you can. Because it’s better to have a shot with a bad composition than no photo at all. In street photography you can’t really tell people to walk past your camera again or the sun to keep shining on that wall for a couple more seconds.

how to crop on mac

In quite a lot of genres of photography, sometimes it’s better to take as many shots in a row as you can, without worrying too much about composition, then crop your images and get the composition right at the editing stage.

Even top-notch photographers use cropping every now and then. After all, it’s a great and effective tool that can help you improve your images or prepare them for publishing on social media.

In this article you will learn how to crop a photo on Mac in three different ways. Each of them is easy, unchallenging and doesn’t involve paying or downloading anything.

Crop Photos Online

How to Crop Photos on Mac Using Photos App

If you are an iOS user and take images with your iPhone or iPad, it’s highly likely that the image that you want to crop is already in the Photos app. Fortunately, it already has all the necessary tools that can help you improve the composition and remove unnecessary parts of your photo.

That’s right, the Photos App has a cropping tool! And since your images are already there, it’s quite convenient to use it. With this built-in app, you can crop an image on Mac without any fixed aspect ratios. It is also possible to make use of a preset or enter your custom aspect ratio. Additionally, the Photos App allows you to straighten your photos.

How to crop a photo on Mac in Photos App:

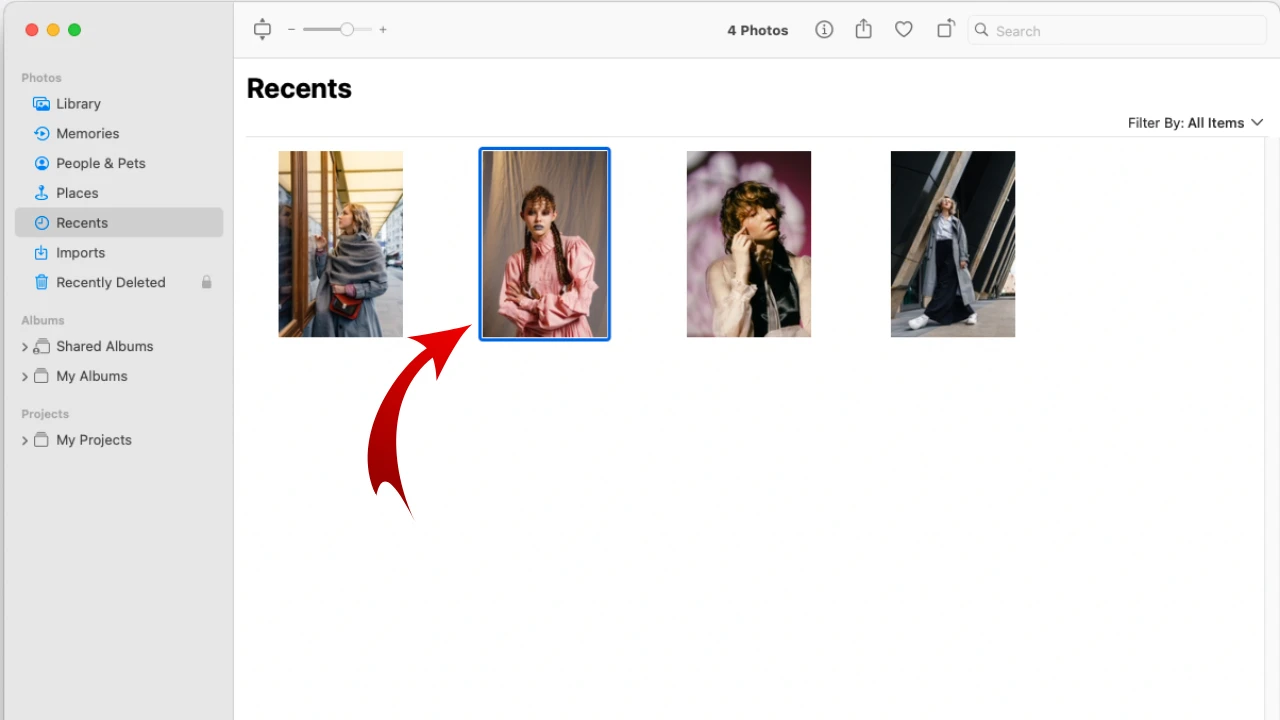
1. Go to the Photos app and double-click the photo you want to edit.

crop photo on mac

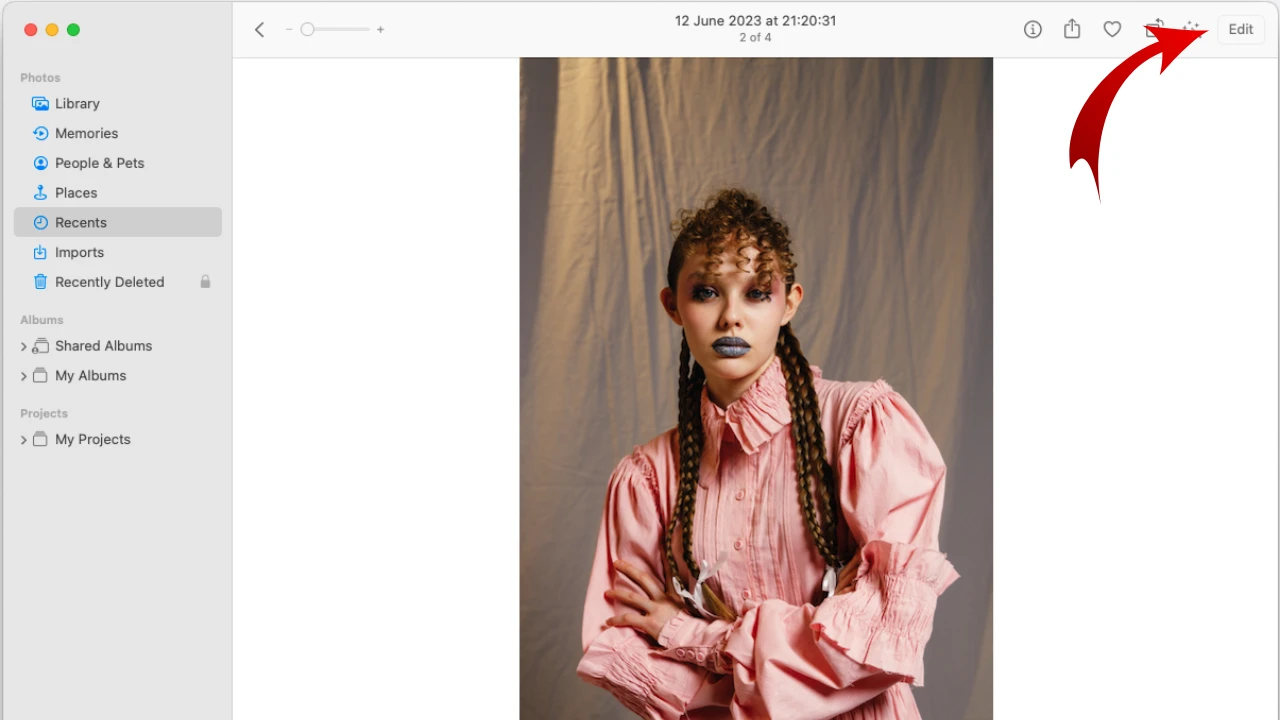
2. Click the Edit button in the top right corner or press the Return key – this is a shortcut that opens the editing section.

how to crop image on mac

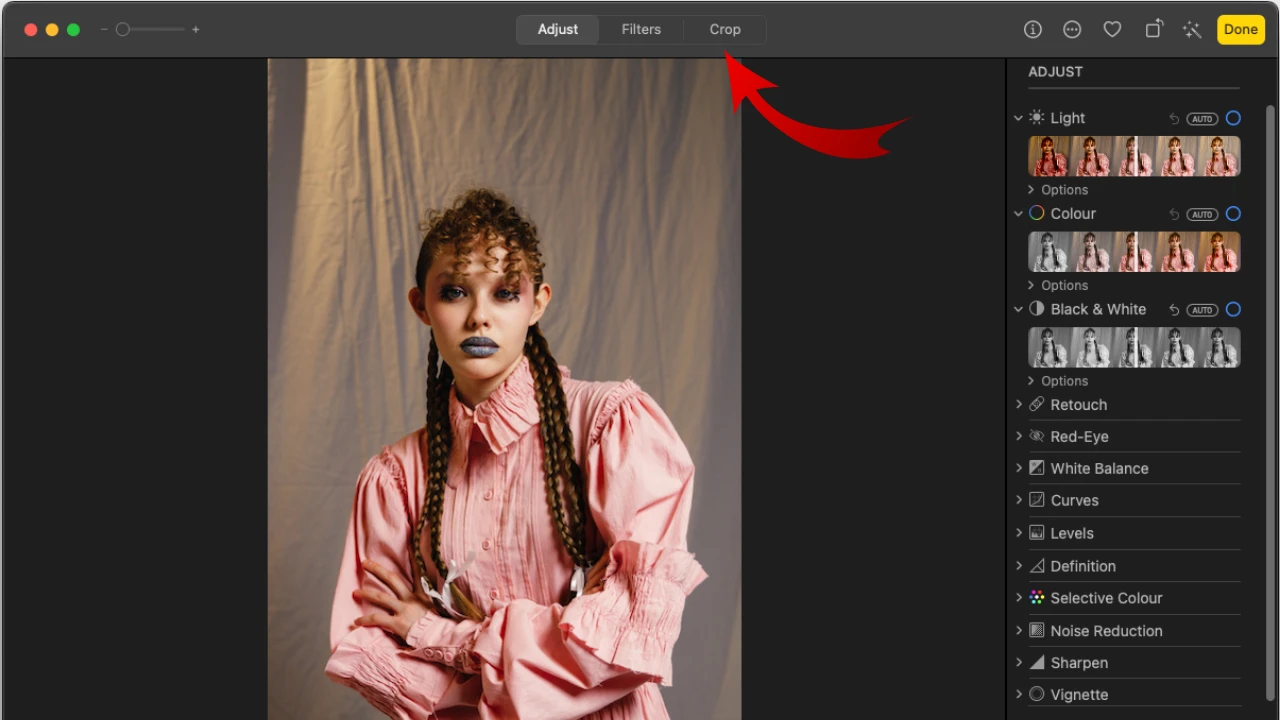
3. Click the Crop button in the toolbar or simply press C.

how to crop photos on mac

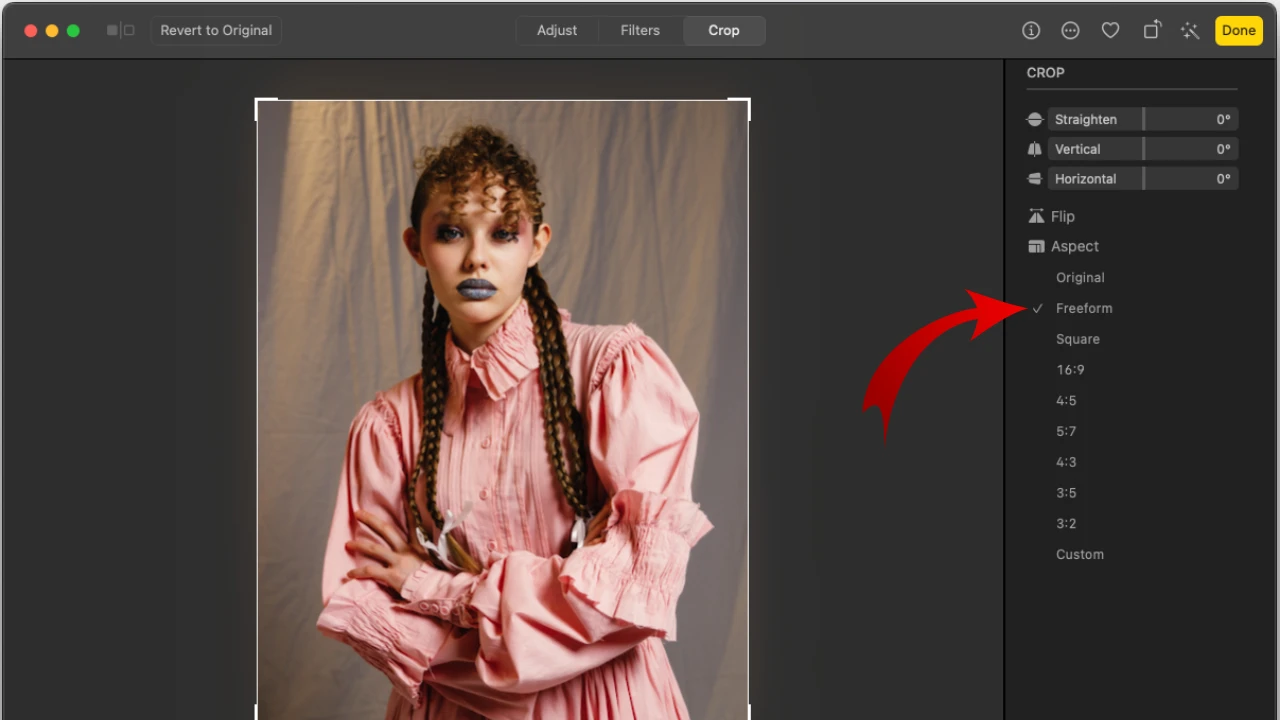
4. Go to the Aspect section on the right side.

how to crop a photo on mac

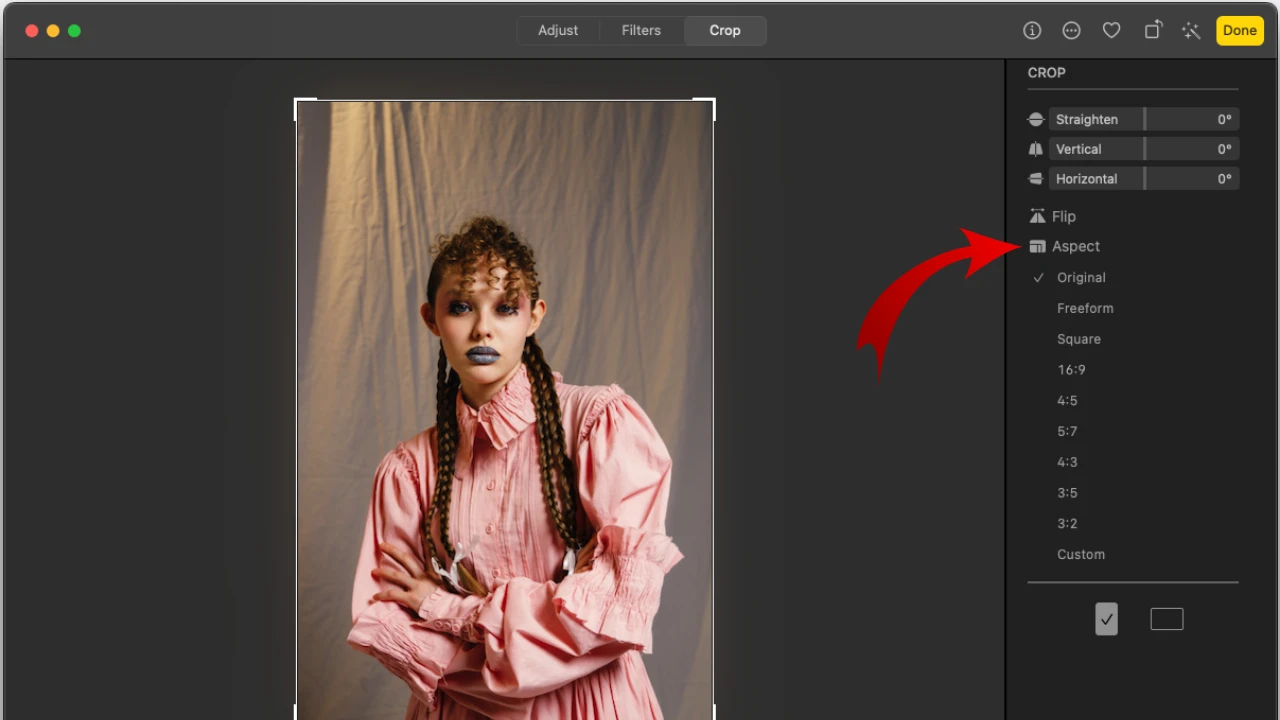
If you choose “Original”, then the aspect ratio of the original image will be maintained. This is a great option if you need to get rid of tiny bits of your image, but you don’t want to change the aspect ratio.

The “Freeform” option allows you to crop your image on Mac however you want – the aspect ratio won’t be locked. You can simply drag the corner and the sides of the cropping area to adjust it. Please be aware that this can result in some odd aspect ratios.

how to crop an image on mac

The app offers a few common aspect ratios. If you choose one of them, then the aspect ratio will be locked – you won’t be able to change the ratio of width to height. Fortunately you can switch between vertical and horizontal aspect ratios with the help of two buttons underneath the list of aspect ratios. For example, you can select 16:9 and click on the horizontal button. This will give you a 9:16 aspect ratio.

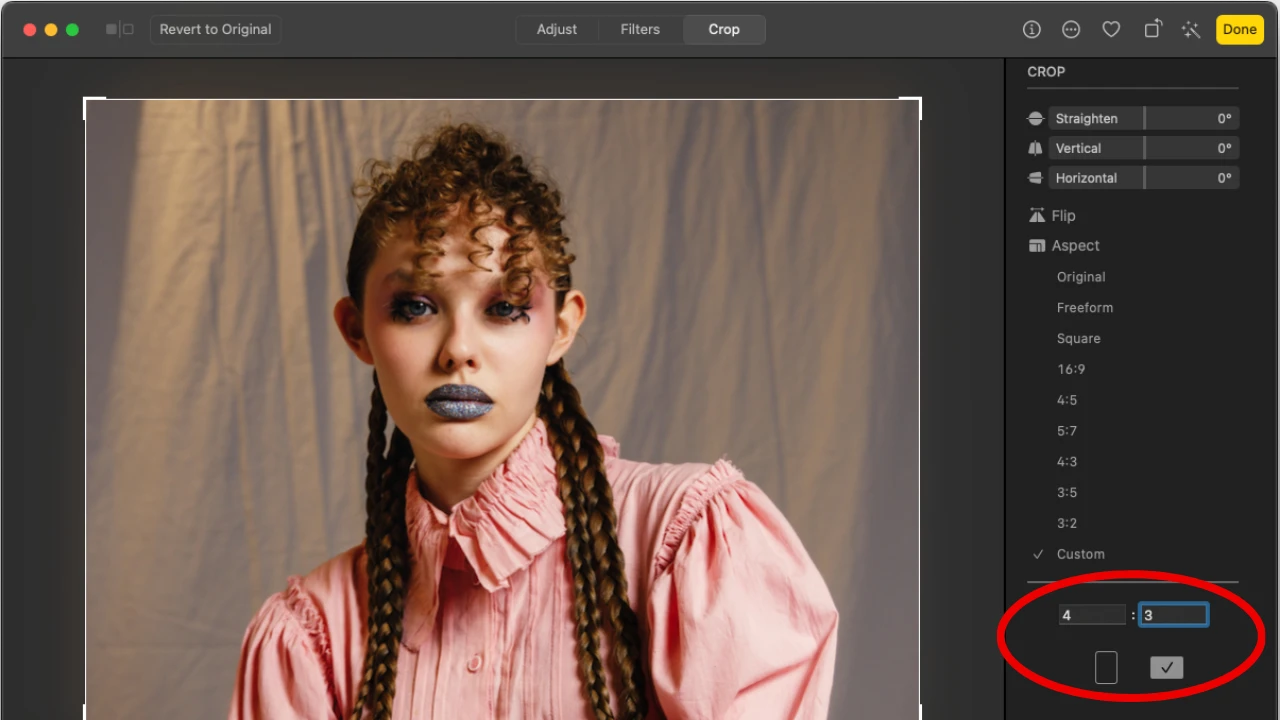
The app also allows you to enter your own aspect ratio – select “Custom” and type in the necessary values.

how to crop photo on mac

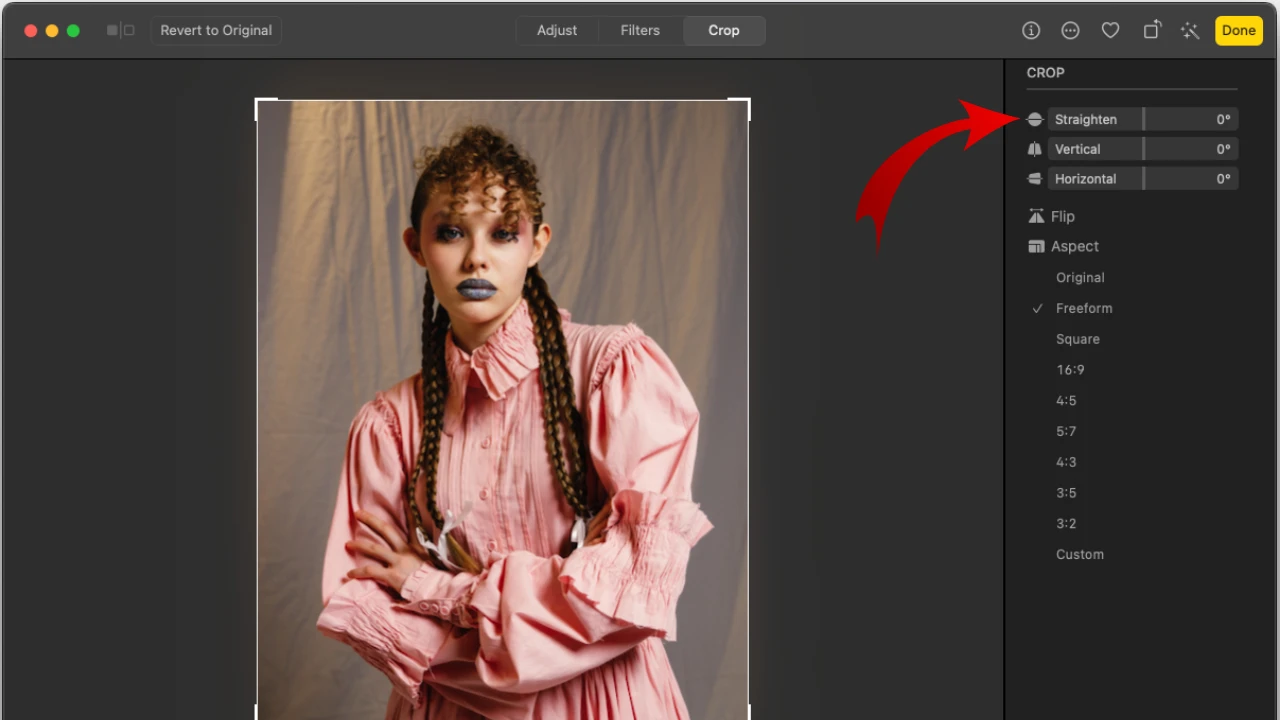
5. To rotate your entire photo, go to the Straighten slider and adjust it until you are happy with the result. There’s an option to straighten your image automatically – click on the “Auto” button at the bottom. There’s also the Reset button right next to it. This button allows you to reset all the changes. Press it, if you want to start over.

how to crop a picture on mac

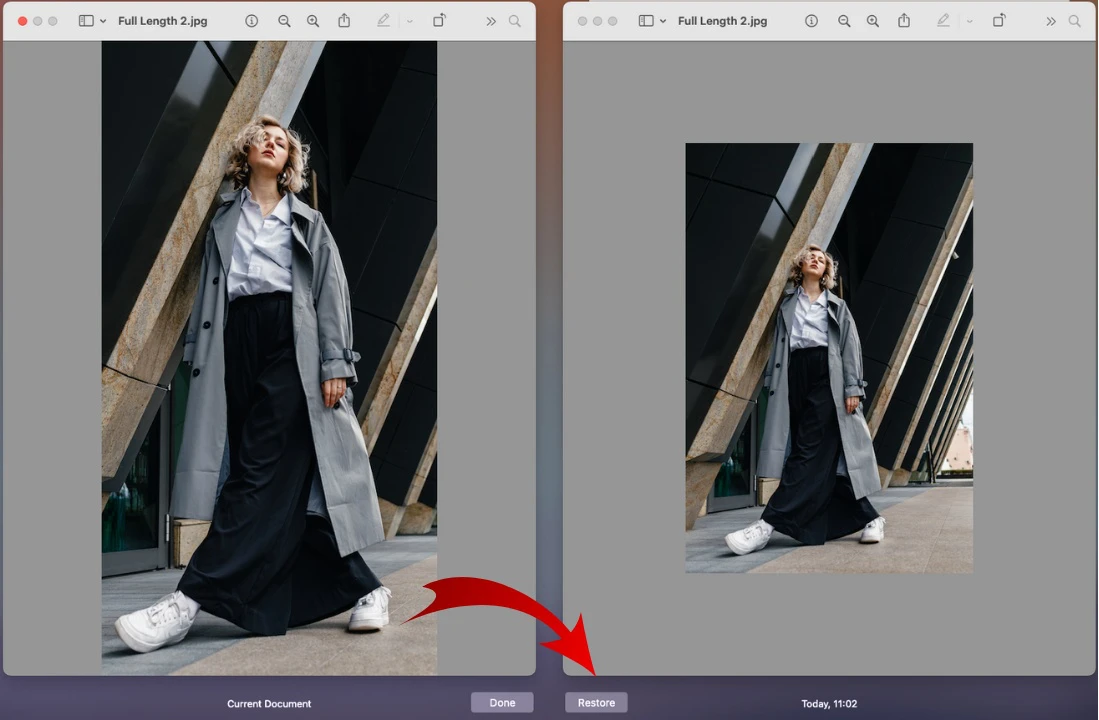
6. When you are finished with cropping a photo on Mac, click the “Done” button.

All editing in the Photos app is non-destructive. You won’t see the original image in your library, but don’t worry about it. You can go back to the editing section and click on the “Revert to Original” button at the top of the screen. The original image is safe, and nothing will happen to it.
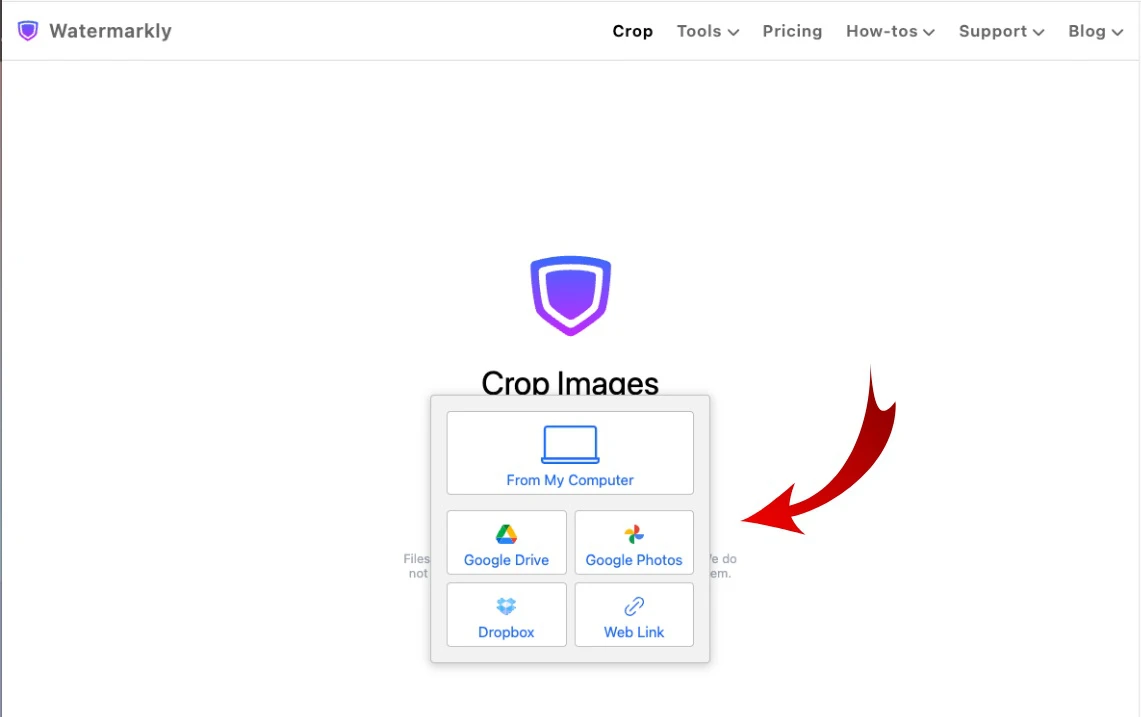
Crop Photos Online

How to Crop an Image on Mac Using Preview

Another way to crop an image on Mac is to use the Preview app. What’s great about this option is that you can edit an image even if it’s in the Downloads folder or any other folder, for that matter; in other words, it can be anywhere, not just in the Photos library. However, you need to be aware of the fact that cropping in Preview is slightly different from the previous option.

You have to select and adjust the cropping area manually. There are no fixed aspect ratios and no straightening tools. You simply select a part of an image that you want to keep with the cursor and get rid of everything else.

The quickness and simplicity of this option is probably its main advantage. For example, if you need to crop a screenshot on Mac, it’s better to do this in Preview. But if there’s a specific aspect ratio that you need to crop your image to, or if you want to fix a compositional mistake, you will need a basic set of editing tools which the Preview app doesn’t provide. Therefore, this option won’t be good for you.

Let’s see how to crop a photo on Mac in Preview:

  1. In the Preview app double-click the image you want to crop on Mac. how to crop on mac
  2. Select the Show Markup Toolbar button. crop image on mac
  3. Next click the Rectangular Selection button. If you want to crop an image into a circle, click on the small arrow next to the icon of the rectangle. It will open a small drop-down menu. In this menu, you will need to choose the Elliptical Selection. crop photo on mac
  4. Select the area of the image that you want to keep. Everything outside the selection will be cropped out. If you want to get a perfect square or a perfect circle, hold the Shift key while making your selection. Also, please note that it’s possible to adjust your selection after you make it. how to crop image on mac
  5. Once you are done, click the Crop button. You can also press Command + K. how to crop photos on mac

You can save your edited image by going to File > Save or simply close the Preview. Your edited file will be saved automatically.

If you don’t like the cropped version and you want to undo the changes immediately, before exiting the app, go to Edit > Undo Crop. However, if you decide to undo the changes later, you will need to find the original. In the Preview, go to File > Revert To > Browse All Versions. Then you will need to search for the original.

how to crop a photo on mac

As you can see, with this tool, you can crop an image on Mac quickly and easily. However, there isn’t much room for experimentation, and you won’t be able to crop with a fixed aspect ratio. In the Preview app you can also reduce image size, change its dimensions, flip and rotate.

Crop Photos Online

How to Crop Photos on Mac Using Watermarkly

The third way to crop a photo on Mac is to use a free photo cropper called Watermarkly. This option is different from the two previous ones because Watermarkly isn’t built-in. However, this is a browser-based app, which works online. Therefore, you’ll be able to utilize it no matter what operating system you have. Using a third-party tool to crop images can be more convenient and efficient for a number of reasons, which you will learn about below. First, let’s take a look at how to crop an image on Mac using Watermarkly step by step:

  1. Go to Watermarkly website and choose the Crop tool. how to crop an image on mac
  2. Click the “Select Images” button and pick the photo that you want to crop. Alternatively, you can simply drag it from its folder into the app. how to crop photo on mac
  3. Select the shape of your cropping area – it can be rectangular or circular. how to crop a picture on mac
  4. You can crop an image however you want. It’s also possible to choose one of the common aspect ratios or enter your custom aspect ratio. crop image on mac
  5. Watermarkly offers the straighten tool, too, so you can tilt your entire image if necessary.
  6. Click the Next Step button – it will take you to the export settings. Here you can go to the Preview section and see how your cropped image will look. In the export settings you can also resize your photo and change the file format. how to crop on mac
  7. When you are done with the settings, click the Crop Image button and download the result.
Crop Photos Online

Crop an Image on Mac: Watermarkly vs Built-In Options

As you can see, each of the three options doesn’t require much time or effort and involves only a few simple steps. You won’t need to pay or install anything to crop an image on Mac. You can use either of these options even if you are a complete beginner.

So, which one should you choose?

Well, your choice will depend on whether cropping an image on Mac is a one-time task or something you will need to do on a regular basis. Plus, what if you’ll need to crop a large number of photos? This might be somewhat challenging to do in the built-in apps because they don’t support batch-processing and you will have no other choice but to crop each image separately.

If you need to crop a single image on Mac every now and then, the Photos or the Preview will probably be more than enough for you. But if you need batch-processing and an extensive toolkit, then Watermarkly will be a better choice.

Here are the main advantages of Watermarkly over the built-in apps:

You don't have to worry about the original images

If you want to crop a photo on Mac using either of the built-in apps, it’s better to make a copy of your image first, then crop it. As it has already been mentioned, the editing in Photos app is non-destructive. Therefore, you’ll be able to revert back to the original if necessary. That said, if you revert back to the original, all your cropping will be undone; thus, you will need to create a copy of your image anyway, if you want to have both the cropped version and the original.

This isn’t the case for the Preview app. You will need to have the original image to revert back to it.

This is where Watermarkly stands out. This app never changes the originals – it automatically creates copies and crops them. You won’t have to do this manually, and the original files will always be at hand. What’s more, you can duplicate your image while it’s in the app and set the cropping area differently on the duplicated version. As a result, you will crop a single image on Mac in two different ways at the same time, which will allow you to experiment with cropping.

A great choice of cropping presets

Unlike the Preview app and similarly to the Photos app, Watermarkly offers some cropping presets. For instance, you can select one of the common aspect ratios. Moreover, you can enter not only your own aspect ratio but pixel dimensions, too.

What is unique about Watermarkly compared to the built-in apps is that it offers ready-made presets for social networks like Instagram, Facebook, YouTube and more. If you select any of these presets, your cropped image will meet the requirements for both aspect ratio and pixel dimensions. If you tend to crop your images on Mac for social media, this will dramatically speed up your workflow.

how to crop on mac

Different shapes

Watermarkly allows you to select the shape of your cropping area with a single click. Depending on how you adjust it, you can get a rectangle, a square, an oval or a circle. In the Preview app, you can utilize the Elliptical selection tool, but it’s not very convenient. If you don’t want to spend much time or effort on prepping your images to post them on social media or use them as advertising materials, you can crop images into a circle easily and efficiently with Watermarkly.

crop photo on mac

Batch cropping

This might be the main advantage that Watermarkly has over the built-in apps. If you are wondering how to crop photos on Mac in one go, Watermarkly’s photo cropper is the tool that you need. Its free version allows you to process up to 10 images per day. There is no need to crop your photos one by one. Just upload all the images you want to crop into the app and get to work. Watermarkly supports the majority of popular image formats – you can crop JPG, crop PNG, and even crop GIF files. It’s possible to set the cropping area in one and the same way for the whole batch. Alternatively, you can set the cropping area on each image differently. If you don’t like the limit of 10 images per day, consider purchasing a license and getting access to the full version of Watermarkly. You can check the pricing here.

how to crop photos on mac

Previously used crop presets

If you need to crop photo on Mac in a similar way and on a regular basis, this feature will make your workflow much faster and easier. The app remembers the last 10 presets that you used to crop images; even if you entered your custom aspect ratio or pixel dimensions. What’s more, if you purchased a license, your crop settings will be synchronized between all your devices. It doesn’t matter whether it’s a Mac, iPhone, iPad or even Android.

Crop Photos Online

Answers to Frequently Asked Questions

Why should I crop an image on Mac?

There are many reasons why you might want to crop an image on Mac.

First of all, it’s a great way to get rid of unnecessary and distracting elements in a photo. For example, maybe there’s a bright street sign somewhere in the background closer to the edge of the frame, and it is distracting from the main subject. Or maybe you want to get rid of the time and date that are visible in your screenshot. By cropping an image, you can fix the compositional mistakes or change the shape of your photo. Some popular social media platforms have size requirements that involve changing the aspect ratio of an image – this can be achieved with cropping, too.

Cropping a photo on a Mac is more convenient than on an iPhone or iPad simply because the computer screen is larger, and you can be more precise while editing.

How to crop a photo on Mac?

There are two built-in options to crop a photo on Mac – you can do this in either Photos app or Preview. Photos app offers some cropping options – you can crop an image on Mac without a fixed aspect ratio or pick one of the cropping presets. It’s possible to enter your own aspect ratio as well as straighten your image. Plus, you can revert to the original if necessary.

In Preview, you won’t find any presets or the straighten tool. You will need to select and adjust the cropping area manually, but unlike the Photos app, your cropping area can be rectangular or circular.

Both of these built-in apps are great if you need to crop a single photo and do so quickly. But if you need batch-processing, it might be a good idea to use a third-party tool like Watermarkly.

What should I keep in mind when cropping a photo on Mac?

The first step is to decide whether you want to use a built-in app or a third-party one. Then you need to decide what shape your cropping area should have. Another thing to keep in mind is the aspect ratio. Do you need a non-standard aspect ratio? Do you want to meet the size requirements of popular social media?

Remember that in some apps it is possible to crop and resize an image for Instagram and some other social networks; it can be possible to change the file format, too.

Crop Photos Online

Summary

If you do any work online, it’s highly likely that you will need to crop an image at least once or twice in your life. Maybe you will need to crop a screenshot to get rid of unnecessary information. Maybe you will want to share an image on Instagram which will require you to change the aspect ratio and pixel dimensions of your photo.

Either way, cropping an image on a Mac is not as complicated as you might think. Even if you’ve never cropped a photo before, you will definitely be able to do this easily. It might be a good idea to try each app that was mentioned in this article to figure out which one is the best for you.