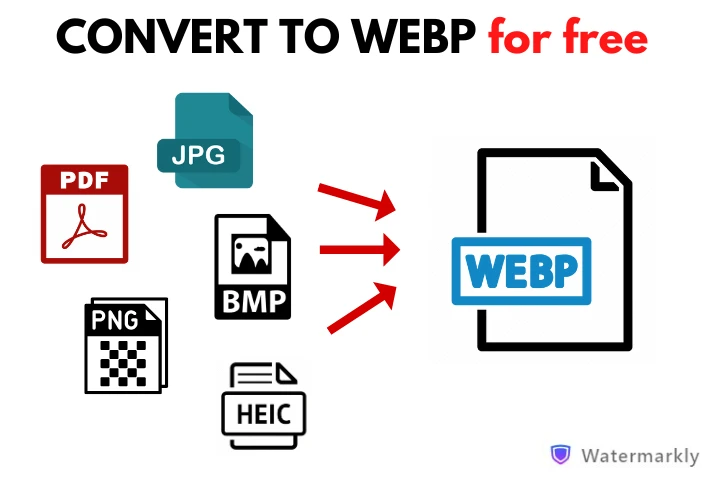
How to Convert to WEBP in 3 Simple Steps
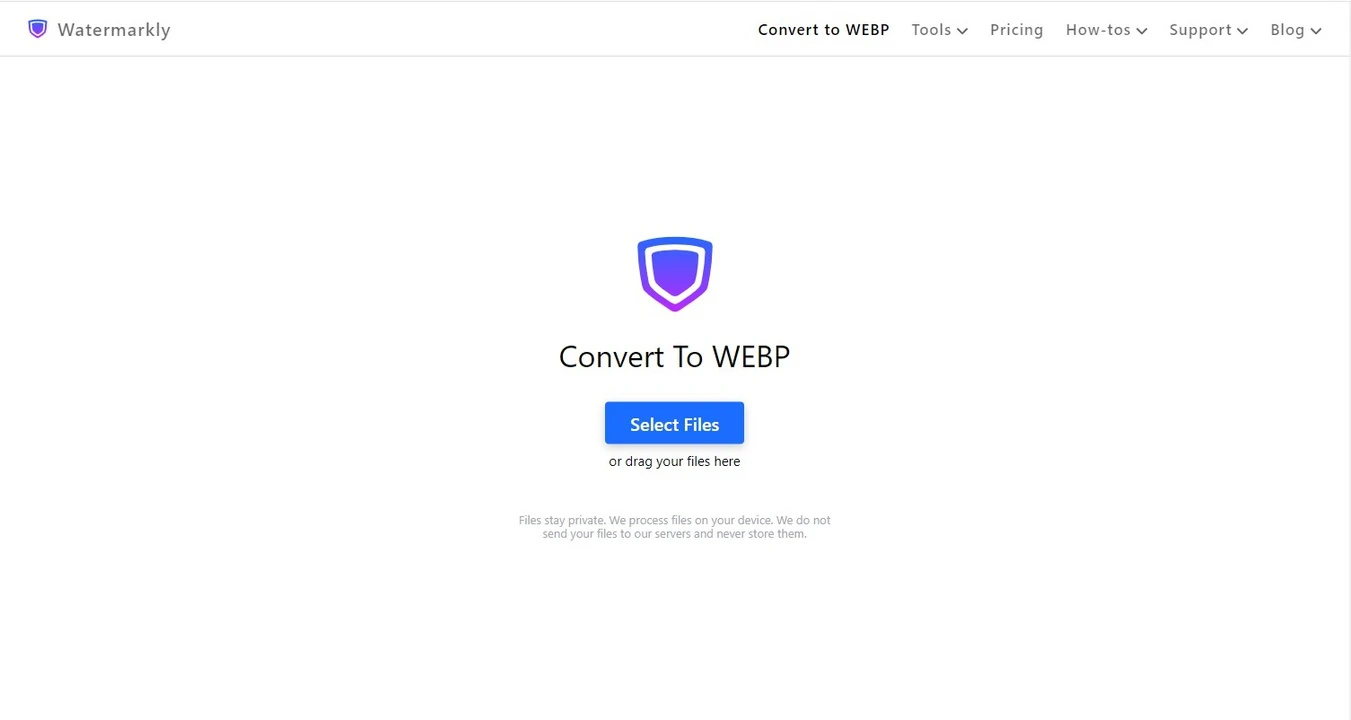
- Upload the files. Upload images that you want to convert to WEBP into Watermarkly. It’s possible to import from your device or a cloud storage. Since our WEBP converter works in a browser, you can process your files on any device you want. The only requirement is to have a browser and connection to the internet.
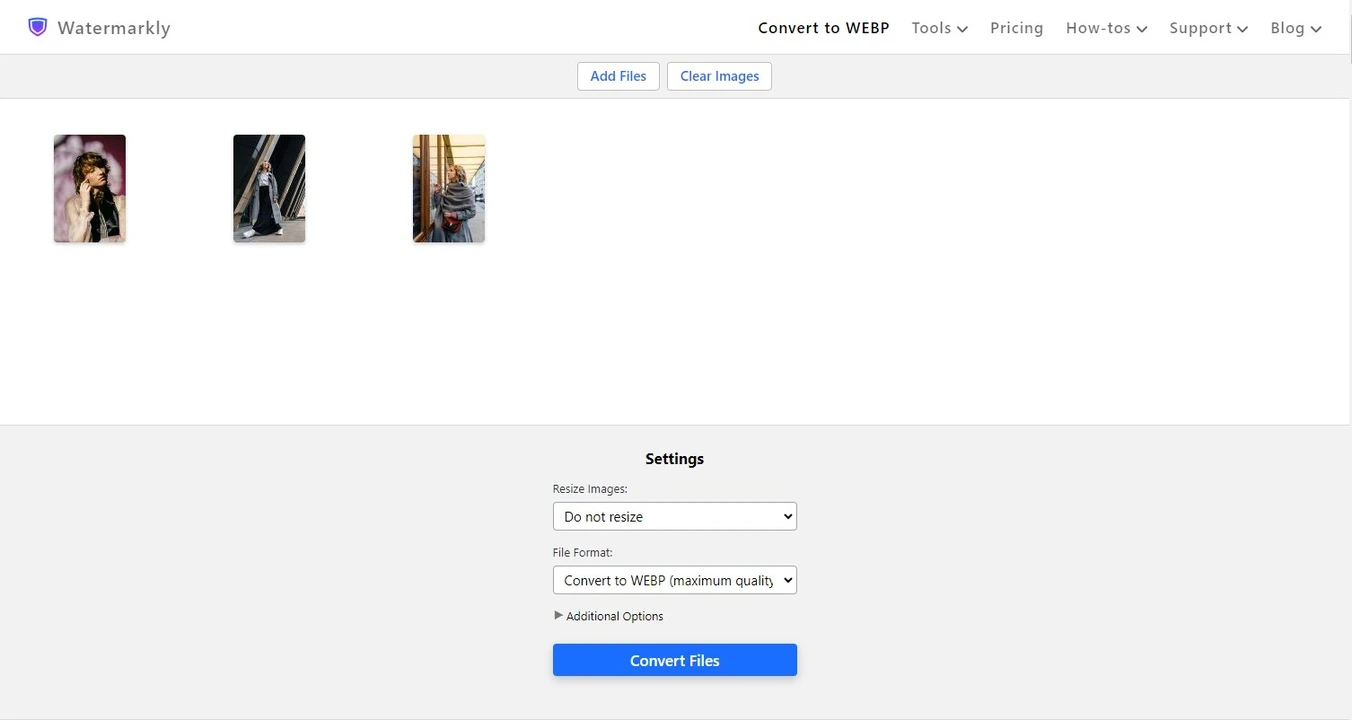
- Set the necessary settings. Next, choose the file format that your images need to be converted to – WEBP. You can pick the image quality, as well. If you need the best quality possible, select the option with the words “Maximum quality”. Please keep in mind that depending on the settings, it might take the WEBP converter a longer time to process your files.
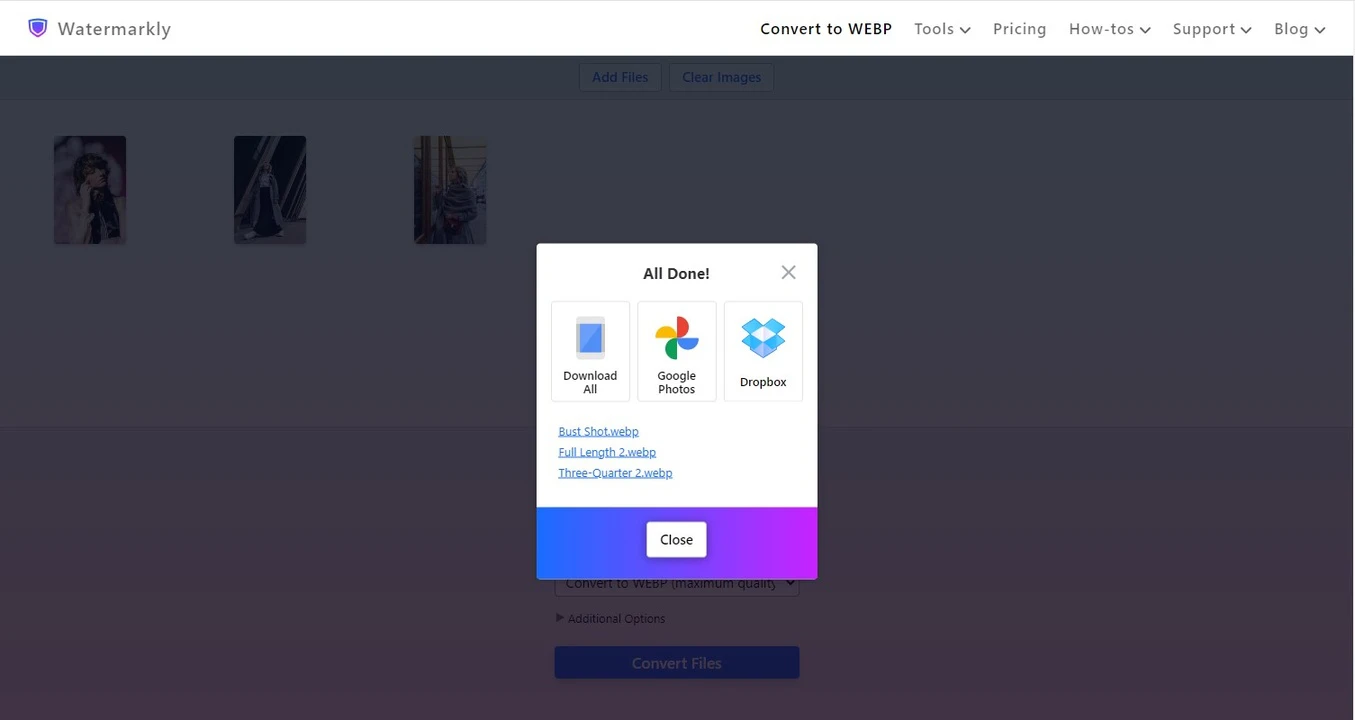
- Save the processed files. Once you are done with the settings, click on the “Covert Files” button. The converting itself is completely automatic – you don’t have to do anything. Once the process is finished, you will need to save the converted copies. That’s right, the original files will remain unchanged. You can download the WEBP files to your device or one of the cloud storages.
How to Change Size When Converting to WEBP
Watermarkly allows you to convert to WEBP and change the size of your files at the same time. There’s no need to switch between the apps for this. More to that, you can enter a specific number for width or height or change both pixel dimensions. Additionally, it is possible to make an image smaller or bigger by a certain percent. Let’s take a look at the resizing options that our WEBP converter offers.
Do not resize
If you don’t want to change the size of your images, then this is the option for you. If you select it, you will get processed copies of the same size as the originals after converting to WEBP.
Exact Width
With this option, you’ll be able to change the width of your image. In other words, you enter a specific number of pixels for the width that the image needs to have after you convert to WEBP. The height will be changed automatically. On the right side of the settings, you will see the size of the original image and what size the processed version will have.
Exact Height
This options works pretty much the same as the previous one, except that instead of width, you enter a specific number for the height. The width will then be changed automatically. This option and the previous one are perfect if your image already has the necessary aspect ratio.
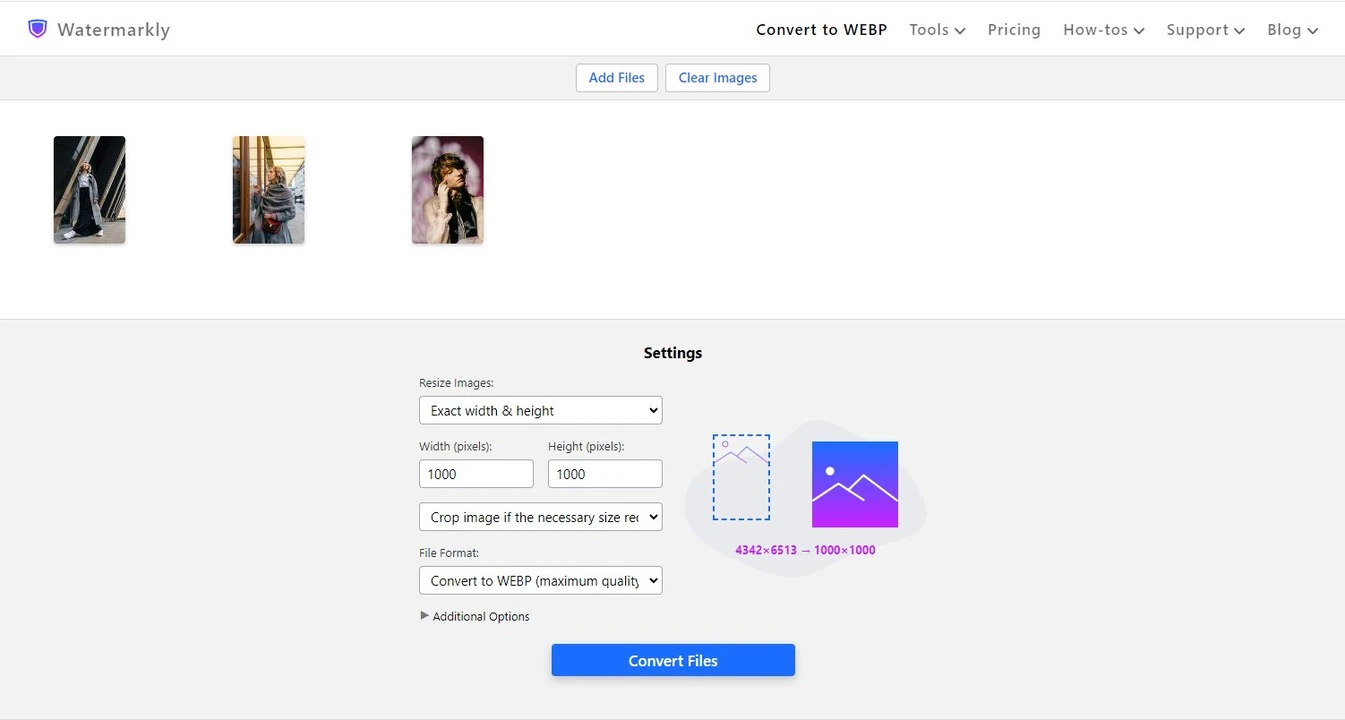
Exact Width and Height
If you want to change both pixel dimensions after you convert to WEBP, this option is for you. Here, you can enter the exact number of pixels for both the height and the width. Please note that your new pixel dimensions might produce the aspect ratio that is different from the one that the original image has. For example, if you enter 1000x1000px, that’s a square, which is a 1:1 aspect ratio. And your original image has the 2:3 aspect ratio. So, the aspect ratios are different. This is why you will need to choose what you want the WEBP converter to do – it can crop your image to the new aspect ratio. It can also generate pixels or add white pixels around the image to obtain the required size and aspect ratio.
Not Larger Than
This option allows you to enter a new number of pixels for both height and width. However, the WEBP converter won’t resize the image to these exact numbers. Instead, it will resize your image so that its pixel dimensions aren’t bigger than what you have entered. For example, if you enter 1000x1000px, your image can be resized to 1000x750 px after converting to WEBP. This is a great option if there is a certain size limit that you need to meet. For example, if you want to post your WEBP images on a website or a social media platform.
Percentage
If you want to convert to WEBP and make your images smaller or bigger, but you don’t have specific pixel dimensions in mind, you can use this option. Here, you can make your entire image bigger or smaller by a certain number of percent. By default, your original image is 100%. You can enter 85 percent, which means that your converted image will be smaller than the original by 15%. The aspect ratio of your image will stay the same.
Why Watermarkly is Great Tool to Convert to WEBP
You can convert images to WEBP in our app with just a few clicks. You don’t need to have any experience or skills in graphic design or image editing. Our WEBP converter has a straightforward and user-friendly interface, which is certainly a big benefit. Let’s take a look at what other advantages it has.
Free of charge
That’s right. With our app, you can convert images to WEBP for free. Moreover, you won’t see any annoying ads or huge banners that make it impossible to work. There are no pops or any other distractions. You won’t have to sign up, provide your email address or any other personal information. You can simply open the app and start converting your images.
Accessible on any device
Since our WEBP converter is web-based and the entire conversion process takes place in a browser, you can use it on pretty much any device. It’s possible to convert files to WEBP on a computer, tablet, or smartphone – no matter what operating system you have. All you need is a browser and a stable internet connection.
Completely safe and secure
All your files are processed directly in your browser; no one can access them during or after the conversion. No one will be able to get their hands on your images.We don’t store anything on our servers – neither files nor private information. You can rest assured about the safety of your data.
Simple and straightforward
An uncomplicated interface and a basic set of essential tools make it easy to convert to WEBP in a matter of minutes. Even if you’ve never edited images or converted files from one format to another before, you will have no problem using our WEBP converter. It’s so easy that even a child can do it! If you have any questions, please contact us; we will be happy to assist you.
Not just for converting
You’ll be happy to know that Watermarkly allows you not only to convert to WEBP but do some other things. On our website you can also resize and crop images as well as add watermark to PDF and photos. In case you didn’t know, watermarking can be used for both protecting your images from being stolen and promoting your brand on the internet at the same time.
Frequently Asked Questions
What is the WEBP format, and what is its main advantage?
WEBP is a raster graphics format developed by Google. Its main advantage is that it supports both lossy and lossless compression and can produce images that have a small file size, yet excellent image quality. At the same time, it handles colors just as well as a JPEG.
What is the difference between WEBP and PNG formats?
PNG files tend to have a perfect balance between file size and image quality. Both PNG and WEBP support transparency. However, WEBP handles colors much better than PNG, which is why it’s perfectly suitable for photos. At the same time, WEBP images can be of a smaller size than PNG images, yet their quality will be pretty much the same.
Why is the WEBP format considered to be efficient?
First of all, this format produces images of good quality yet small file size. This is a perfect combination for images that you want to share on the internet because, this way, they will load much faster on a webpage. The faster the image loads, the quicker the visitors will see it. Plus, they won’t have to use a ton of internet traffic on viewing a single webpage, which is definitely a bonus. This is especially important for people who use mobile internet.
Which images should I convert to WEBP?
You can convert to WEBP pretty much any image that you want to share online. This format is good for images with wide range of colors and details – for instance, photos. Their excellent image quality will be maintained.
Can I convert images to WEBP on a smartphone?
Of course you can! Our WEBP converter works in a browser, so you can convert to WEBP on any device that has a browser and access to the internet, including smartphones.
Do I need to pay to convert to WEBP?
No, you don’t. Watermarkly’s WEBP converter allows you to convert an unlimited number of files absolutely for free. There are also some additional editing features that are available at no extra cost. Check out the following tools: add text to image, watermark images, blur faces and blur license plates.
Can I convert multiple files to WEBP in one go?
Yes, you can. Our WEBP converter supports batch processing. Simply upload all the necessary files into the Watermarkly’s app, set the settings and start the converting process.