
How to Upscale an Image in Photoshop
by ![]() Lina Thorne • Updated · Posted in Photo Editing
Lina Thorne • Updated · Posted in Photo Editing
Many people believe that when resizing an image in Photoshop without losing quality, they can only make it smaller. And that’s partly true. Reducing an image’s size is much easier because Photoshop simply removes a few pixels. This process is precise and careful, so the image quality usually stays intact.
However, making an image larger in Photoshop (or any other editor) can be more challenging. Adding new pixels isn’t as straightforward as removing them. When an image is enlarged too much, it can become blurry, lose sharpness, or even show visible pixelation.
The good news is that digital technology has come a long way, and today, it’s entirely possible to upscale images without noticeable quality loss. Even better, it’s not as difficult as it might seem.
In this article, you’ll find:
- Step-by-step instructions on how to make an image larger in Photoshop quickly and easily.
- Tips on how to improve the sharpness of an upscaled image if needed.
- A recommendation for a browser-based app that offers a convenient and efficient alternative to Photoshop for resizing.
With this tool, you can upscale images online from anywhere, on any device.
Let’s dive in!
Upscale an Image: What Is It?
To upscale an image means to enlarge it in Photoshop or another image editor without losing noticeable quality. In other words, you can take a 500 × 500 px image and turn it into a 1000 × 1000 px version (or even larger) — without visible blurriness or artifacts. When done right, it’s almost impossible to tell that the original image was much smaller.
The quality of the upscaled image largely depends on the algorithms used by the software. A good program should preserve the image’s clarity, color, and overall sharpness.
Today, AI-powered upscaling plays a key role in achieving excellent results. Fortunately, many modern editing tools and online apps now use artificial intelligence to enlarge images while keeping them crisp and detailed.
Why You Should Upscale Images
Generally, there are two main reasons to upscale an image — to print it or to share it online. In both cases, certain size and resolution requirements must be met.
Technically, you can still print or upload an image that’s too small, but the quality will suffer. And poor quality can ruin even the most beautiful photo. It’s like trying to watch your favorite movie in 144p; you just can’t enjoy it properly.
When You’re Printing an Image
The size your digital photo should have depends on the size of the print you want. If you’re planning to print a large photo, its digital version needs to be large as well.
When it comes to printing, resolution is everything. To make your photo look sharp and detailed, it must have high resolution and excellent quality. If you’re not sure whether your image meets these requirements, it’s best to check with your chosen print shop.
When You’re Sharing Online
Sharing images online is usually more forgiving than printing. Most social media platforms automatically compress images, so you don’t always need a high-resolution file.
However, if you want your visuals to stand out, image quality still matters. If your photo is small or looks a bit blurry, it’s a good idea to enhance and upscale it before posting. This way, your content will look professional and eye-catching.
How to Upscale an Image in Photoshop
Since this is a rather advanced software, it might seem that upscaling an image in Photoshop can be challenging and complicated. But it’s really not. In fact, it will take you just a few clicks. The upscaled copy will look so good that no one will ever guess that the original was much smaller.
There’s something that you need to check first!
You will need the feature called Preserve Details 2.0. It can be found in recent versions of Photoshop, starting with Photoshop CC 2018. So, if you have the latest version of Photoshop, you should be able to make images bigger without quality loss.
Now, before you get to upscaling, you need to make sure that Preserve Details 2.0 is enabled. Thanks to the algorithms that this feature utilizes, Photoshop will be able to increase image resolution, while maintaining image quality and keeping details intact. This is how you will get a bigger image that looks natural and doesn’t have a lot of artifacts.
So, how can you check whether this feature is enabled or not?
First, launch Photoshop and go to Edit > Preferences > Technology Previews.
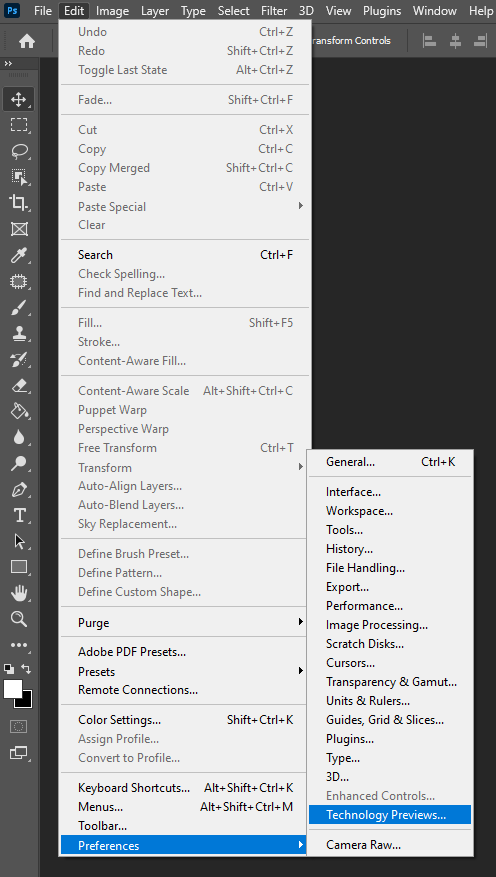
In the Technology Previews section find Preserve Details 2.0 and make sure that there’s a tick next to it. The tick means that the feature is selected. Close the dialog box by clicking on OK.

Now, to make an image bigger in Photoshop, follow these steps:
- Go to File > Open and select the image that you want to upscale.
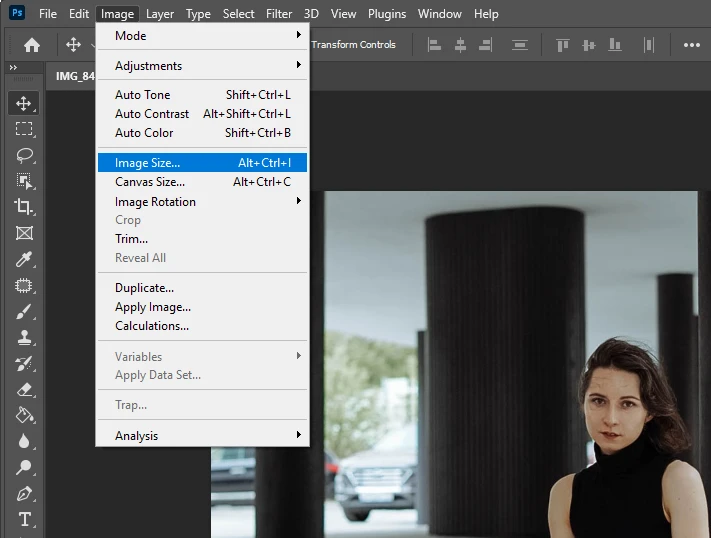
- Next, go to Image > Image Size.
- If necessary, you can make the dialog box bigger. In the Preview, you can zoom in or out of the image.
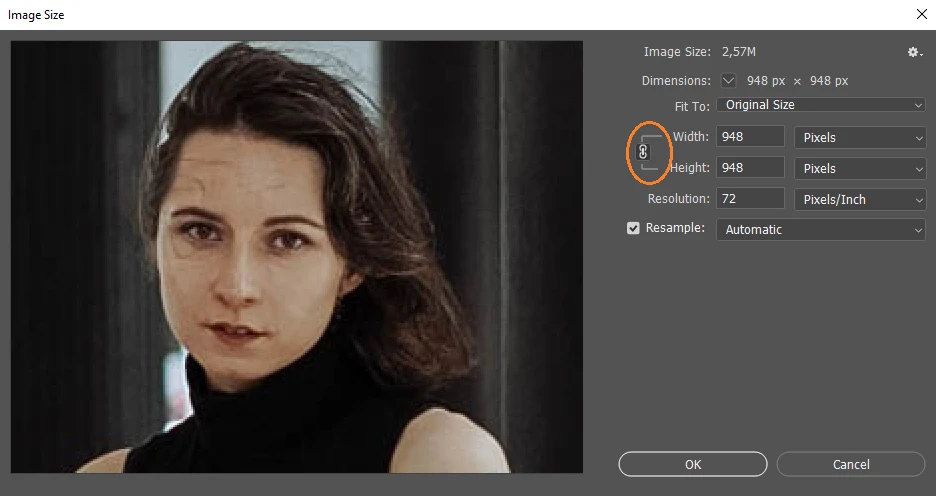
- The aspect ratio needs to be locked. In other words, there should a link between the width and the height in the dialog box. If you change the width, the height should change automatically. This way, you’ll avoid any awkward stretching or distortion of your image.
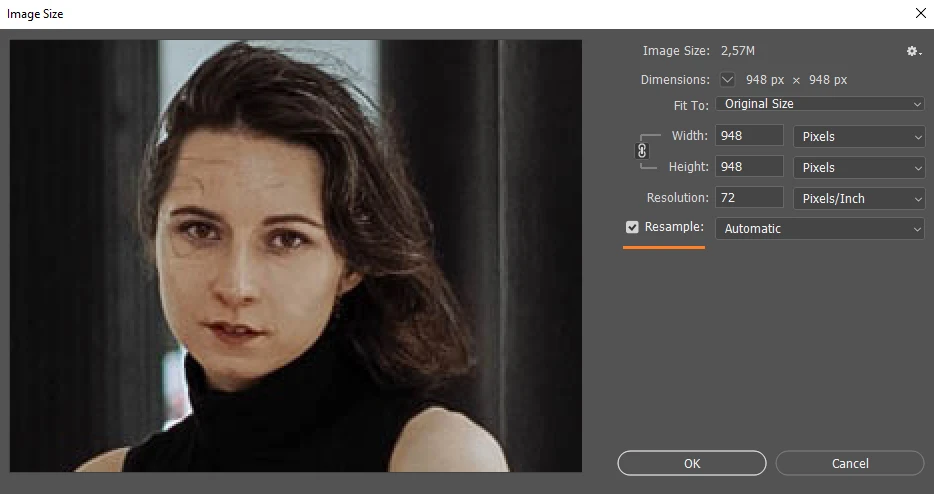
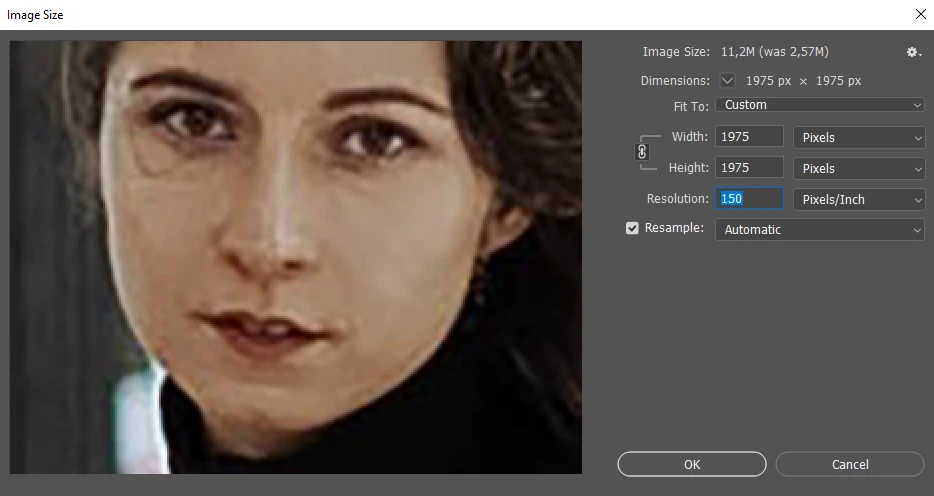
- To get good results, you also need to make sure that Resample is enabled.
- In the Image Size box you can enter a new value for Resolution. When you change the resolution, the pixel dimensions will change, too.
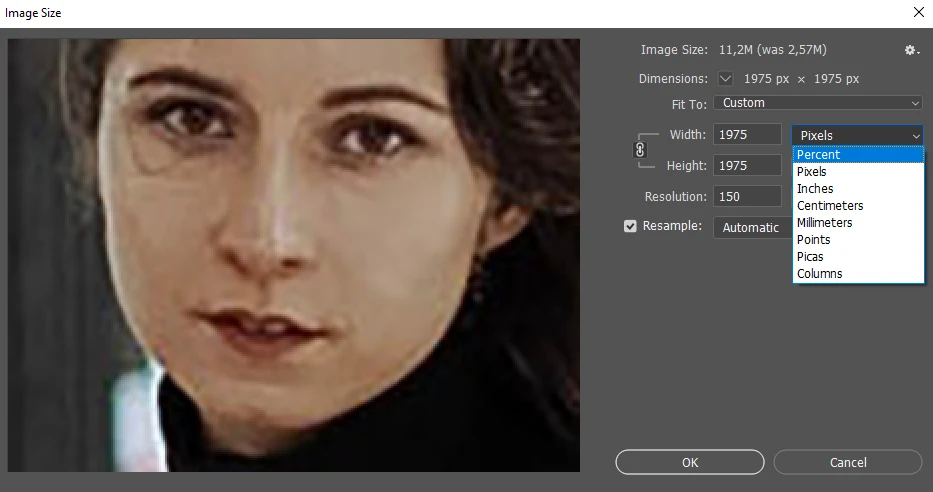
- Now it’s time to see how to make an image bigger in Photoshop. You need to enter new values for the width and the height. If the unit of measurement is set to pixels, then you’ll need to enter the exact pixel dimensions. For instance, 2000x2500px. But to make things easier, you can select Percent and enter 250%.
 Your image will be upscaled 2.5x times.
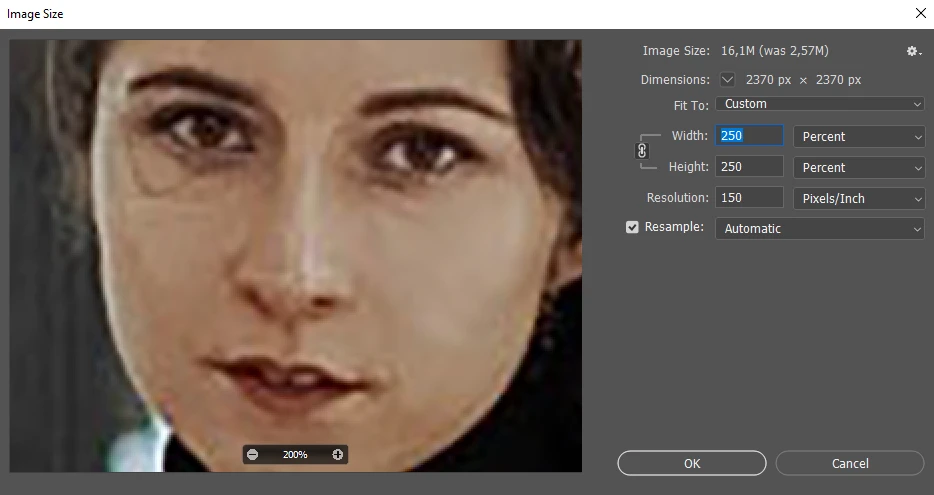
- Next, the resampling method needs to be changed. Right now it’s set to Automatic. When this method is chosen, Photoshop automatically chooses the algorithm that it thinks would be the best. But unfortunately, this doesn’t always produce great results.
- Click on Automatic. This will open the drop down menu with different resampling method.
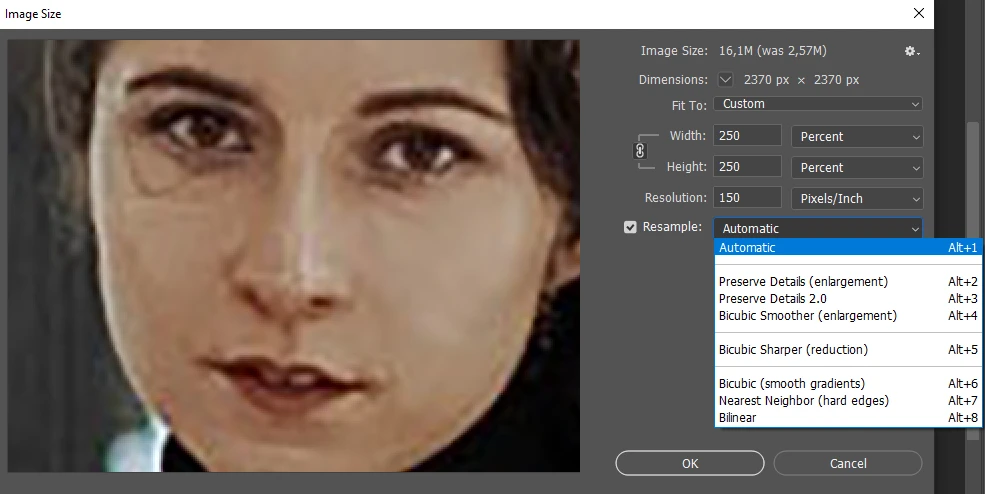 Here’s a tip! Preserve Details 2.0 is a great method because it utilizes advanced AI. It analyzes the image, figures out what details are the most crucial and preserves them. At the same time, it doesn’t go overboard with the sharpening. The details do look sharp and clean. Everything is quite smooth, yet not blurry. And there are practically no artifacts. Nevertheless, it might be a good idea to try different resampling methods. Select different options and check the preview. It’s possible for another resampling method to give better results for your particular image. The changes won’t be applied until you hit OK. So, don’t be afraid to experiment.
 - Select Preserve Details 2.0.
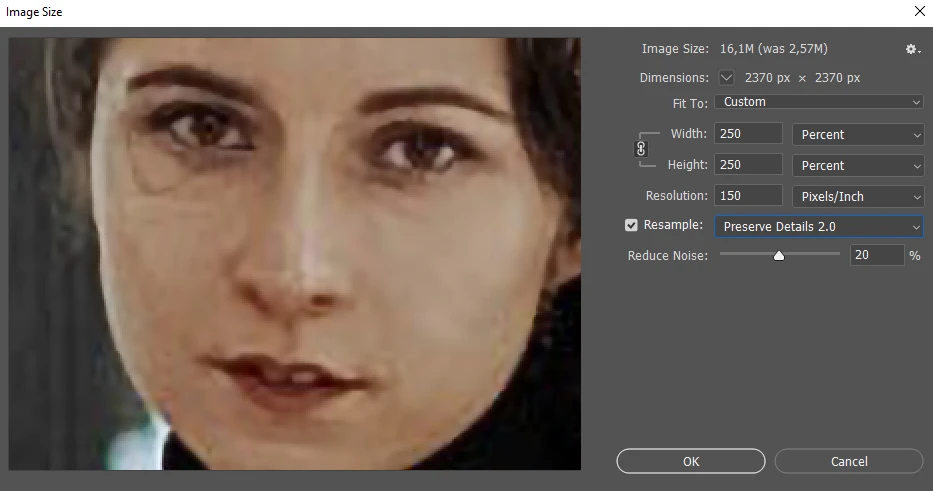
- Increase or decrease Noise Reduction.
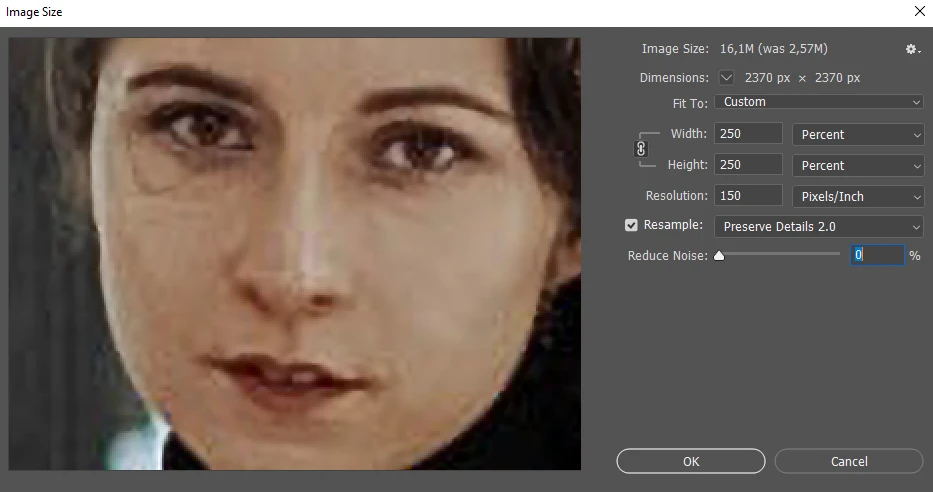

- Click “OK” to apply the changes.
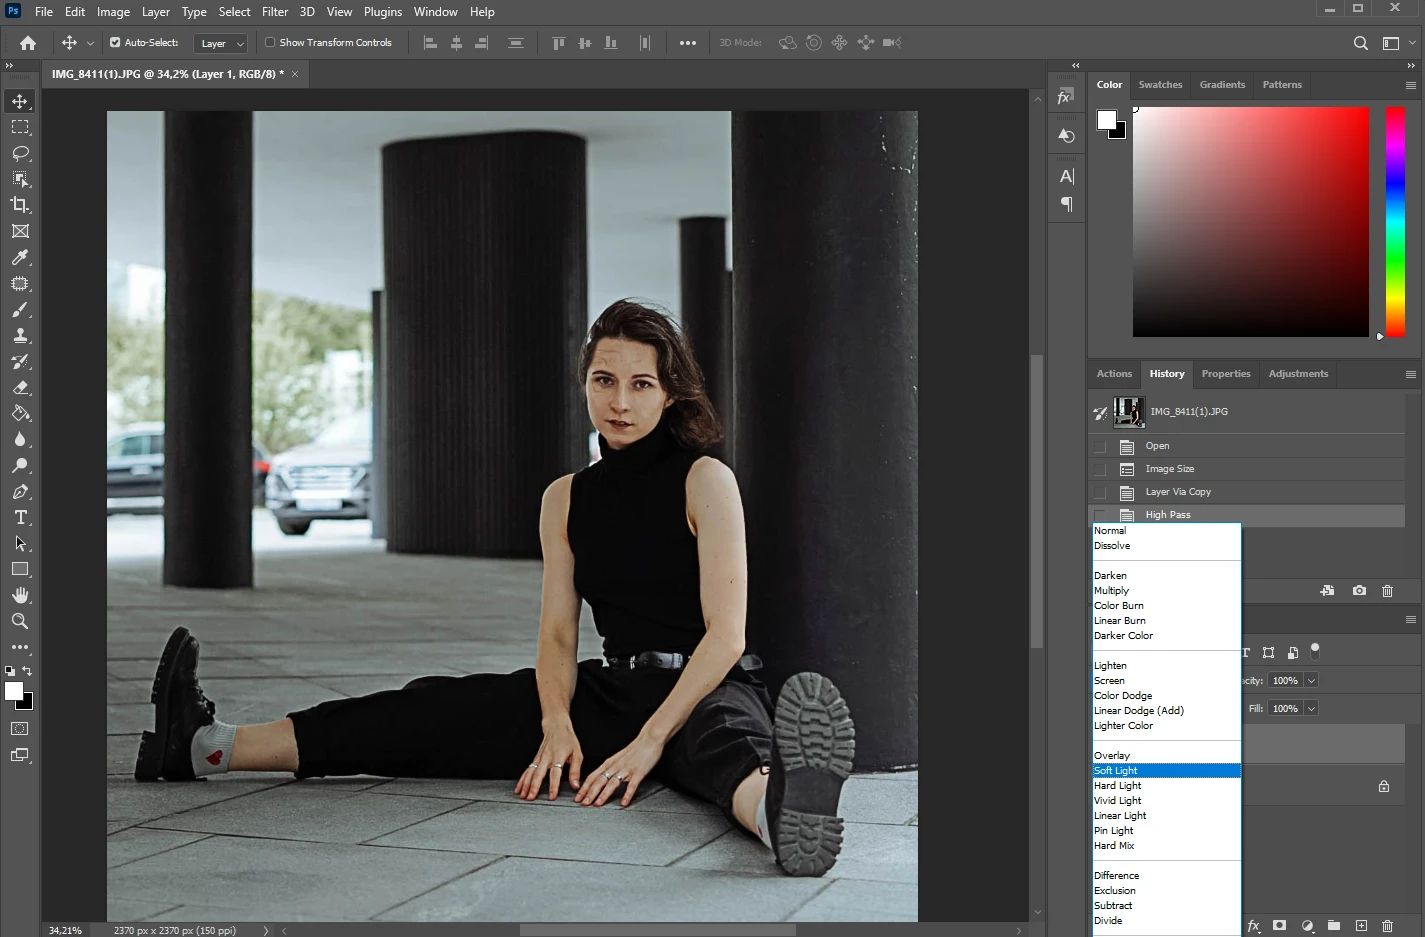
If you had to upscale an image quite drastically, and now it’s lacking some sharpness and contrast, the High Pass filter will help you fix this. Let’s see how you can do this:
- Duplicate the layer by using the shortcut CMD / CTRL + J and select the new layer in the Layers panel.

- Go to Filter > Other > High Pass.
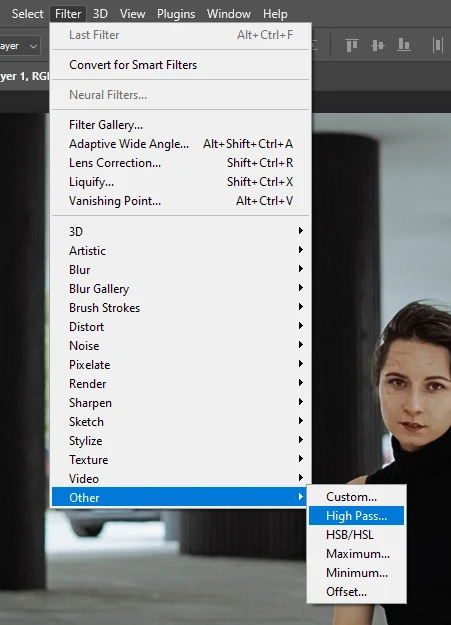
- You will see a grayscale version of your photo. Don’t worry – this is how it should be.
- Adjust the radius. By doing this, you will increase or decrease the amount of sharpening. If the radius is small, only the fine details will be sharpened. Meanwhile, if you want a more general sharpening effect, then go for the bigger radius. Experiment to figure out what works best for your image.
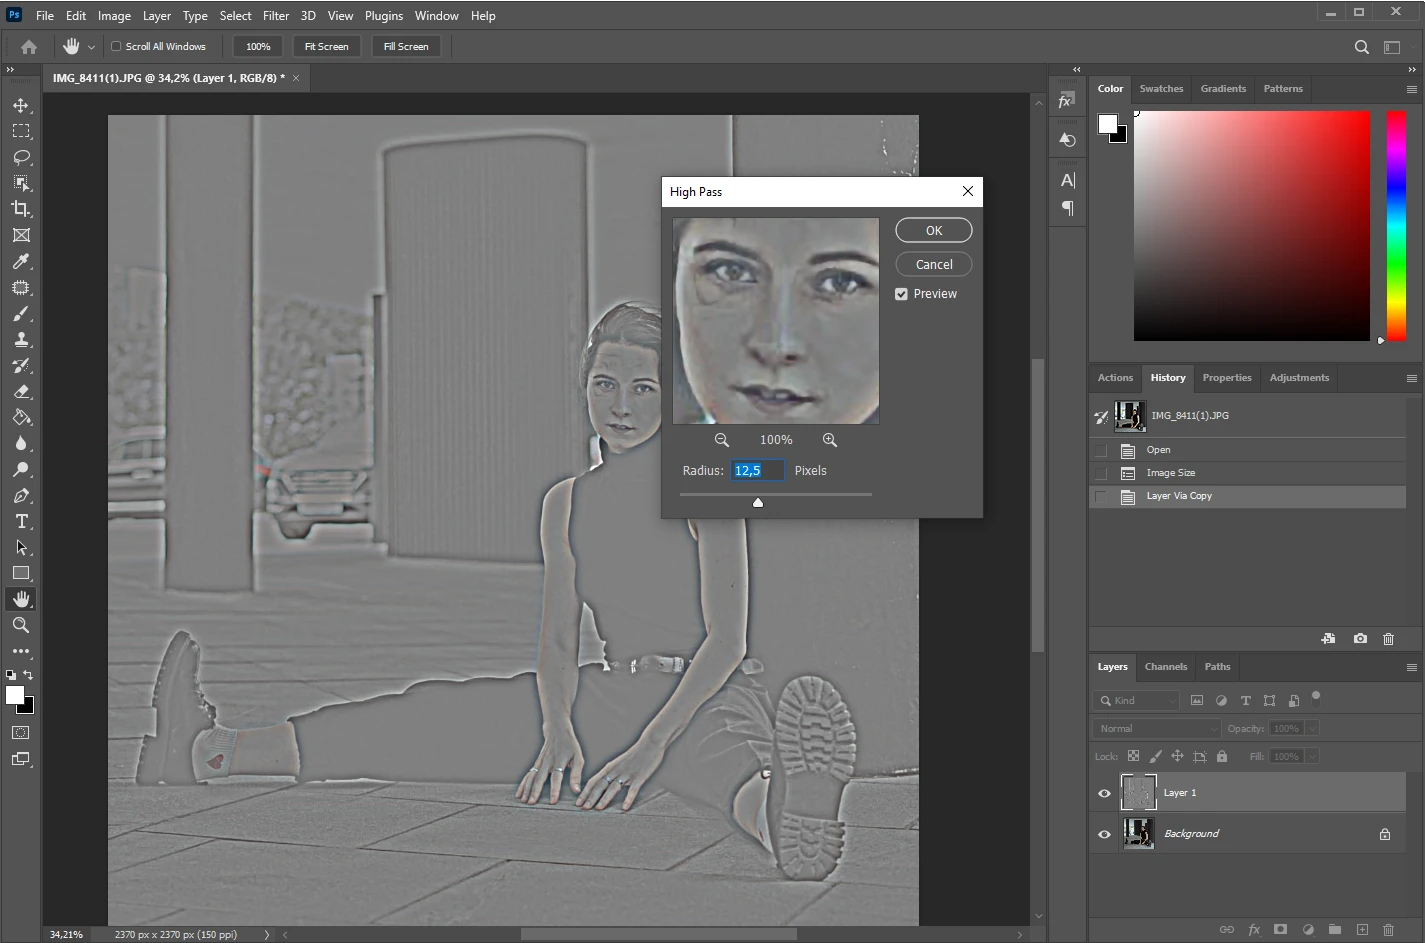
- Click “OK” to apply the High Pass filter.
- In the Layers panel go to the menu with the blending modes. Choose Overlay or Soft Light. They won’t mess with the colors of your image too much.
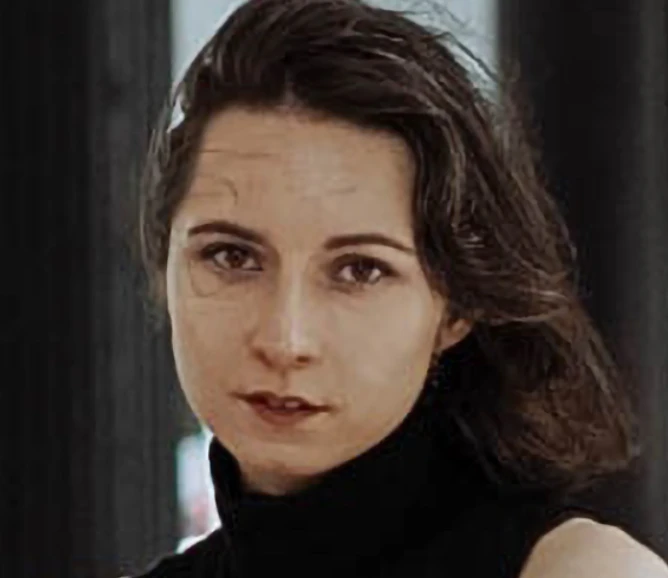
- Let’s take a look at the difference. No High Pass Filter:
 High Pass Filter applied:
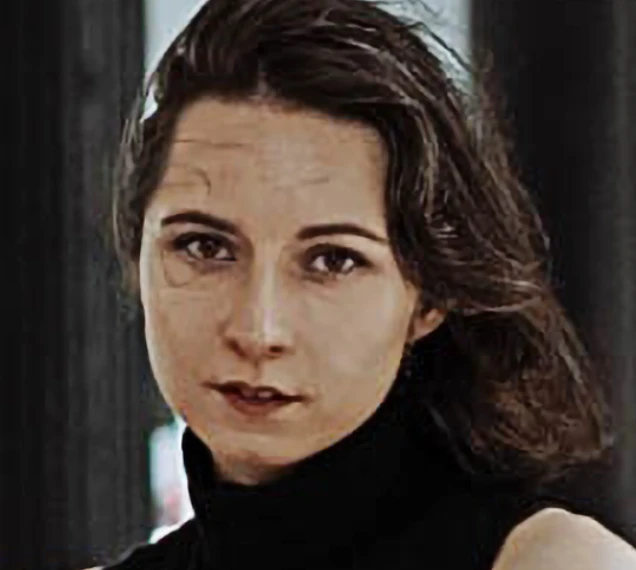
- Finally, to export your image, go to File > Save a Copy.
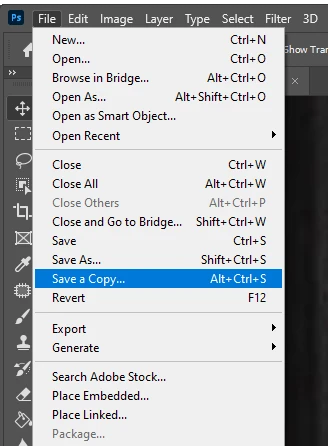
- Select Baseline Standard and make sure that the quality is set to Maximum. This is crucial for excellent image quality.

All done!
Watermarkly vs Photoshop: How to Upscale an Image Online
What if there’s an easier and, most importantly, a better way to upscale an image? You can use a browser-based image resizer, Watermarkly. It’s worth mentioning right away that Watermarkly isn’t nearly as advanced as Photoshop. They aren’t exactly interchangeable. But Watermarkly does have some advantages over Photoshop.
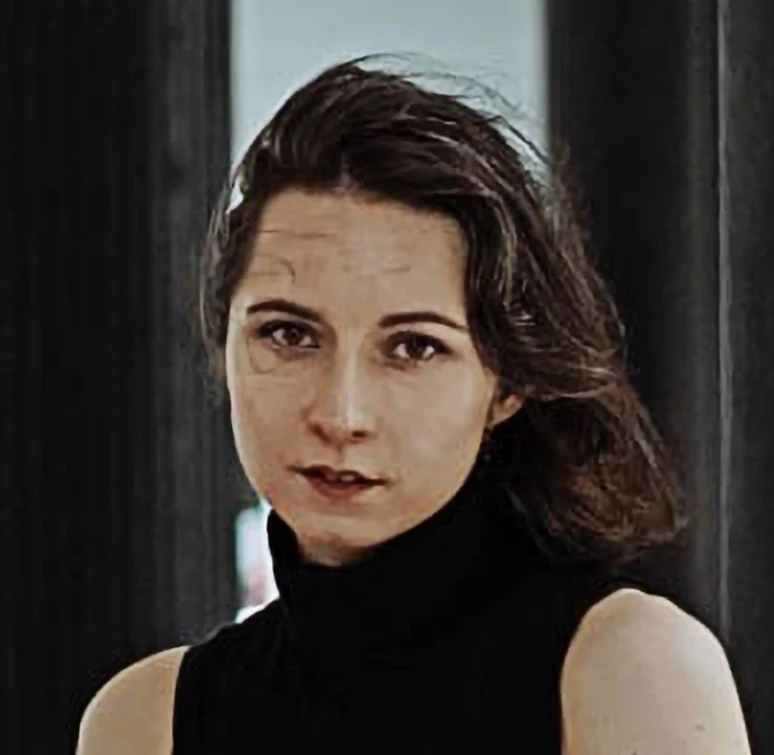
First of all, it produces upscaled images that are much smoother and don’t have a lot of pixelation. This image was upscaled using Photoshop.
And this image was upscaled using Watermarkly.
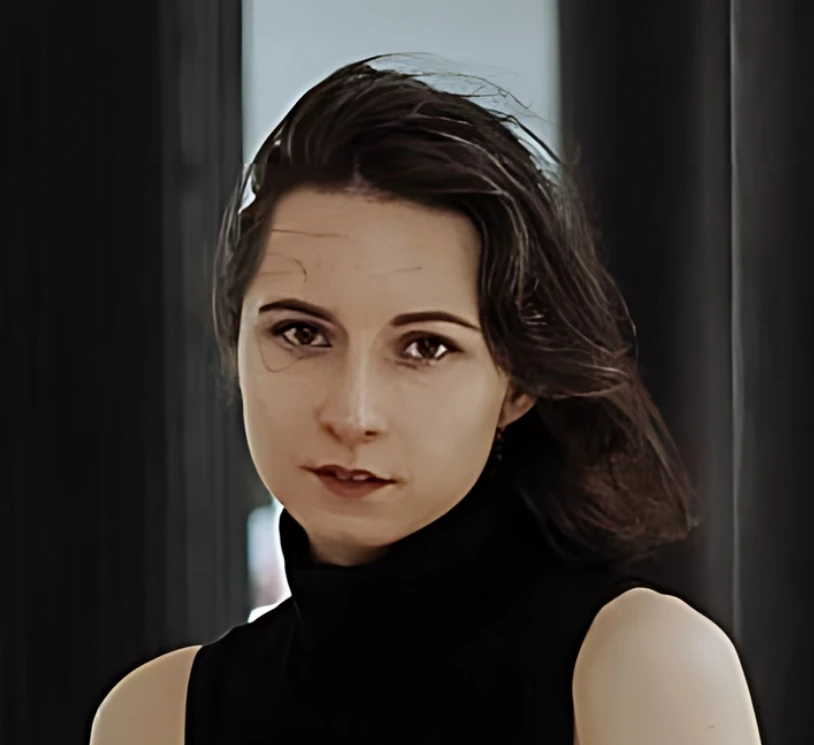
As you can see, all the lines look much smoother. There are no artifacts or sharp edges. The color gradation looks amazing.
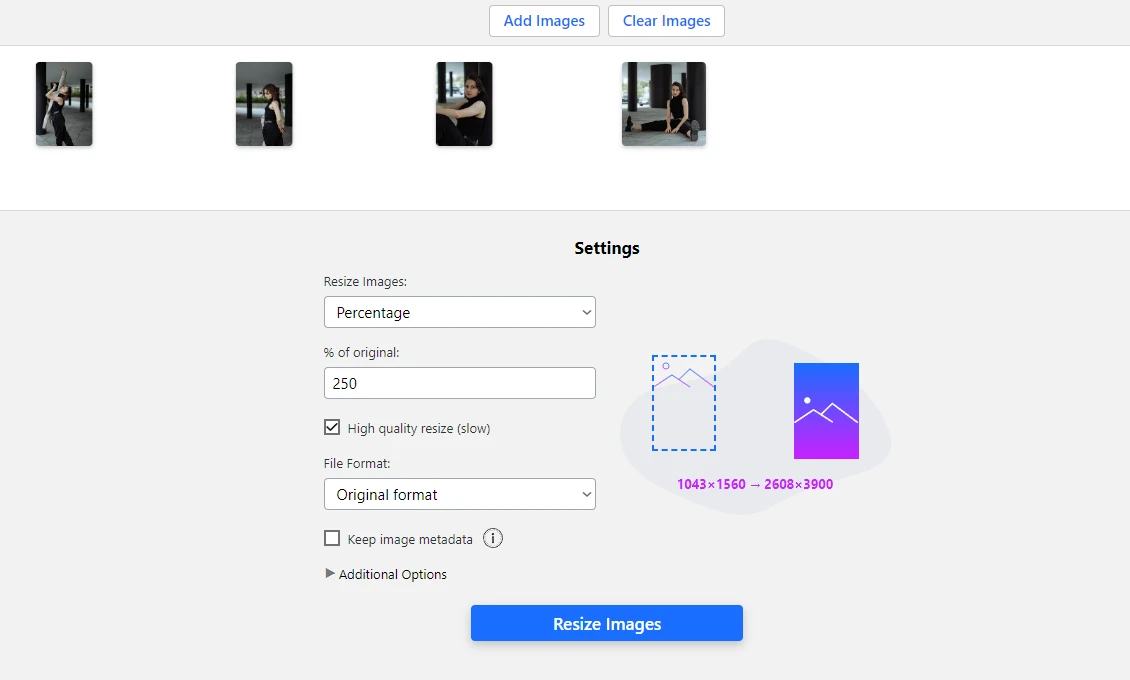
In Watermarkly you won’t need to go through different resampling methods. It uses AI technologies and automatically figures out how to make your image bigger while also maintaining its quality. All you need to do is enable the “High Quality resize” option.
All the tools and buttons in Photoshop can be quite overwhelming and stress-provoking for beginners.
But Watermarkly isn’t like that.
On Watermarkly’s website each online tool is designed to serve a specific purpose.
For instance, our image resizer can be used solely for changing the size of images. It is possible to enable the blurring feature or tell the app to crop your image if you need to change the aspect ratio. Nevertheless, all the focus is on resizing images.
If you are looking for a way to upscale images online, then Watermarkly should be your choice. It works in a browser which means you can upscale images no matter where you are – as long as you have an internet connection. The app will work the same way on all types of devices, and it doesn’t matter what operating system you have. The same cannot be said for Photoshop. There’s a mobile app, Photoshop Express, but it’s much simpler than the desktop version. And, which is more important, it doesn’t have the upscaling feature. Thus, you can upscale an image in Photoshop only on a PC or a laptop.
One of the biggest advantages that Watermarkly has over Photoshop is easy batch-processing.
Naturally, it is possible to process a batch of images in Photoshop. But you’ll need to do it using the Image Processor feature or create an action and then start the batch processing. Either way, it requires some time and preparation. Not to mention that it can be quite confusing for beginners.
But in Watermarkly, it’s easy as pie. You simply upload a batch of files, enter new pixel dimensions or a certain number of percent, then start the upscaling process and download the enlarged copies. You won’t have to deal with a bunch of confusing settings or creating any actions.
Aside from image resizer, Watermarkly’s website allows you to compress PNG or JPG, crop GIF and images of other formats. You can change the aspect ratio of your image to publish it online or crop an image into a circle. It’s possible to blur faces and blur license plates in a matter of minutes as well as protect your visual content with watermarks. Surely, you can do all of these things in Photoshop. But it will definitely require more time and effort.
Watermarkly is no competitor to Photoshop when it comes to complex and advanced editing.
If you want to learn Photoshop, then go ahead and do that! But you don’t really need to choose.
In fact, it might be a good idea to opt for using both apps. In Photoshop you can do more complex editing like creating cool motion blur effects or skin retouching. Meanwhile, you can do all the basic image editing in Watermarkly – it’ll be much easier and quicker. If you do basic editing in Watermarkly, you’ll have more time to learn and practice more advanced editing techniques.
FAQ
How to upscale an image in Photoshop without losing quality?
It’s pretty simple. First of all, open your image in Photoshop and go to Image > Image Size. Once the dialog box appears, enter new pixel dimensions. Alternatively, you can set the unit of measurement to Percent and enter a certain number of percent. If you want your image to be 2x bigger, then enter 200%. Next, select Preserve Details 2.0 in the list of resampling methods. This option should give you the best results. Finally, apply the changes by hitting “OK”. That’s it!
How to upscale an image in Photoshop using AI?
Photoshop utilizes AI technologies in the Preserve Details 2.0 feature. You need to enable this feature if you want to make your image bigger using the Image Size tool without losing any image quality. In Photoshop go to Edit > Preferences > Technology Previews. In the Technology Previews section put the tick next to the Preserve Details 2.0 feature and click “OK”. When you open the Image Size dialog box, pick Preserve Details 2.0 among the resampling options.
How to make an image bigger in Photoshop?
Changing the size of an image in Photoshop is quite easy. It doesn’t matter whether you want to make an image smaller or bigger. This can be done with the help of the Image Size dialog box. You simply go to Image > Image Size, then enter new pixel dimensions. Though, make sure that the width and the height are linked to avoid any awkward stretching. When upscaling an image, you might want to increase its resolution, too. Try out different resampling methods and choose the one that gives you the best results.
Conclusion
Now you know that it’s possible not only to reduce the size of an image without losing quality, but increase it, too! In fact, it’s pretty simple and will take you only a few clicks. You’ll be able to make an image bigger even if you’ve just started learning Photoshop. However, if you are looking for an easier way to upscale an image or even multiple images, you can opt for our image resizer, Watermarkly. Unlike Photoshop, you can use it on any internet-connected device since it works online. Plus, your upscaled images will look smoother and sharper.
More articles
How to Crop in a Circle in Photoshop
How to Blur Faces in Photoshop