
How to Take Great Pictures for eBay
by ![]() Lina Thorne • Updated · Posted in Photography Tips
Lina Thorne • Updated · Posted in Photography Tips
Do you want to sell a few things on eBay? Are you about to create your first ever listing? Don’t rush to upload your product photos just yet – you might need to fix a couple of things first. Or maybe you’re not a complete newbie on eBay and have already sold some stuff. But the sales are rather slow, and you have to wait for months and months before a single item actually sells. Well, photos in your listings might be the culprit.
Remember that when it comes to selling things online, images are everything. No matter how detailed and well-written a description of an item is, it won’t be enough to convince people to buy from you. In fact, most people skim through product descriptions or don’t read them at all! Amazing product photos need to be your top priority if you want to be a successful seller.
Fortunately, this article features the most vital tips on how to take great pictures for eBay. You will learn all the do’s and don’ts. Don’t worry, there’s no need to hire a professional photographer or be one. You don’t really need any fancy equipment, either. Some successful sellers use only their iPhones to take photos of their products – what matters is how they do it. This won’t require a lot of hard work or effort. There are just a few things that you’ll need to pay attention to, and you’ll be good to go!
Alright, let’s dive in!
Why is It So Important to Take Great Pictures for eBay?
When people search for an item, they look at photos first. Naturally, there are some other things that come into play as well: the price and your feedback rate. But what will catch the attention of potential customers first is images.
Your product photos need to attract buyers as well as prompt them to make a purchase.
In a physical store people can examine an item, take a closer look at its condition, smell it, feel its texture. All of these things help them decide whether an item is worth buying. But when shopping online, people make their purchasing decision based majorly on photos. Because there’s no other way to assess an item. You can’t touch or sniff it. You can’t examine it closely to figure out whether, for instance, it’s real or faux leather.
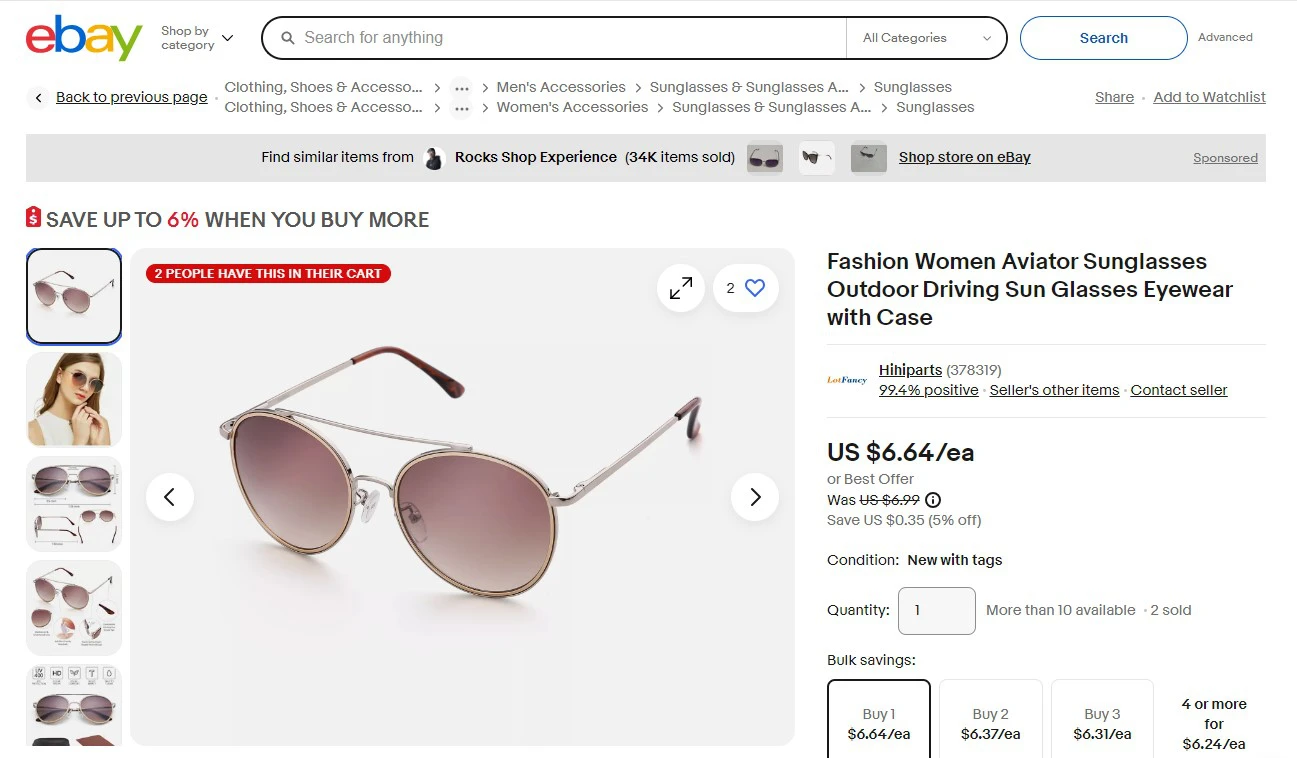
This is why people can be extra careful when shopping online. If they can’t see an item in your photos clearly and the photos themselves look bad, blurry and poorly-lit, they will choose a different seller over you. After all, the competition is pretty high on eBay. In addition to this, if your images don’t depict products accurately, you will have to deal with lots of complaints and returns. It’s your job to ease the worries of your potential customers and convince them that they will get exactly what they want when buying from you.
Do you see how important it is to take amazing photos for eBay?
Here’s a tip!
It shouldn’t come as a surprise, but eBay has some restrictions and requirements for product photos. For instance, there shouldn’t be any logo or text on them. So, before you edit and upload your pictures, it’s better to read all the eBay’s rules for images and make sure to follow these rules if you want to avoid any dire consequences.
How to Take Great Pictures for eBay
Alright, let’s take a look at what you need to keep in mind when taking photos for eBay.
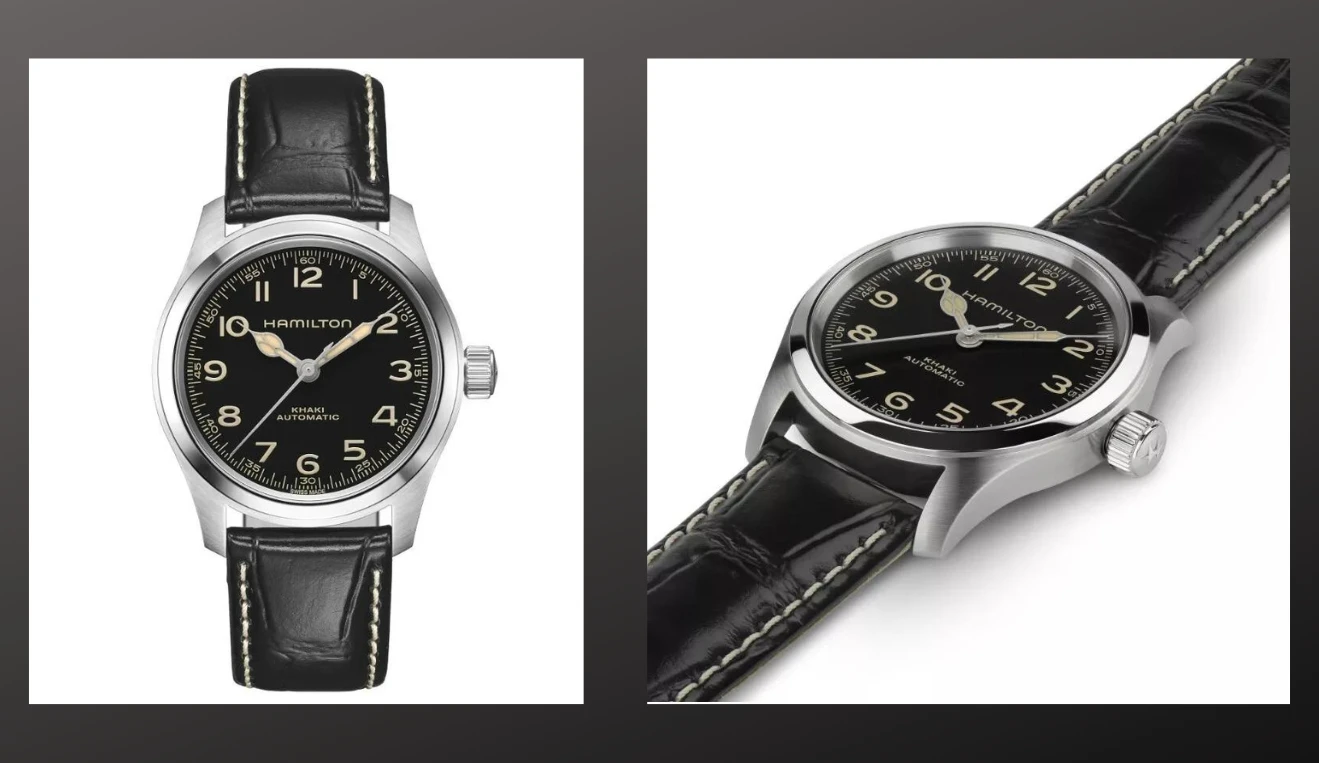
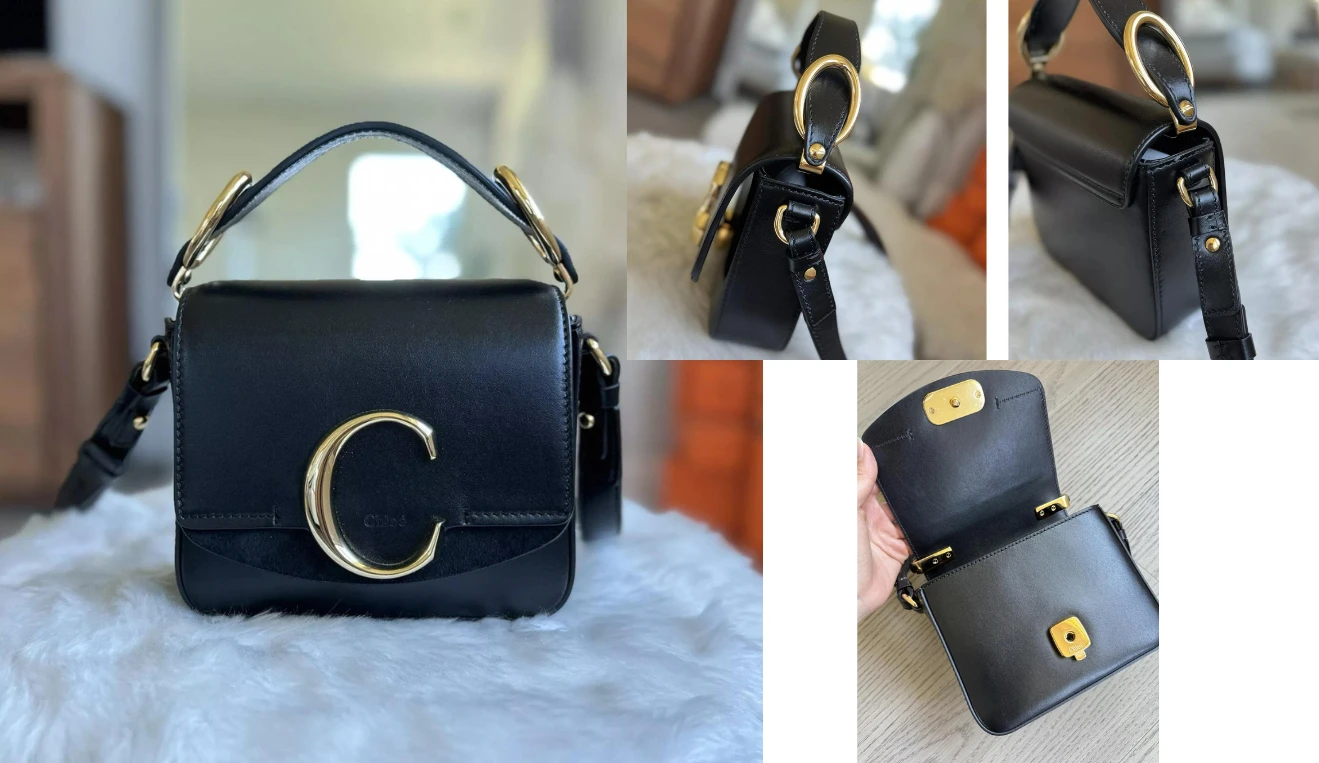
Use Different Angles
The item that you’re selling needs to be shown from various angles. Take a photo of it from the front, then from the back, from one side and another side. Maybe even take some photos from below and above. Take closeup shots of important details. It’s a good idea to show not only the product, but also manuals, chargers and batteries, accessories. If there’s a box – say, you’re selling shoes that didn’t fit you – take a picture of the box, too. The more photos you take, the better.
It’s absolutely vital for you to show any flaws or damage done to the item that you’re selling. This will help you avoid any complaints regarding it not being as described. Also, remember that if you show pretty much every aspect of an item in your photos, potential customers won’t have to ask a ton of questions. So, this will save you some time, too.
You can upload up to 12 images when creating a listing. So, if you can, upload all 12 photos and use the photo from the best angle as the main photo since it will show up in the search results.

Images Should Be Clear and Sharp
Camera shake and blurriness might be okay for some creative styles of photography as they can create a sense of rush and convey a certain atmosphere. But when it comes to eBay, your product photos should be clear. No blurriness or shaking. The entire item needs to be in focus and clearly visible as potential customers should be able to determine what it looks like and what condition it is in.
One of the ways to avoid shaking is to lit your scene properly. You can invest in some lighting equipment or use sunlight but bring your item closer to the window. Make sure that there’s just enough light for your shutter speed not to be too slow, if you’re using a digital camera. Ideally, the shutter speed should be over 1/160 if you are shooting hand-held. It’s also great if your camera has in-body image stabilization – it will also help you avoid the shaking. Smartphones tend to have built-in image stabilization, but it’s still a good idea to hold your phone as steady as possible when taking photos.
A more common way to keep your camera steady is to use a tripod. If you don’t want to spend too much on this, you can purchase a second-hand one. You need a tripod that can offers adjustable height and angles; fortunately, most of them do. Afterall, you might need to take images of products that vary in sizes and shapes, so you will need to adjust the height that your camera is positioned at. Alternatively, you can pile a bunch of books and prop your camera on them; any sturdy surface is suitable for this. But in this case, the angle will be pretty much the same as you won’t really have the chance to tilt your camera.
Finally, make sure that all the details are in focus. If you are using a digital camera, you might want to shoot at around f8 or even f11. You don’t need a shallow depth of field when taking photos for eBay.
Finally, there’s another reason why your images might be blurry and even a bit pixelated. The size of your image might be too small. Maybe you accidentally set the “Smallest Size” option in the camera settings and now all your photos are around 400-500pixels. As a result, their quality is poor, all the lines and details aren’t sharp enough. Fortunately, you can use an online image upscaler to increase image size as well as improve image quality. In a matter of minutes, you can easily change the size of your images from 450x450 pixels to 1500x1500 pixels. The upscaled version will look much sharper and clearer than the original!
The Key to Success is Good Lighting
If you’re looking to take great photos for your eBay listings, you need to also consider that lighting can make or break an image. It’s hard to see an item clearly if it’s terribly lit. Some details might get obscured by the shadows. The colors will be inaccurate. If there isn’t enough light, your images might get blurry. And generally speaking, the item itself might not look all that visually appealing. So, getting good lighting is key to getting great pictures for eBay.
Now, you don’t need to have some fancy equipment to light your scene properly. You can easily use sunlight. Set your item closer to the window. Move the curtains away and let in as much light as you can. It’s a good idea to get a reflector or at least a large sheet of white paper to fill in the shadows and control the overall lighting. For instance, you noticed that the shadows on one side of an item look quite dark. So, you can place a reflector near that side to bounce off some sunlight and, thus, make the shadows not as dark. If it’s an overcast day and you’re not getting enough light, you will probably need to take photos for your eBay listings outside.
Another thing that you can do is get a lightbox or a light tent. In most cases they aren’t expensive yet will make things much easier. Alternatively, you can easily make your own lightbox using white cardboard or white cloth materials. You can also make a DIY softbox – you’ll need some cardboard, tinfoil, tape and some semi-sheer piece of fabric or greaseproof paper to diffuse the light. If you decide to invest in some lighting equipment, make sure that it produces white light as it’s essential to convey all the colors of an item correctly.
What you also need to keep in mind is that you need to light an item evenly. You want to avoid any glare or shadows. It’s also not good if there are some spills of tinted lighting – yellow, blue, or something else. This issue might arise if you mix lighting of different temperatures. For instance, if you light an item using a softbox which has white lighting. But you also turned on the overhead lighting in the room and it has a warm yellow color. As a result, you will get a photo that has some spills of yellow light.
If you are planning on using natural light, it’s better to shoot either in the morning or in the afternoon. It’s not a good idea to shoot at noon or around that time, because the sun is usually too harsh and too high which will create some unwanted shadows and glare. Shooting during sunset or sunrise is not a good idea either because you might not get enough light, and the colors of the item will look somewhat different. If you are shooting indoors during the day get a pieces of white sheer fabric or greaseproof paper. This can help you diffuse some direct harsh light spilling into the room.
The Background Should be Clean
What you need to keep in mind while taking pictures for eBay is that nothing should distract from the item that you’re selling. Thus, the background shouldn’t be busy. Ideally, it should be minimalistic and monochrome. You can easily use a posterboard or a foamboard for this purpose. A large sheet of paper or a white cloth that doesn’t have many wrinkles can be okay, too. If you live in a place that has a white wall, you can use it as a background! As was mentioned above, you can also use a lightbox. This will give you not only good lighting, but a clean, monochrome background, as well.
It’s better to shoot against a white or light-grey background. However, if you have a highly reflective or a light colored item, it’s better to use a black or grey background. Otherwise, you will get too much glare or your light-colored product – for instance, a white T-shirt – will blend in with the white background. That’s not what you want. A background of white, grey or black color is ideal because it won’t mess with the colors of an item.
As an option, if you don’t have a clean background or your item is too large – maybe you’re selling a car! – you can remove the background and replace it with solid color using some free AI apps that work online.

There Shouldn’t Be Any Clutter
Any clutter in your images can be distracting. So, aside from having a white or black background, it’s important that you also remove any clutter from it.
Eliminating clutter is true not only for backgrounds. It’s a good idea to clean up the item that you’re selling. If you fished out a dress from an attic and it has some dust on it, it’s better to clean it up before photographing. Wash it. Get rid of the dust or dirt as well as any lint or fluff on the fabric. There shouldn’t be any fingerprints, either. The item needs to look clean and presentable.
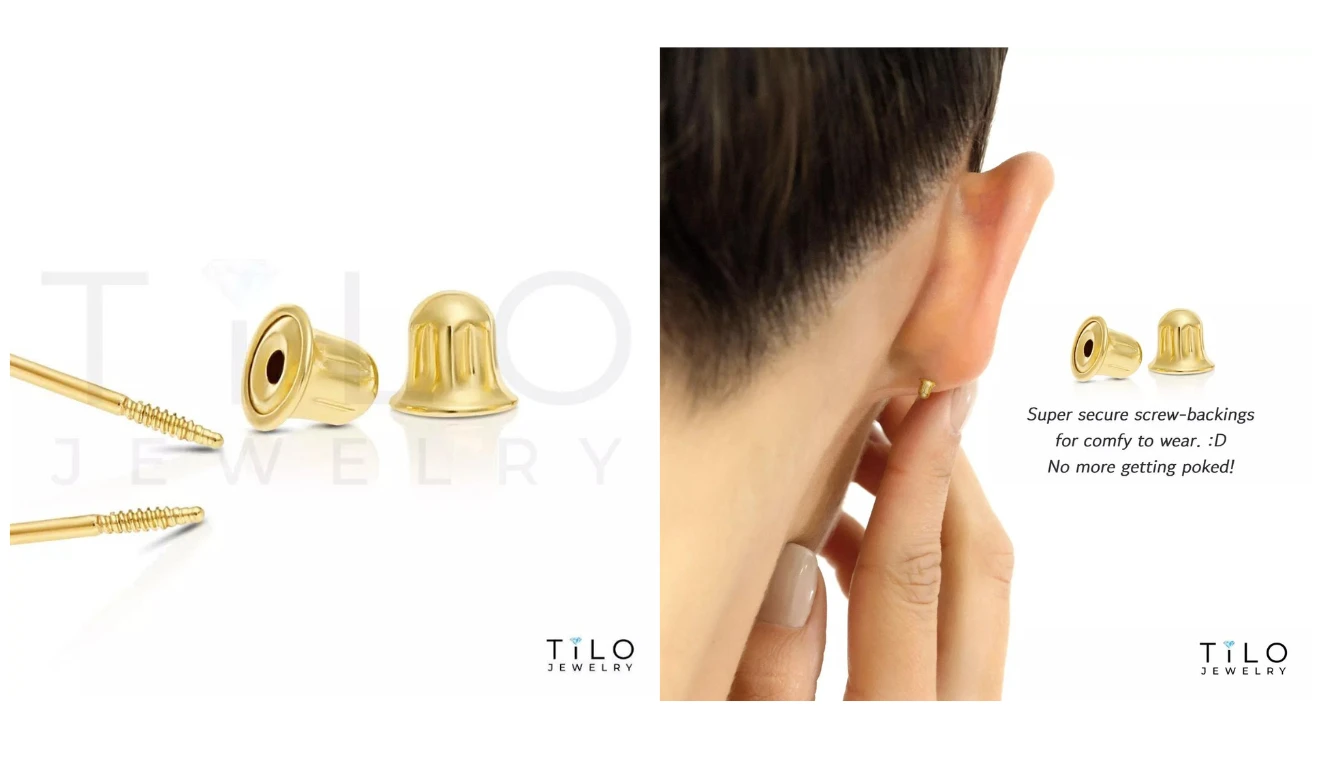
Remember that all the focus, all the attention should be on the item you want to sell. It also means that it might not be a good idea to use any props or at least keep them to a minimum. Ideally, your photos should show only the item that you’re selling, so potential buyers won’t get distracted or confused. It’s okay to use a mannequin to put your piece of clothing on or some kind of a stand to prop an item. It’s also possible to use something for the purpose of demonstrating scale. For instance, you can place a coin or a ruler next to a piece of jewelry so buyers will have a better understanding of its size.
Other than that, get rid of all the clutter and distractions.
Make Sure That the Colors Are Accurate
This is especially important when selling clothes, shoes, bed sheets and other types of textiles. These are usually the cases when buyers tend to care about color accuracy; it’s possible that you can get a complaint that an item isn’t as described if the colors don’t match.
You need to make sure that the colors are accurate when you are taking photos – compare the item and the photos of it. Using white lighting should help you with maintaining color accuracy. This is also something to keep in mind when editing. Fortunately, eBay photos don’t really require a lot of editing. But when editing, keep the item close to you and make sure that you’re not changing colors too much. It’s perfectly possible to turn a greenish yellow T-shirt into an orange T-shirt in Lightroom and that’s definitely not what you want.
Square And Centered
When taking photos for eBay, make sure that an item is in the dead center and takes up the majority of the frame. This will create a harmonious composition, and all the focus will be on the item that you’re selling.
Your photos need to be square. That’s what eBay likes. Thus, if you are taking photos on a smartphone, you’ll need to enable the 1:1 aspect ratio, which may also be called the Square ratio depending on the settings of your camera app. If you are shooting with a digital camera, you should be able to set the 1:1 aspect ratio in the settings as well.
Don’t worry if you haven’t done any of that beforehand, though. Say, you already have a few photos ready for a listing. They are relatively well-lit and sharp. The background is white and clean. However, the item is positioned slightly to the left within the frame and the aspect ratio is 4:3. You can fix the composition and change the aspect ratio by cropping photos in an online image cropper; for instance, Watermarkly. You’ll just need to upload your photos, select the 1:1 aspect ratio and adjust the cropping area so that your item is in the center. Easy as pie!
Remember to Optimize Photos
Okay, so, you followed all the tips and took some great pictures for eBay. You are ready to upload them…But! Before you do that, you need to optimize your photos. It’s vital if you want them to look sharp, clear and of good quality after they are published. You see, just like any other online platform, eBay has certain size requirements that images need to meet.
An image should have a minimum size of 500x500 pixels. The image size shouldn’t be too big, either. Some platforms reduce the size of images automatically and eBay is no exception. This can have a negative effect on the overall image quality and sharpness. When it comes to image size, you should aim for 1500-2000 pixels. Say, you have square photos of a product. The aspect ratio is correct. But the image size is 4500x4500 pixels. That’s too much. With the help of an online image resizer, you can easily resize your photos to 2000x2000 pixels.
What’s more, the file size of a photo shouldn’t exceed 12 MB. In fact, the smaller the file size of an image, the faster it will load on a website. That’s exactly what you want. Ideally, your image should look good, sharp and clear yet have a small file size. You can achieve this with image compression. When an image is compressed, its file size decreases dramatically, yet its good quality is preserved. As a result, you’ll get an image that will look sharp and clear, and at the same time load quickly due to its small file size. How can you compress photos? It can easily be done in an online image compressor within a couple of minutes. Here are a few free tools for compressing images of different formats — Compress JPEG, Compress PNG.
Do I Need to Watermark My eBay Photos?
Generally speaking, it’s not recommended to watermark photos for eBay. Unfortunately, there have been cases when listings were taken down because of watermarks in photos.
That said, there have also been cases of one seller stealing photos from another and using them in their listings. So, how can you protect photos from unauthorized use? Well, you’ll need to be smart about watermarking and follow a couple of rules.
First, don’t place your watermark dead in the center or central part of your image. It should be somewhere outside of the central area. But make sure that your watermark slightly covers the lower or upper part of a product in the photos. This is necessary to prevent watermark removal. If your watermark is placed on the monochrome background, it can be easily cropped out or removed with an eraser tool. But if it covers the product slightly, then it will be much challenging to remove it and, thus, steal your photos.
Second, you can use a textual watermark with your brand name and a copyright symbol. But it’s a no-no to use any logo. Your watermark shouldn’t be bright colored. It can be light grey or white - depending on the background. The opacity should be around 5-7% since your watermark will need to be quite unobtrusive.
Your watermark shouldn’t obscure any crucial details of your product. Customers should be able to view every details of an item that your selling properly and clearly. At the same time, it shouldn’t be easy to remove your watermark. Otherwise, it won’t protect your photos. This is the balance that you’ll need to achieve.
Learn more about photography watermark ideas.
In Conclusion
If you want to be a successful seller on eBay, there are a couple of things that you’ll need to avoid. Don’t use blurry, unclear and low-resolution images with poor lighting, cluttered background and lots of props. Watermarks can be okay if you design and place them properly. When it comes to creating a listing, don’t just upload a couple of photos – show your product from various angles. It’s also vital to optimize your photos otherwise all your hard-work might be undone when the platform automatically reduces the image size which will lead to quality loss. Hopefully, now you know how to take great pictures for eBay thanks to this article. By following these tips, you will surely increase your sales!