
How to Resize an Image in Paint
by ![]() Lina Thorne • Updated · Posted in Photo Editing
Lina Thorne • Updated · Posted in Photo Editing
Knowing how to resize images is as important as knowing how to crop them.
Why?
Well, in most cases, you might need to change the size of your images before sharing them online. Some websites and social media platforms have their own size requirements. If you don’t follow them, your images might not get uploaded or their quality might get noticeably worse.
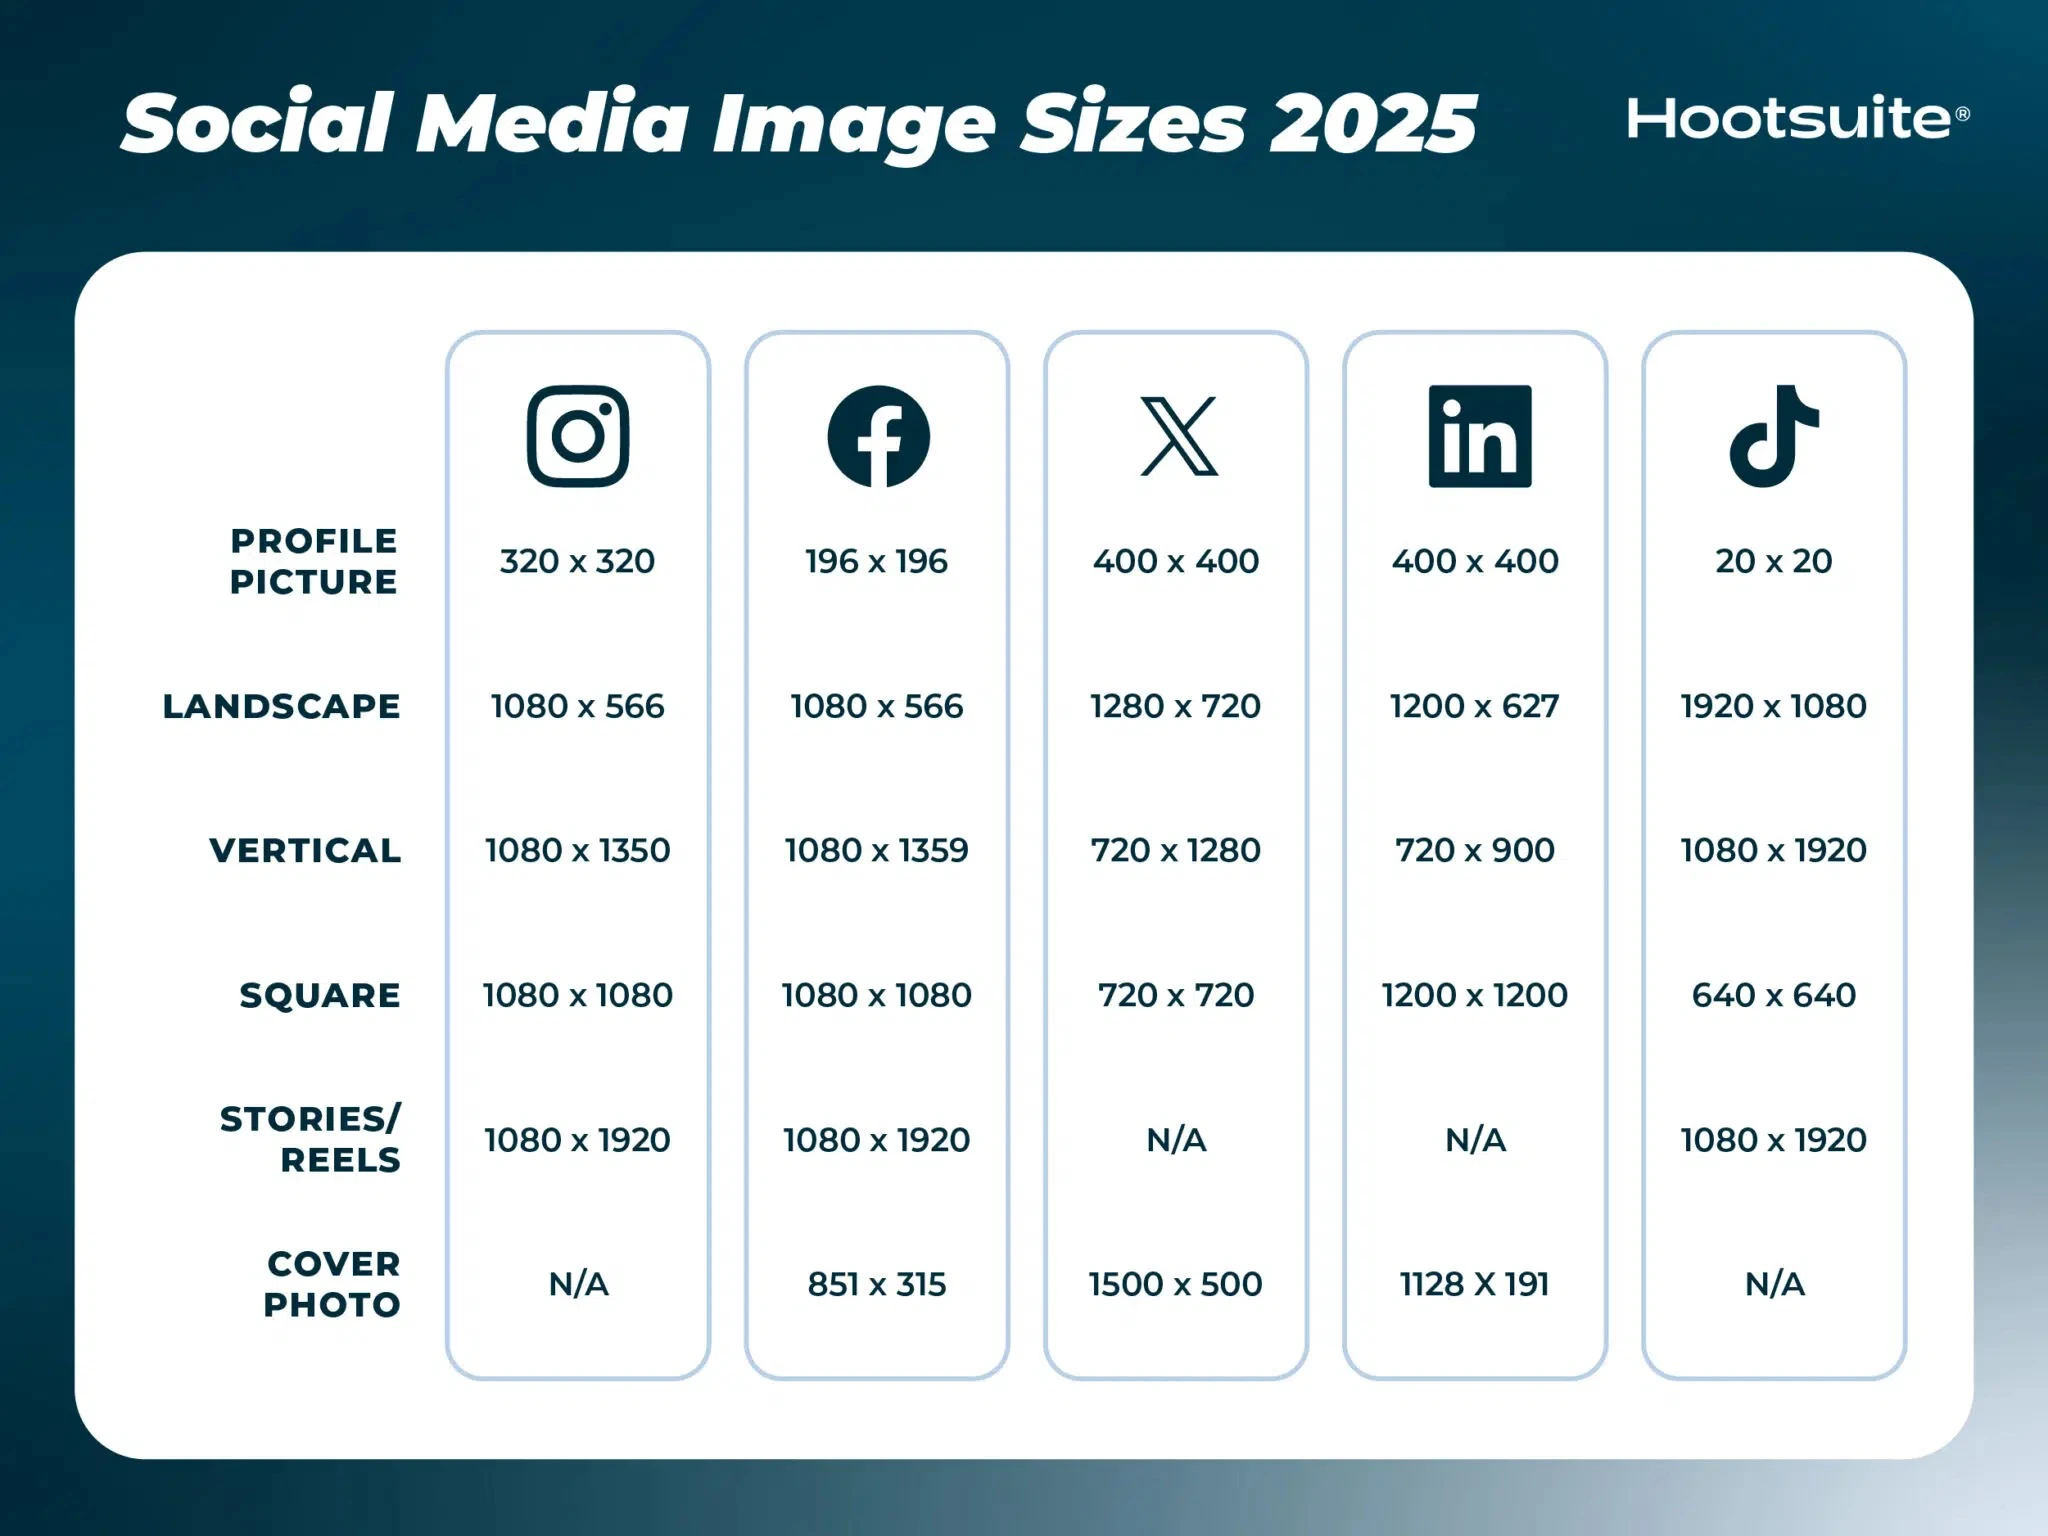
Hootsuite has prepared a great guide:
Another reason for resizing images can be to send them via email or a messenger without exceeding the limit on the file size.
You can change the size of your image in two ways:
- By changing its file size – this affects how much storage space it takes up.
For example, your image file might be 20 MB. - By changing its pixel dimensions – this means adjusting its height and width.
For instance, an image could be 3000 × 5500 pixels.
Changing pixel dimensions is often necessary when uploading images to social media. If you reduce the pixel dimensions, the file size will also decrease — but not by much. To significantly reduce file size, you’ll need to compress the image.
This guide, however, focuses only on changing pixel dimensions.
You might think you need advanced image editing software for this — but you don’t!
In fact, you can easily resize an image using Microsoft Paint. That’s right — if you’re a Windows user, you already have an app that can resize your images.
MS Paint is simple and straightforward, so there’s practically no learning curve. This guide will show you how to resize an image in both Paint and Paint 3D with clear, step-by-step instructions.
How to Resize an Image in Paint
Utilizing it for resizing images is actually a work in the park. If you are a beginner at image editing and all you really need is to change the pixel dimensions, MS Paint can be a good choice for you. It can work with images in JPEG, PNG, non-animated GIF, single-page TIFF and BMP.
On top of that, you already have this raster graphics editor on your Windows computer because it’s supposed to be pre-installed.
Moreover, it can be used on practically any version of MS Windows. Say, for some reason, you have to work on an older version of MS Windows – maybe, Windows 7 or 8. Your old device won’t be compatible with more modern downloadable image editors. But that’s not a problem for Paint.
Please keep in mind that it’s better to create a copy of the original image, then open the copy in MS Paint and make all the necessary changes. Of course, Paint allows you to save your resized image as a copy.
However, if you accidentally click on the Save button or use the CTRL + S shortcut, while working with the original file, all the changes will be applied to it. And you will lose your original file.
It’s always better to keep the original file unchanged in case you might need it.
So, follow these steps to resize an image in Paint:
- Find the image that you want to duplicate in the folder. Right-click on it, then select the Copy option in the drop-down menu.
- Switch to a different folder or remain in the same folder. Right-click anywhere, then select the Paste option. This will create a copy of the original image.
- Right-click on the copy and go to Open with > Paint. This will open your image in MS Paint.
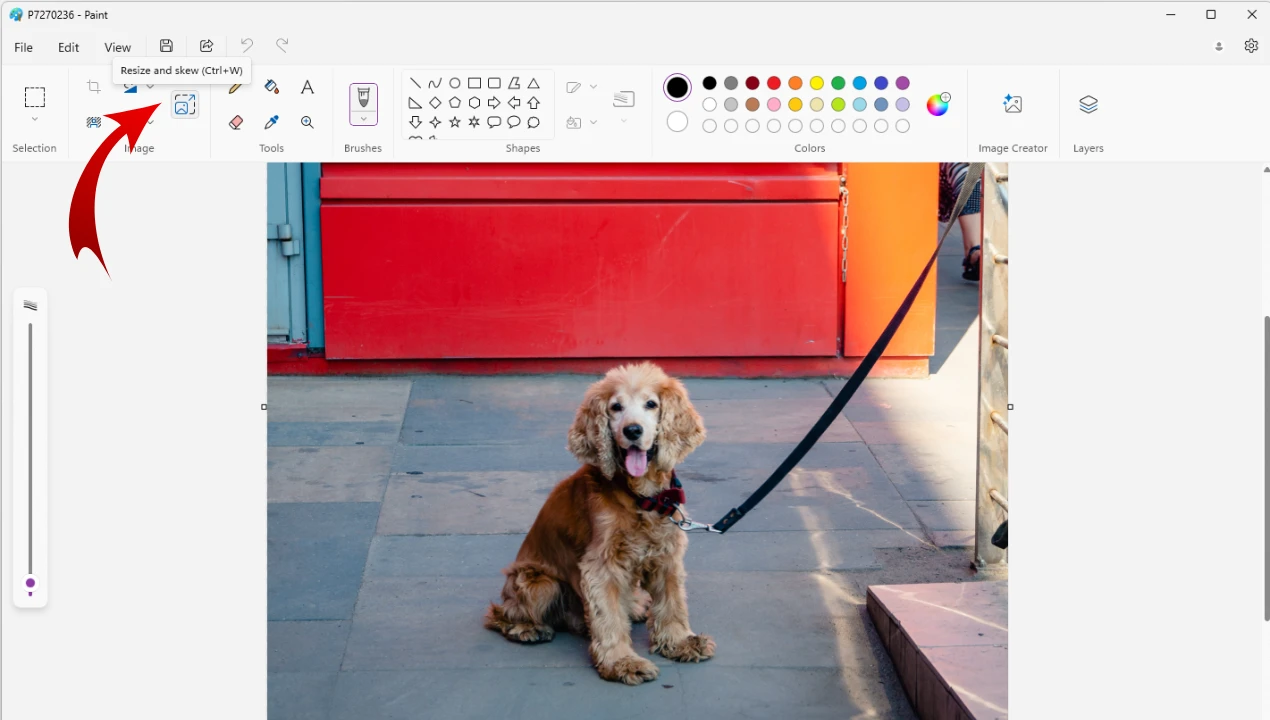
- Once you are in Paint, click on the Resize button at the top.
- The Resize & Skew window will open. Here, you can actually resize your image in two ways:
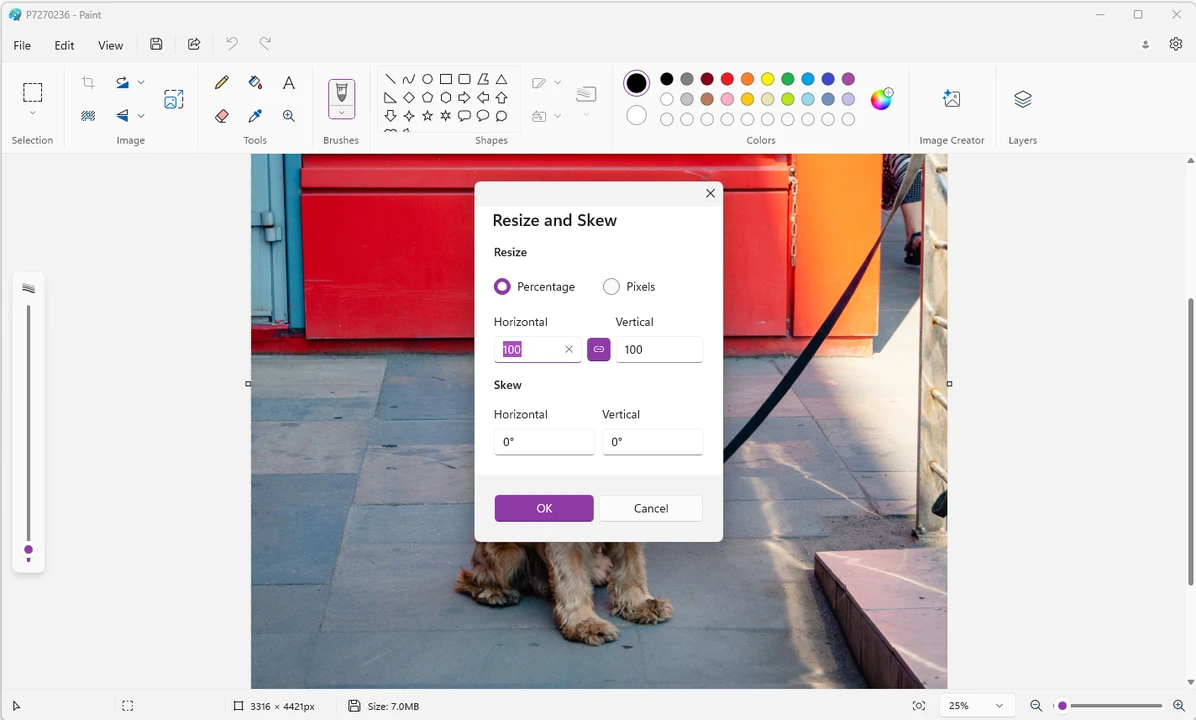 Select Pixels if you need to enter the exact number of pixels for the height and the width. The Vertical is the height of your image, while the Horizontal is its width. Select Percentage if you need to make your overall image smaller or bigger, yet you don’t need your image to have the exact pixel dimensions. For instance, if you enter 50, the image size will be decreased by 50 precent.
 - Before applying the changes, make sure to enable the Maintain aspect ratio option.
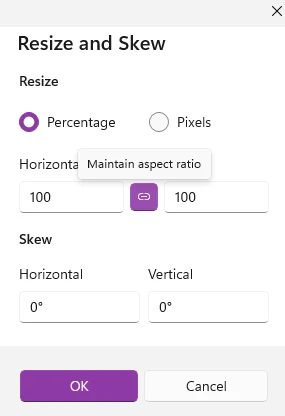
When this option is enabled, the width will change automatically, when you change the height and vice versa. That’s because the aspect ratio – the ratio of the width to the height – will be locked. It’s vital for this option to be enabled if you don’t want your image to get distorted or oddly stretched out. Please note that if you need to change the original aspect ratio, you will probably need to crop your image. - Click OK and your image will be resized.
- Use the CTRL + S shortcut to save your image.
- Alternatively, if you skipped creating the copy of your image, you might want to go to File > Save as, then enter the name for your resized image. This option will also be more suitable if you want to pick a different file format for your image. For instance, change PNG to JPEG.
That’s it! You’ve resized your image in Paint!
What you should be aware of, though, is that it’s okay to slightly upscale the image, but don’t go overboard with it. If you try to make your image 2x bigger, for instance, most likely you will end up with a blurry image.
How to Resize an Image in Paint 3D
First of all, please note that you can no longer find Paint 3D in the Microsoft Store because it was removed in November 2024. It won’t get any updates, either.
Nevertheless, it’s included in this guide because it can still be found on some Windows 10 computers. Paint 3D is kind of like an upgraded version of Paint, so if you happen to have Paint 3D, it might be a better choice. It’s definitely more comfortable to use.
Here’s what you need to do:
- In the Windows search bar type in Paint and select Paint 3D in the search results. This will open the app.
- Navigate to Menu > Open, then find and select the image that you want to resize and click on Open.
- Click on the Canvas button at the top.
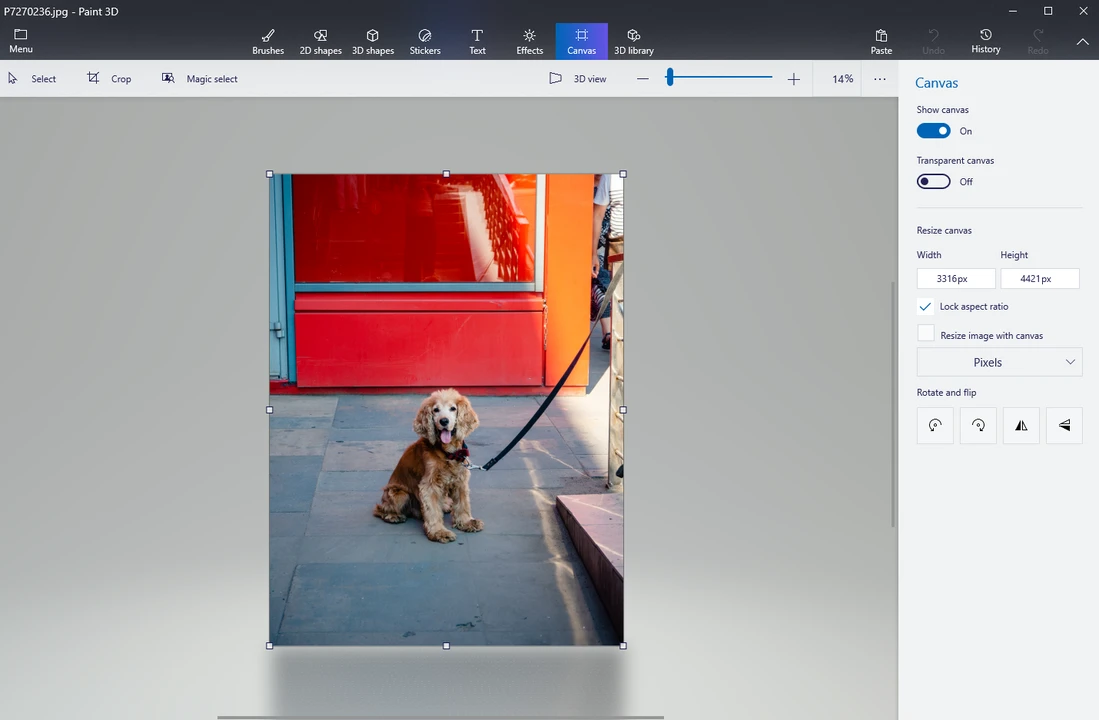
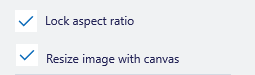
- Make sure that these two options are checked:
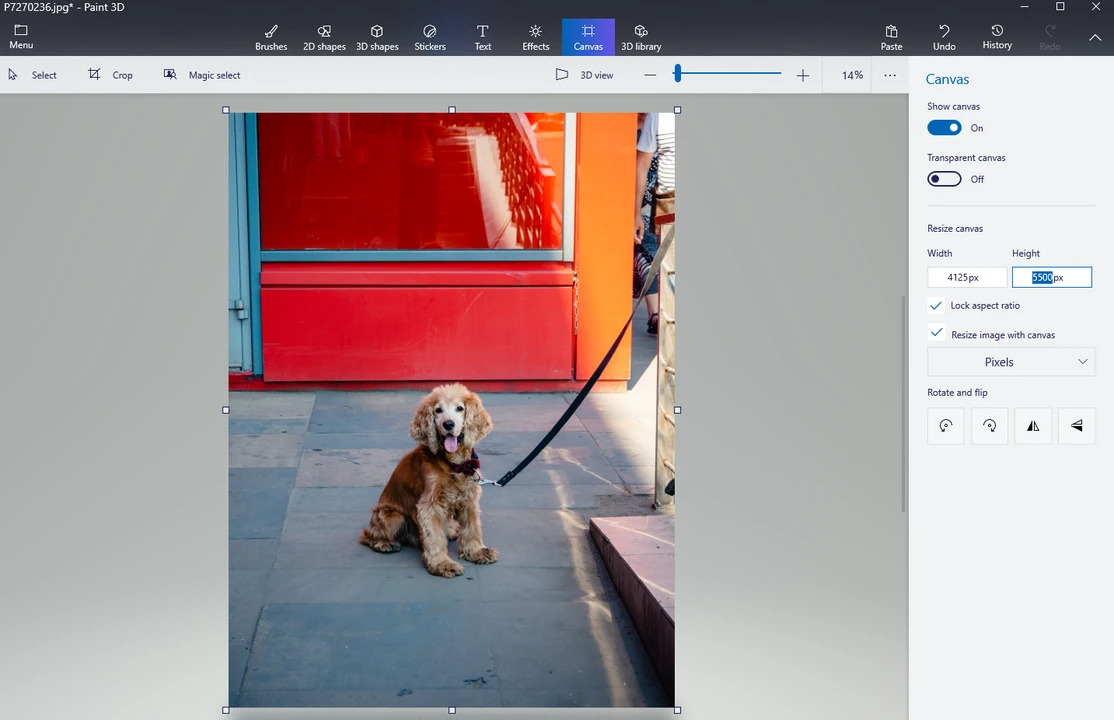
When the aspect ratio is locked, it means that it’s maintained. The width will change automatically as soon as you change the height and vice versa. This option needs to be checked to avoid weird distortion. Here’s an example of what might happen: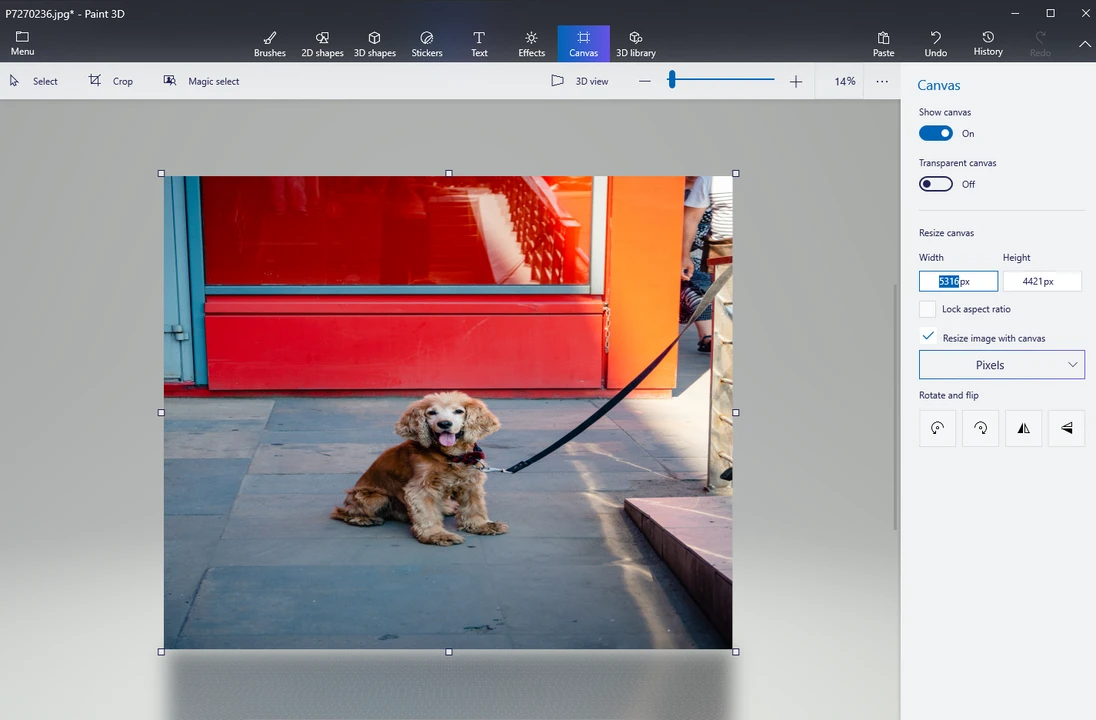 You’ve probably noticed that you are currently in the Canvas section, not the Image section. To put it simply, your image is currently on a white canvas. If you uncheck the Resize image with canvas option, then enter new pixel dimensions, you will end up with either an image surrounded by some white background (if you increase the size of the canvas)
 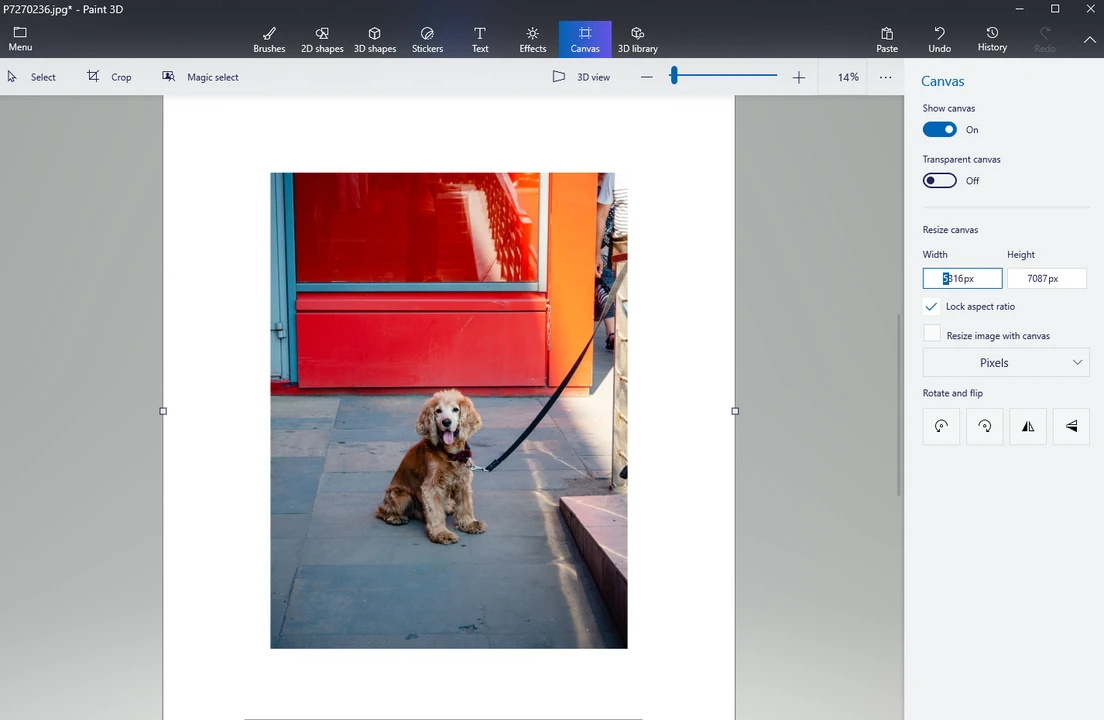 or with some awkwardly cropped image (if you decrease the size of the canvas).
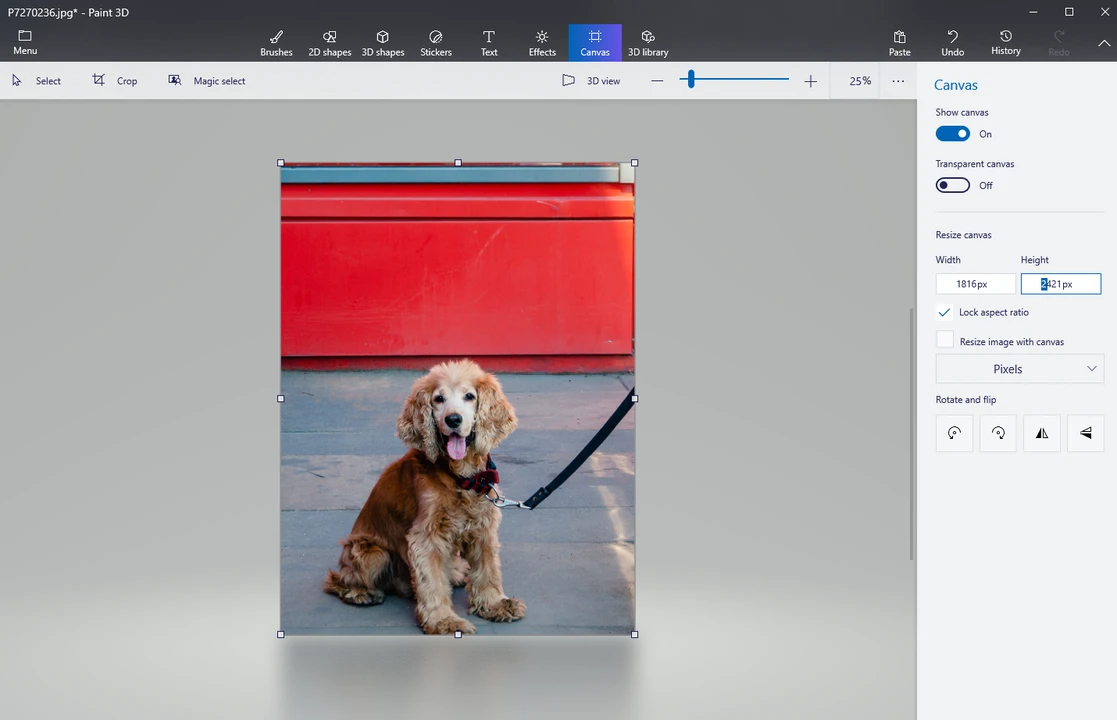
- Select whether you want to resize your image by pixels or percentage. Similarly to Paint, you will be able to enter the exact pixel dimensions if you choose the Pixels option. The Percentage will allow you to change the overall image size.
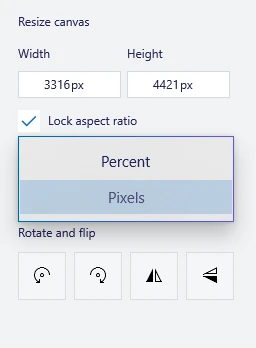
- You will see the original image size in the Width and the Height input areas. Select the number in the necessary input area, then enter a new value.
- Press Enter. The pixel dimensions of your image will be changed.
- Go to Menu > Save As > Image, then type in the file name and pick the necessary file format. This will save your image as a copy.
All done!
Similarly to MS Paint, it’s not a good idea to make the image size drastically bigger in Paint 3D. This app may offer more tools and features. It’s generally better and more advanced. Still, it doesn’t have the tools that are necessary for an image to be upscaled properly. To put it simply, if you try to make your image much bigger in Paint 3D, the resized copy will probably be pixelated.
A Better Way to Resize Images
Paint and Paint 3D can be a great choice for resizing images. They are simple, convenient and already on your Windows computer. You don’t need to install anything.
But Paint and Paint 3D won’t be suitable for processing multiple images.
In fact, you won’t even be able to upload and work with more than 1 file at a time. So, resizing dozens of images will be tedious and take you quite a long time.
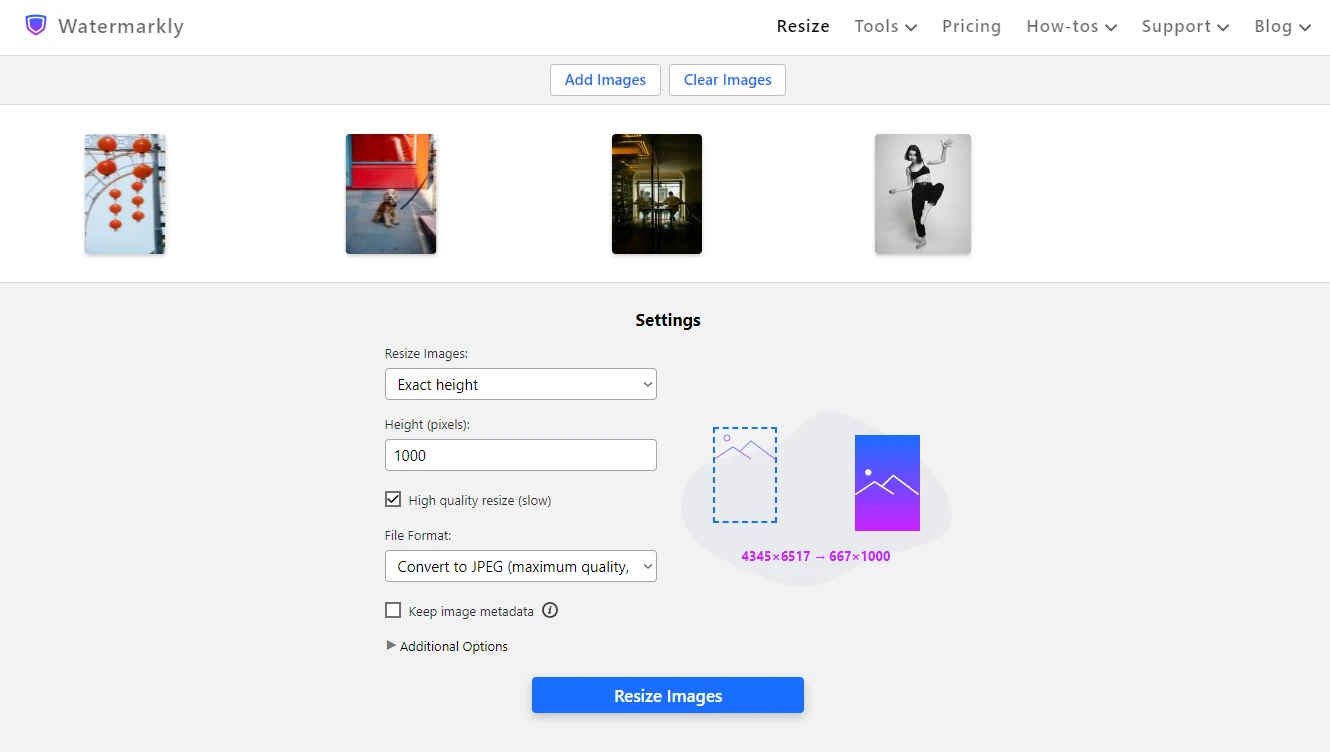
Fortunately, there’s an alternative – Watermarkly’s online app for resizing images. It works in a browser, so it doesn’t require any installation. It’s beginner-friendly and offers an uncluttered and intuitive interface. You will be able to get amazing results with it; maybe even better than with Paint or Paint 3D.
Watermarkly has several advantages over them.
Batch-processing
What if you have dozens of images that need to be resized? In Paint or Paint 3D you will need to process one image after another. But in Watermarkly you can upload a batch of images and change their pixel dimensions in one go.
Upscaling images
Do you want to make your images bigger? You can easily do that in Watermarkly. Upscaling images requires increasing the number of pixels.
Neither Paint nor Paint 3D knows how to do it properly. They will simply increase the number of existing pixels which may lead to a blurry image.
Meanwhile, Watermarkly actually utilizes AI to fill in newly generated pixels with the right colors. As a result, you will get upscaled images that look just like the originals or maybe even better. It will be incredibly hard to tell that the original was much smaller.
No need to create a copy first
When working with images in Paint or Paint 3D, you will need to duplicate your image first if you don’t want to change the original image accidentally.
With Watermarkly, you won’t have to worry about that. You can simply upload your images from your device or one of the available cloud storages, and Watermarkly will create their copy automatically. All the changes will be made only to the copies.
Work on any device
One of Paint’s benefits is that you can use it on any version of Windows – be it Windows 8 or Windows 11.
Since Watermarkly is an online app, you will only need a browser and a stable internet connection to use it. Hence, you can use it on any version of Windows. In fact, you can use it on nearly any device regardless of its operating system.
No distortion
You can enter new values for both width and height of your image. But in this case, the original aspect ratio won’t be maintained and your image will probably end up being stretched out in an odd way.
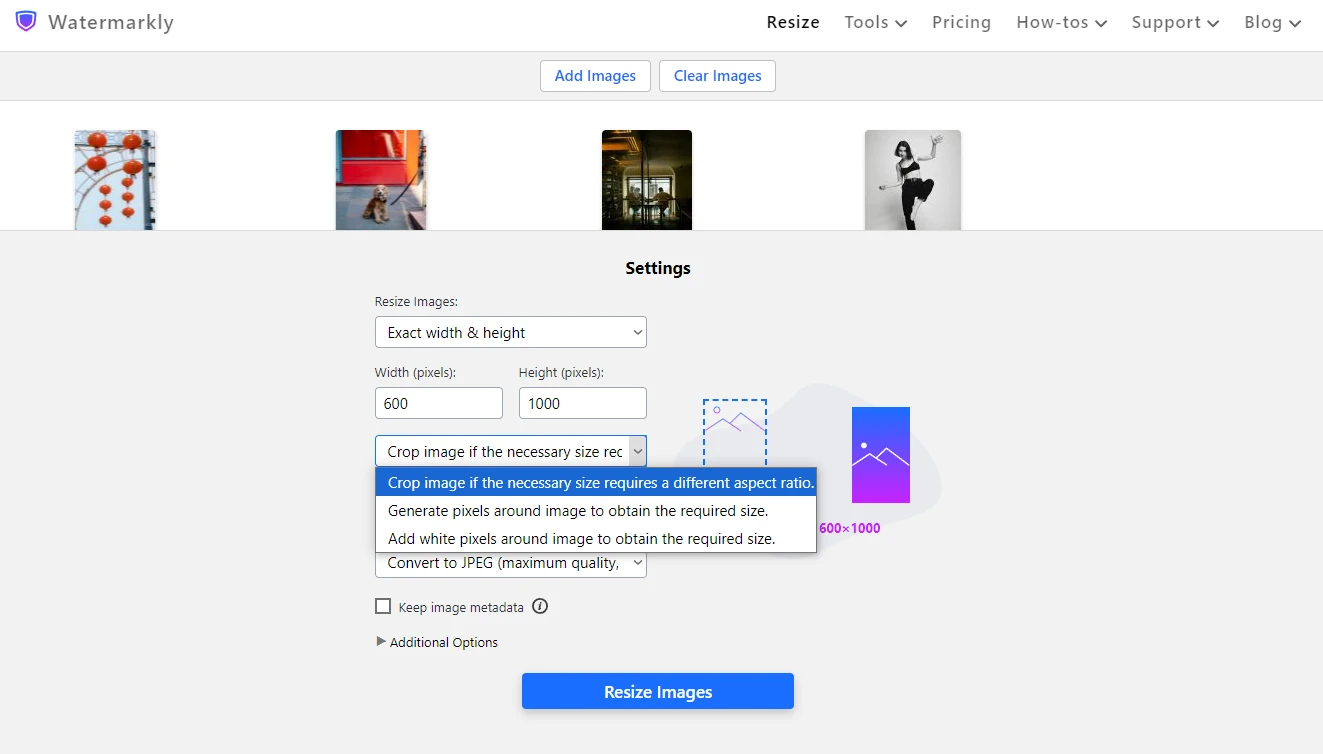
Watermarkly allows you to resize images while maintaining the original aspect ratio, but it’s not the only option that it offers. You can enter the exact pixels dimensions for the width and the height, then choose whether you want the app to crop photo or generate new pixels around it to achieve the new aspect ratio. This way, your image won’t get awkwardly distorted.
On top of all that, Watermarkly is a website that offers several online tools for basic image editing. For instance, you can use it to compress your images and decrease their file size drastically.
It’s not possible to compress images in MS Paint or Paint 3D. There’s also an app for converting images to JPG, PNG and WEBP. You can use Watermarkly to watermark photos, add video watermark and watermark PDFs as well as crop your images. In fact, the app for cropping can be a much better choice for resizing images for social media – it even has built-in templates with the necessary aspect ratios and pixel dimensions for different platforms.
There’s a downside, though. Both Paint and Paint 3D are free to use. Watermarkly does have a free version, but it has a limitation – you will be able to resize only up to 10 images per day.
Therefore, if you have a big batch of images to work with, you will need to purchase a license. But considering how many different tools Watermarkly offers, this purchase will definitely be worth its money.
Conclusion
It may come as a surprise, but you can actually use MS Paint and Paint 3D to change the pixel dimensions of your image. It will take you only a couple of minutes and practically no efforts; even if you’ve never done this before.
Hopefully this guide on how to resize an image in Paint has shown you that this is a pretty straightforward task. And if you need to change the size of multiple images or make an image bigger, you should consider using Watermarkly instead. It will definitely handle upscaling an image much better than Paint or Paint 3D. And since it supports batch-processing, resizing multiple images will be super quick and convenient.
Guides to Resizing Images
How to Resize an Image in Canva
How to Upscale an Image in Photoshop
How to Resize an Image in Photoshop