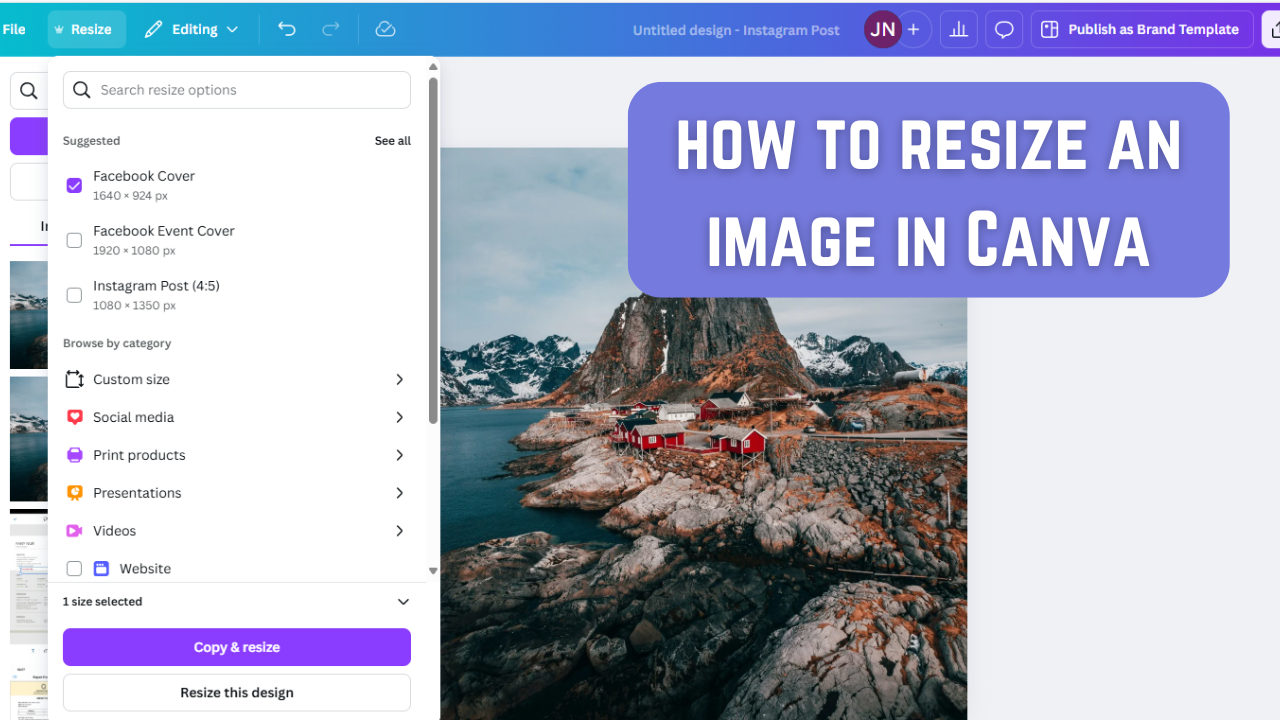
How to Resize an Image in Canva
by  Lina Thorne • Updated · Posted in Resize Photo
These days, pretty much everybody knows about Canva. It’s an online image editor that can provide you with lots of creative freedom. It has an intuitive interface and an amazing selection of various templates and design elements. It’s a perfect choice for beginners, amateurs and professionals.
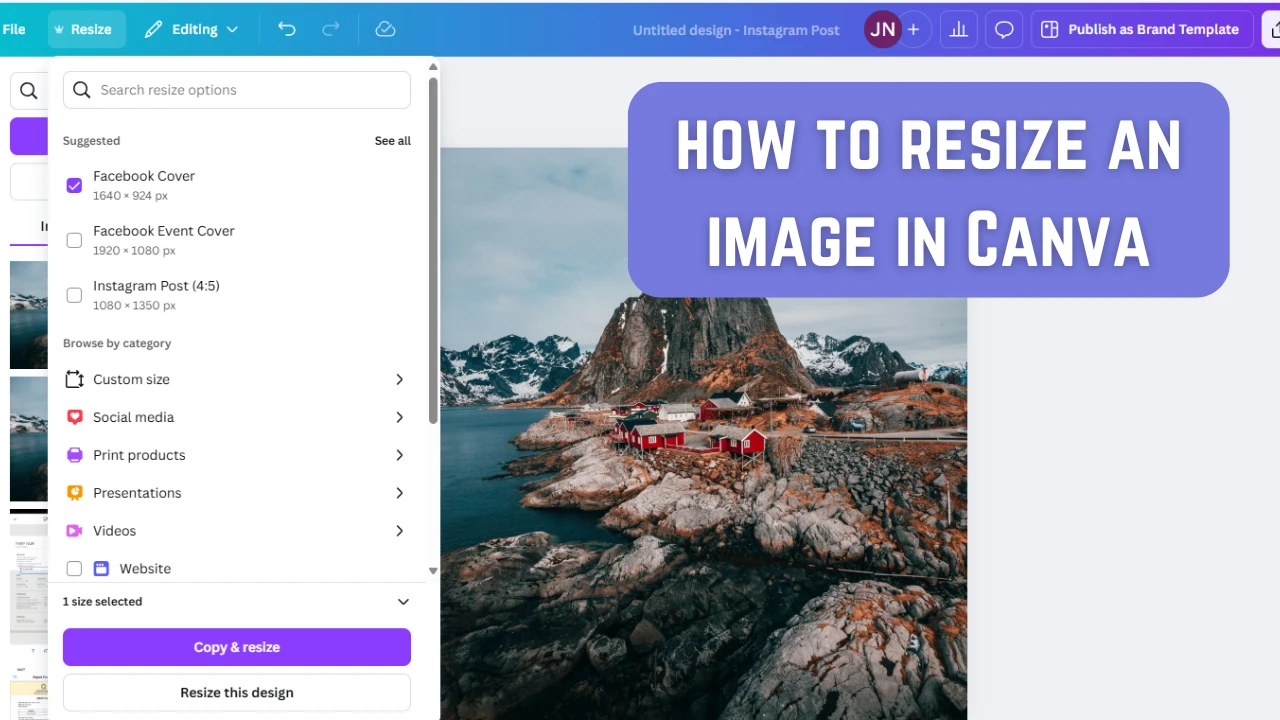
One of the main things that you’ll need to do when preparing images for publishing them online is making sure that they meet the necessary size requirements. It is crucial if you want to avoid automatic image compression which can have a negative effect on the image quality.
Plus, most popular social media networks require you to crop your images anyway.
Surely, Facebook, Instagram and other similar platforms do have built-in editors which you can use for cropping. But this can also mess up the quality of your images, so it’s better to use an app that was designed specifically for image editing.
Resizing images in Canva doesn’t require any editing skills. Within just a couple of minutes you will be able to do this even if you are a complete beginner.
This article features detailed instructions on how to resize an image in Canva.
In fact, you will learn how to do this in several different ways – how to resize an image in Canva for free and using Canva Pro. You will also find out how to crop an image in Canva and how to resize an image without cropping it.
Don’t worry, all of these methods are super easy and quick. You will also learn about a website that offers online apps for cropping and resizing images. With their help, you will be able to prep your images for the web in a faster and less complicated way. It can be a great addition to using Canva.
Keep reading if you want to learn more!
How to Resize an Image in Canva Pro
There’s a way to resize an image in Canva that requires little time and effort. You can do this with the help of the Resize button. But there’s a catch. This feature is available only in Canva Pro. So, if you happen to have Canva Pro or if you’re willing to pay for it, here’s what you need to do:
- Create a new design (for instance, Instagram Square Post) and upload the image that you want to resize.
- Click on the image to open it in the editing window, then right-click and select “Set image as background“.
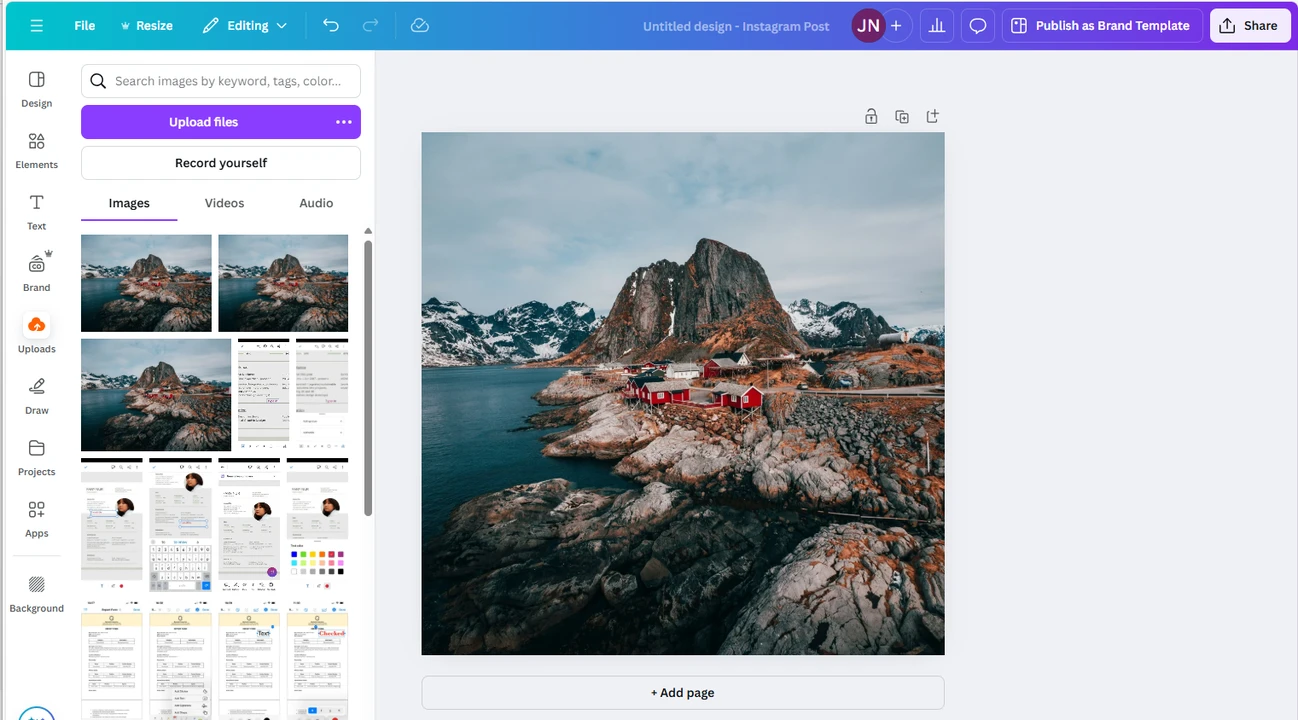
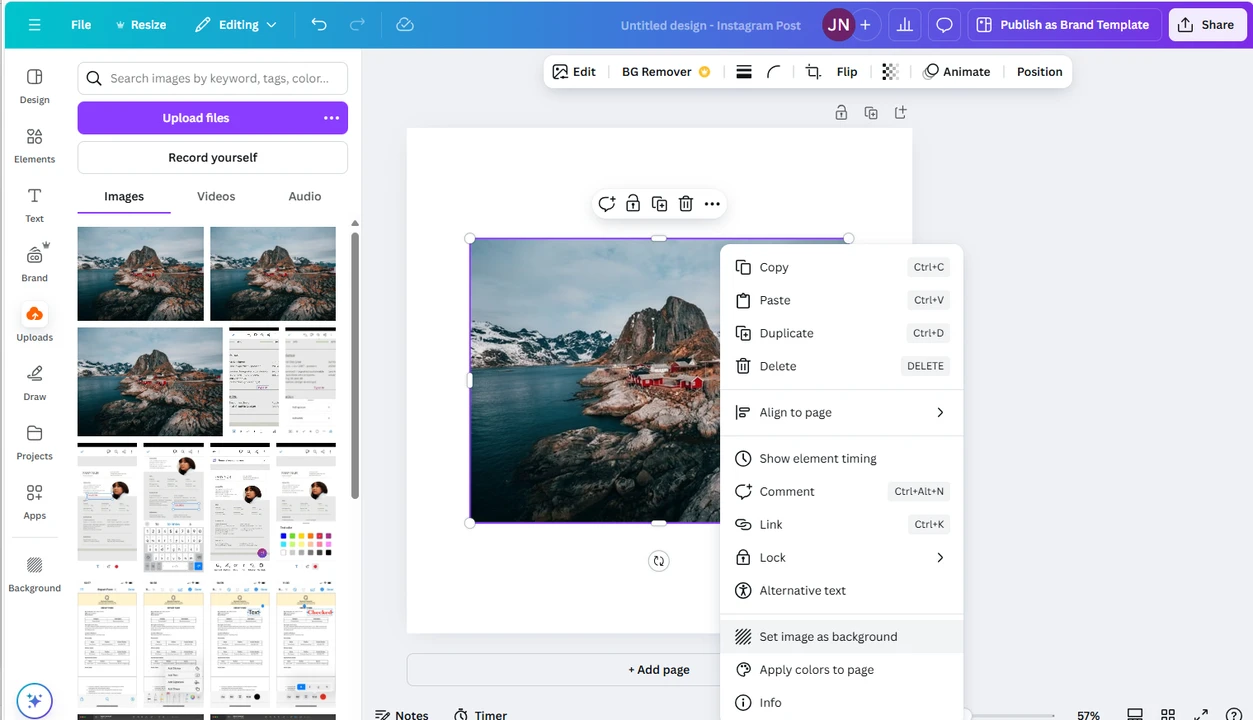 This way, the size of your photo will be adjusted to fit the dimensions of an Instagram post.
- Click on the Resize button at the top. You will see lots of different options in this menu.
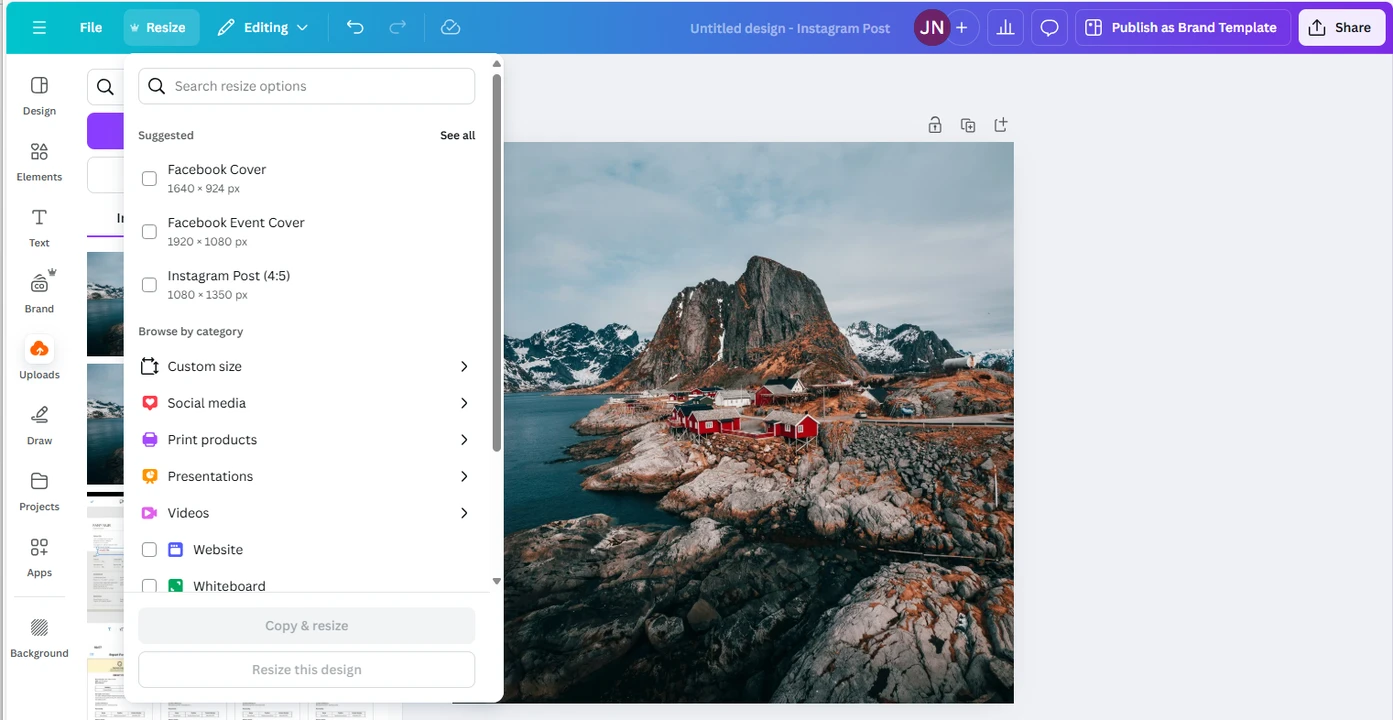
- If you need to resize your image by specific pixel dimensions, select Custom size.
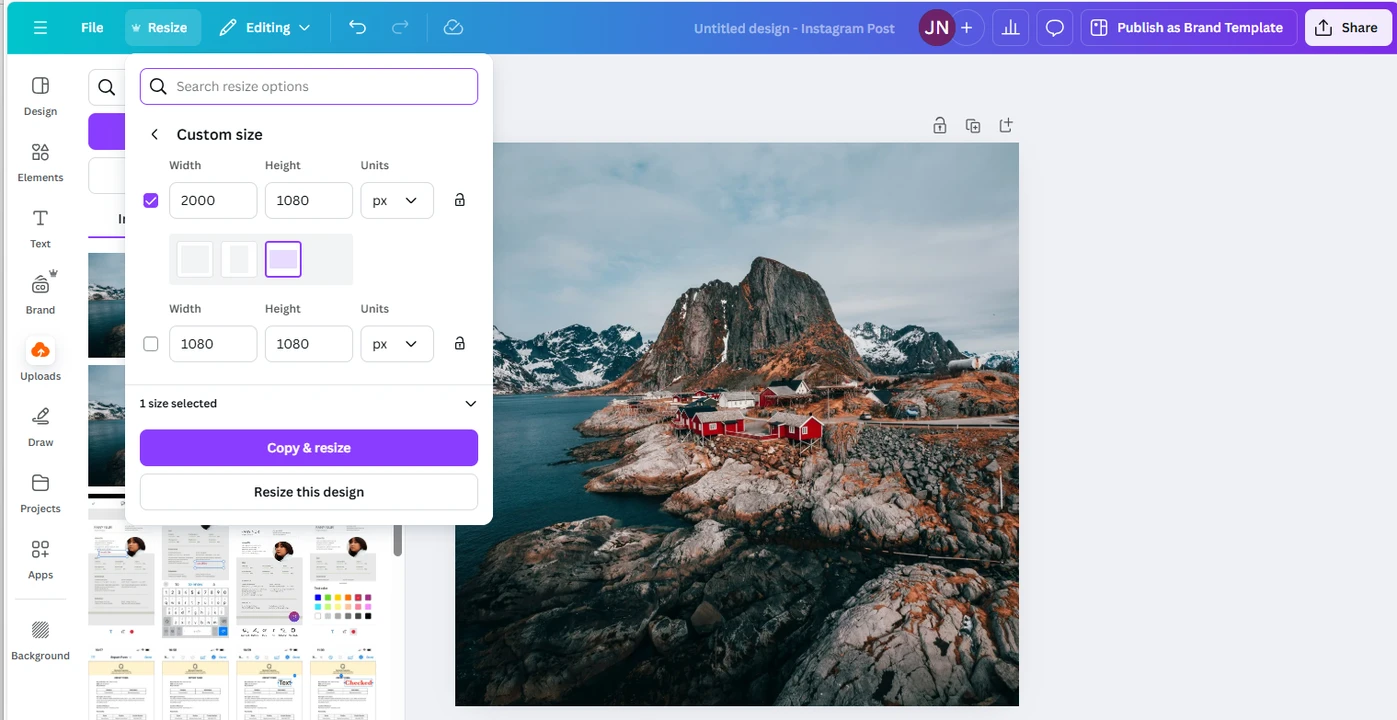
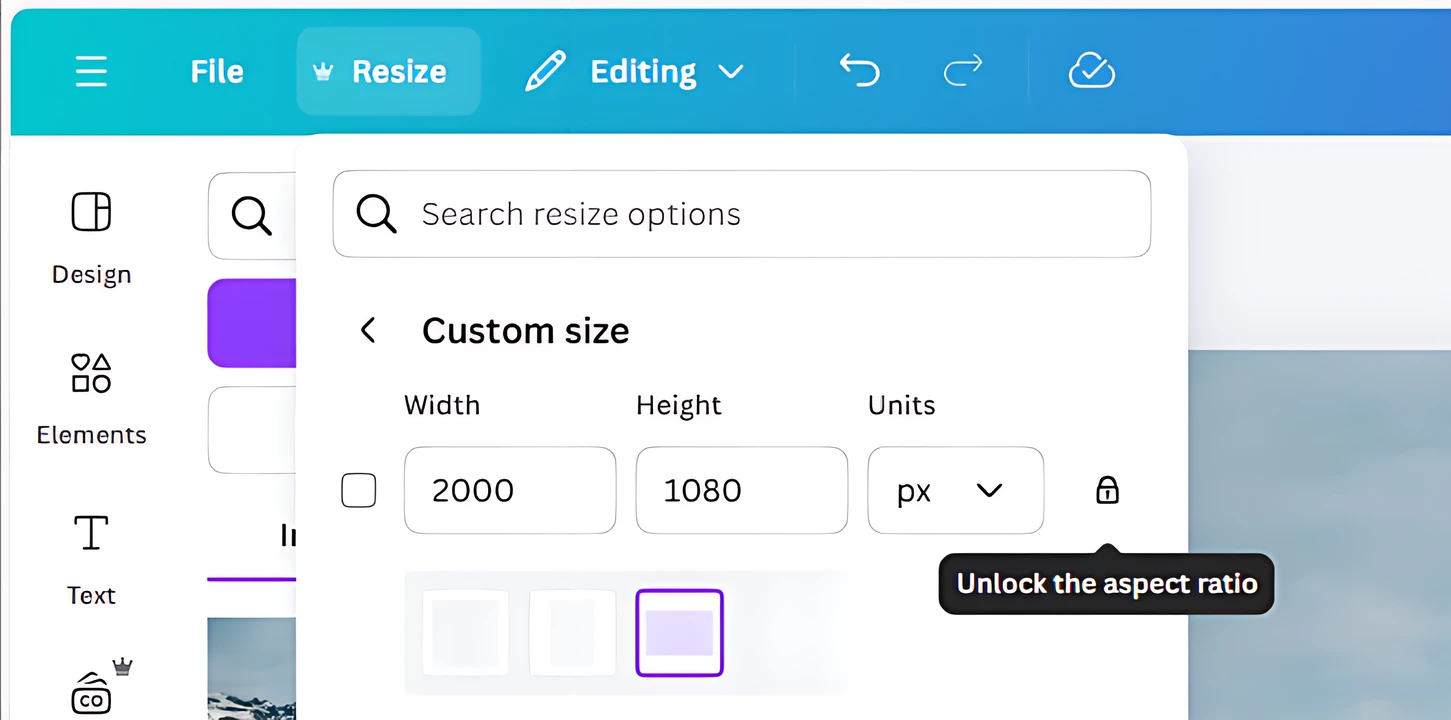
- If the original aspect ratio needs to be maintained, click on the lock icon. It needs to be locked.
- If you need a specific preset – for example, a resizing preset for a social media post – you can type in what you’re looking for in the search bar. For example, you can resize an image for Instagram Reel or Facebook Cover. Then simply click on the necessary option. Please note that in this case, both the image size and the aspect ratio will be changed.
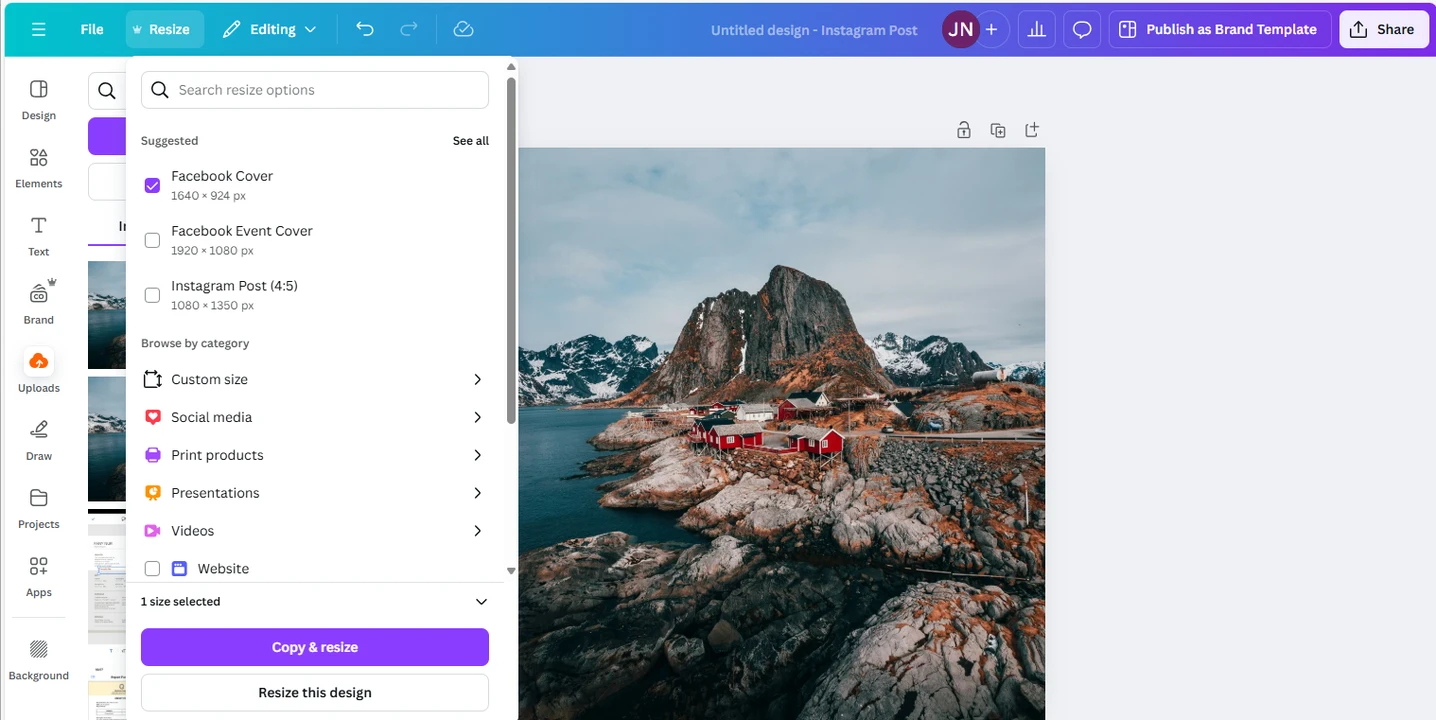
- Click on Continue and wait for Canva to show you a preview of your resized version.
- You will see two buttons – Resize the current design and Copy and Resize. If you click on Resize the current design, then your current image will be resized. If you click on the Copy and Resize, your image will be copied, then the copy will be resized. The resized copy will appear in a new tab.
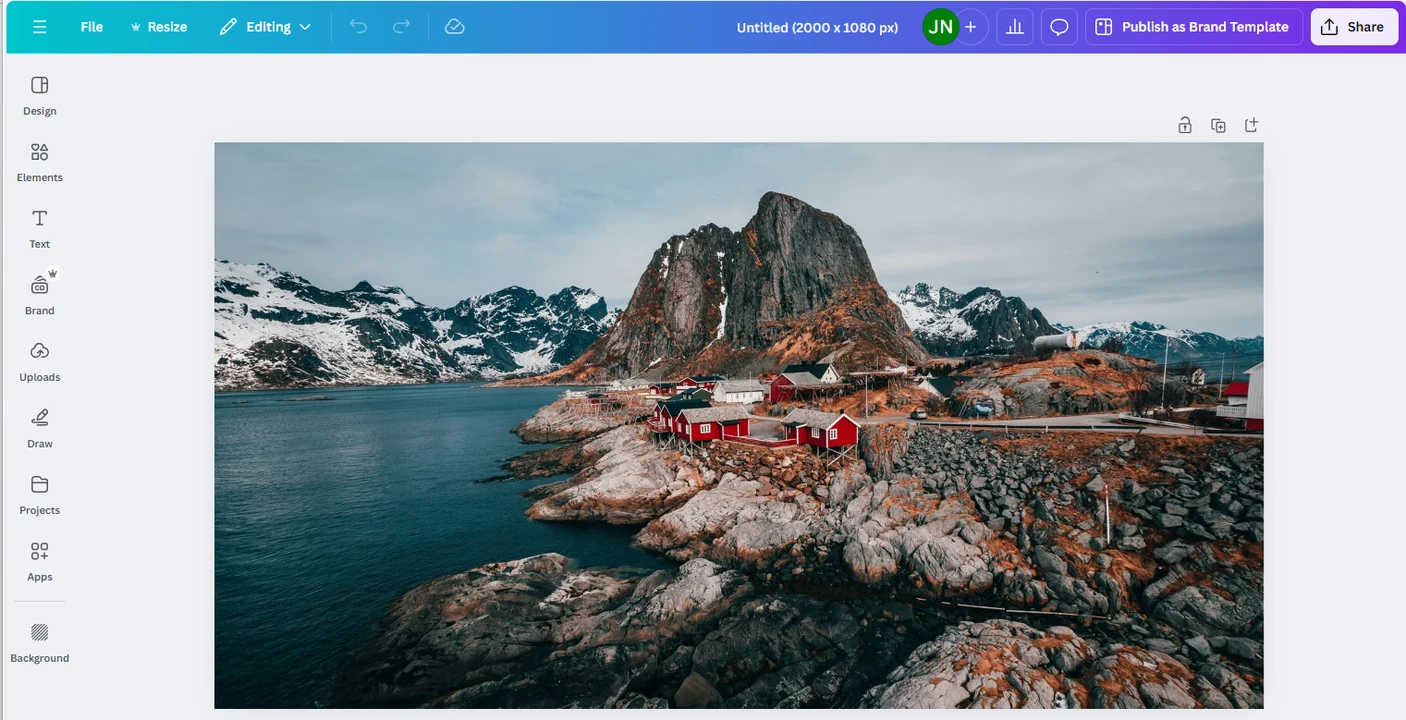
- To export your resized image, go to Share > Download.
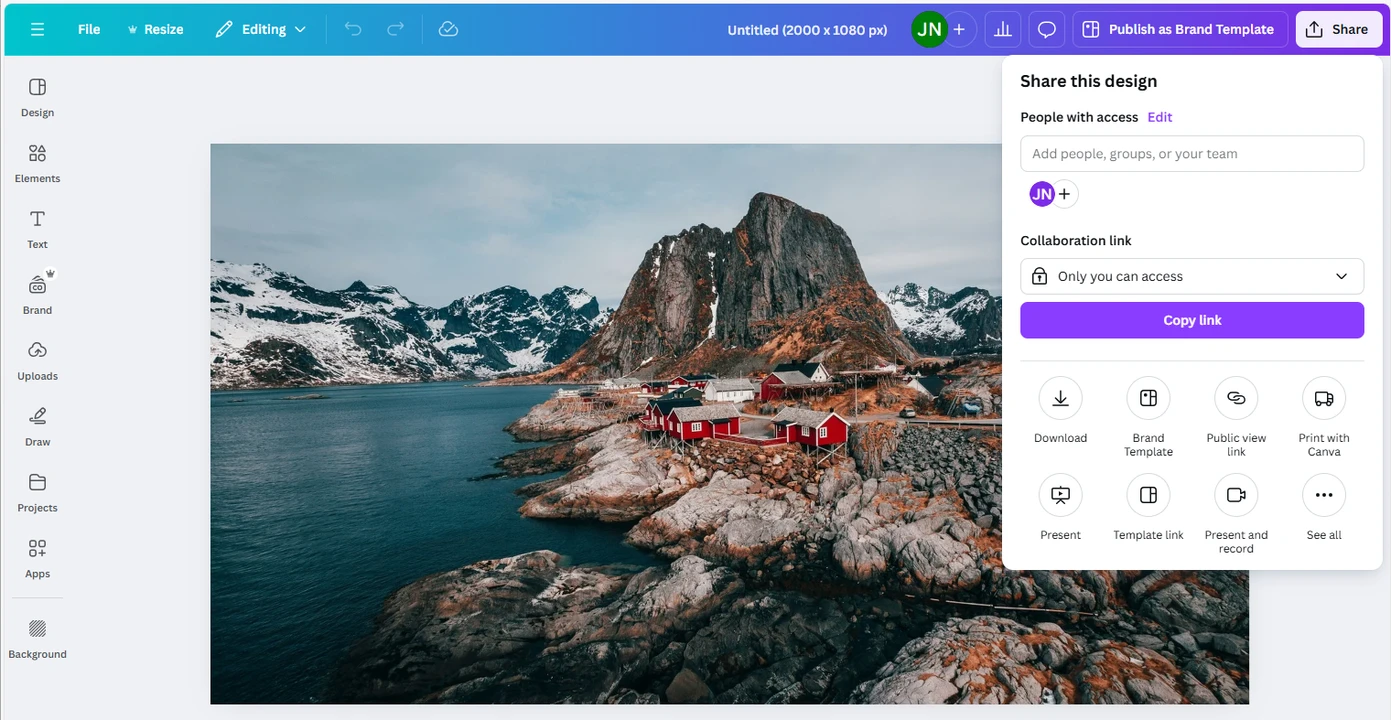
And that’s all you need to do to resize an image in Canva Pro! It’s a pretty straightforward way to prep your images for the web.
How To Resize an Image In Canva For Free
Don’t worry if you don’t have Canva Pro. It is possible to resize a photo using the free version of Canva. It’s pretty effortless but will require some extra time and steps.
Please note, though, that it’s impossible to use Canva without creating an account. So, the first thing that you’ll need to do is to sign up and log in. Then follow these steps:
- Open Canva’s dashboard and click on the “Create a design” button, which can be found in the upper left corner.
- If you have a specific image size in mind, choose the Custom size option. Then change the measurement unit, if necessary, and enter new values for the height and the width.
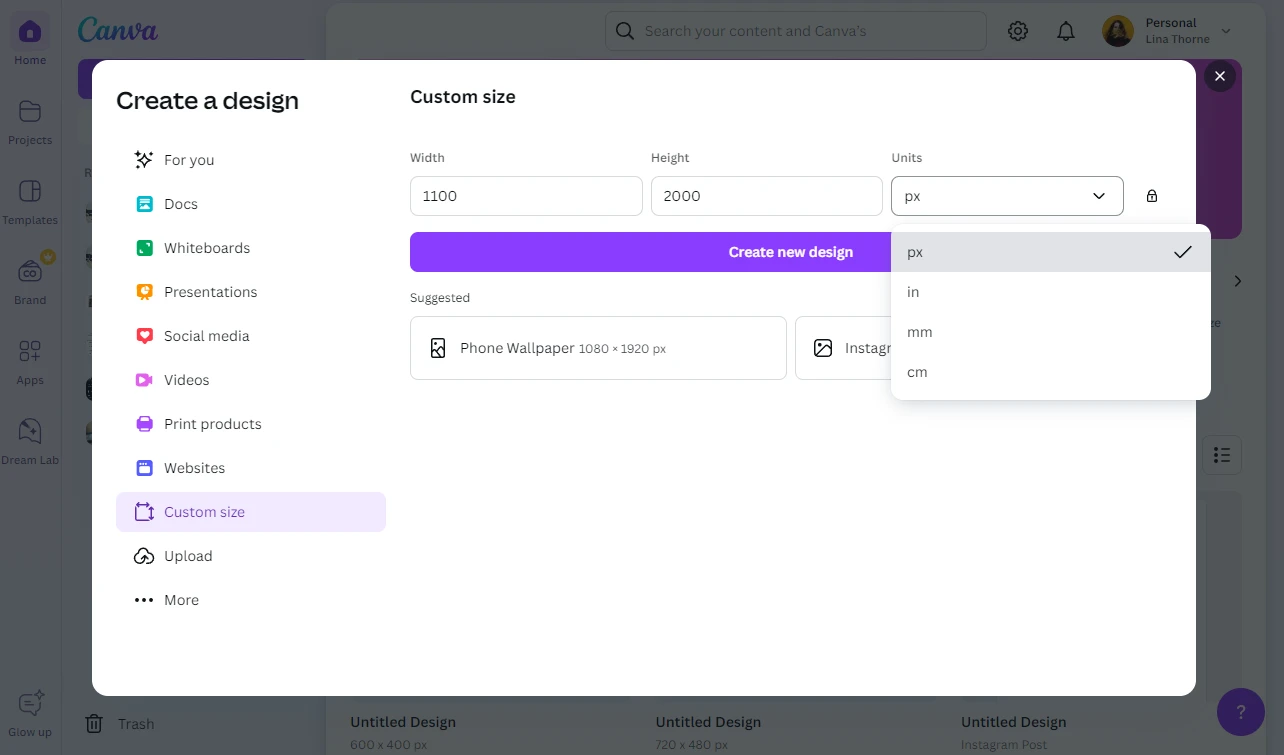 Alternatively, if you need to resize an image to post it on social media, you can select a resizing template. Lots of them can be found in the Social media section. You can also just type in what you need into the search bar.
 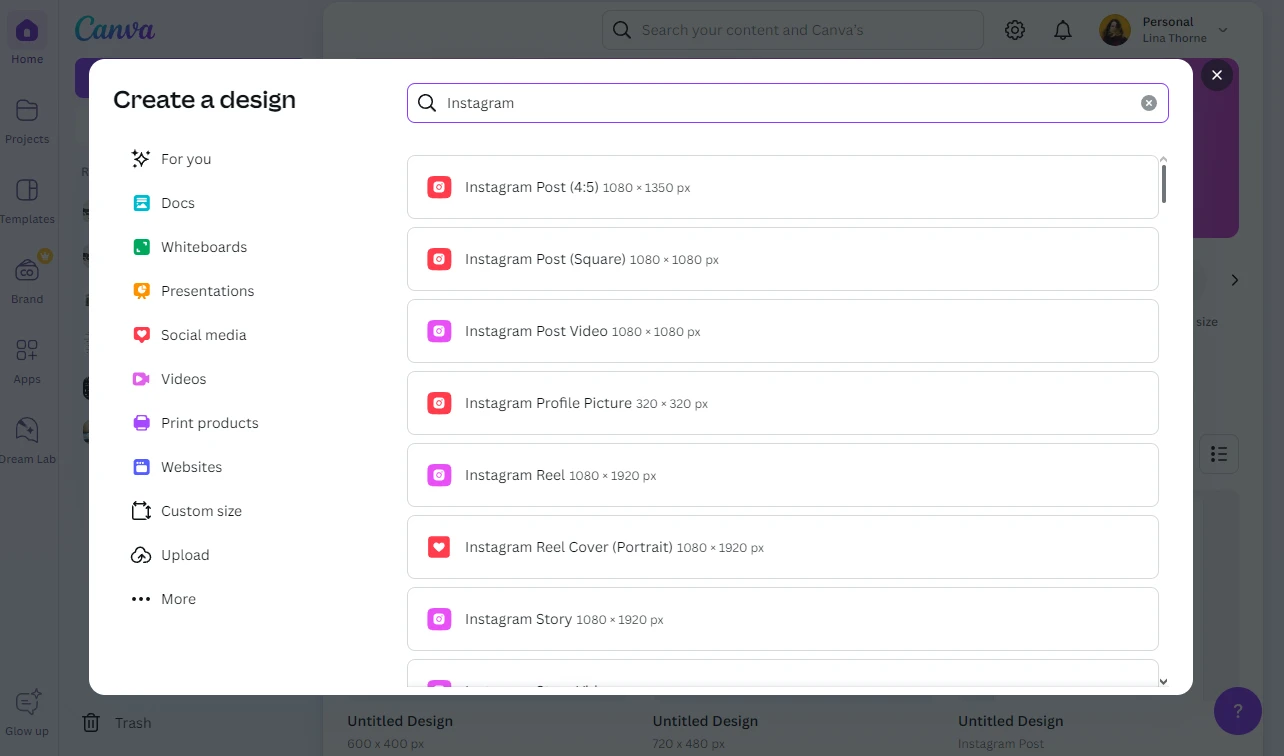 If you opted for Custom Size, click on Create new design. If you found the necessary resizing template, simply click on it.
 - A blank template with the necessary image size will open in the editor.
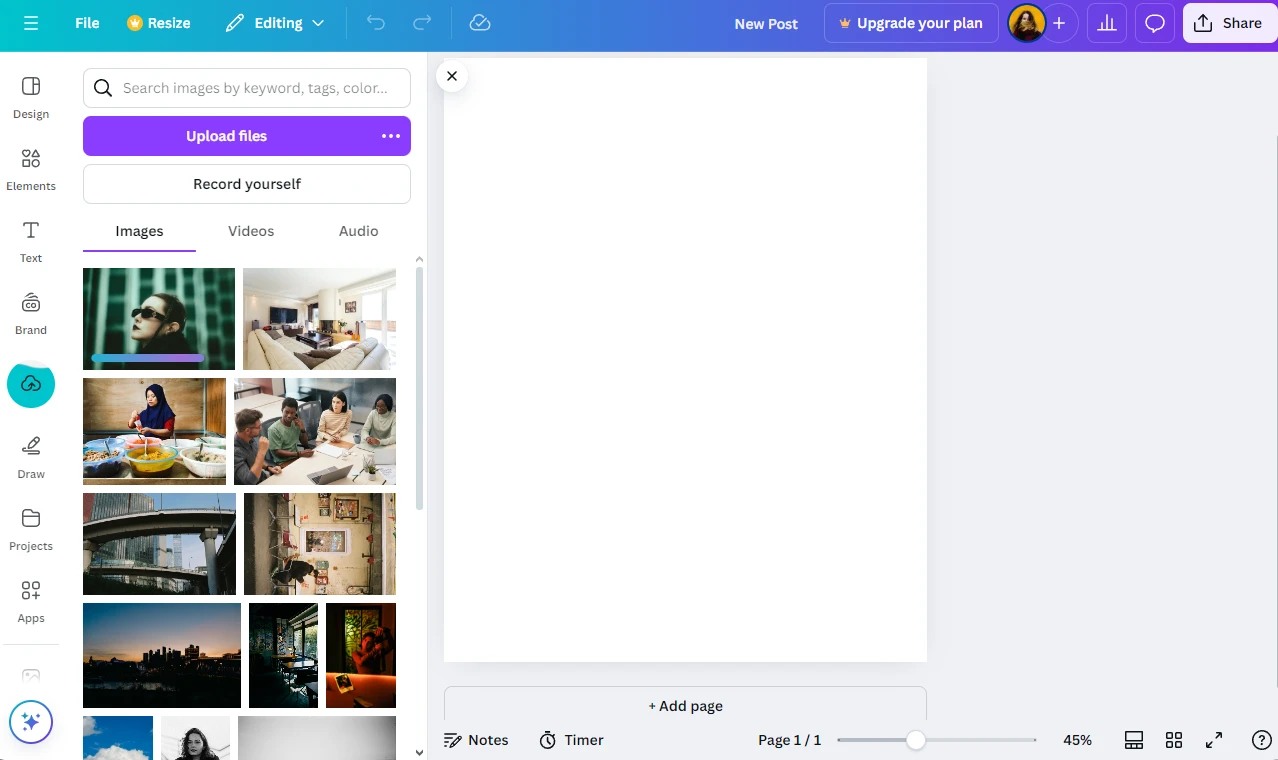
- Go to the Uploads sections in the bar on the left, then upload the photo that you want to resize. When the import is done, click on the uploaded photo. It’ll be instantly added to your template.

- Adjust the size of your image so that it covers the entire template and there are no blank areas. You can do this with the help of your cursor.
 Alternatively, you can right-click on the image and select Set image as background. Your image will instantly cover the entire template.
 - When you’re happy with how your image looks, go to Share > Download. You might need to change the format from PNG to JPG here.
- Click on Download. Voila! Now your image is resized!
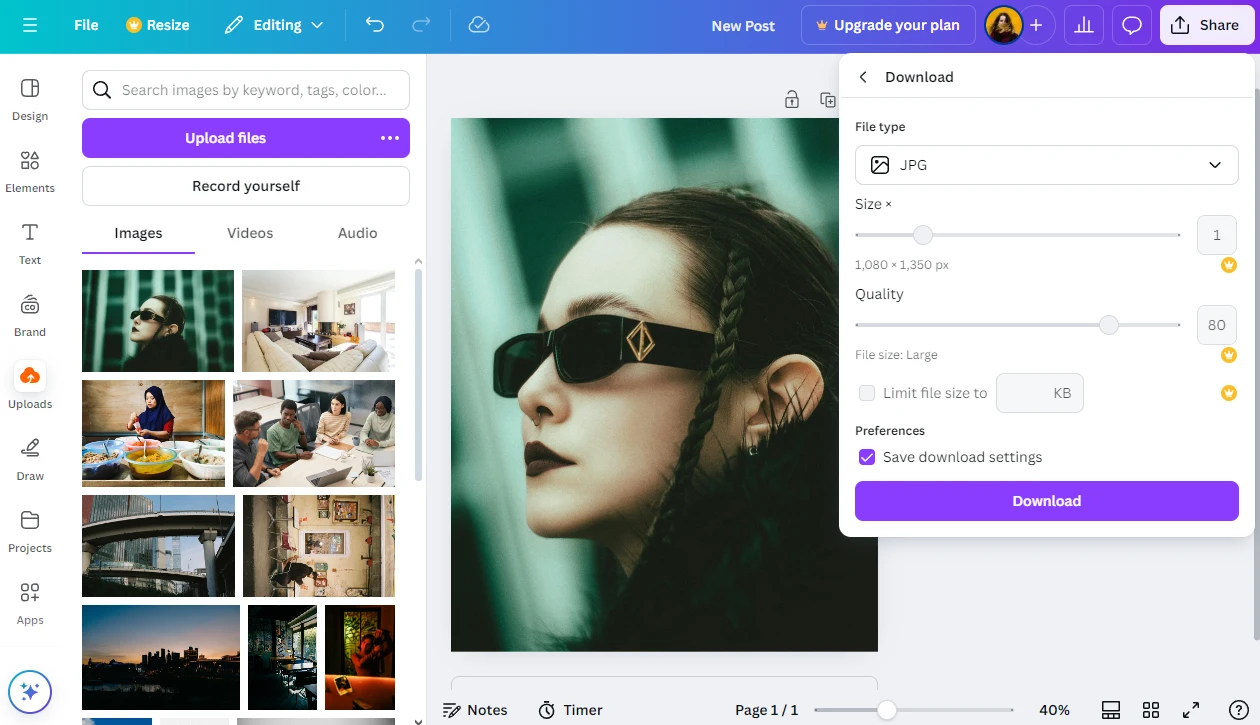
As you can see it’s not as quick and simple as using the Resize button. However, it’s an efficient and relatively easy way to resize an image in Canva for free.
How to Resize Multiple Images in Canva
Say, you have several images that need to have the same aspect ratio and image size. It’s not that hard to achieve this! Here’s how you can resize multiple images in Canva:
- Click on the “Create a design” button on Canva’s dashboard, then select the necessary template or enter your custom size. Keep in mind that all imported images will have the same pixel dimensions after resizing.
- When the blank template opens in the image editor, click on Add page.
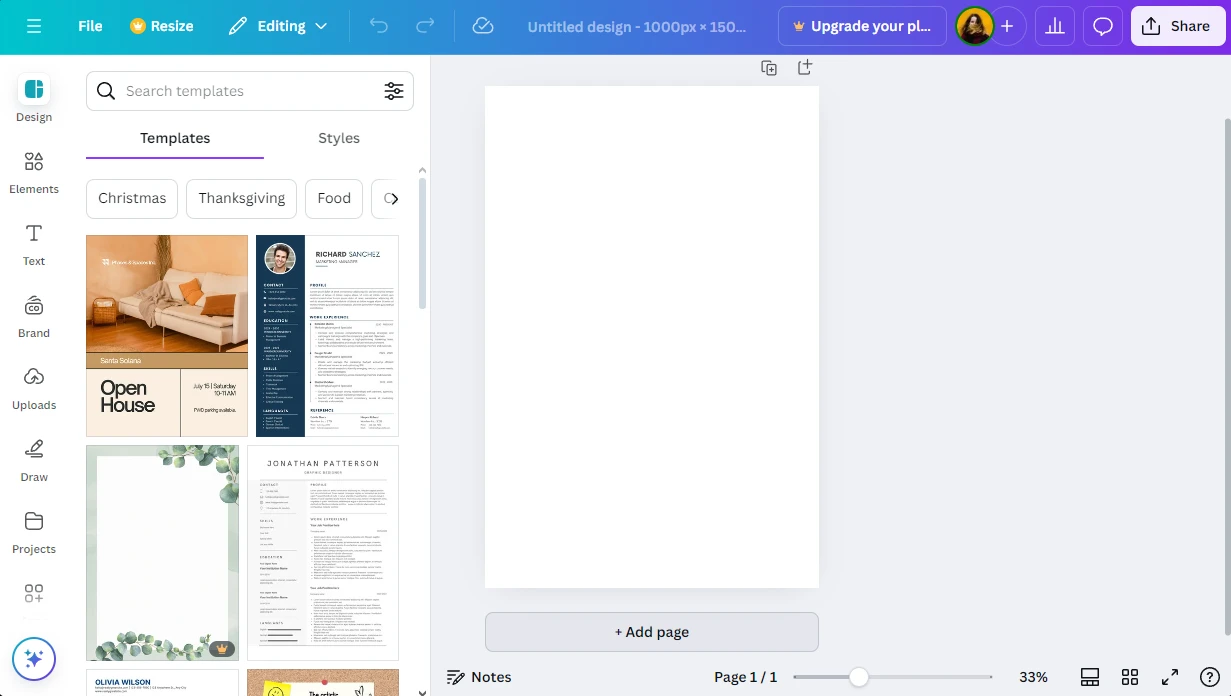
- Create as many copies as you need. For instance, if you need to resize 5 images, add 4 more pages. You need to have 5 pages in total.
- Navigate to the Uploads section, then import all the images that you need to resize.
- Drag the first image into the first blank template, then adjust its size. Make sure that the image covers the entire template.
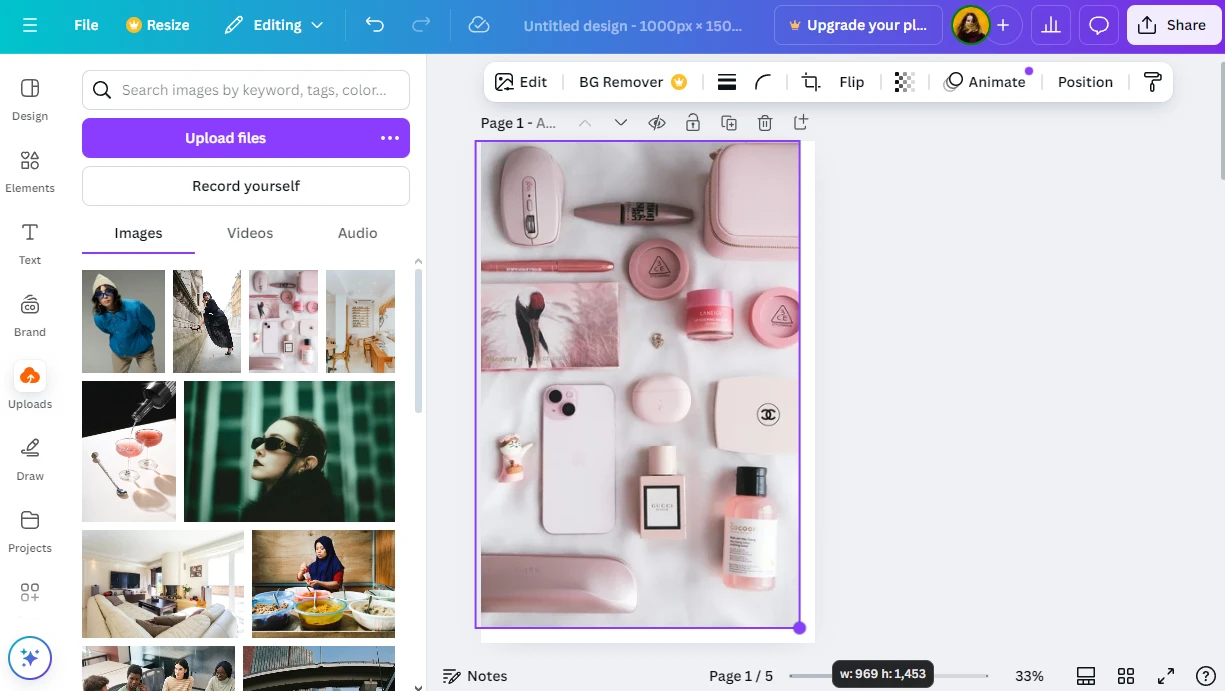
- Scroll to the second page, add your second image and adjust it.
- Repeat this process with all the necessary images.
- When you’re ready, go to Share > Download and select All pages. Make sure to choose PNG or JPG as the file type.
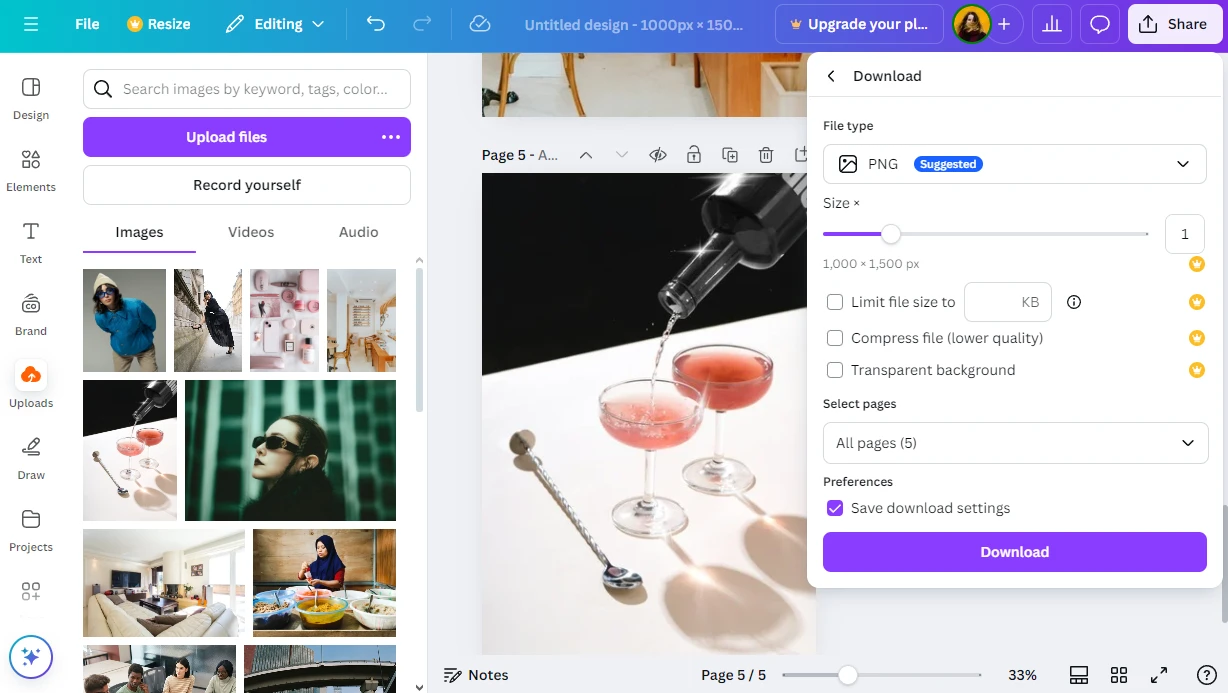
That’s it! When Canva finishes the processing, you’ll download a zip file with all your resized images.
How to Resize an Image in Canva Without Cropping
In the majority of cases you’ll need to change the aspect ratio of the pictures that you want to share on social media. Thus, you will need to resize and crop them. But what if you want to publish your visual content elsewhere? What if you simply need to change the pixel dimensions without changing the original aspect ratio? It’s possible to do this, as well. Here’s how you can resize an image in Canva without cropping:
- Open Canva and click on Create a Design, then select Upload. Find and import the image that you want to resize.
- Wait for your image to get imported, then click on the Use in a new design button.
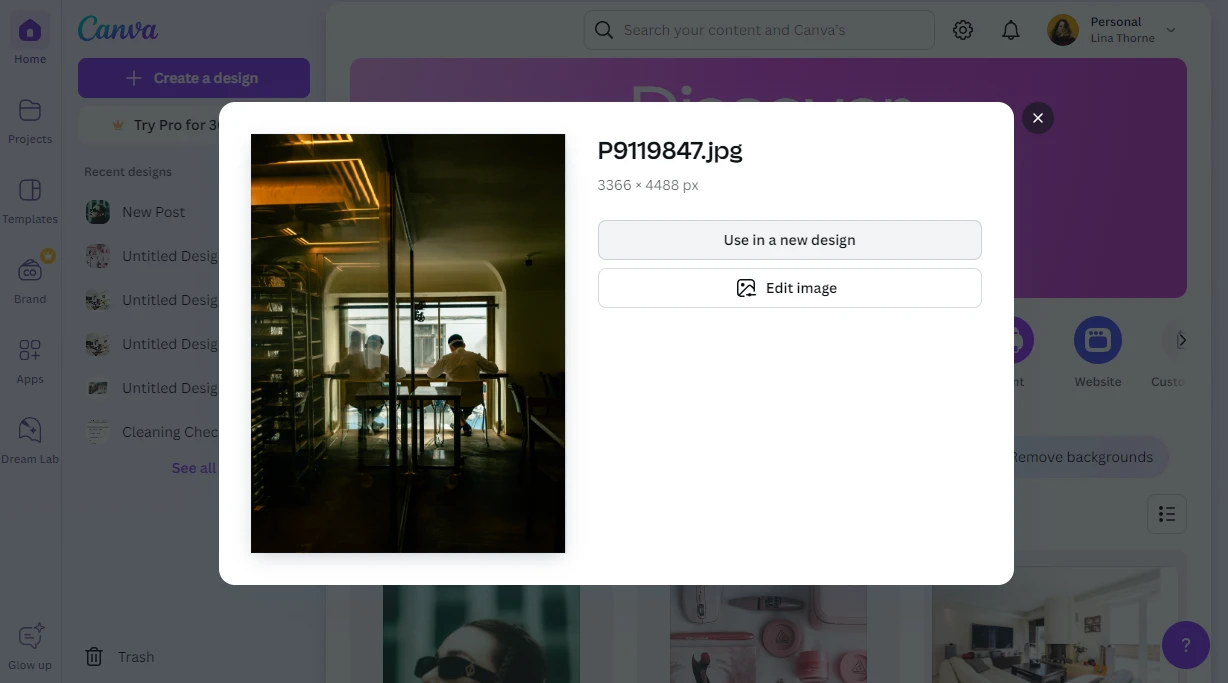
- Select Custom size. You will see the pixel dimensions of the original image. Click on the lock icon to lock your aspect ratio. It means that the original aspect ratio will be preserved, and you will only need to change either the height or the width.
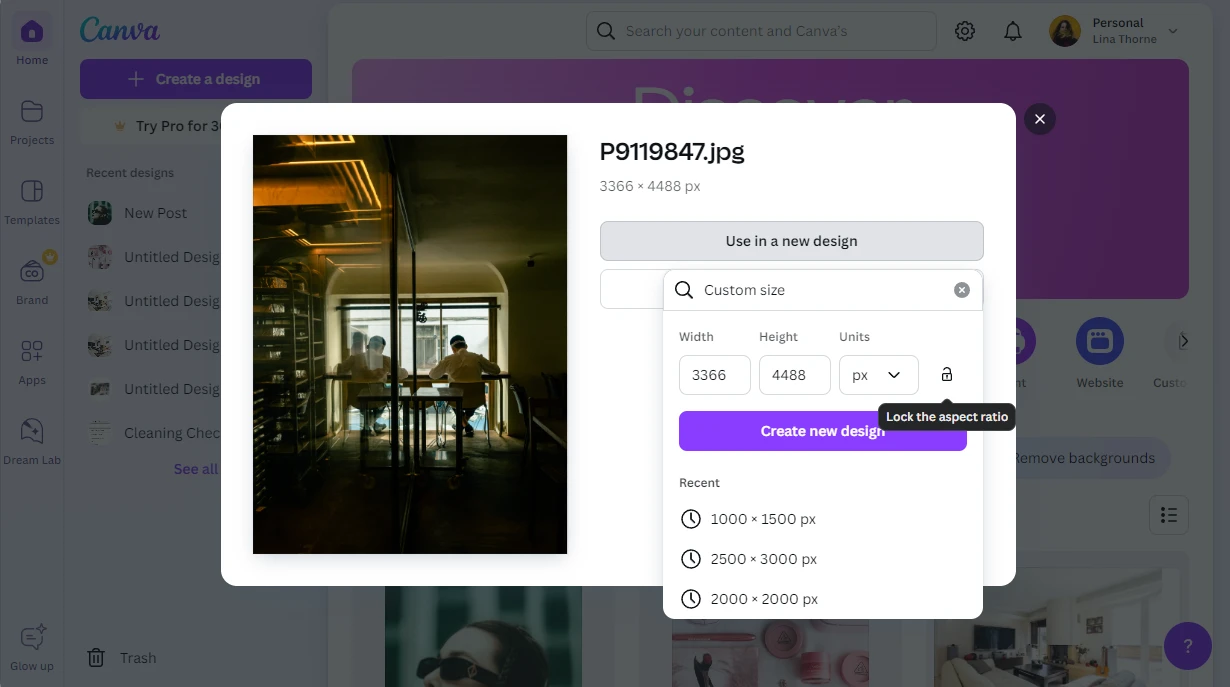
- Enter the new value. For instance, type in 2000 for the height. Since the aspect ratio is locked the width will be changed automatically.
- Click on Create new design.
- Your image will be automatically resized once it shows up in the image editor.
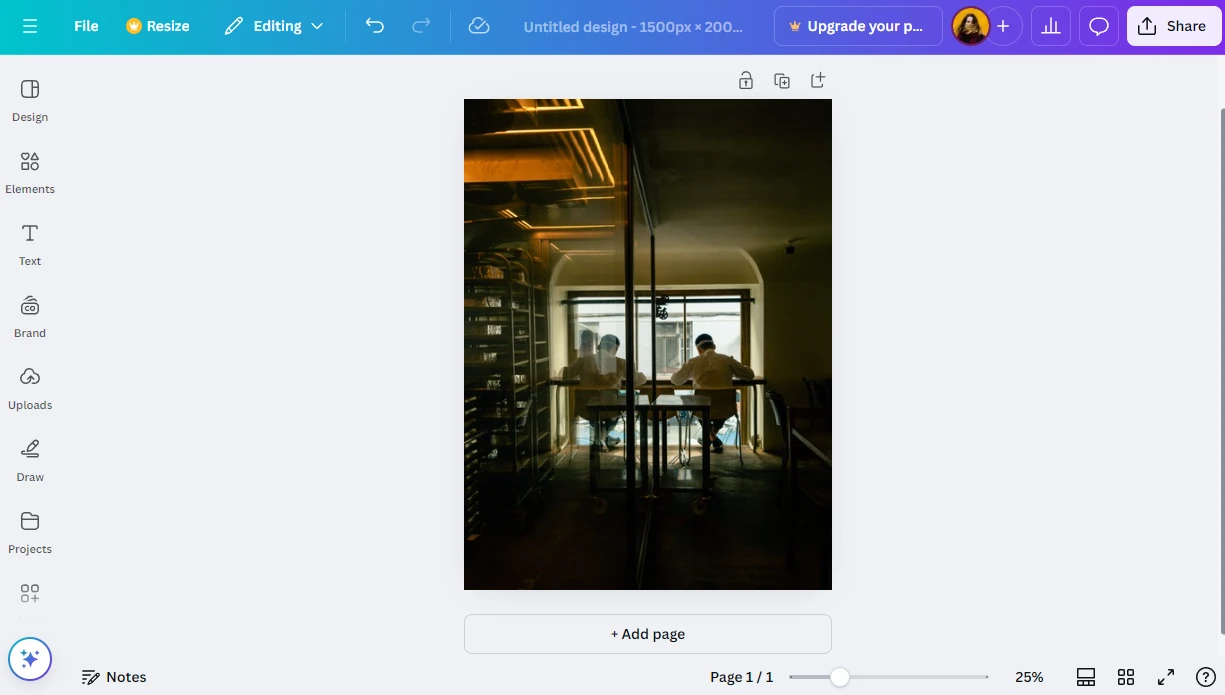
- Go to Share > Download. Select the necessary image format or adjust any other settings.
- Click on Download again and download your resized image.
Easy as pie, right?
A Simpler Way to Resize Images
Resizing one or several images in Canva isn’t particularly difficult – no matter whether you have Canva Pro or use this image editor for free. Nevertheless, Watermarkly can help you achieve the same results in a quicker and less complicated way.
Watermarkly is a website that offers a selection of browser-based tools for basic image editing. It is not a full-fledged image editor like Canva. You won’t be able to use it to edit photos themselves or create incredible designs either from scratch or by using a template.
Watermarkly is not really for designing visual content; although there’s an app for adding text to photos which you can use to add some extra pizzazz to your images.
Watermarkly is absolutely perfect for doing some quick and basic image editing, including resizing and cropping. For instance, here’s how you can resize an image without cropping it:
- Open the Resize Photos app on Watermarkly’s website.
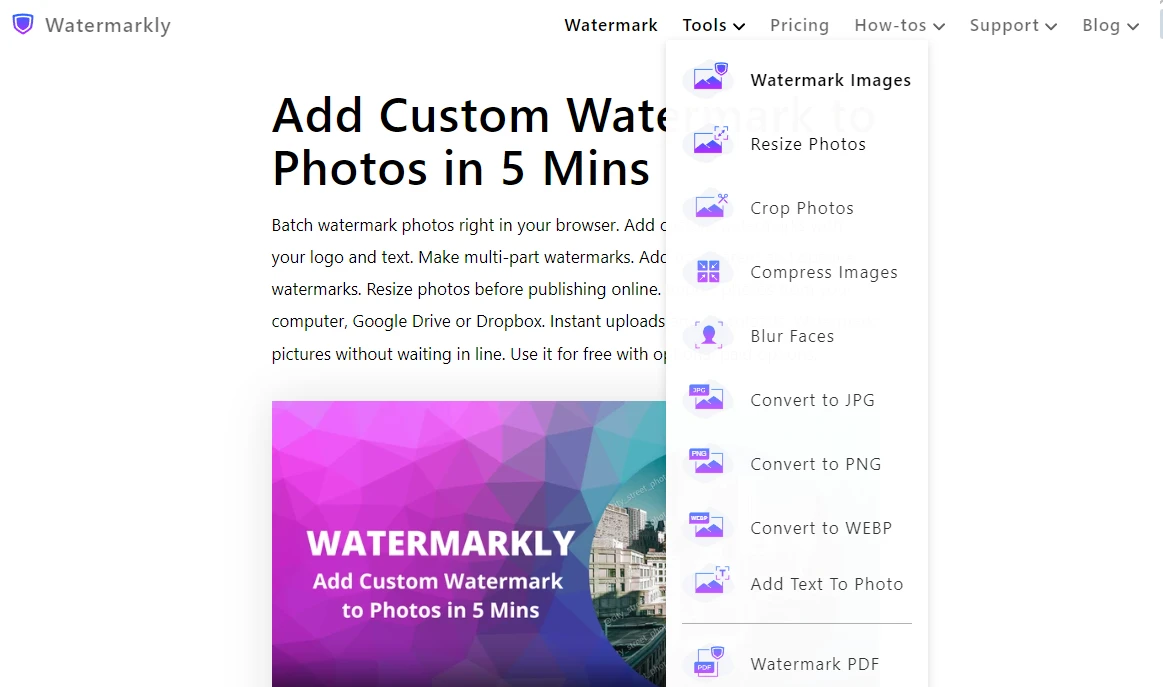
- Upload one or several images into the app by using the Select Images button.
- Choose one of the resizing options. For example, it can be Exact Height.
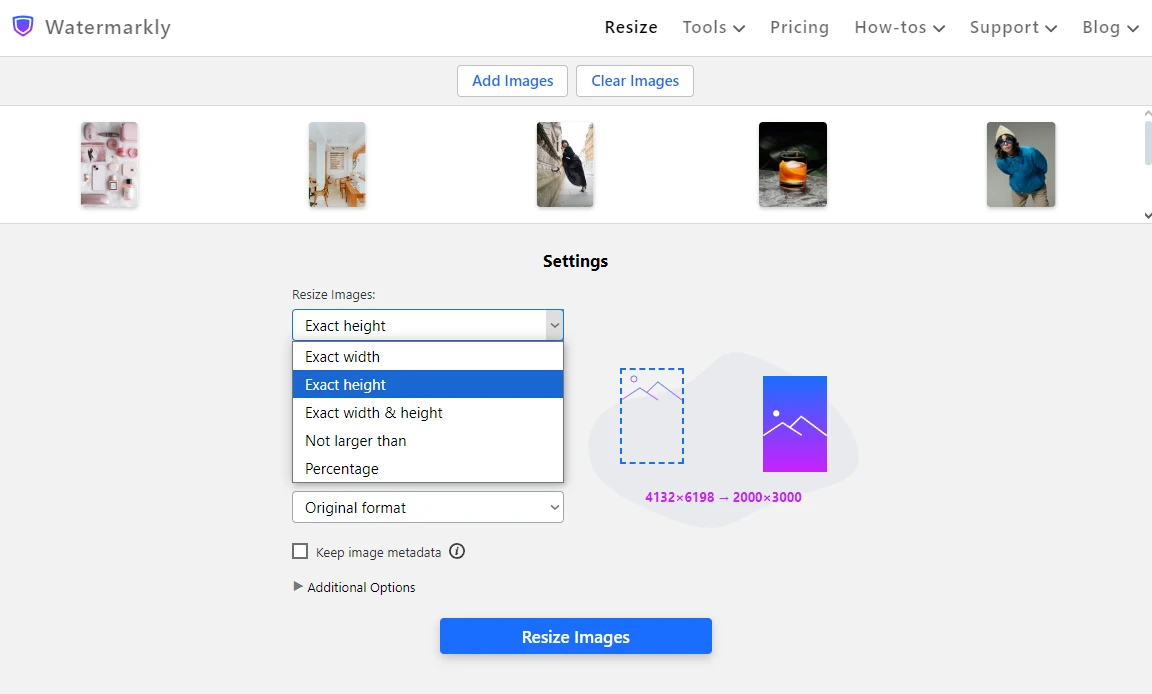
- Enter the new value for the height. The width will be changed automatically.
- Select the file format and quality.
- Click on Resize Images, then download your files when resizing is done.
And that’s it!
Everything is straightforward and quick. Please note that if you upload several images, they will be resized by one and the same image size.
What if you need to resize multiple images for social media? Then you should use Watermarkly’s cropping tool. Here you will be able to crop and resize each image in a batch separately as well as make use of some ready-made presets. Follow these steps:
- Open the Crop Photos app on Watermarkly’s website.
- Click on Select Images, then import all the necessary files.
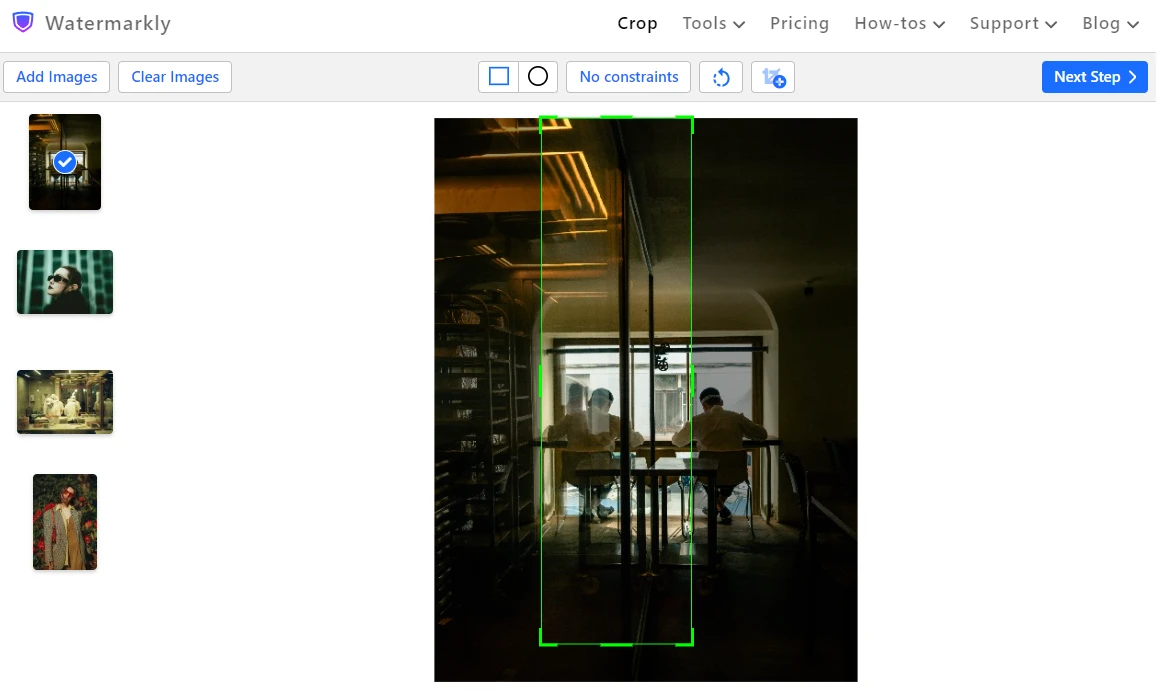
- Click on No Constraints. In this section you can enter specific pixel dimensions or aspect ratio. There are also ready-made presets with commonly used aspect ratios as well as presets for popular social media platforms. For example, you can pick a preset for Instagram Portrait.
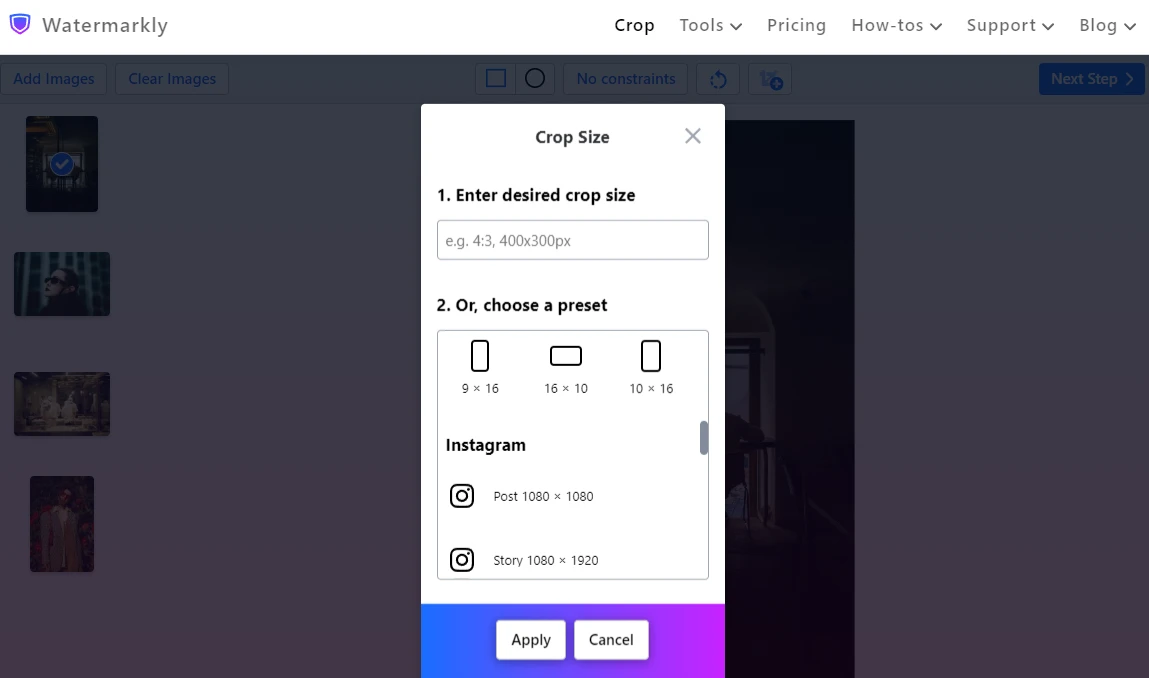
- Adjust the cropping area. After the export, your image will have the aspect ratio and pixel dimensions that meet Instagram’s size requirements.
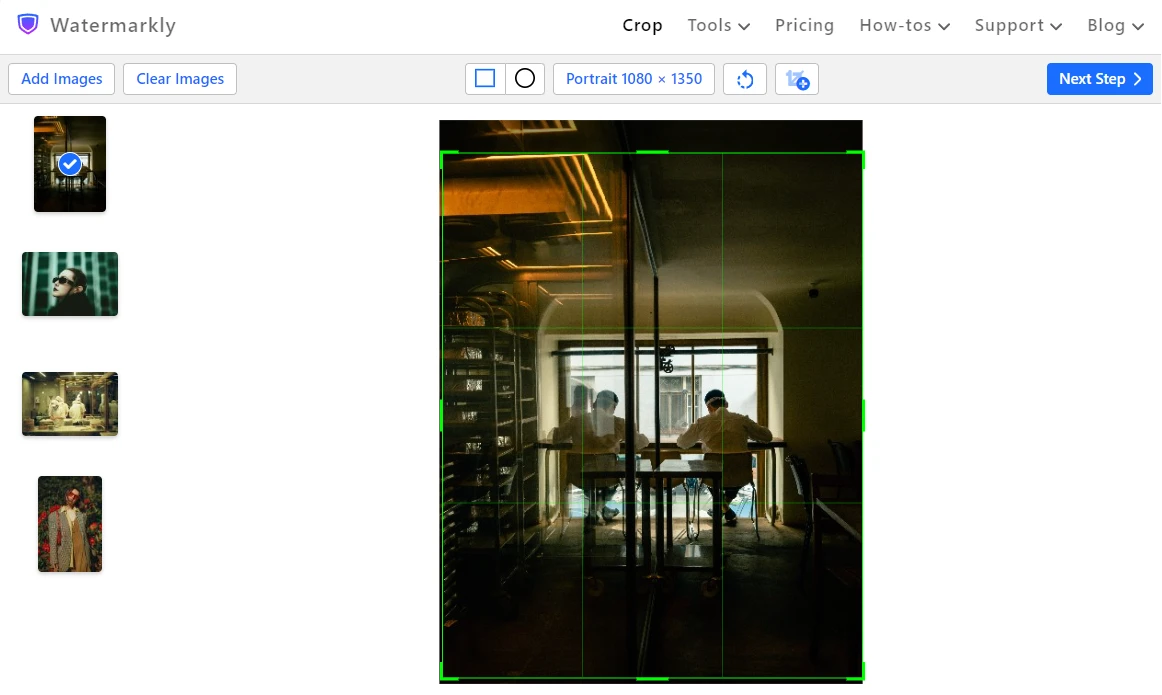
- Say, you need to resize one and the same image for different social media platforms. Select the necessary photo and click on the Add Crop button. Your image will be duplicated.
- Now, simply choose a different preset and adjust the cropping area. For example, you can use the Instagram Portrait preset on the initial image and the Facebook Page Cover preset on the duplicated version. After the export, you will get two resized copies of the same image.
- Adjust the cropping area on each image in the batch, then click on Next Step.
- Specify the export settings, then click on Crop Images. When the processing is done, download your files.
Now, you have your resized copies. That’s right, Watermarkly always creates copies of your files automatically and applies all the changes to them, so nothing will ever happen to the originals.
As you can see, cropping and resizing images in Watermarkly is incredibly easy and quick. What’s more, this process is rather similar to using the Resize feature that can be found in Canva Pro. Except that Watermarkly can be used for free with some minor limitations. Its free version allows you to process up to 10 images per day.
It’s worth noting that both resizing and cropping images in Watermarkly requires fewer steps than in Canva. There’s no need for you to add new pages or adjust your image on an empty canvas; there are no canvases here to begin with. You can easily upload a single photo, then crop it for all your social media platforms. It will surely be much quicker and easier than in Canva.
In the free version of Canva you won’t be able to have any control over the quality of your resized images. Meanwhile, in Watermarkly you can select excellent, good or decent quality.
It goes without saying, but Watermarkly isn’t a complete alternative to Canva, which is a full-fledged image editor. Frankly speaking, you can benefit greatly from using both apps. Canva is perfect for creating eye-catching designs and getting really creative. Watermarkly will come in handy when you need to make some simple and quick changes to your images.
Final Thoughts
Now you know how to resize an image in Canva. Without a doubt, Canva Pro does have its perks – it provides the quickest and easiest way for resizing images. But if you have some time on your hands, you can achieve the same results with the free version. That said, performing basic editing tasks in Canva can be a bit complicated. If you want a more straightforward and faster way to resize your images, you should consider using Watermarkly. It can make the process of prepping your visual content for the web much easier.
More Guides
How to Resize an Image in Paint
How to Upscale an Image in Photoshop
How to Add a Watermark in Canva