How to Make an image a Circle in Google Slides
by  Lina Thorne • Updated · Posted in Crop Photo
Cropping images into a circle or any other shape can help you add a touch of creativity to your presentation. In fact, Google Slides offers a selection of different shapes, so you can go for a polished look or, on the contrary, bring in a little bit of fun and humor.

By cropping your images into a shape that’s different from a rectangle or a square, you can really surprise your audience and prompt them to take a closer look at your presentation. It’s an efficient way to break the monotonous pattern of similar shapes and forms. It can really help you transform an image and highlight only what’s necessary.
Google Slides is a very user-friendly online app that has all the necessary tools and features for creating beautiful presentations. Even total beginners can easily master it. Since this app is included in Google Workspace, you can use it for free and there’s integration with Google Drive, Google Docs and other Google services.
Leave all your worries aside! Making an image a circle in Google Slides is a pretty straightforward task that will require only a few minutes of your time; if not less. In this guide we’ll walk you through all the steps that you’ll need to take – so, you will have a clear understanding of the whole process.
Are you ready? Let’s get started!
How to Make an Image a Circle in Google Slides
Changing the shape of an image might seem like a complicated task, but you will actually be able to do this within just a couple of clicks. You can use a special mask in Google Slides to make an image a circle or any other shape.
So, after you create a new presentation or open the necessary one, follow these steps:
- Select the slide that you want to insert an image into, then navigate to Insert > Image and choose where your image should be imported from. For instance, you can upload your file from your computer.

- When your image is imported, use the cursor to resize and reposition it, if necessary.

- In the toolbar at the top find the Crop icon and click on the small arrow right next to it. You will see the Mask flyout menu. If you don’t see the Crop icon, your image is probably not selected. Click on your image to select it; the Crop icon should appear in the toolbar.

- In the Mask flyout menu, go to the Shapes section and pick the oval.

- Needless to say, if making an image a circle in Google Slides isn’t what you need, pick a different shape. For instance, your image can be heart-shaped or you can opt for cropping it into an arrow or a pentagon. Cropping an image into a non-standard shape can help you bring a little bit of diversity and even humor into your presentation.

- If your image is square and you select the oval shape, then it will be instantly cropped into a circle. But if your image is rectangular, you will end up with an oval. That’s because using this mask, you can crop an image into an oval or…turn an oval into a circle.

- If you want to turn an oval into a circle, double-click on your image. You should now see your entire image and the black cropping handles.

- Draw the black cropping handles inwards to change the size and shape of your cropping area. Keep adjusting them until you get a circle.
 Unfortunately, in Google Slides, you have no other choice but to turn an oval into a circle manually. This goes without saying, but it might take you a while to get the necessary shape. And you might not get a perfect circle at all.
 - Let’s say that you got the shape that you want…But now you need to resize the cropping area just a little bit. If that’s the case, please, change the size of the cropping area using a black corner handle, while holding Shift. This way, you will be able to keep the shape and aspect ratio intact. Otherwise, you might accidentally turn your circle back into an oval.
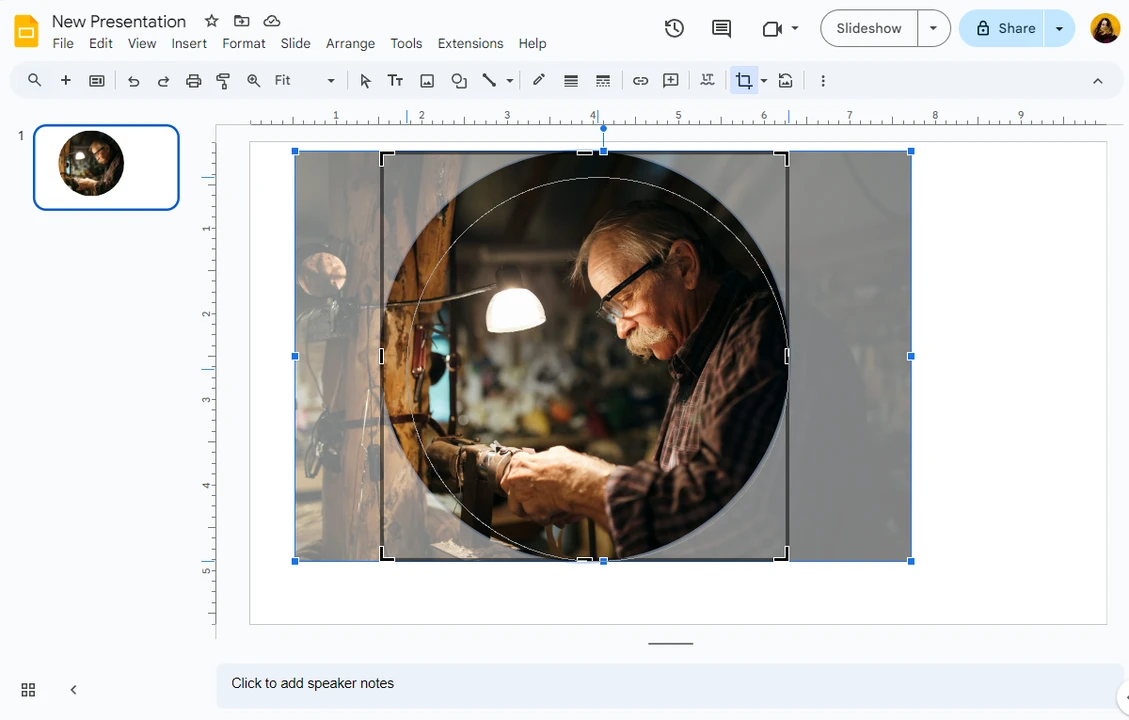
- To make sure that all the unnecessary parts are cropped out, change the size and place of the image itself. Technically, you can reposition the cropping area. But in most cases when you try to move the cropping area to a different place with the cursor, you end up repositioning the image instead. It’s another downside of Google Slides.
 Here’s a tip. It’s crucial to use images of high resolution and quality; especially if you want to crop them. This is important because the pictures in your presentation should be crisp and clear. Yet if you try to get rid of a big chunk of an original image, you might end up with something pixelated and blurry. You definitely want to avoid that! Otherwise, your presentation won’t have the desired impact.
 - Do you want to rotate your image? There’s a small ball-shaped handle at the top of the image. Click on it, then drag the cursor to the left or to the right and the angle of your image will change.
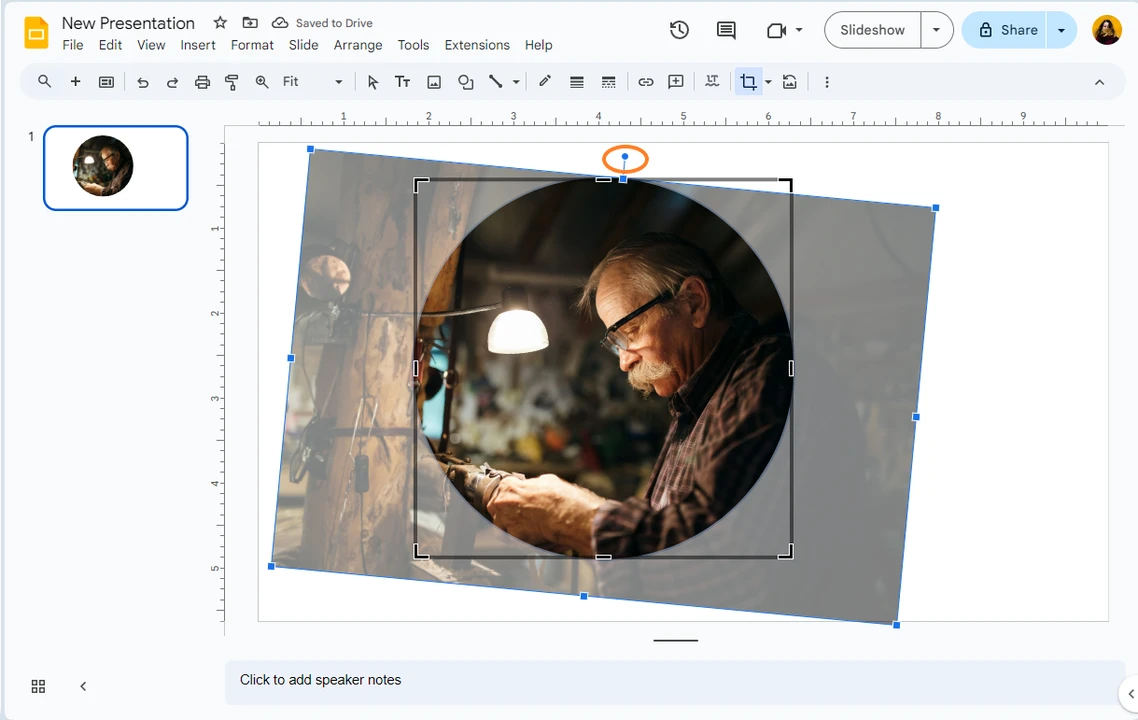
- When you’re ready to apply the changes, press Enter.

- Once the changes are applied, you can use the cursor to drag your cropped image to a different place on your slide or even resize image. Fortunately, Google Slides have automatic guides that will show you where the center of the slide is or help you align your picture with other elements on your slide.

- If after the changes have been applied, you need to adjust the placement of your image inside the circle, double-click on the image. Then use the blue handles to change the size or position of your image. To apply the new changes, press Enter again.
- You can add an effect to your circle-cropped image in Google Slides if you want to make your image a bit more visually appealing or separate it from the background. Google Slides doesn’t have a vast selection of effects, but you can add a reflection or a shadow. To do this, right-click on the image and choose the Format Options in the drop-down menu.

- Check the Drop Shadow box or the Reflection box, depending on which effect you need; you can add both if you want to. Make the necessary adjustments – you can change the distance, opacity, size or radius.


- Please note that the Format Options menu can actually be used to make some other adjustments to your image. For instance, you can recolor it.

That’s it! Now you know how to make an image a circle in Google Slides! It isn’t as complicated as you thought, right?
How to Crop Multiple Images into a Circle. Alternative App
Google Slides is a free app that’s very user-friendly. Why would you even need an alternative, right?
Well, it’s an app for creating presentations. It does have a cropping feature, but it wasn’t designed for cropping. For this reason, it can’t offer the same level of flexibility and convenience that an actual photo cropping app can.
On top of that, let’s say that your presentation contains several images that you want to make a circle. Cropping multiple images in Google Slides can be challenging because the only way to do this is by cropping one image after another.
Google Slides allows you to select several images at once, and then you can reposition them as a group, for instance. But the moment you select more than one image on a slide, the Crop button will disappear from the toolbar. Considering finetuning the shape and all the other adjustments that you’ll need to make, it will probably be a rather time-consuming task.
If you want a faster and more convenient way to crop a batch of images, you should give a try to Watermarkly’s photo cropper! Similarly to Google Slides, it’s an online app that works in a browser, so you will be able to use it on nearly any device.
The main advantage that Watermarkly has over Google Slides is that here you can upload as many images as you want. That’s right! It’s a batch-cropping app. So, you can crop multiple images into a circle in one go! The whole process from start to finish will require only a few minutes.
It’s worth mentioning right away that Watermarkly doesn’t offer a selection of different shapes, unlike Google Slides. You will be able to crop your image into a perfect circle, square or rectangle. It’s not possible to crop it into an oval, an arrow or some other shape. If that’s what you need, you’ll have to use Google Slides.
However, since you can crop an image only into a circle in Watermarkly, there’s no need to hold Shift while you’re making changes to the cropping area. You won’t have to be extra careful and drag only the corner of the cropping area. The shape of a perfect circle won’t get distorted. No matter what.
Let’s see how to make image a circle in Watermarkly:
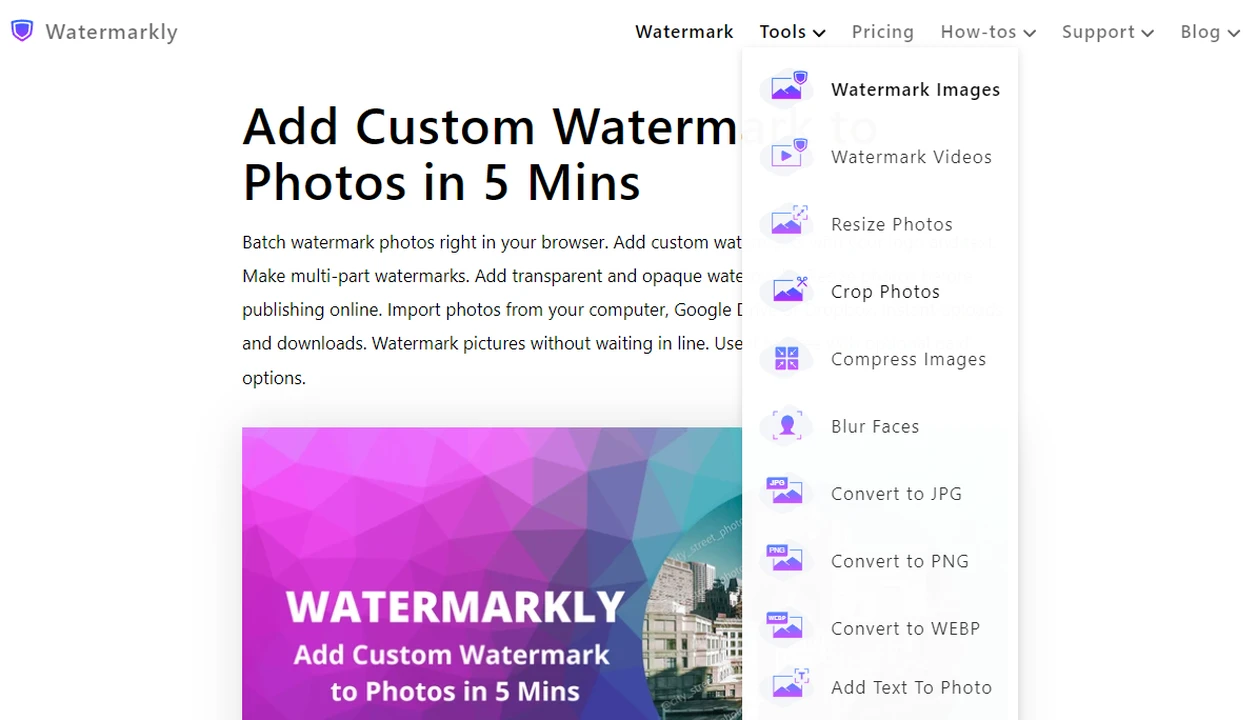
- Choose Crop Photos in the Tools menu on Watermarkly’s website.
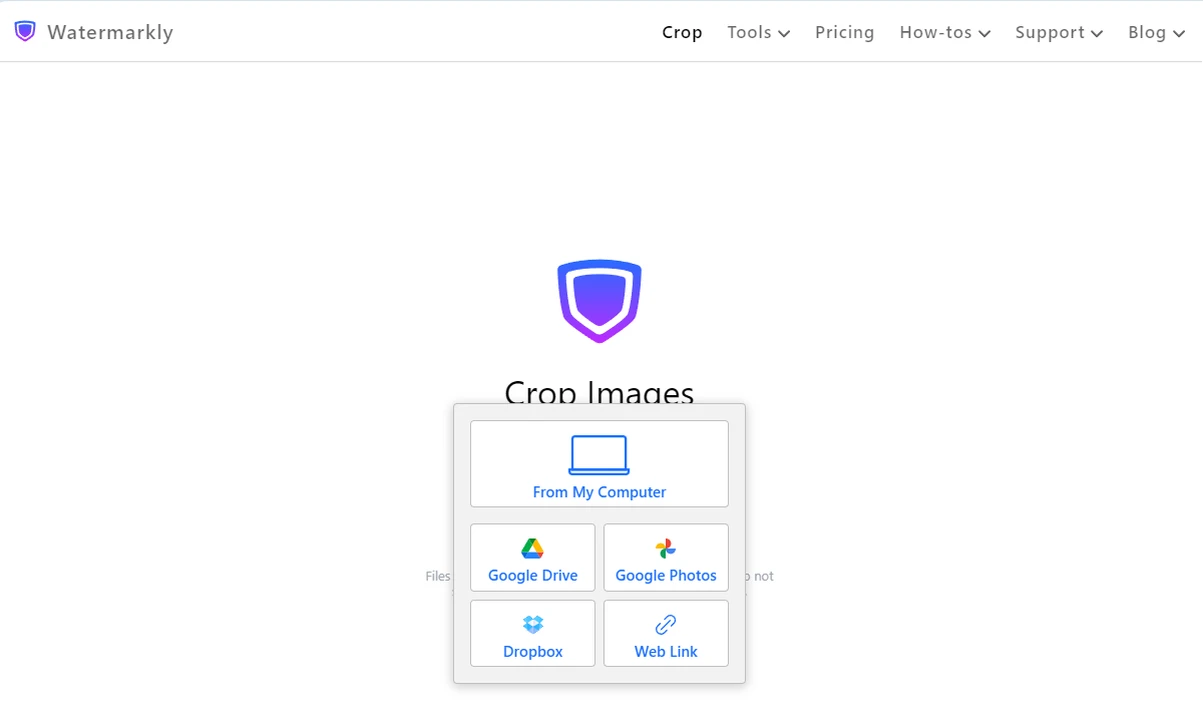
- Click on the Select Images button, then choose the suitable option for importing and upload your images into the app.
- In the toolbar at the top select the circle option.
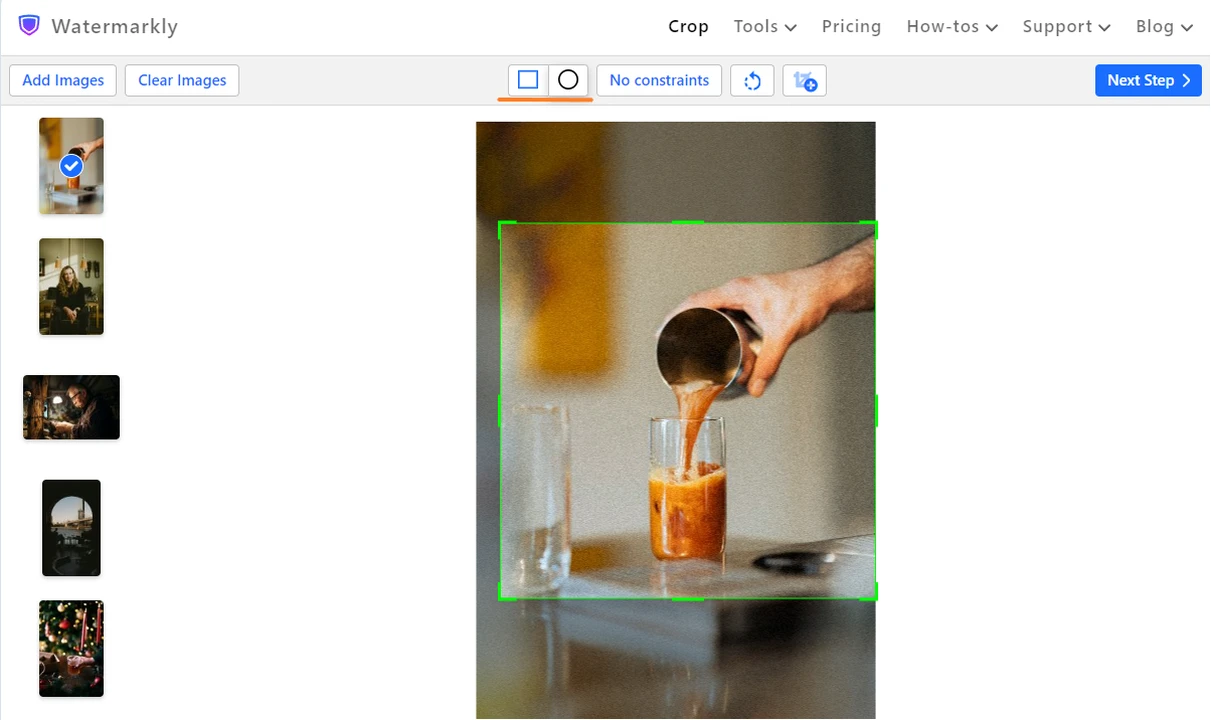
- Drag the green borders of the cropping area with the cursor to make it bigger or smaller. If you need to reposition the cropping area, place the cursor inside it, then drag the cropping area to a different place while holding the left button of the mouse. Since you need to adjust only the cropping area, the entire process of making an image a circle is easier in Watermarkly than in Google Slides.
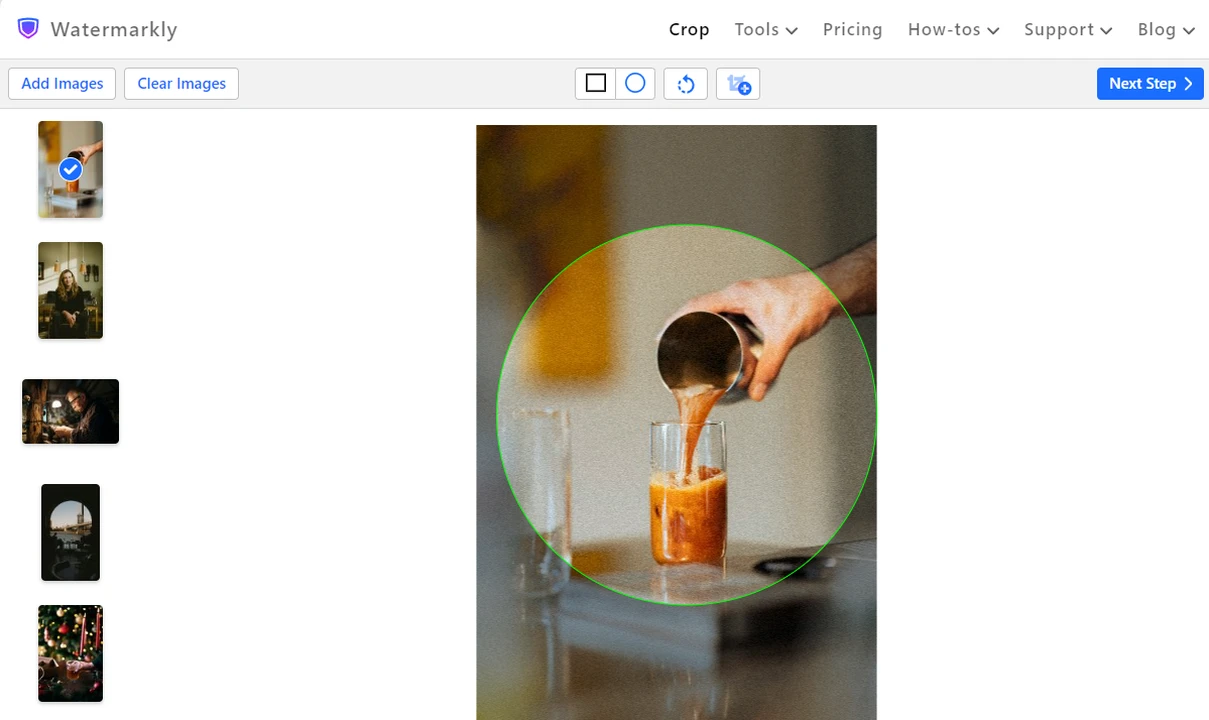
- In Google Slides it’s possible to rotate an image. This can be done in Watermarkly, as well! Click on the Rotation button at the top.
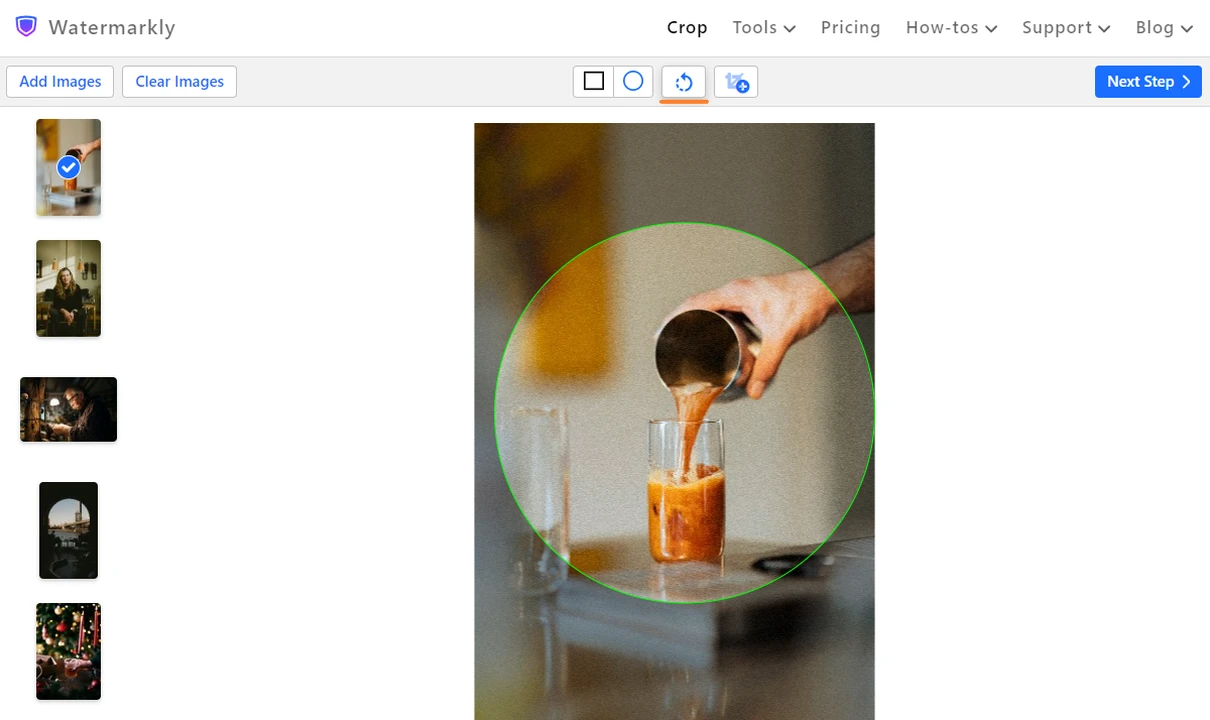 The Rotation slider will be revealed. Drag it to the left or to the right to rotate your image.
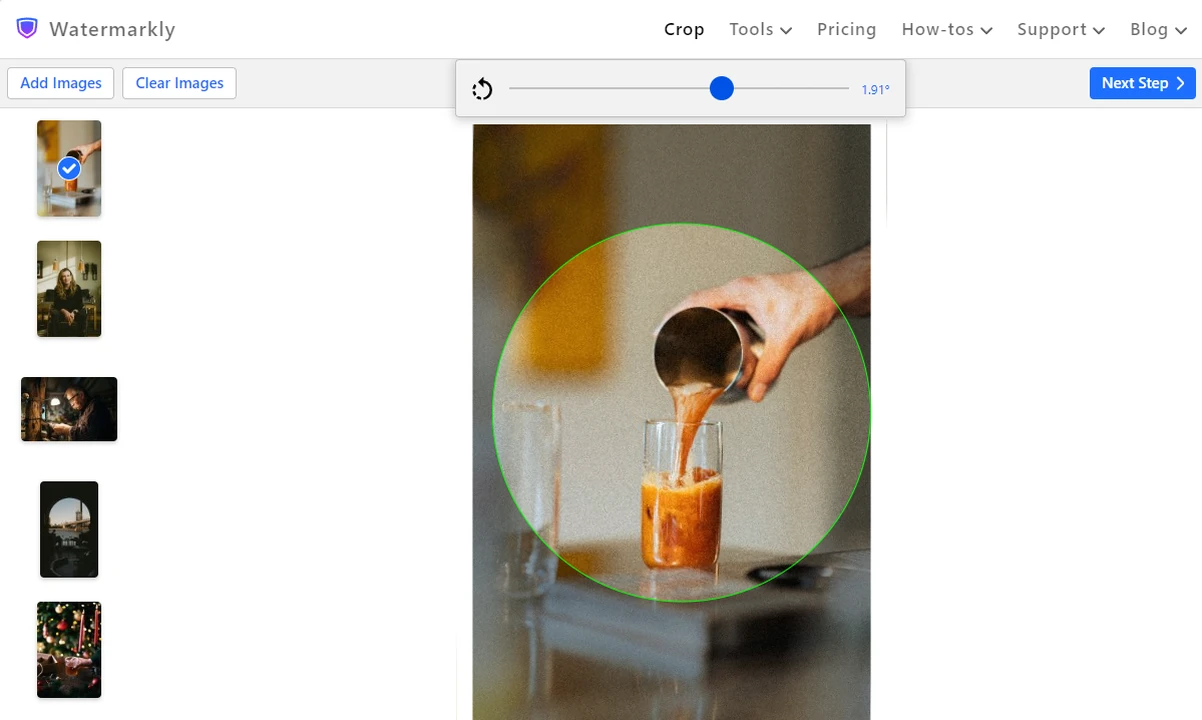
- In Watermarkly you can make use of the duplicating feature. Here’s how it works. Select an image and click on the Add Crop button at the top.
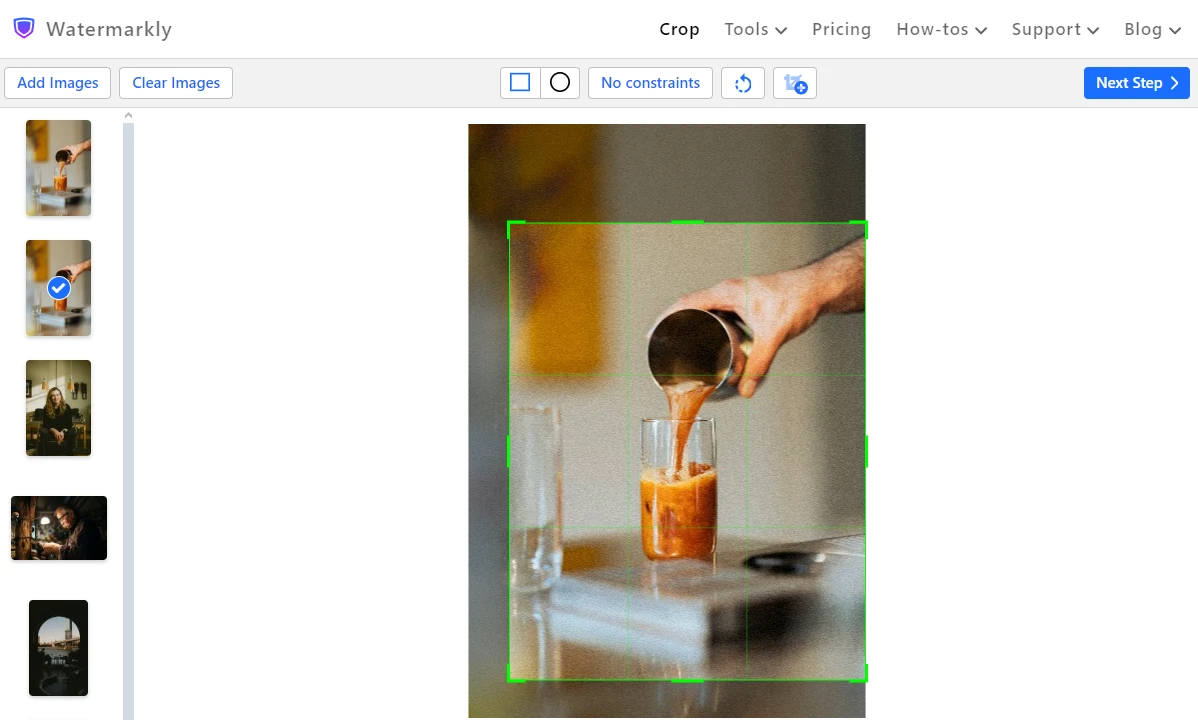
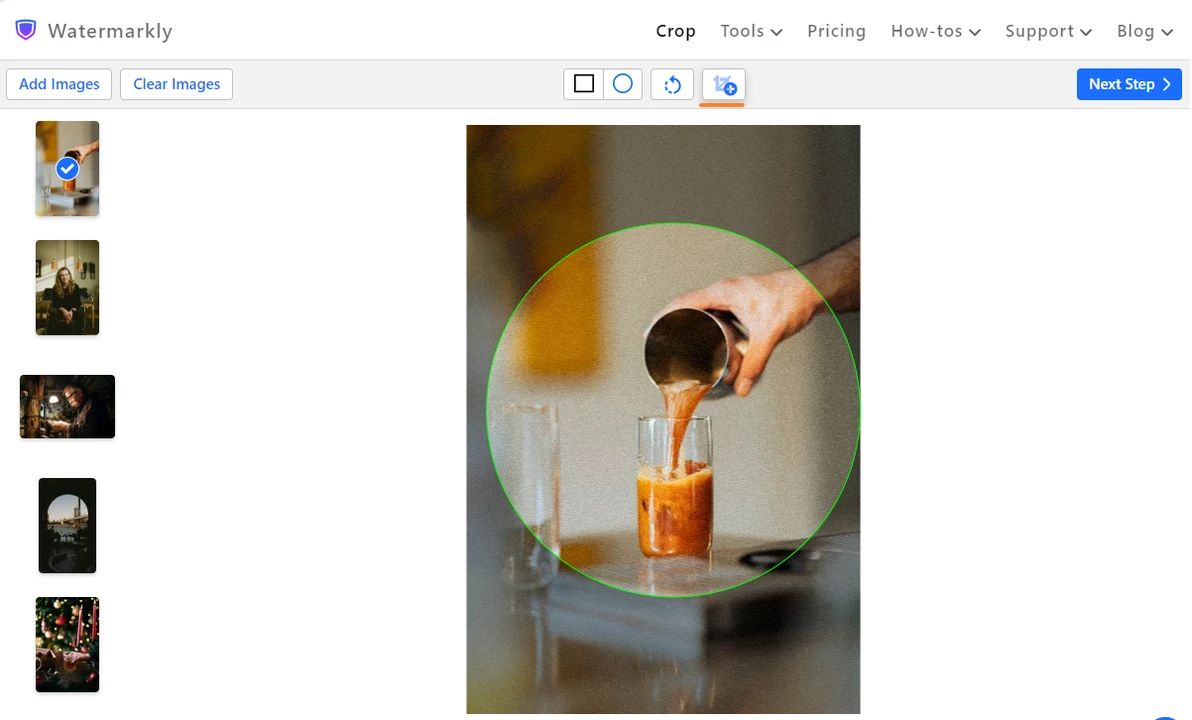 Your selected image will be duplicated. On this duplicated image, you will be able to adjust the cropping area in a different way. For instance, you can crop your image into a perfect square. This way, you will get two cropped versions of one and the same image.
- When you’re done adjusting the cropping area on the first image, switch to the next one and adjust the cropping area. The changes that you make to the cropping area on one image won’t affect the other images.
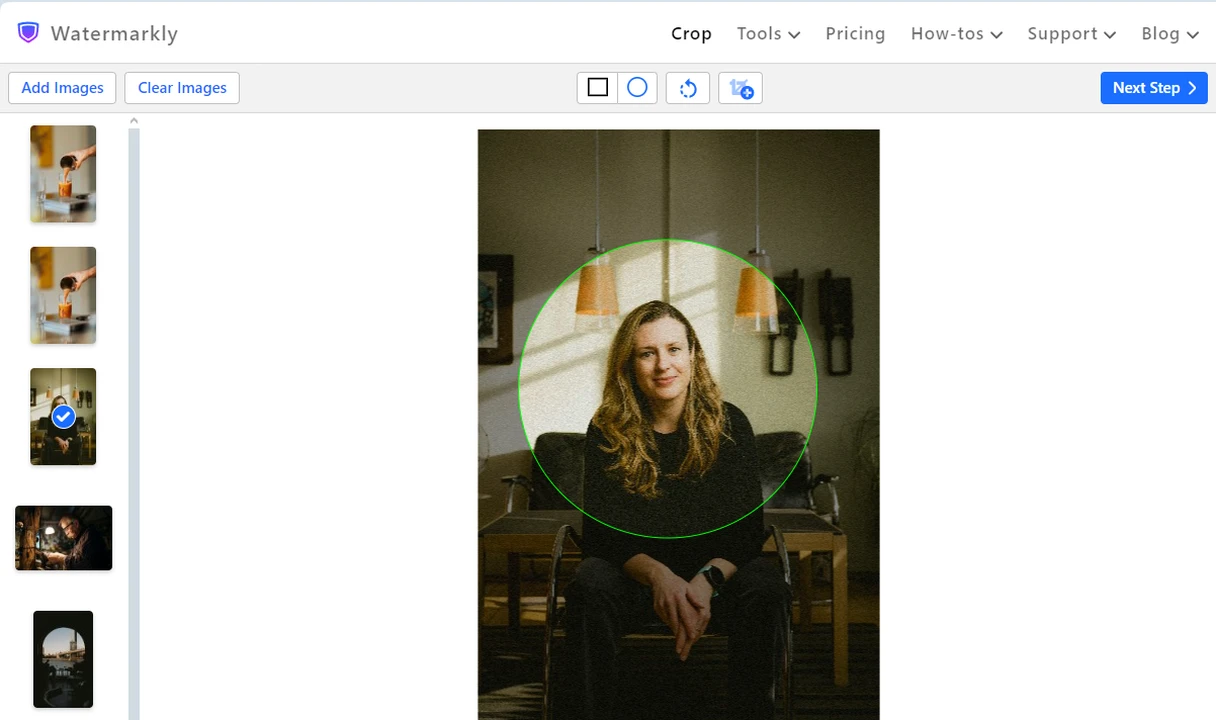
- Adjust the cropping area on each image in the batch.
- When you’re ready, click on the Next Step to go to the export settings.
- You can click on the Preview button. This will take you to the Preview section where you can preview your cropped images.

- If everything looks the way you want it to, go back to the export settings and specify them.
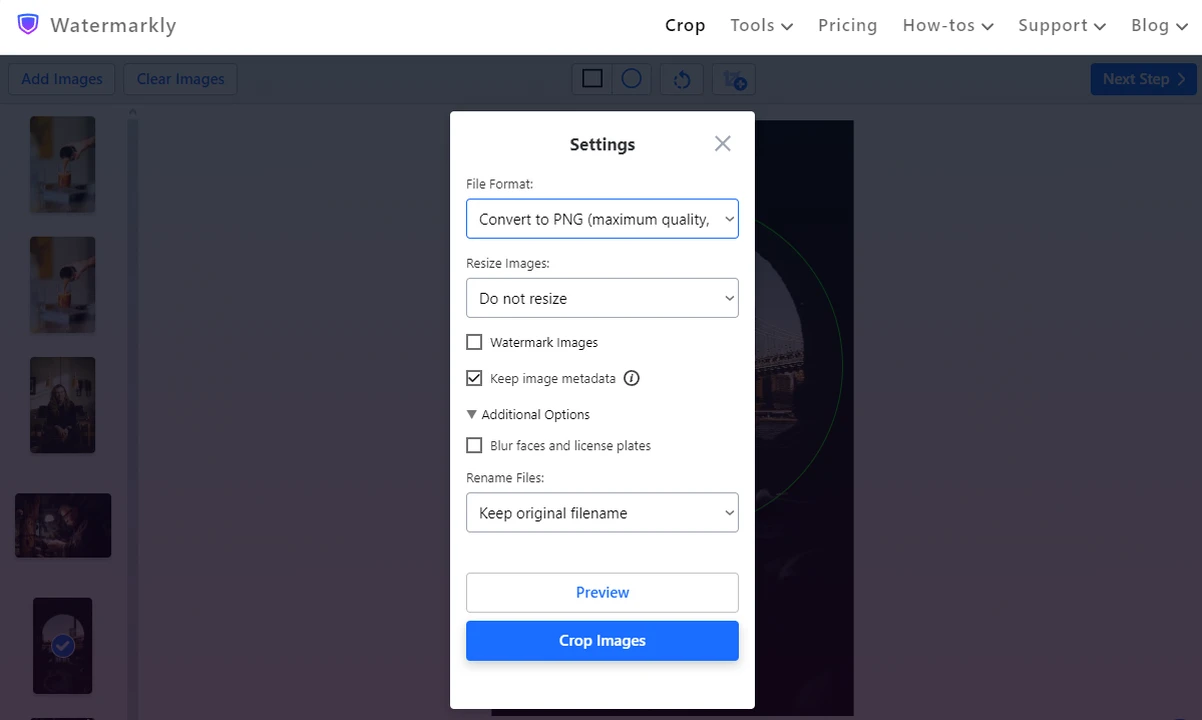 What’s important here is that you will need to select the PNG format in the File Format menu. Otherwise, the corners of your circle-cropped images won’t be transparent.
 - To initiate the processing, click on the Crop Photos button. Wait for a couple of minutes and save your cropped images.
That’s it!
Make an Image a Circle. Google Slides vs Watermarkly
When you make an image a circle in Google Slides, nothing happens to the original. That’s also true for images that you crop in Watermarkly. This online app works only with copies that it creates automatically. So, no matter whether you choose to crop in Google Slides or Watermarkly, your original images will remain unchanged.
Of course, there are some downsides.
As it has already been mentioned, Watermarkly lacks a broad selection of different shapes to crop your images into. But probably the biggest downside is that you won’t be able to do all the work in one app.
Your presentation might be filled with lots of images, and there’s a high chance that you need to crop half or even all of them. Being able to make all the changes right in Google Slides would’ve been more convenient, for sure. But instead, you will need to import and crop all of your images in Watermarkly, then insert them into your slides. Switching between the apps can be a bit tedious.
In addition to this, you won’t be able to add effects to your images or add changes to the images themselves – for instance, recoloring them – in Watermarkly. If you want to add a shadow or a reflection to your image, you will need to do that in Google Slides. It means that if you want to add an effect to multiple images, you will need to edit them one by one. Which isn’t very time-efficient.
However, it’s worth mentioning that Watermarkly offers not only an app for cropping. On this website you can find several different apps for basic image editing. You can watermark photos, blur faces on your images, compress photo size and more. So, you might not be able to use it for adding effects, but it can come in handy if you need to make some small changes to your images.
Despite all of those downsides, cropping images in Watermarkly, then uploading them into Google Slides will surely require less time than cropping and editing all of your images in Google Slides one by one. With the help of Watermarkly, you can actually make your workflow faster, easier and more efficient.
Here’s an idea! If you have some time on your hands, try to make an image a circle in Google Slides. Then crop the same image in Watermarkly. It will help you to determine which method is quicker and easier!
To Sum Up
If you’re looking for a way to make your presentation more captivating, you can achieve this goal by cropping images into different shapes. For example, the circle shape works perfectly for portraits. Making an image a circle in Google Slides will take you only a couple minutes. Hopefully, the detailed instructions in this guide has shown you that it’s a pretty uncomplicated task.
Of course, Google Slides does have some disadvantages: turning an oval into a circle might be somewhat tricky and the only way to crop multiple images is to crop one image after another.
Therefore, if you need to crop several images into a circle in Google Slides, it might take quite a while. As an alternative, you can use Watermarkly’s crop tool. With its help, you will be able to crop as many images as you need and turn them into perfect circles. It’s a very time-efficient and effort-saving way of cropping images for your presentation.