
How to Make a Video File Smaller: Best Methods
by ![]() Lina Thorne • Updated · Posted in Video Editing
Lina Thorne • Updated · Posted in Video Editing
Large-sized files can be a real hassle. It’s a challenge to share them via email or upload to social media. And you can run out of your storage space pretty quickly because of them. Fortunately, there’s a way to make a video file smaller without sacrificing too much quality. Actually, there are multiple ways. And you don’t have to be a video editor or tech wizard to do it!
In this beginner-friendly guide, we’ll cover the best methods to reduce the file size of a video: from changing formats and lowering resolution to using free tools like VLC, HandBrake, and even trimming unnecessary parts of your video. We’ll also explain the difference between lossy and lossless compression, and how video codecs affect file size.
Why Make a Video File Size Smaller?
This can be quite beneficial. In some cases, even necessary. Here are the key reasons why you might need to reduce a video file size:
- Share files without any issues. Large files usually take longer to upload or download, which is something you might already be familiar with. But on top of that, most email services and messaging apps have a file size limit. So, for instance, if you want to send a video via email, you’ll need to either reduce its file size or upload it to a cloud storage.
- Get the results you need. Some platforms might not have a file size limit, yet they don’t exactly like large-sized files, either. So, when a large-sized file is uploaded, it gets automatically compressed, which may have a negative effect on the video quality. By compressing your videos before uploading, you can have more control over the final result.
- Improve streaming. Smaller videos don’t require lots of bandwidth, thus they can be played more smoothly and without much buffering when the internet connection is slow or when mobile data is used.
- Free some storage space. High-quality videos take A LOT of space. You can run out of free memory storage pretty quickly. As a solution, you can transfer your large-sized original videos to an SSD and replace them with compressed versions on the device that’s running low on memory.
Understanding the Basics: Compression, Codecs, and Containers
If you are a beginner when it comes to working with videos, codecs, formats, and bitrate can seem rather confusing and mind-boggling. Nevertheless, if you want to get good results, you have to learn some basics. Don’t worry, we’ll keep things simple.
1. Compression
The most common way to make a video file smaller is to compress it. There are two types:
- Lossless compression reduces the file size without affecting video quality. No data loss occurs at all! This can be especially useful if you need to edit the footage multiple times or preserve every detail. Moreover, you can fully restore the video to its original state if needed. The main downside is that you won’t be able to reduce a file size dramatically. If you were to compress the same video using both types, the lossy version would end up significantly smaller.
- Lossy compression removes redundant or less noticeable data from the video, like tiny differences in color hues. Needless to say, the file size can be reduced quite dramatically. But of course, this comes at a price – the video quality can degrade quite significantly, as well; especially if you over-compress the video. It’s important to note that once you perform lossy compression, you can’t reverse the process. The data in your compressed video file will be lost permanently.
2. Video Containers
Some people confuse a video container with a video format. But they aren’t the same. A container is a file format that contains video and audio along with metadata and subtitles. Meanwhile, a video format is a combination of a video codec and a container; this is how a video is stored and played back.
Popular containers:
- MP4 – widely compatible and efficient.
- MOV – commonly used on Apple devices.
- MKV – flexible, often used for high-quality videos.
3. Codecs
Inside a video format, you’ll find a codec, which is a method used to compress and decompress the video. This is how a video is encoded.
Common codecs:
- H.264 – the most widely used; provides a good balance of size and quality.
- H.265 (HEVC) – newer, more efficient; can reduce the file size by 25–50% more than H.264 while maintaining the same quality. But it’s not as compatible as H.264.
- AV1 – also a new codec. Incredibly efficient, especially with lower bitrates. But it’s not particularly compatible, either.
4. Other Factors That Affect File Size
- Resolution: 1080p takes up more space than 720p or 480p.
- Frame rate: 60 frames per second (fps) is bigger than 30 fps.
- Bitrate: This is the amount of data used per second of video. If you need a smaller file size, lower the bitrate. But note that this will lower the quality, too.
How to Make a Video Smaller by Changing Format or Resolution
One of the most effective ways to reduce a video file is by either changing its format or lowering its resolution.
Changing the Format
If your goal is to share and store your videos without any issues, convert them to MP4. MP4 uses the H.264 codec by default, which provides excellent quality at a much smaller size. This extremely popular video format is widely supported and works well across almost all devices and platforms.
How can you change the format of your video?
The fastest and easiest way is to use a free online converter like FreeConvert.
Alternatively, most video editors allow you to choose a new format when you export your final file. So, when you are in the export settings, select MP4 as your export format. This method can be used even if you don’t need to do any video editing.
Lowering the Resolution
Another highly effective way to make a video file smaller is to decrease resolution, which is the number of pixels displayed in each frame. For instance, your video might have a 1080p resolution.
When the resolution is high, the video is sharper, clearer, and more detailed. But the file size is also bigger. Try recording a 1-minute clip in 4K, then in 1080p – and you’ll see how drastic the difference is.
In some cases, simply lowering the resolution can help reduce the file size.
How can you do that?
First of all, video editors allow you to change not only the format, but the resolution, too.
If you don’t need to do any video editing or don’t want to download anything, you can use online tools like Clideo to lower the resolution.
Changing either format or resolution might seem like something simple and insignificant. But in reality, it can make a video file size MUCH smaller.
How to Make a Video File Smaller using VLC
That’s right! You’ve probably heard of this free media player. Maybe even used it to watch videos. But did you know that it can also compress videos? Because it can!
Here’s what you need to do:
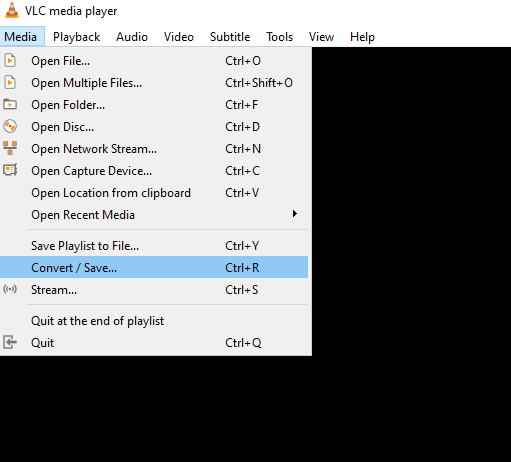
- Open VLC > Choose Media > Convert/Save.
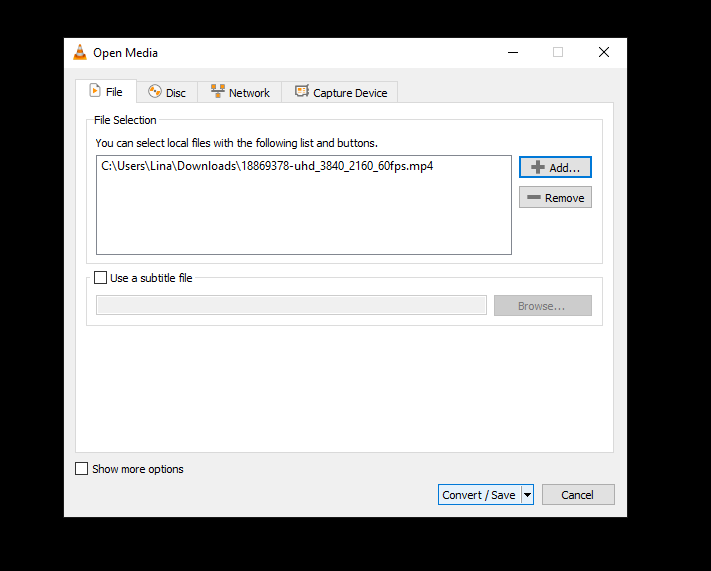
- Click Add to import the video that you want to compress, then select Convert/Save.
- Under Profile, choose Video – H.264 + MP3 (MP4) or H.265 if available.
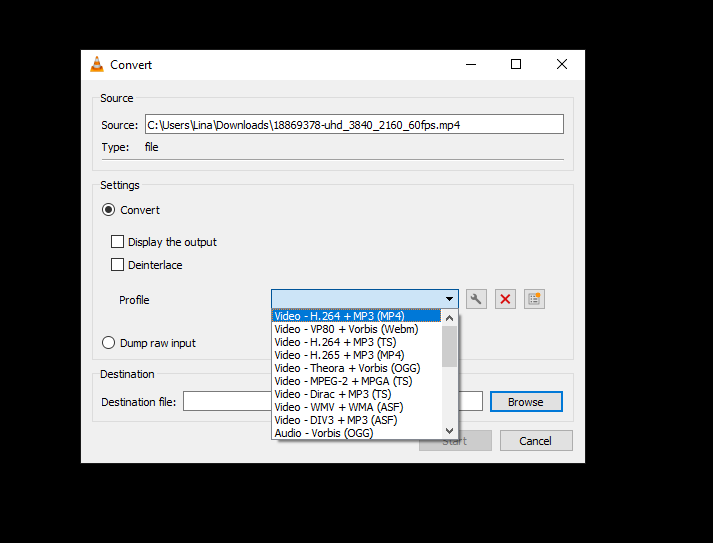
- Click on the Wrench icon to adjust the settings: ◦ Lower bitrate (e.g., 1500 kbps for 1080p). ◦ Reduce frame rate (e.g., 24 or 30 fps).
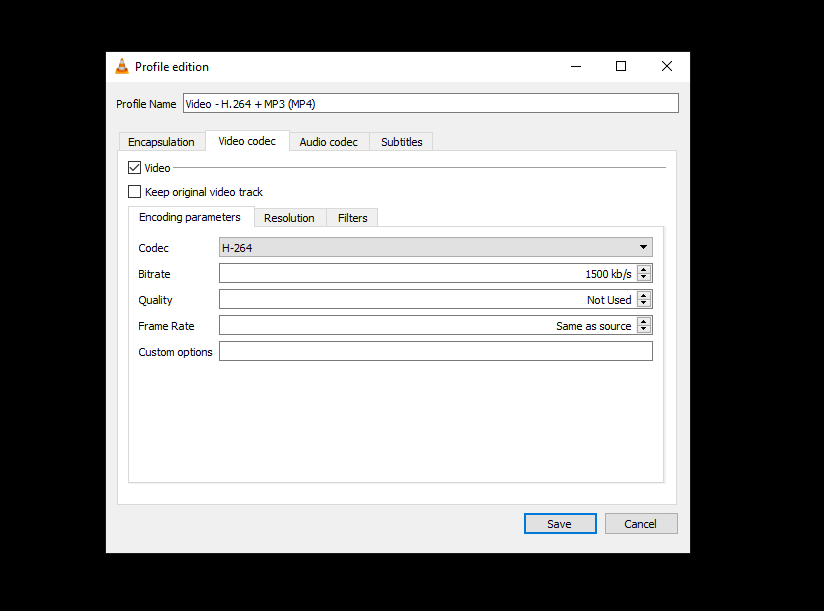 When you’re done with adjusting the settings, click on Save.
 - Choose where to save the file in the Destination file, then click Start.
What’s great about this method is that it doesn’t matter whether you’re on Mac or Windows – VLC is available on both.
How to Make a Video File Smaller on Mac using HandBrake
If you want more control over how your video is compressed, there’s no better tool to use than HandBrake. It’s completely free, open-source, and works on Mac, Windows, and Linux. So, yes, if you are on a PC, you’ll be able to use this method, too.
Here’s how it works:
- Download HandBrake from handbrake.fr and install it.
- Open the app, then drag and drop the necessary video file.
- Choose a preset. For instance, you can go for “Fast 1080p30” or “Fast 720p30” – either of them will produce a smaller video file.
- Go to the Video tab and make adjustments to the RF (Rate Factor). Set it somewhere between 20-25. Lower frame rate from 60fps to 30fps, if needed.
- In the Dimensions tab, lower the resolution if needed. Here, you can also tell the app not to crop your video if it has an uncommon aspect ratio.
- Click on Start to begin the compression process.
Please note that you won’t see the final size until the compression is done. So, if you need a specific file size, you might need to try out different presets and tweak settings until you get what you need.
HandBrake is probably the best tool for compressing videos because it’s free of charge, easy to use and can really help you make a video file smaller without losing quality. Unlike online editors, it doesn’t require registration, has no limits on the number or size of uploaded files, and doesn’t add watermarks to videos.
How to Make a Video File Smaller on iPhone
Needless to say, it’s better to compress videos on a computer – especially if you have a huge-sized file – since computers are, generally, more powerful. But what if you have a large-sized video on your iPhone that you’d like to make smaller without transferring it to your Mac? Well, it’s possible to compress videos directly on your smartphone. But there’s no built-in video compressor – you’ll have to use a third-party app.
Now, let’s see how you can use a third-party app to compress a video on your iPhone:
- Go to the App Store and type in Video Compressor, then choose and download one of the apps.
- Once installed, open it.
- Select the video you want to compress.
- Select the desired resolution and quality.
- Tap Compress. Wait until the compression is done, then save or share your small-sized video.
Yep, it’s pretty quick and easy!
How to Make a Video File Size Smaller by using an Online Converter
There’s a hassle-free way to make your video file smaller – no matter if you are on iPhone, Mac or some other device. Using an online video compressor might be the best and simplest choice for you. But please note that online compressors have upload size limits, and some require you to sign up.
The process is very similar to using a mobile video converter: you upload your video, adjust the settings, start the compression, and download the compressed file. Super quick, super easy.
Here are online converters that you can give a try to:
- VideoCandy
- VEED Video Compressor
- Riverside Video Compressor
- Clipchamp
- CloudConvert
To get the best results, try out several free online video compressors. This will help you find the one that delivers the perfect balance between file size and quality.
Things to Watch Out For:
- Speed depends on your internet. Uploading and processing can be slow if your internet connection is weak, and you need to process large files.
- Watermarks. Many online tools offer free and paid versions. Free versions may add watermarks to your video.
- Quality trade-offs. Some online apps might use a very high level of compression, and it will be impossible for you to change it. As a result, you might end up with a blurry and pixelated video.
How to Make a Video File Size Smaller using Trimming
This final method is kind of an alternative solution. The previous methods didn’t involve making changes to the actual video. But here, as you’ve probably guessed, you need to change the length of the video. Trimming is cutting out parts of a video that you don’t need. By shortening the length of your video, you’ll inevitably reduce its file size.
It’s important to note that if you only remove a few seconds, there won’t be much of a difference in size. But if you get rid of a significant portion, the file size will be reduced significantly.
Moreover, you can easily do this on your iPhone using a native app:
- Open the necessary video in the Photos app.
- Tap Edit, then drag the start and end handles.
- Tap Done, then save the trimmed version.
If you are on Android, your native Gallery app should allow you to trim videos, as well.
Please note that you’ll be able to trim only the beginning and the end of your video using a native app. If there’s a redundant bit in the middle of the video, you’ll need to use a third-party app. For instance, CapCut.
One of the best things about CapCut is that it’s a powerful, yet beginner-friendly video editor that can be used on iOS, Android, Mac and PC.
Here’s how you can trim your video on Samsung Galaxy (the process is the same on an iPhone):
- Once you download and install CapCut, open it and tap on New Project.
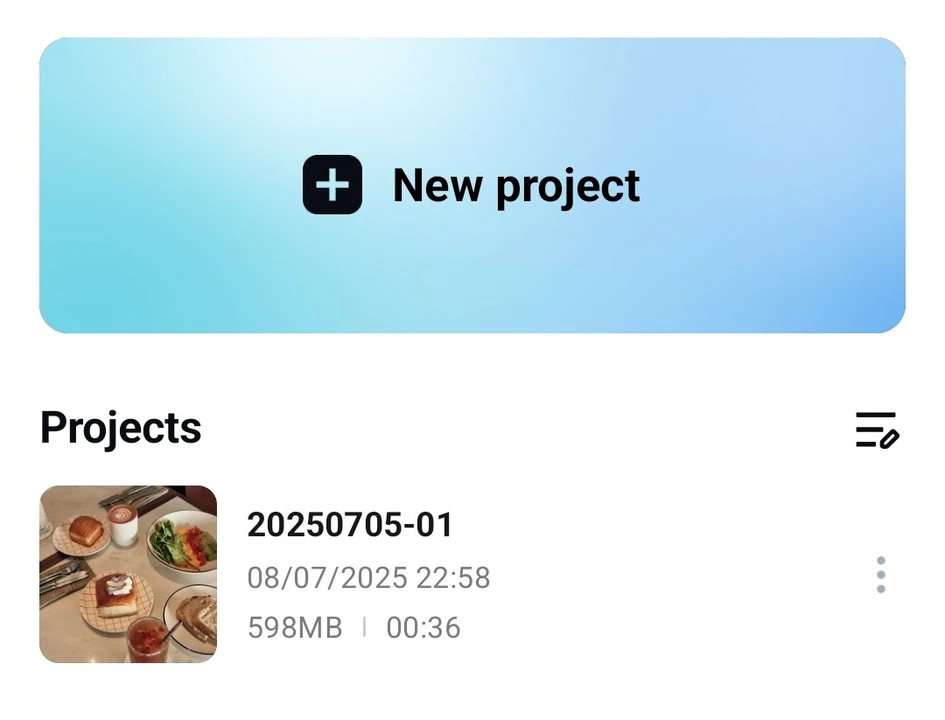
- Import the necessary video.
- Find the beginning of the bit that you want to get rid of and tap on it.
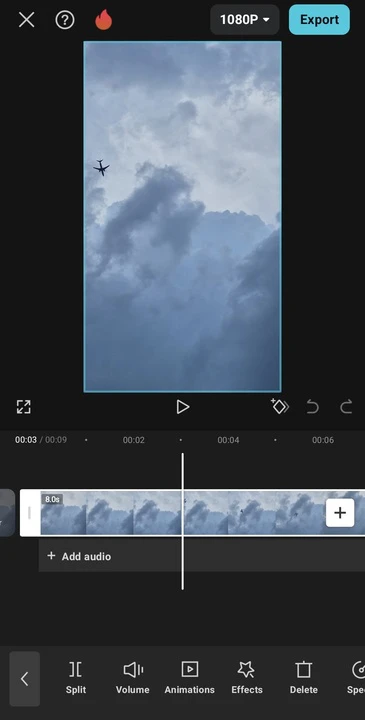
- Tap on Split.
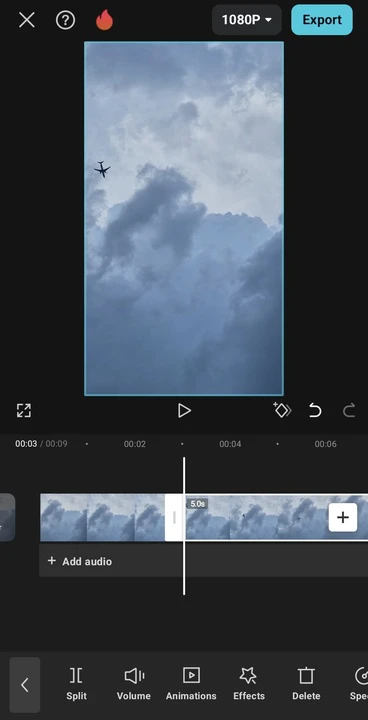
- Then do the same with the end of the bit.
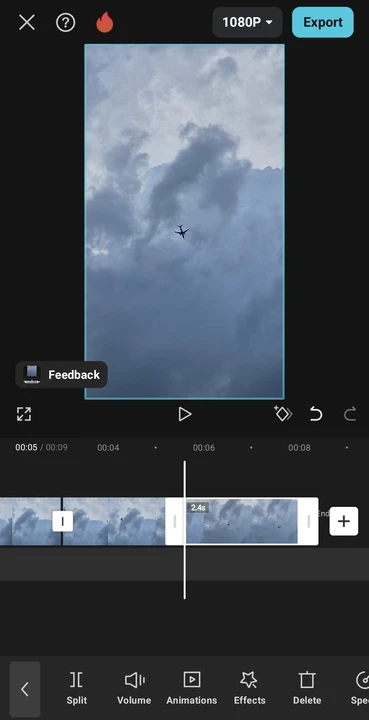
- Tap on the bit you need to remove – it should be isolated now.
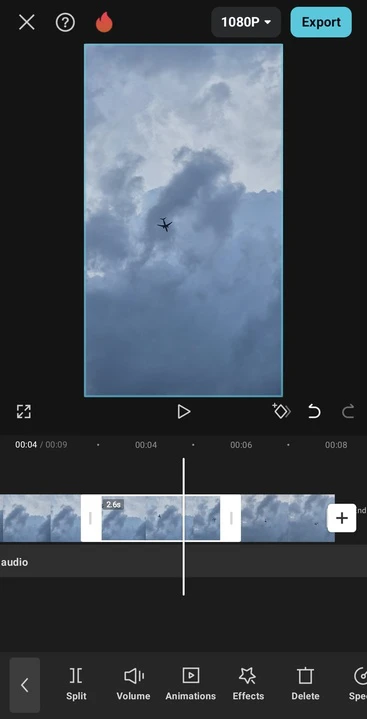
- Tap on Delete. Voila, the redundant bit is gone!
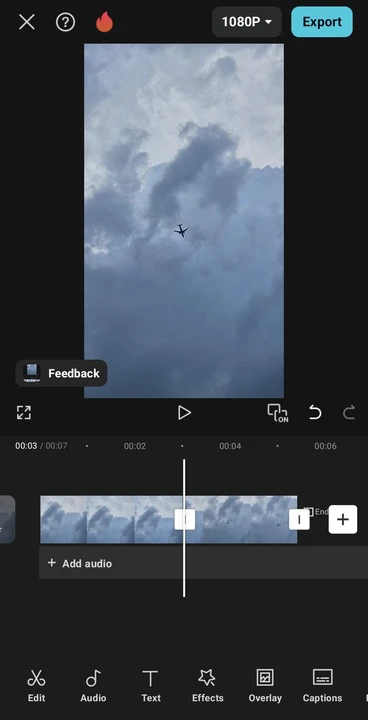
- Here, it’s also possible to get rid of the beginning and the end of the video by dragging the start and end handles.
- Do some other adjustments, if desired.
- When you’re ready, tap on 1080p. Select the resolution, frame rate and code rate.

- Tap on Export and wait until your edited video is exported.
As you can see, it’s a much more convenient tool for trimming your videos than a native app.
Conclusion
There’s no shortage of ways to make a video file smaller. But it’s important to choose the right method for your needs. If you need to process your video quickly to post it on social media or share via email, opt for using an online converter or a third-party mobile app to get the job done. If you are on a computer, you can give a try to VLC media player. If you’re looking for more control and flexibility, your best bet is HandBrake – it’s powerful and free of charge. If your video is too long, you can try trimming it – this will reduce its file size, too.
Video compression doesn’t mean you need to sacrifice quality. With the right settings and a little practice, you will surely find that perfect balance between optimal file size and good quality. Hopefully, the tools and methods in this guide will help you save space, speed up sharing, and simplify your overall workflow.