
How to Crop in a Circle in Photoshop
by ![]() Lina Thorne • Updated · Posted in Photo Editing
Lina Thorne • Updated · Posted in Photo Editing
In most cases, digital images tend to be rectangular. But it doesn’t mean that you can’t experiment with shapes. You’ve probably come across some circular images on the Internet, haven’t you? Maybe you’ve seen them on a website. It could’ve been someone’s profile picture. Have you ever wondered how you can get the same result? Well, you’re in luck! In this article you will learn how to crop an image into a circle in Photoshop.
Cropping can help you fix your composition and direct the viewers’ attention wherever you want to. You can keep only what’s truly important in your image.
You can crop a portrait into a circle for your social media profile or business card. And who says that you need to crop only photos? You can find an image that’s filled entirely with a solid color or a pattern, then crop it into a circle. It can be a great addition to the design of your website!
One of the most popular, multipurpose software for image editing is Photoshop. Since it has an incredibly vast set of features and tools, it is used by beginners, amateurs and professionals. And yes, you can use it for cropping in a circle, too. Photoshop offers the Crop Tool, which allows you to quickly get rid of unnecessary parts of an image. But its cropping area can only have the shape of a rectangle or a square. If you want to get a circle, you will need to use a different approach. In fact, there are a couple of different ways to crop photos into a circle in Photoshop. Both of them will require only a few minutes of your time. You will also learn about an easier option to crop an image into a circle – fret not, you won’t need to download or install anything.
Let’s dive in!
Images Are Rectangular No Matter What
There’s something that needs to be mentioned first. It’s important for you to understand that you won’t be able to turn a rectangular image into a circular one as if you cut out a circle with a pair of scissors. In other words, your image will have the shape of a rectangle no matter what – even if it looks like a circle.
Yes, social media platforms and various websites are filled with circular images. But you might be surprised to know that this is only an illusion. Circular images are actually rectangular. How is that possible you may ask? Well, the edges of those images are invisible, and what you see is a circle. Here’s an example:

As you can see, this image actually has the shape of a square. But the white part is usually transparent, which is why you see only the circular area. Now, you know how rectangular images can look like circles. Let’s see how you can achieve the same result.
How to crop in a circle in Photoshop
Photoshop is an image editing software that can be intimidating to some people. It’s not surprising since it does have some complicated, advanced tools that require a decent amount of time to master them. Fortunately, cropping is pretty easy to do. You will be able to make your rectangular images look like circles even if you are a beginner and don’t know Photoshop all that well.
As it has already been mentioned, there are a couple of ways how you can crop an image into a circle in Photoshop. This can be done either with the help of the Marquee Tool or the Frame Tool. Any recent version of the software will work for this, in case you are wondering.
Let’s take a look at how you can crop an image into a circle in Photoshop:
How to Crop an Image into a Circle with the Marquee Tool
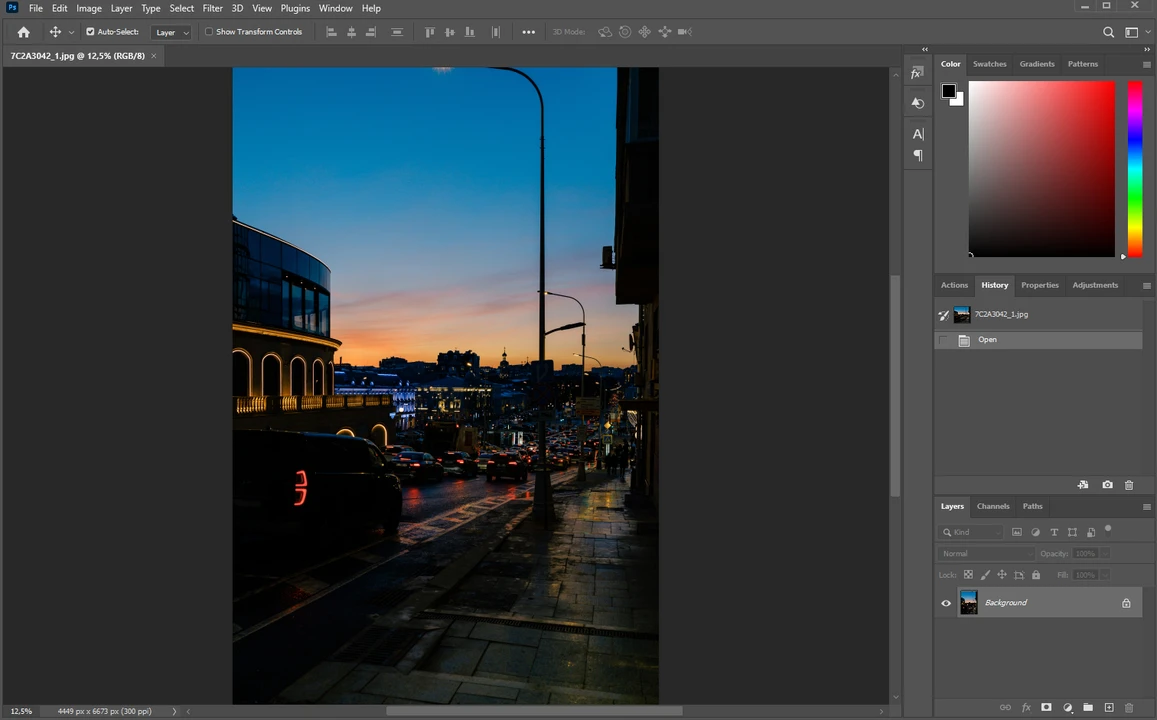
- Import the image that you want to crop into Photoshop.
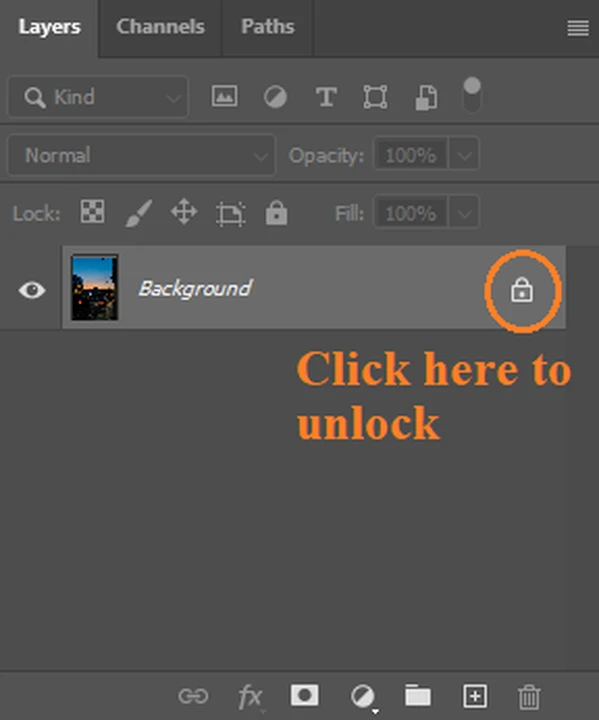
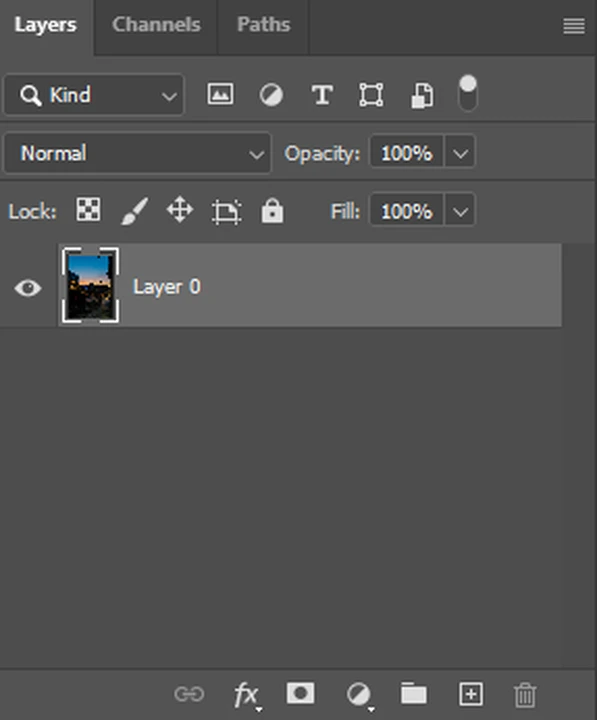
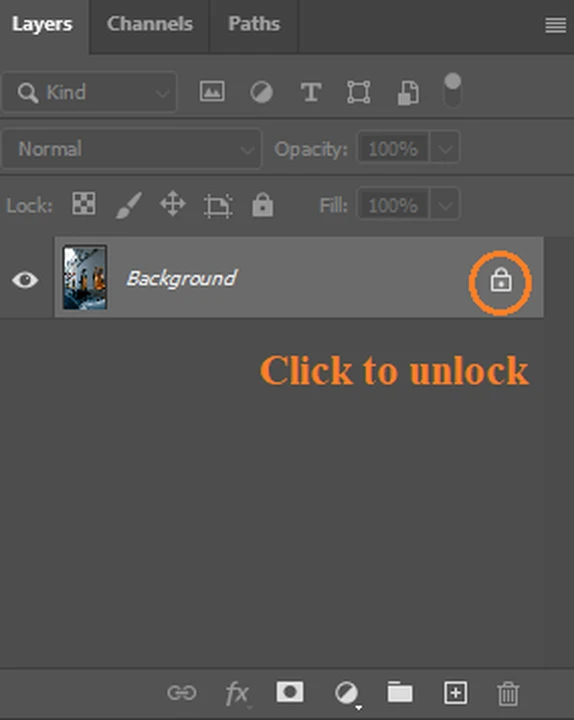
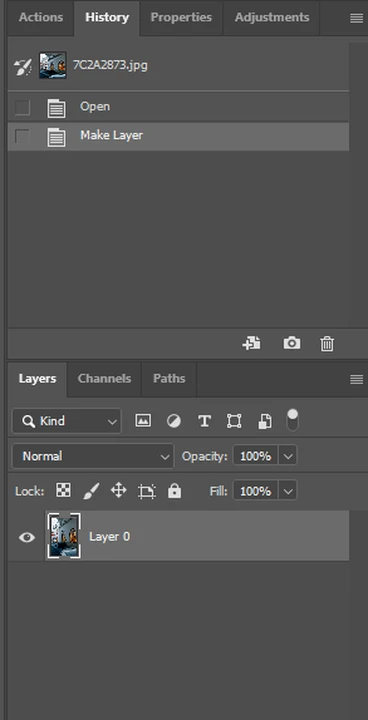
- Now, you need to convert the Background layer to a normal layer. This is due to the fact that the Background layer doesn’t support transparency, and a part of your image will need to be transparent. In the Layers panel, click on the lock icon. Once you do this, the background layer will be named “Layer 0” and you won’t see the lock icon anymore.
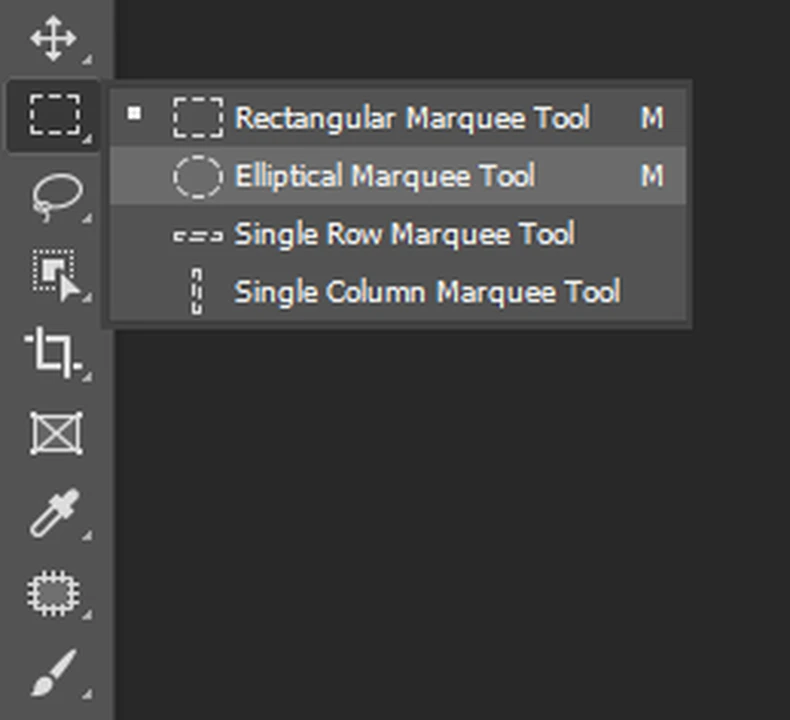
- Select the Elliptical Marquee tool by clicking on its icon. It’s okay if you see a rectangle instead of a circle. Right click on the rectangle to open the drop-down menu and select the oval. It’s also possible to use the “M” shortcut.
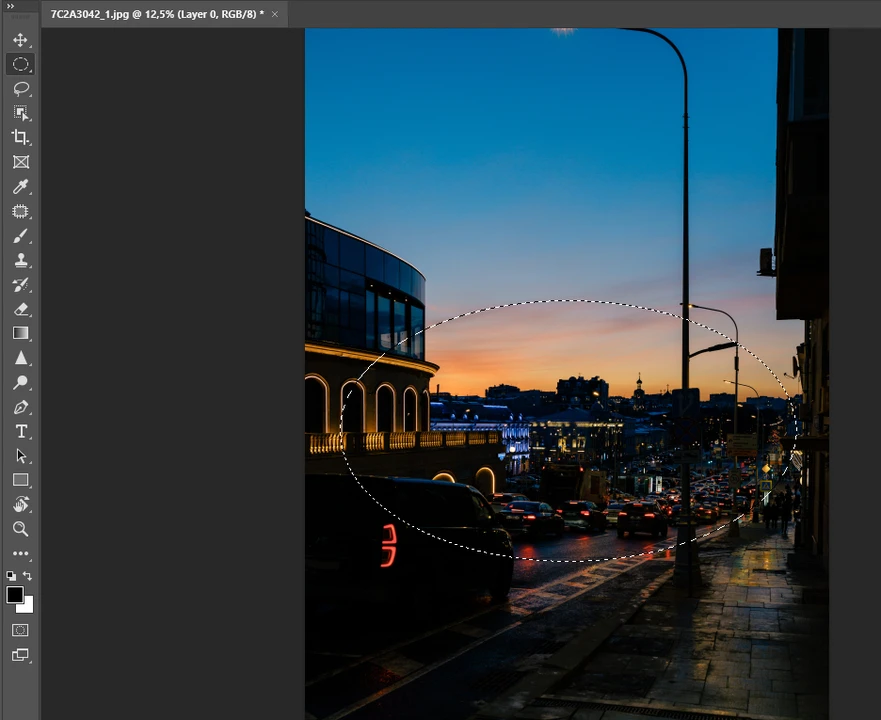
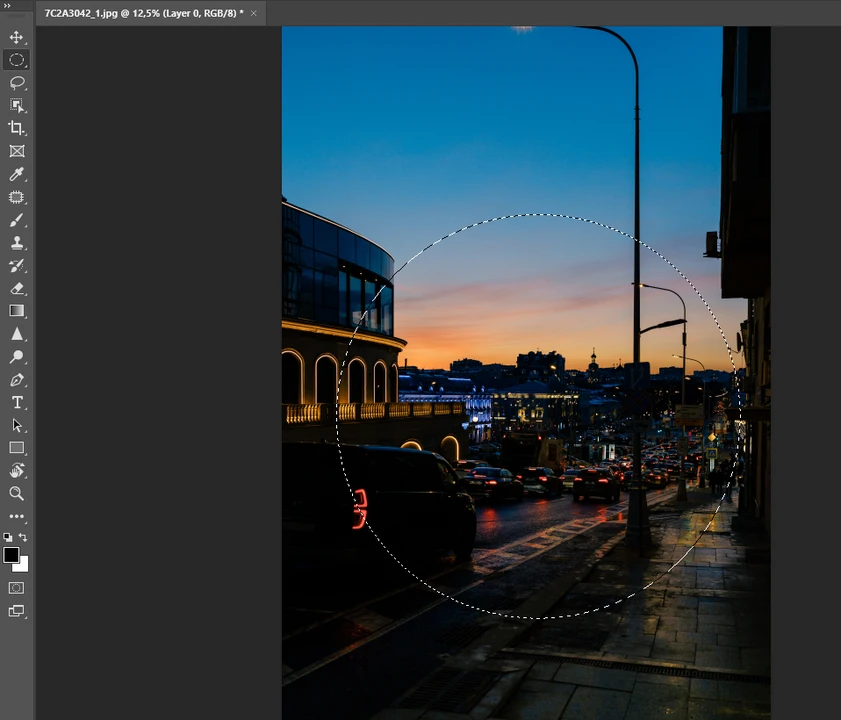
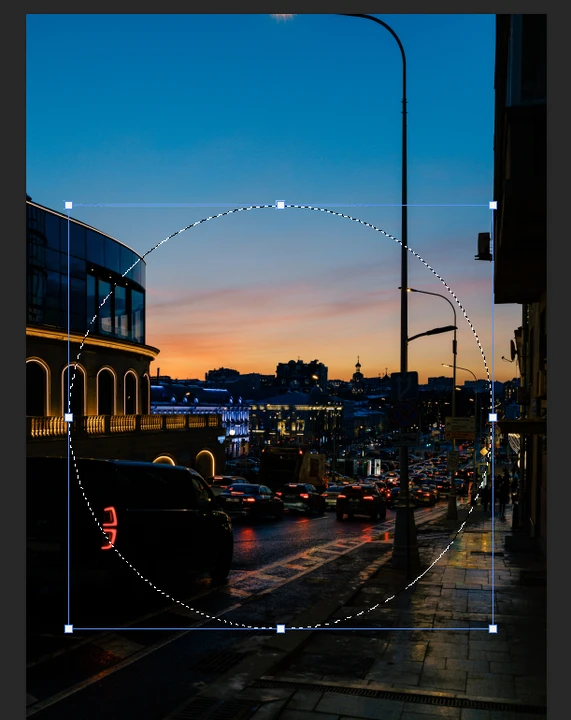
- Once you selected the Elliptical Marquee Tool, drag the cursor over the area that you want to crop to create an outline. Since it’s the Elliptical Tool, you will probably get an oval outline. But you can get a perfect circle. To do this, hold the SHIFT key, while dragging the cursor. You will see that the outline now has the shape of a circle.
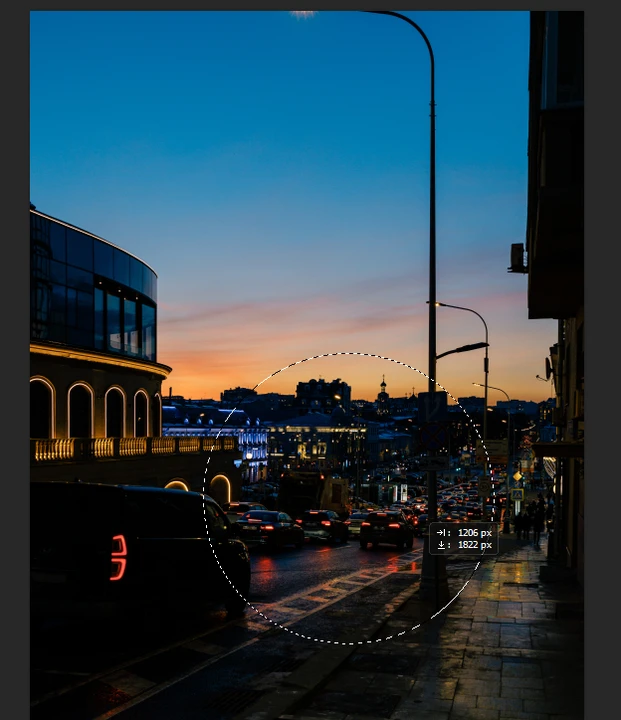
Here’s a tip! If you need to reposition the selection, while you are still drawing it, keep pressing the mouse button and the SHIFT key, and add the spacebar. Then, drag the selection to a different place. Release only the spacebar. Keep pressing the mouse button and the SHIFT key, while you are still drawing the selection. Once the selection has the size that you need, let go off the mouse button first, then the SHIFT key. Don’t do this in a different order, otherwise you will get a random oval instead of a perfect circle.
- If you already released the mouse button and the SHIFT key, but you’d like to reposition your selection, all you need to do is click inside the outline and drag the selection to a different place. Make sure that the Marquee Tool is still selected.
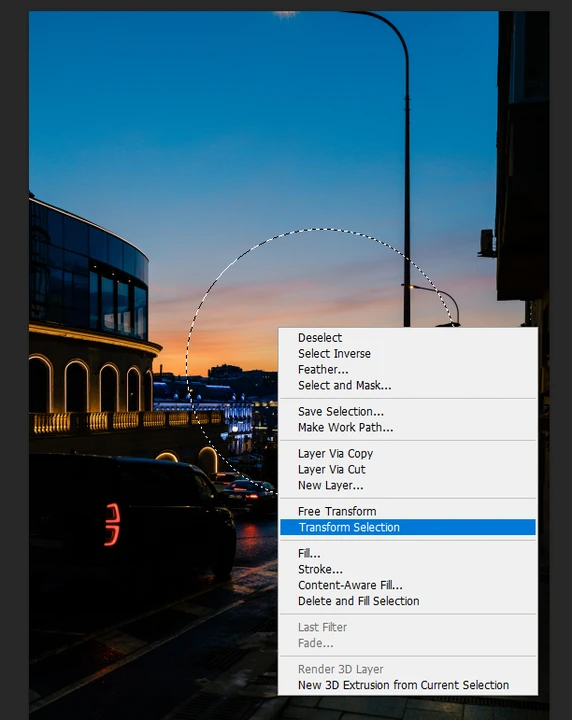
- If you want to make your selection bigger or smaller after it has already been drawn, you can right click inside the selection and select “Transform selection”. The blue borders will appear. Drag them to change the size of your selection. Press “Enter” once you are done. Don’t worry, the shape of the perfect circle will be maintained.
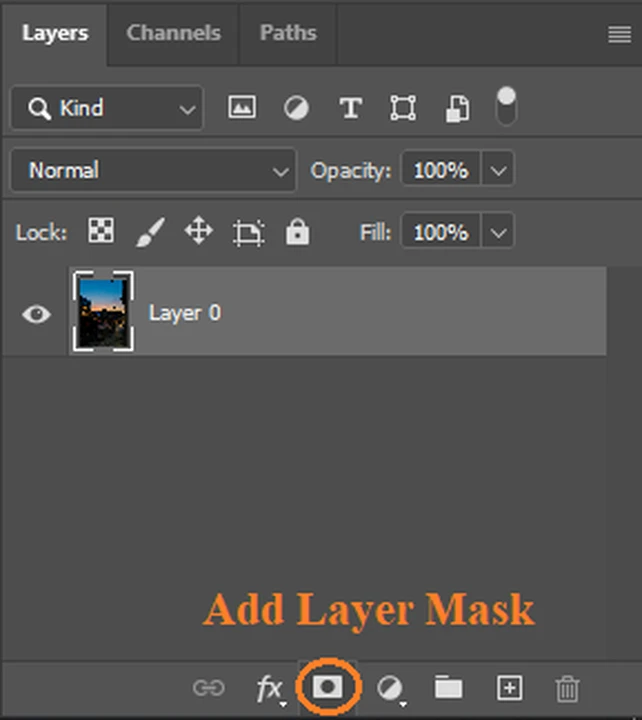
- When the area that needs to be cropped into a circle is selected, choose the Layer Mask by clicking on its icon.
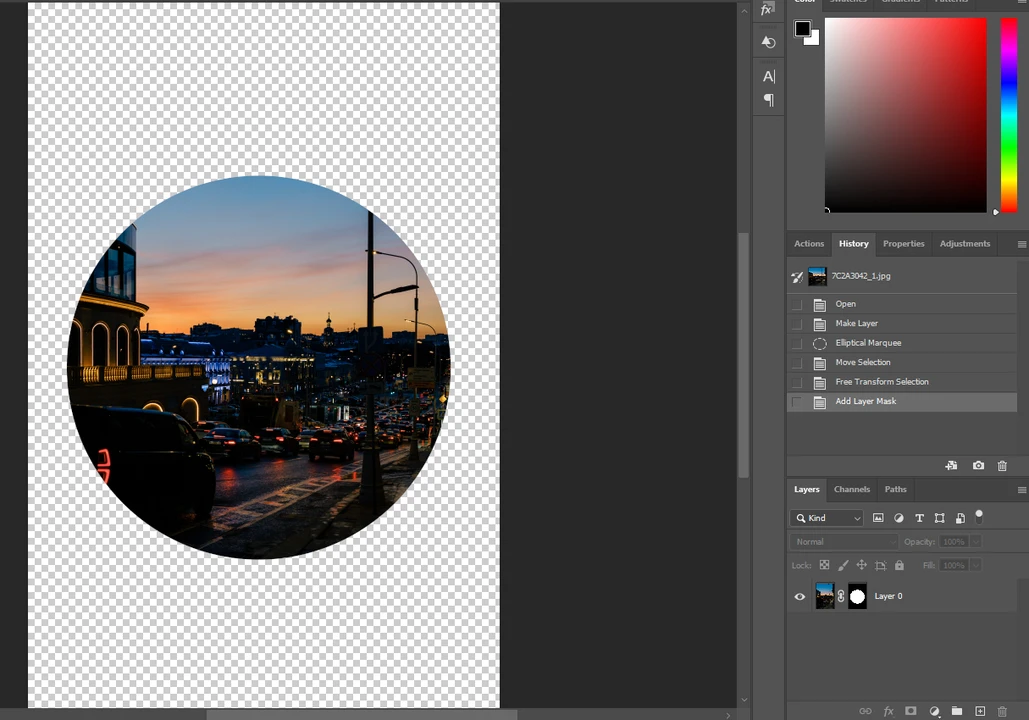
- Now, you need to load the mask as a selection. Press ‘CTRL” on Windows or “CMD” on Mac, then click on the mask in the Layers panel.
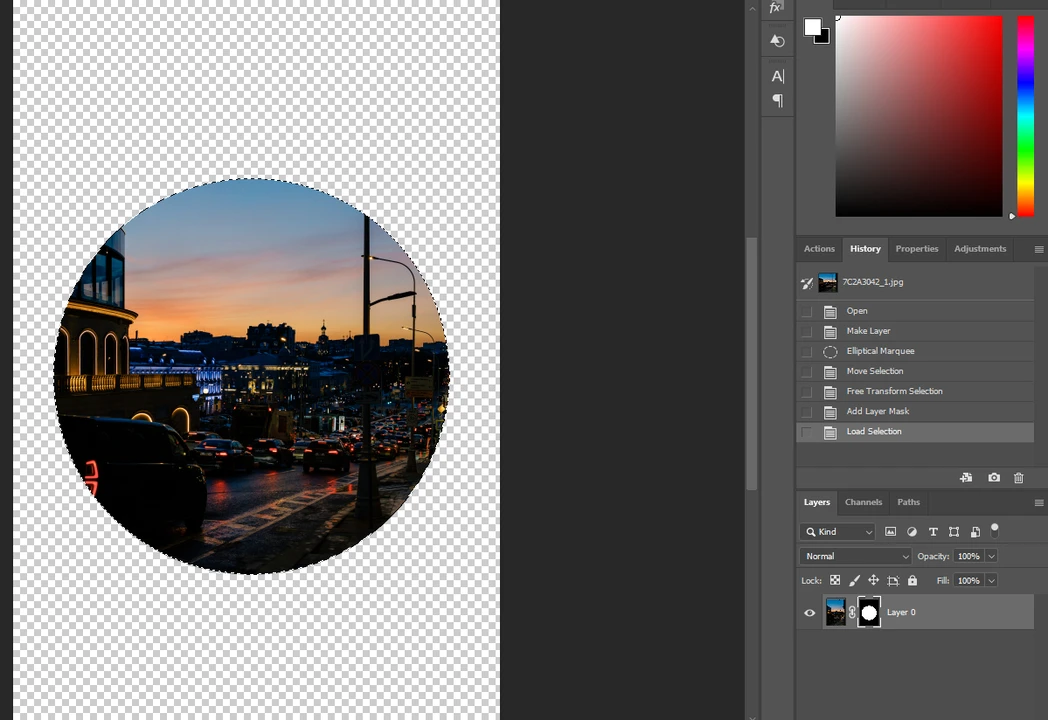
- You have a lot of extra pixels that are transparent, so you don’t really need them. To crop your image quickly, go to “Image” > “Crop”.
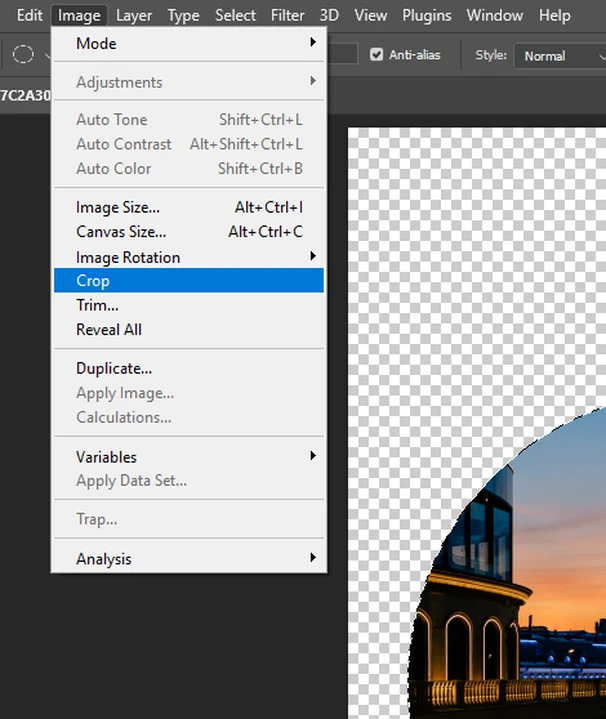
And just like that, all the extra pixels are gone!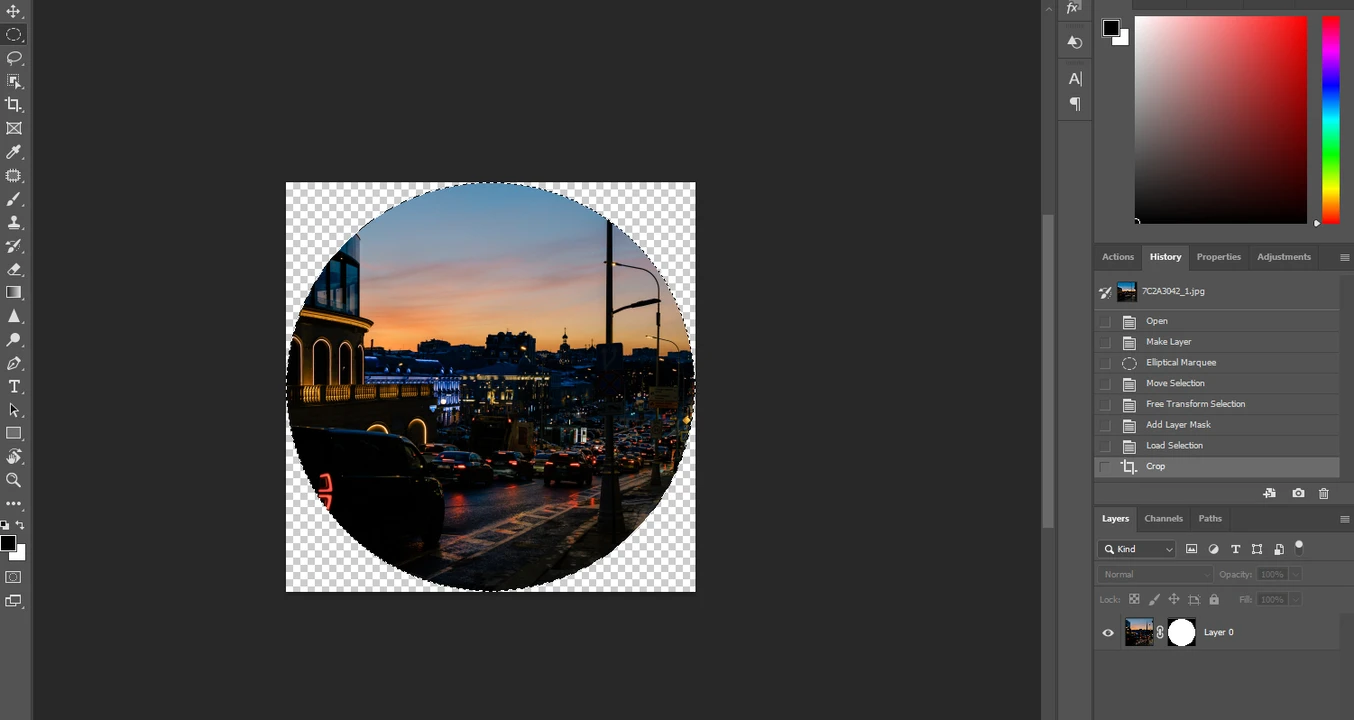
- It’s time to export your image. Go to File > Export > Export As….
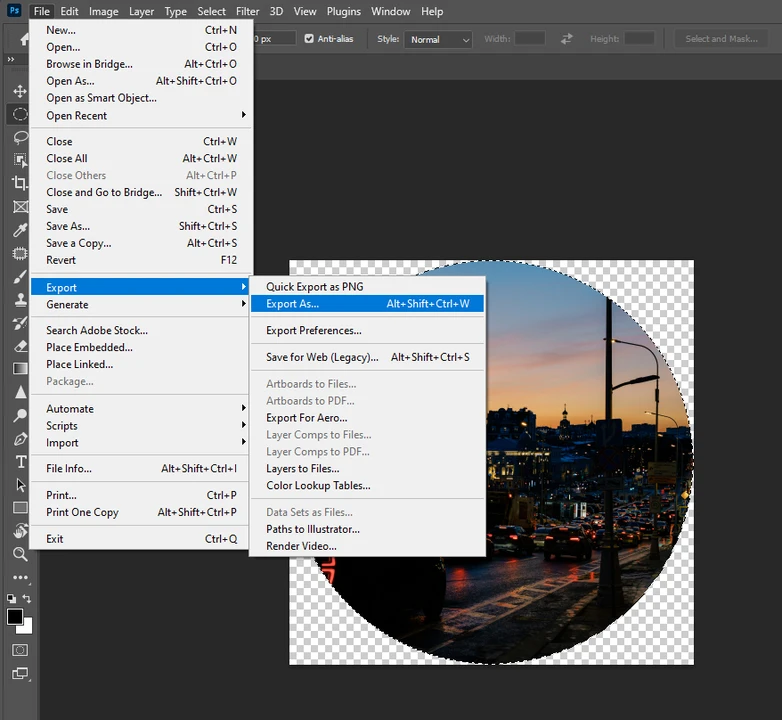
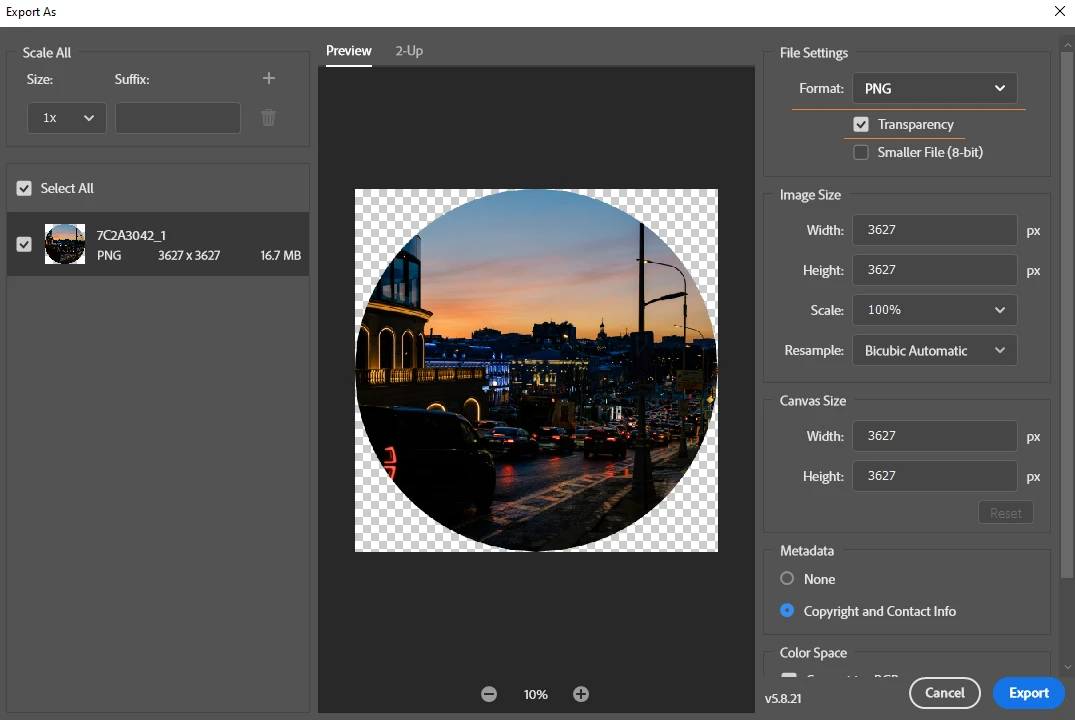
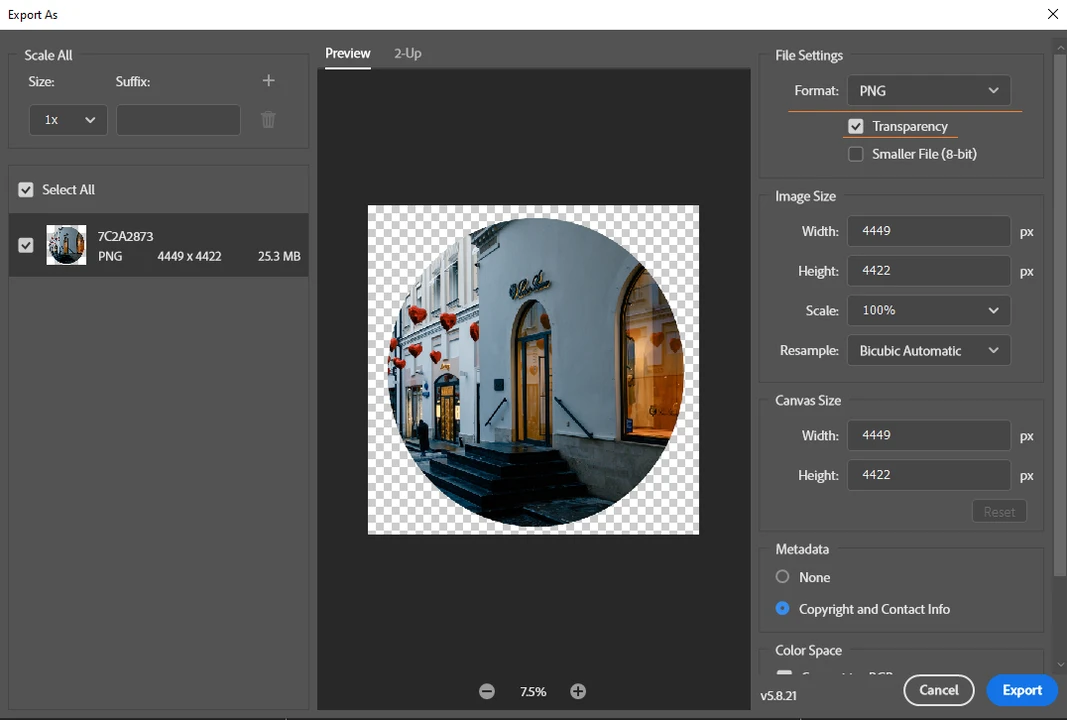
- This will open the window of the export settings. Here, select the “PNG” format. Make sure that the box next to “Transparency” is checked. This is important because you cannot export in JPG since this format doesn’t support transparency. If you export your image as JPG, you will see a white frame around your circle. Specify other settings if necessary and click on “Export”.
How to Crop an Image into a Circle with the Frame Tool
There’s actually another way how you can crop in a circle in Photoshop. Let’s take a look at it:
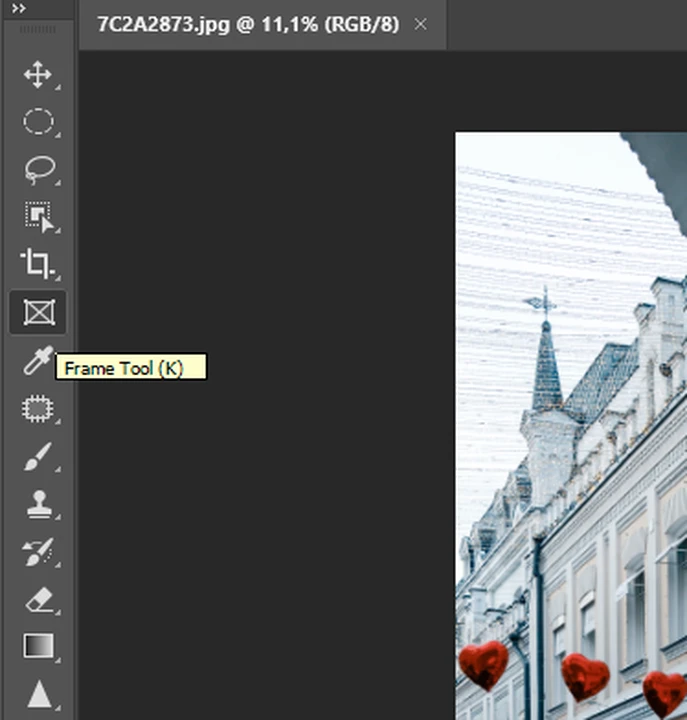
- Once your image is open in Photoshop, select the Frame Tool. You can use the “K” shortcut for that.
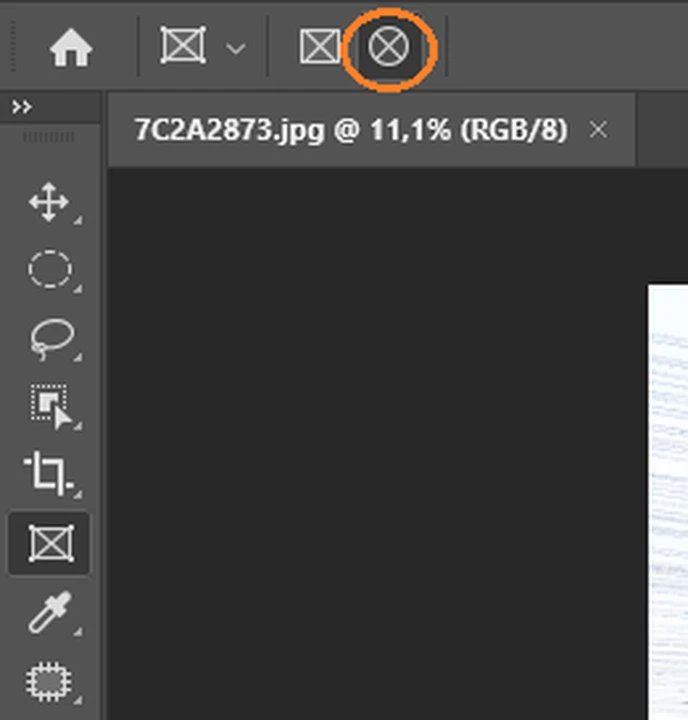
- In the Options bar at the top, pick the circle option.
- Before you do anything else, you will need to unlock the Background layer. To do this, click on the lock icon in the Layers section. Once you see the words “Layer 0” instead of “Background”, it means that your layer is now unlocked.
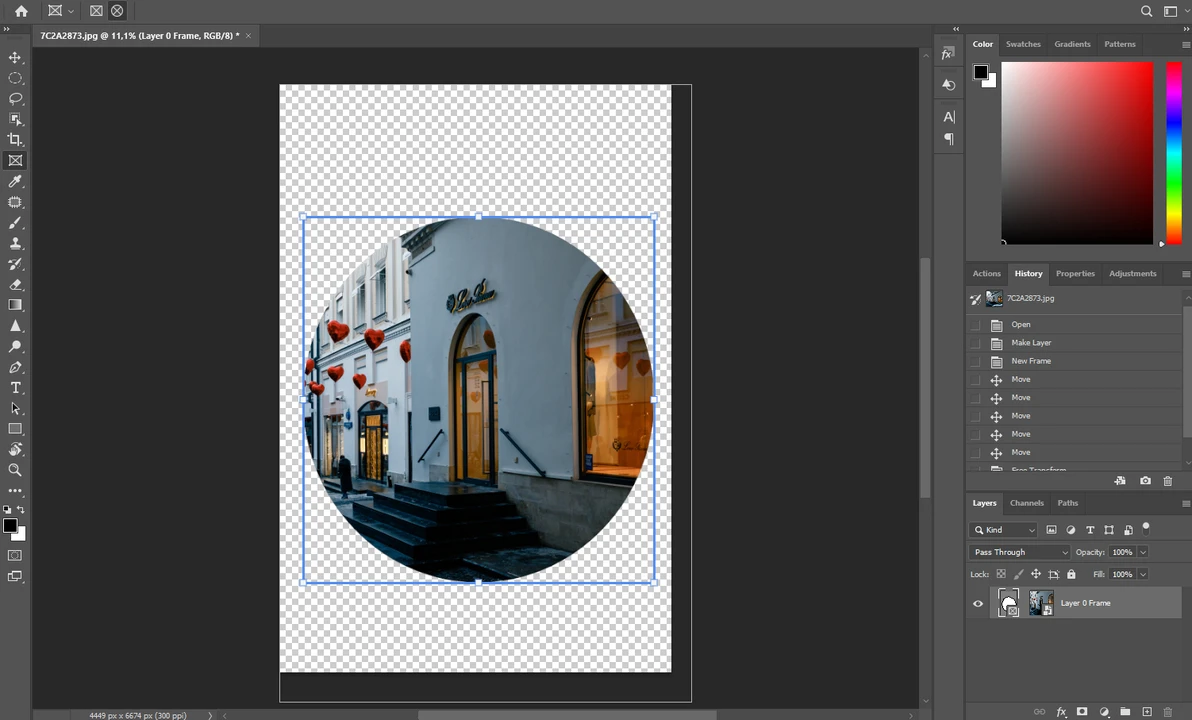
- With the Frame Tool selected, drag the cursor over the area that you want to crop into a circle. Let go of the mouse button. Now, you created a new frame over your photo!
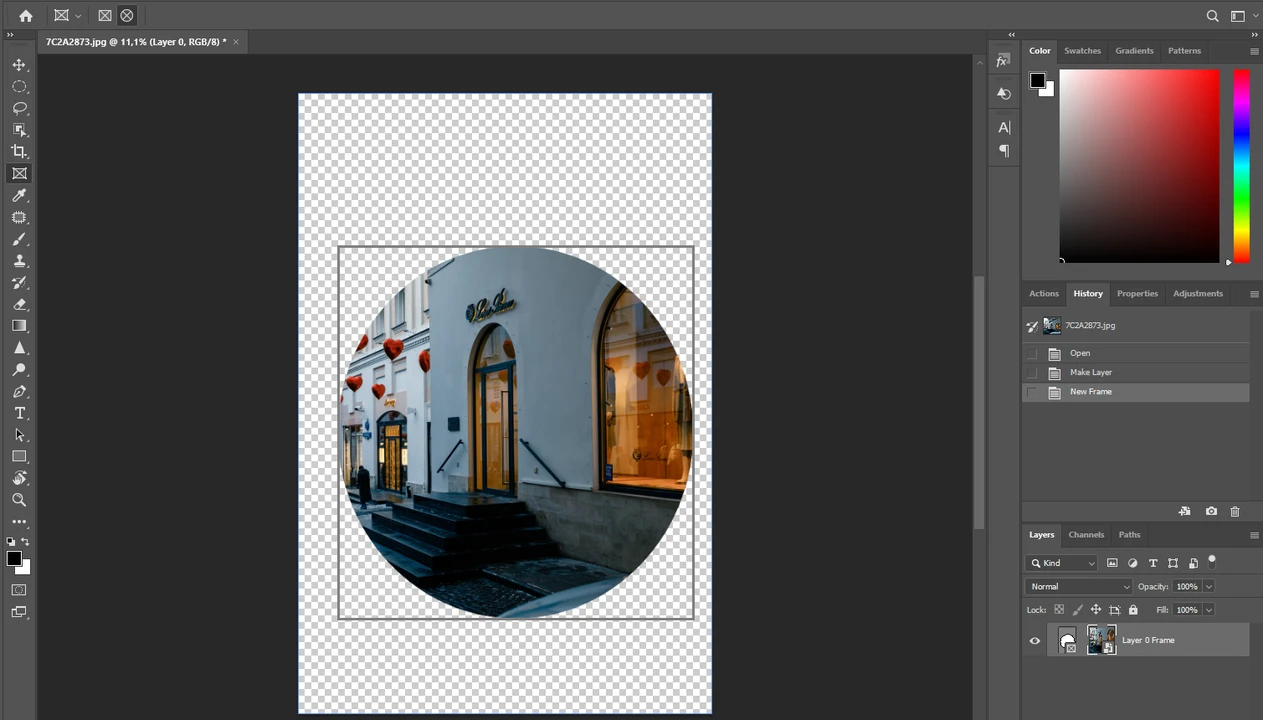
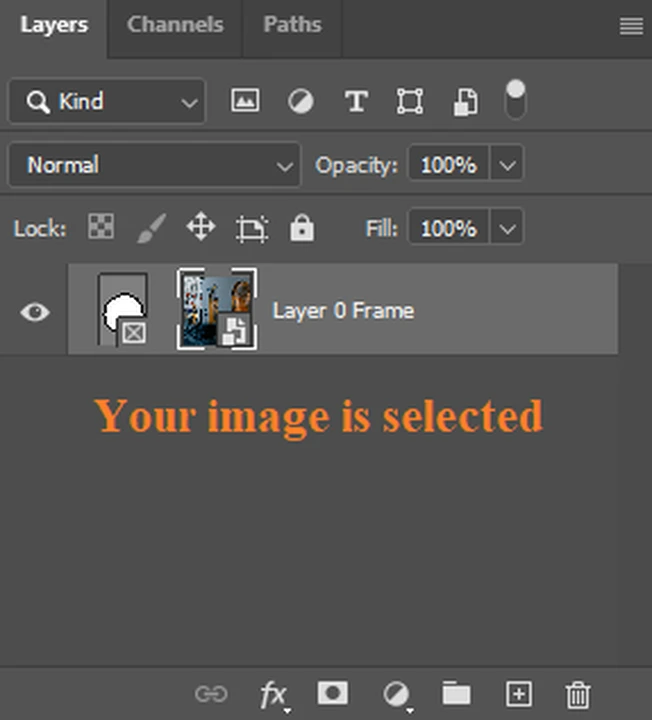
- Click on your image in the Layers panel to select it. Now, you can reposition the image with the help of your cursor.
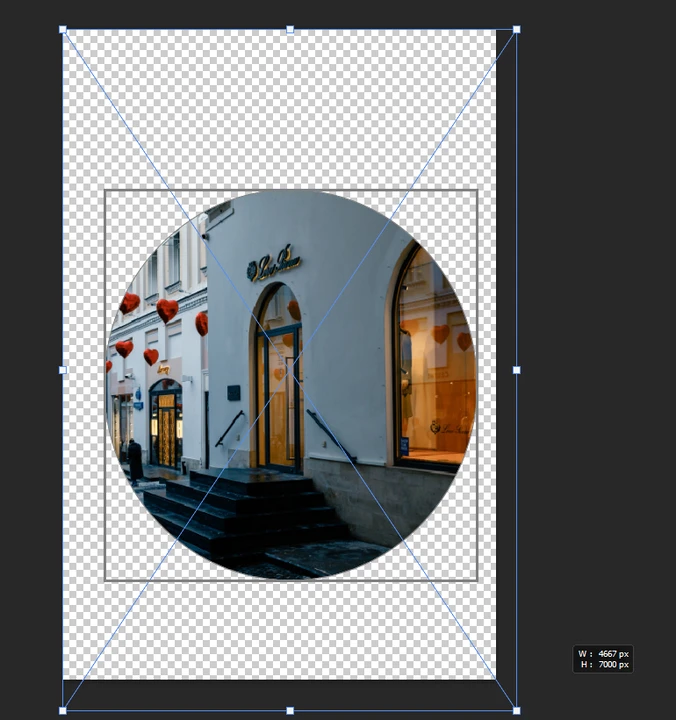
- If you want to make your image bigger or smaller, you can click on CTRL + T or Command + T to enable the Free Transform tool. This will allow you to resize your image in Photoshop. Once you are done, press “Enter”.
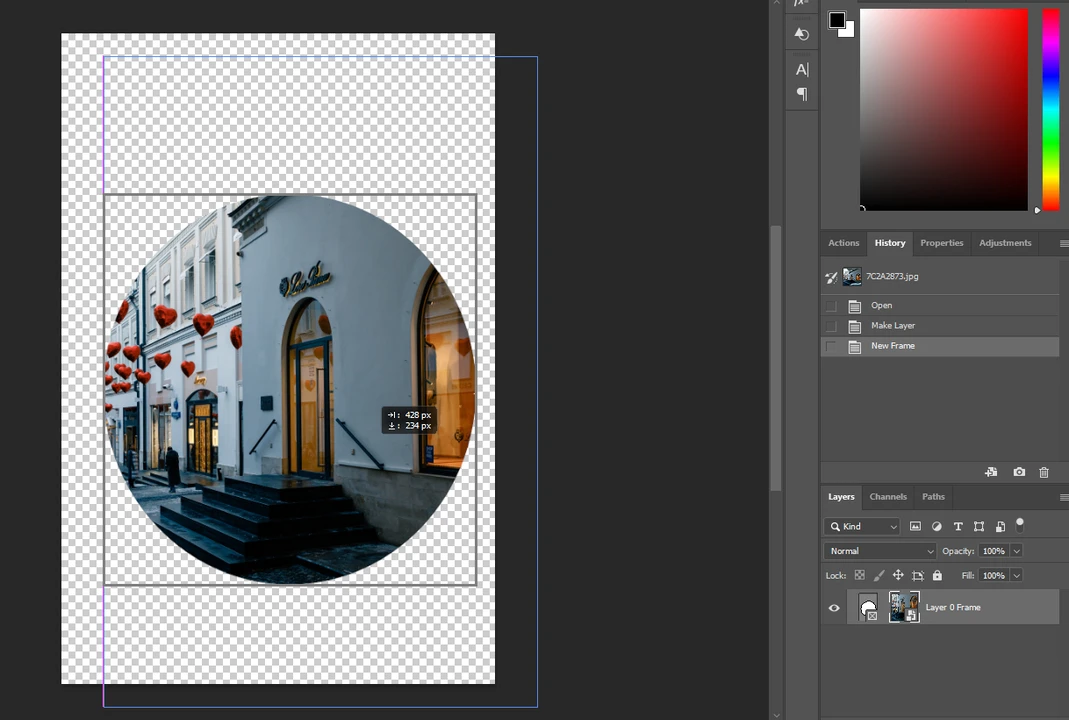
- If you want to change the size of the frame, click on the Frame in the Layers panel to select it. Then drag the blue borders to resize the circle.

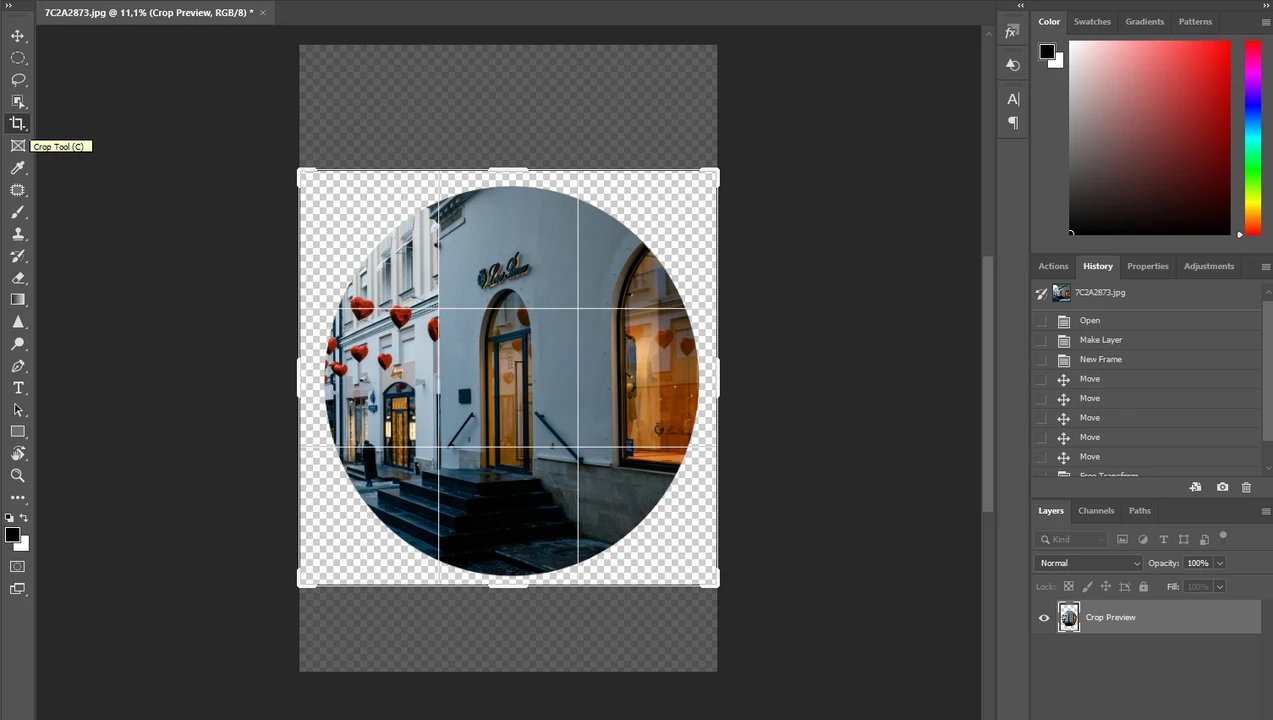
- Select the Crop Tool – you can press “C” to enable to – and trim away the unnecessary, transparent bits of the image.
- It’s important to select the Frame in the Layers panel before you export. Once you do that, go to “File” > “Export” > “Export As”.
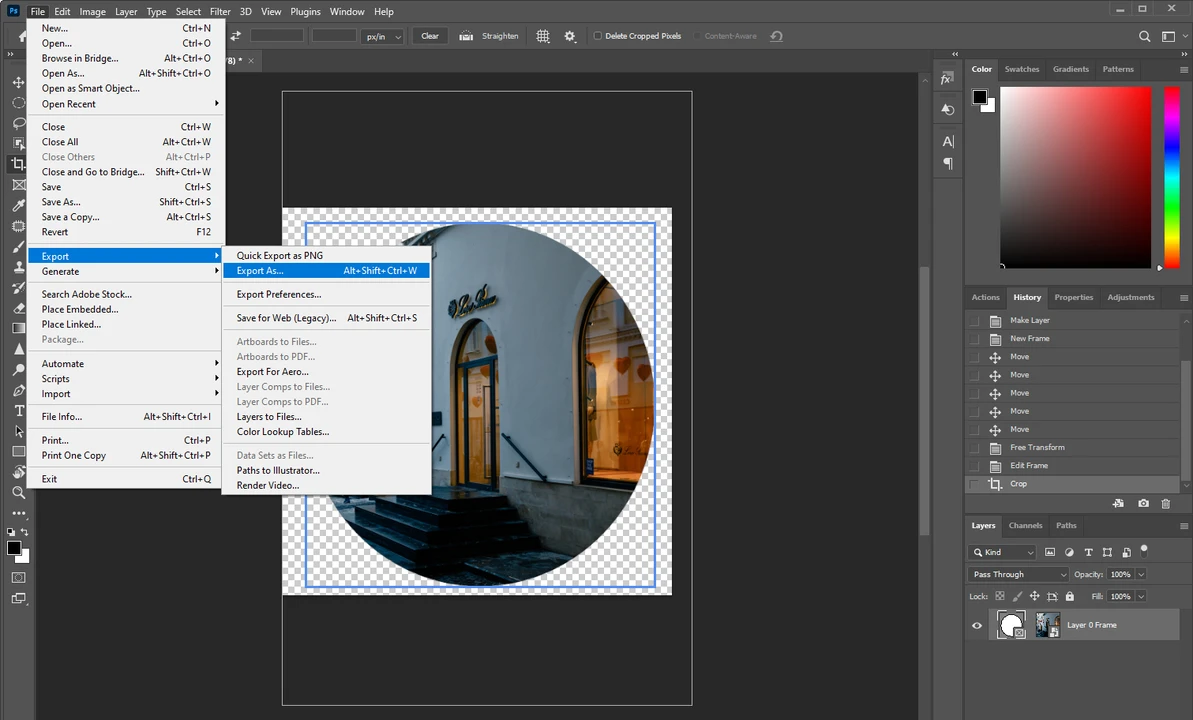
- In the export settings, select PNG in the Format drop-down menu. Also, make sure that the “Transparency” is checked; this is highly important. When you are done with the settings, click on the “Export” button.
All done!
There’s an Easier Way
Since you’re reading this article, chances are, you already have Photoshop and aren’t looking for any alternatives. But you have to admit that it’s somewhat complicated to crop an image into a circle in this advanced program. Do you wish there was an easier and quicker way to do this? Well, there is! Watermarkly can help you with that.
Watermarkly is a browser-based app, which means you won’t have to spend your time or your device’s memory space on downloading and installing anything. You won’t have to sign up or create an account. You can open the app and get to work right away. More to that, the app is designed specifically for cropping and doesn’t have a ton of complicated tools, so you will figure out how to use it in little to no time. Watermarkly is perfectly suitable for those who have never worked with an image editing software before, so if you know Photoshop even a little bit – which is an advanced software – you will have no trouble using Watermarkly.
How to crop an image into a circle in Watermarkly
With Watermarkly, you will get the results that you need in fewer steps. Here’s how you can do it:
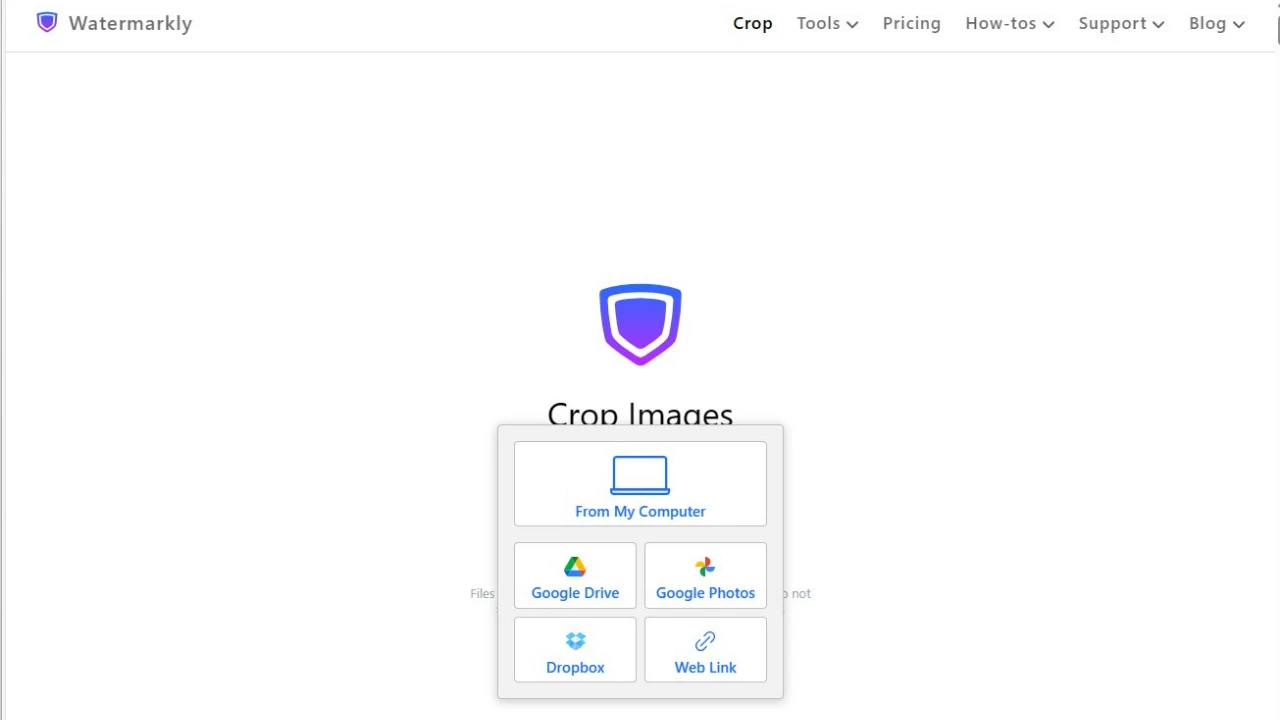
- Import one or several images that you want to crop. You can drag and drop them into the app or use the “Select Images” button. You also have the option to upload your files from Google Drive, Google Photos or DropBox. It’s possible to import via weblink, too.
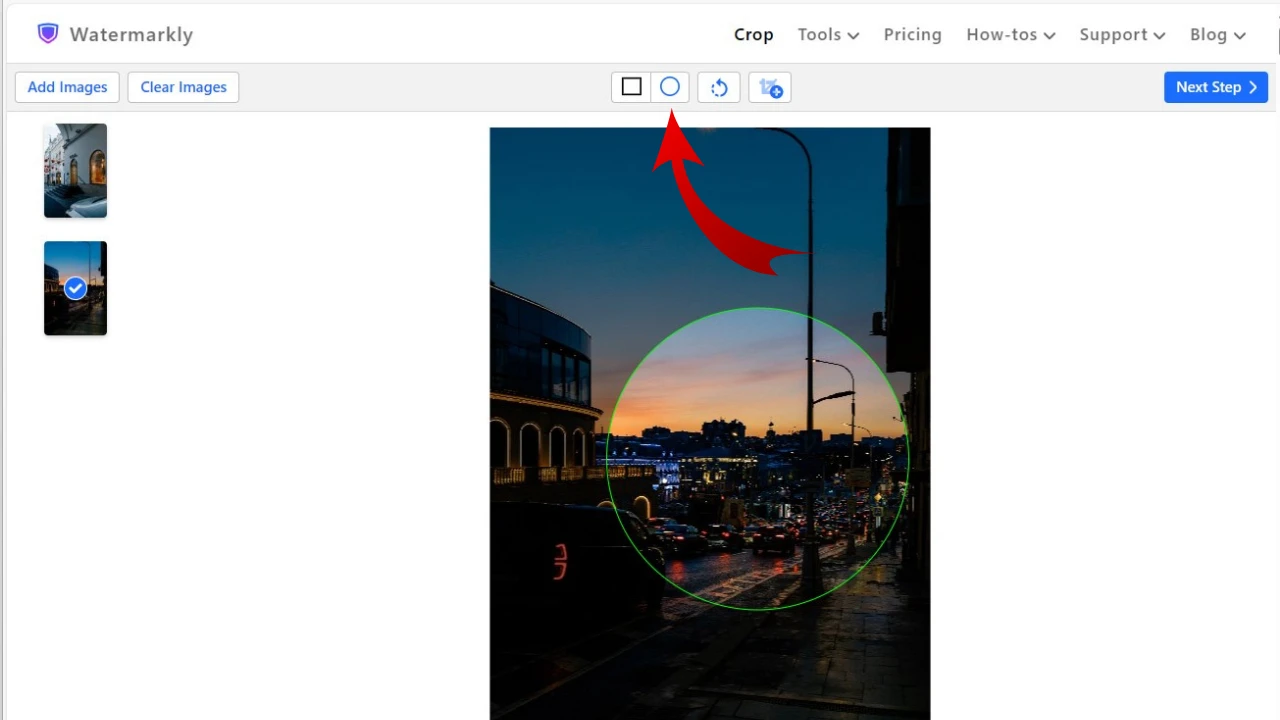
- Once your images are in the app, select the circle shape at the top. The circular cropping area will appear on your image.
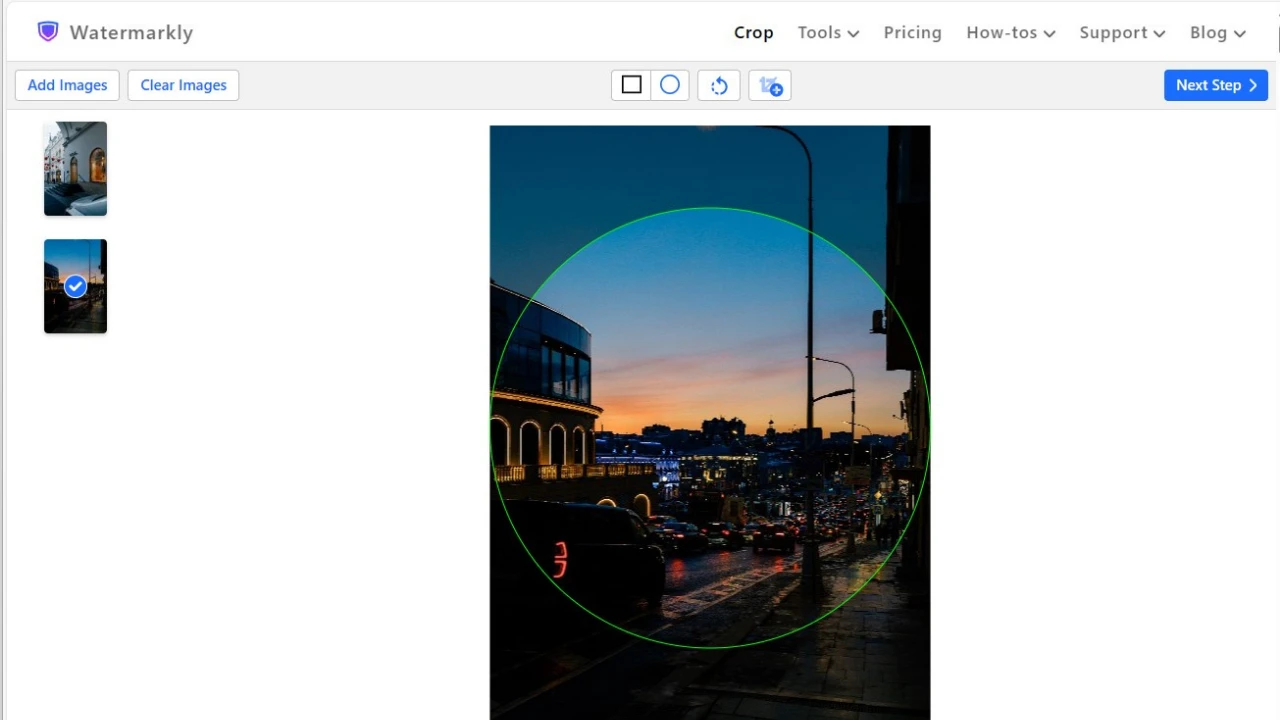
- To reposition the cropping area, place the cursor inside and drag it to a different place.
- Resize the area by placing the cursor on the green border and dragging it.
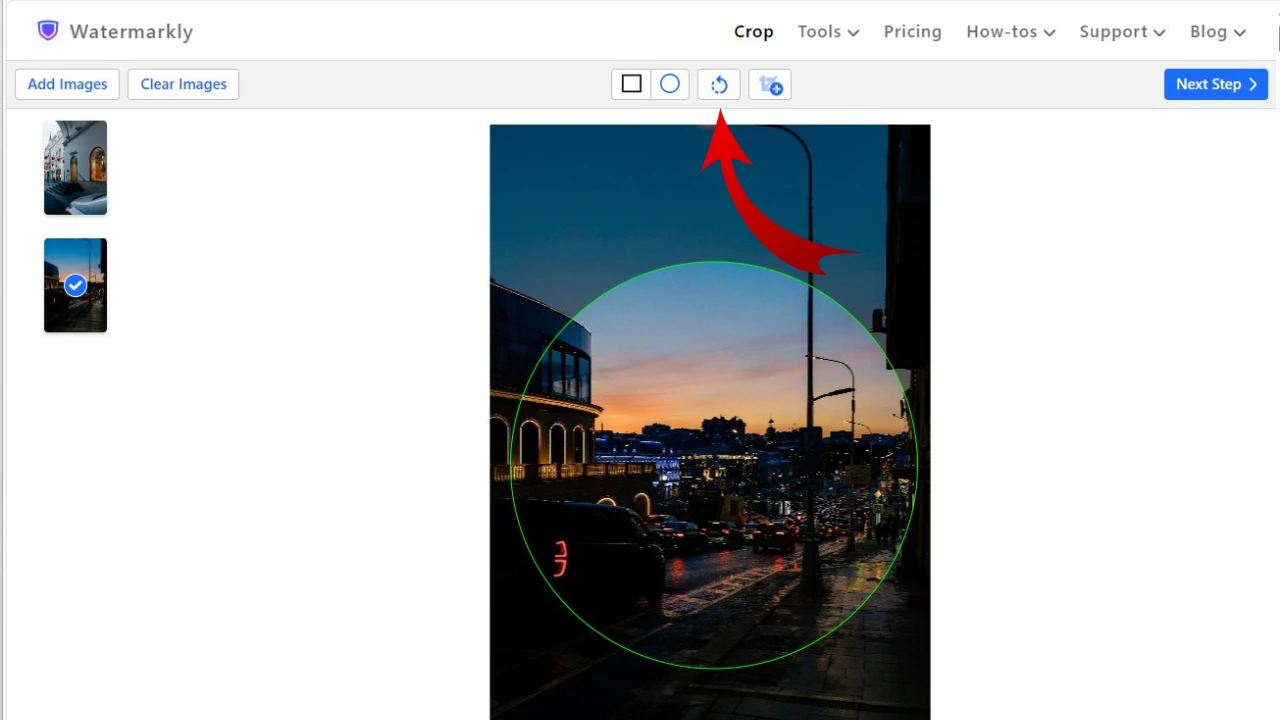
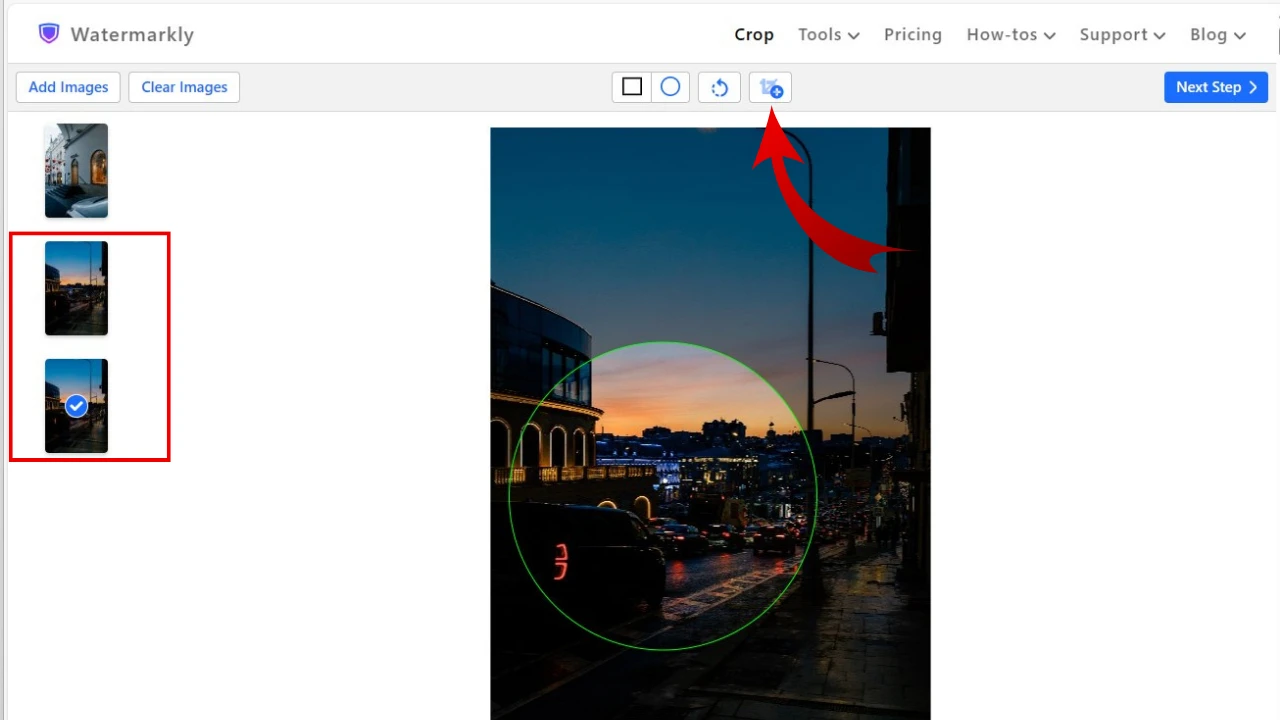
- To tilt the entire image, click on the circular arrow at the top, then drag the slider to the left or to the right until you get the desired result.
- Watermarkly has a feature that you might like. Here, you can duplicate your image and crop it in a different way. Click on the icon next to the circular arrow. Your image will be duplicated, and you can adjust the cropping area on it differently.
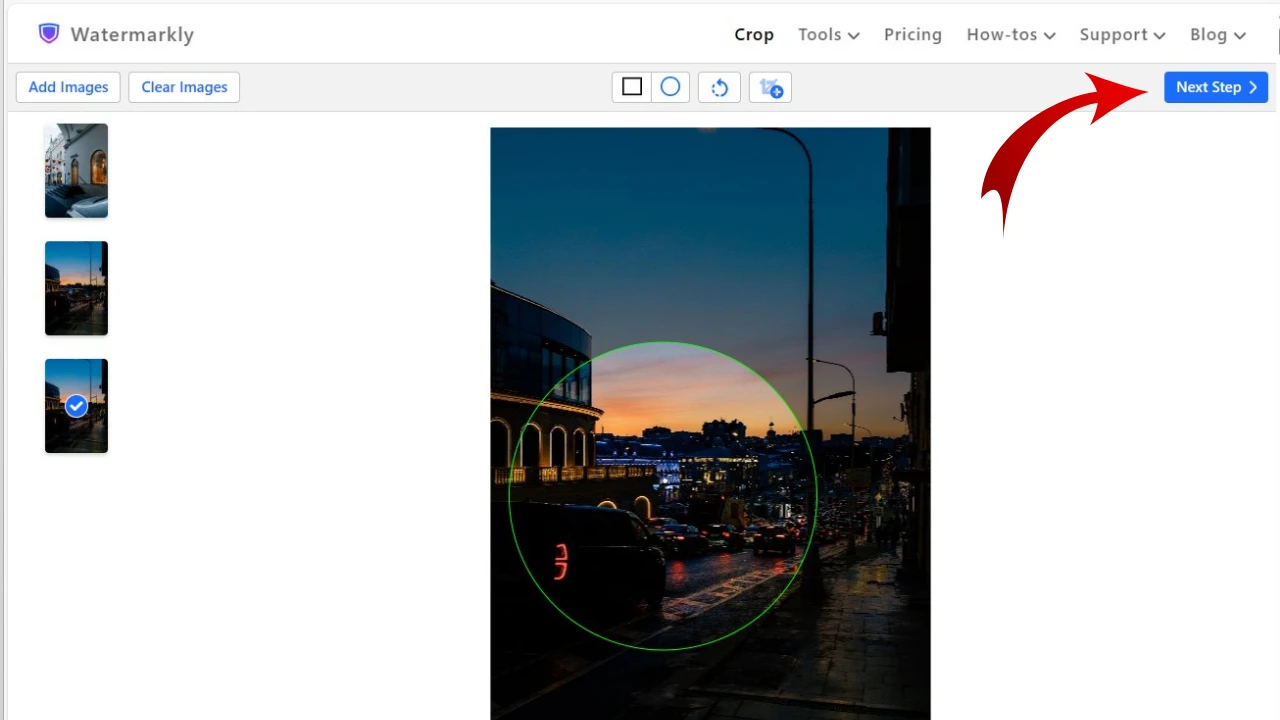
- When you are done with the editing, click on Next Step to go to the export settings.
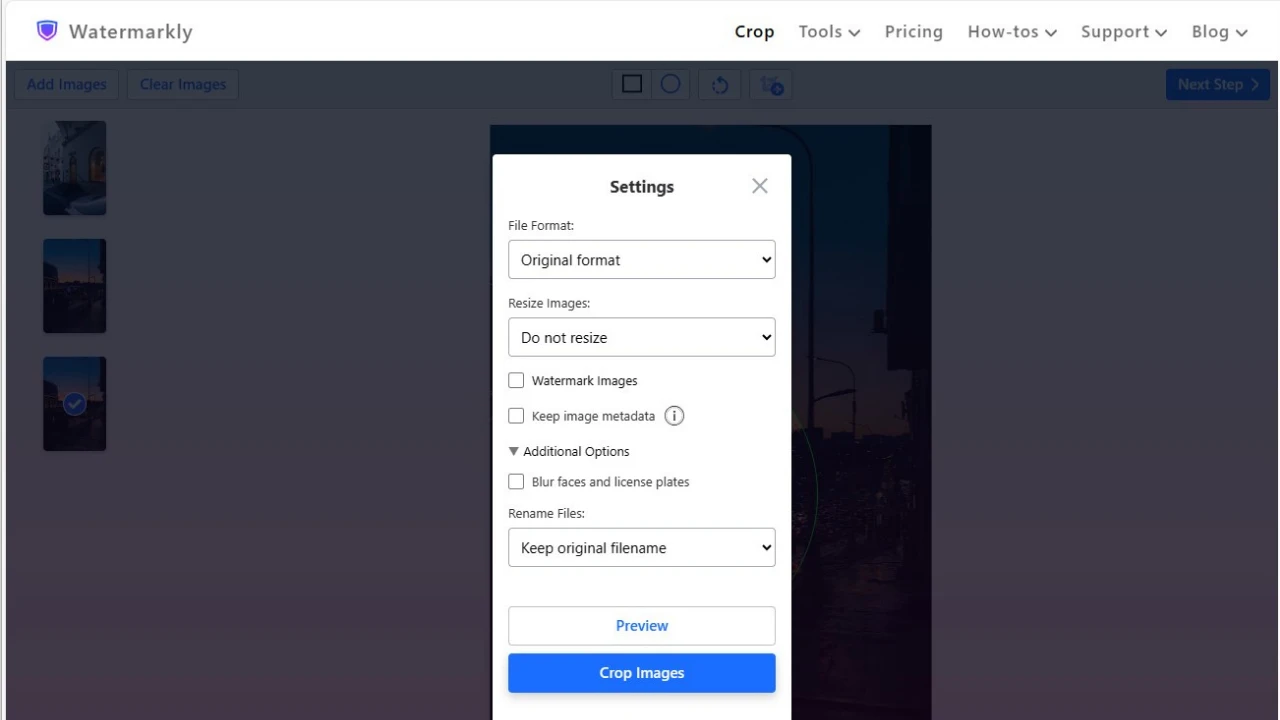
- In the settings, you can select a new file format. If your original image is in JPG, it’s better to select PNG or WEBP as both of these formats support transparency. Here you can pick a different size and name for your cropped images, keep the metadata, add a watermark to photo and even blur faces and blur license plates.
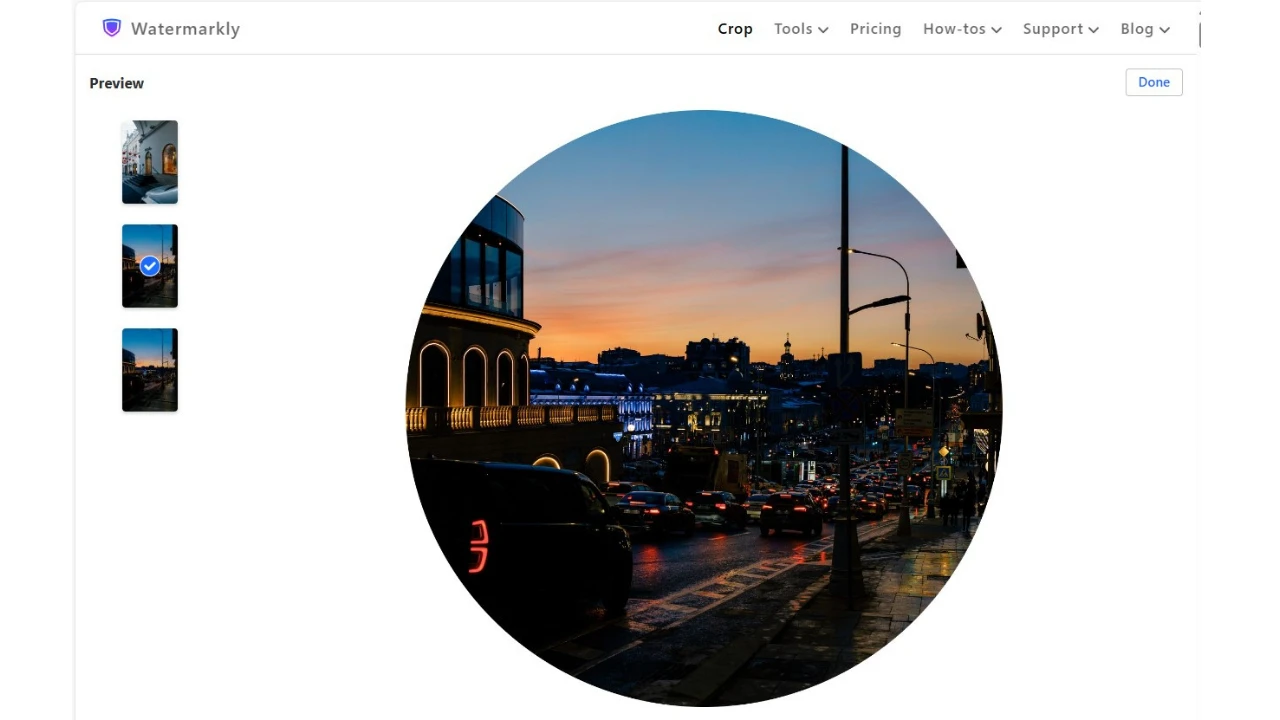
- You can go to the Preview section by clicking on the “Preview” button. Here, you can see what your cropped images will look like. If there’s something that you don’t like, simply close the preview section and exit the export settings to get back to the editing stage.
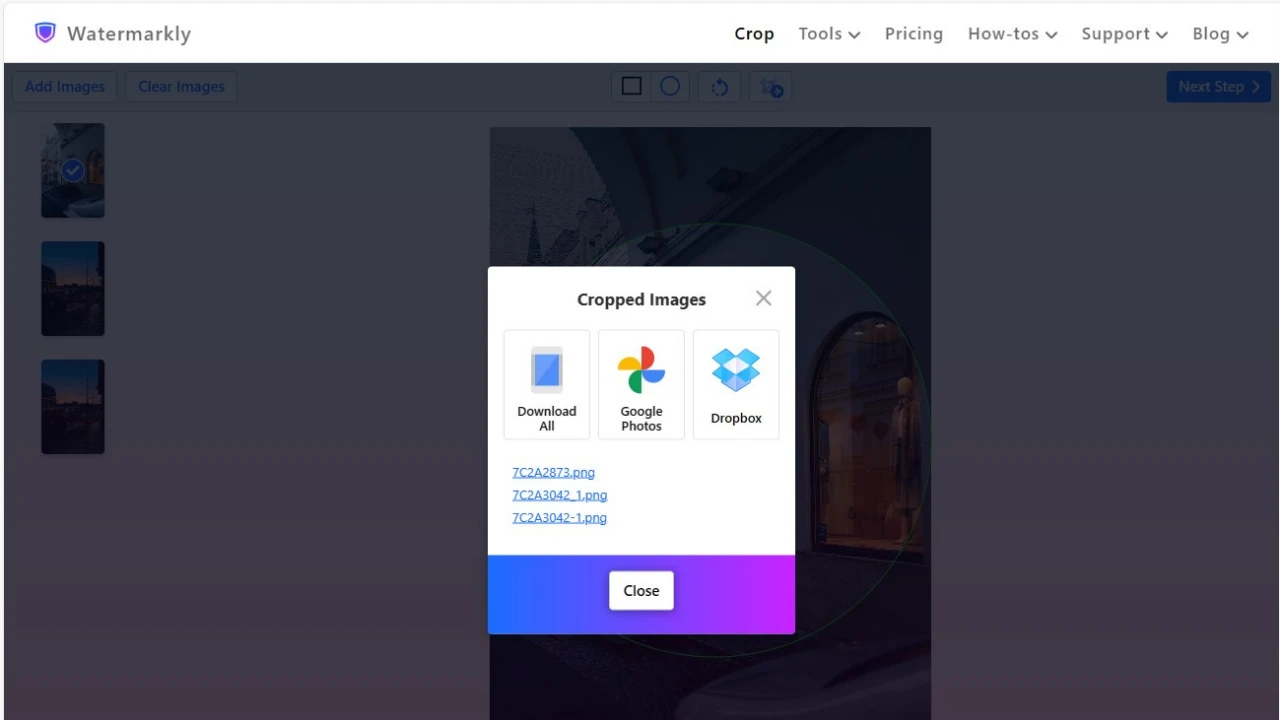
- If you are happy with everything, click on “Crop Images” in the export settings. When the app is done cropping your images, download your cropped copies to your device or a cloud storage.
That’s it!
No Layer masks or frame tools. Quick and easy. Right?
Watermarkly vs Photoshop
Watermarkly has both advantages and disadvantages over Photoshop.
It’s a web-based app, so you can use it on any device that has a browser – a PC, a laptop, a tablet or a smartphone. Photoshop has a mobile version which is called Photoshop Express, but it’s not nearly as powerful as the advanced software that can only be used on a PC or a laptop. Not to mention that Photoshop Express doesn’t have the Marquee Tool or Frame Tool, so you won’t be able to crop into a circle using this mobile app. With Watermarkly, you can crop images into a circle anywhere and on any device or operating system.
Watermarkly works in a browser, so it won’t take up any memory space on your device. Photoshop requires a decent amount of memory space, if you are using it on your computer. You will need to have some decent hardware for the software to work properly, too. All Watermarkly requires is connection to the internet and a browser.
If you know how to do a couple of things in Photoshop, but you are still mostly a beginner when it comes to image editing, Watermarkly can be much easier for you to use because it isn’t as complex and complicated as Photoshop. It has an intuitive and straightforward interface as well as a set of all the basic tools.
Watermarkly will never overwrite your original files or change them in any other way. Watermarkly automatically creates copies of your images and crops them. Photoshop doesn’t overwrite files, either. Thus, you won’t have to worry about the safety of your original files with either Watermarkly or Photoshop.
Photoshop does support a wider range of formats, but in Watermarkly, you can crop images in JPEG, crop GIF, crop PNG and a couple others; all of these formats are popular, so in most cases, Watermarkly will be of great use to you.
Watermarkly is actually a website that offers a set of different online tools. On this website, you can add a watermark, crop your images into a circle or rectangle, resize photo and compress your image and more. Photoshop has a TON of tools and features, some of which are quite advanced. It’s insanely complex. You can use it for a variety of different purposes.
Watermarkly is simple. It can only be used for some easy and basic image editing. This can viewed as both an advantage and disadvantage because you might need Photoshop for a vast variety of purposes. But Watermarkly can make some of those same tasks much easier and help you speed up your workflow. So, it might be a better idea to use both Photoshop and Watermarkly, depending on what you want to achieve and how much time you have.
Conclusion
Now you know how to crop an image into a circle in Photoshop. More to that, you’ve learnt how to do it in two different ways and neither of them is complicated or takes too much time. This task is definitely not as challenging as you might’ve thought. Nevertheless, Photoshop is an advanced software that requires some time to master. It has a wide range of tools and features which can be both an advantage and a disadvantage. If you only have a few minutes to crop an image into a circle, there’s an alternative that you can use – a browser-based app, Watermarkly. With it, you’ll be able to get the same result, but it will take you less time and it’ll surely be less complicated.
More articles
How to Resize an Image in Photoshop
How to Blur Faces in Photoshop
How to Upscale an Image in Photoshop