
How to Crop an Image in Photoshop
by ![]() Lina Thorne • Updated · Posted in Photo Editing
Lina Thorne • Updated · Posted in Photo Editing
Photoshop is probably the most well-known and versatile image-editing software nowadays. It offers a mind-blowingly wide range of tools and features – from basic to advanced; including everything you need to crop an image.
In fact, there are several ways that you can crop your image in Photoshop:
- using the Crop Tool;
- using a Clipping Mask.
In this post you will also learn about:
- how to crop to a specific pixel size;
- how to crop to a specific aspect ratio;
- how to crop and rotate in Photoshop.
Let’s move on and see how cropping works in Photoshop.
How to Crop an Image in Photoshop Using the Crop Tool
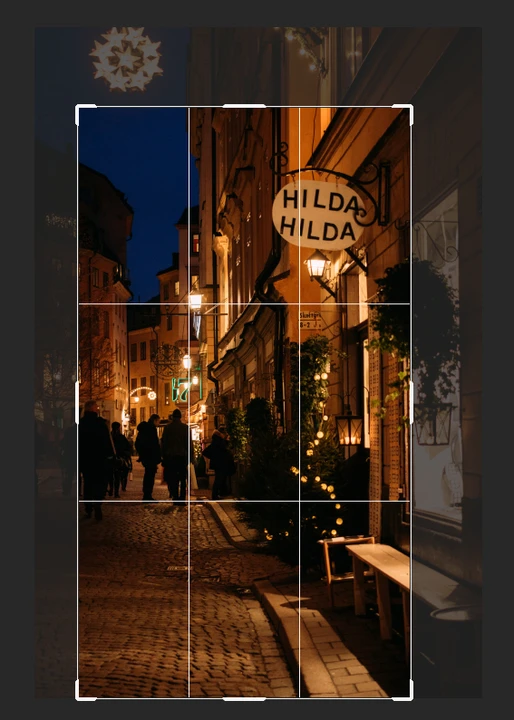
To get rid of all the unnecessary parts of your image in Photoshop, you can use the Crop Tool. Don’t worry, it’s much easier than you might expect.
Here is how to use the Crop tool:
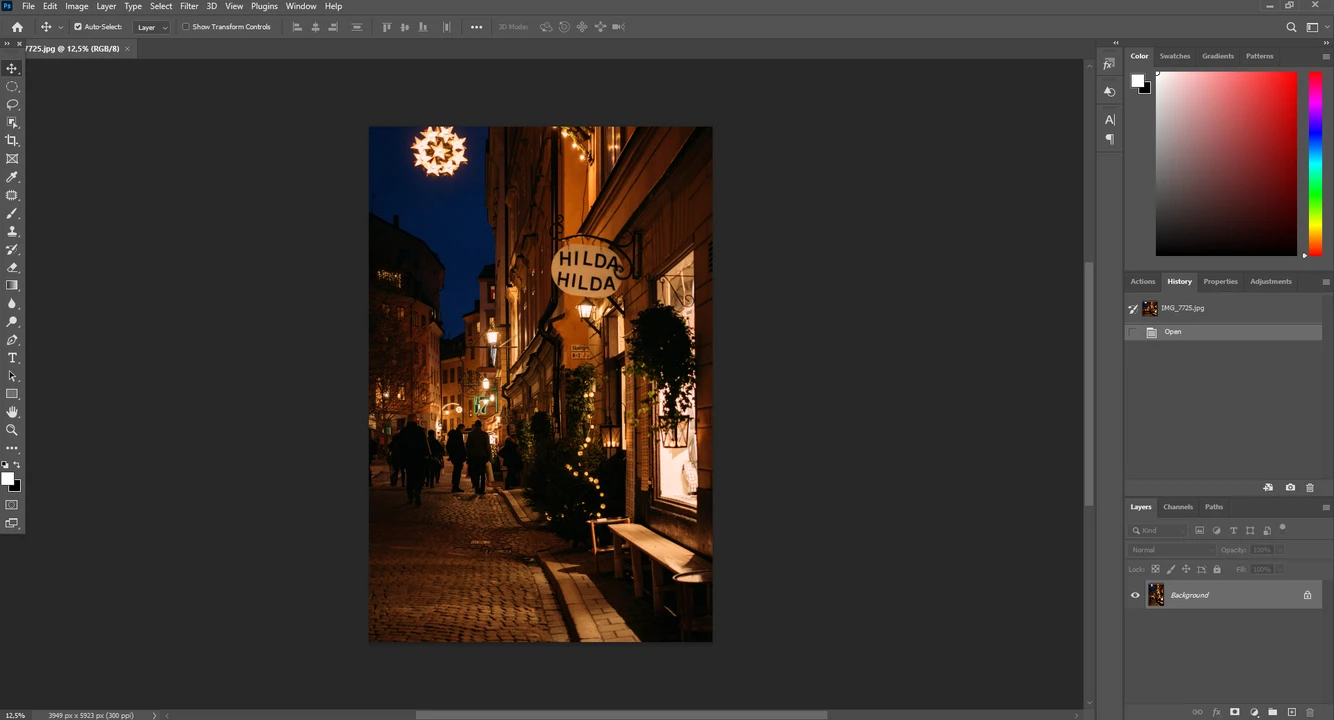
- Launch Photoshop.
- Go to File > Open, then select the photo you wish to edit.
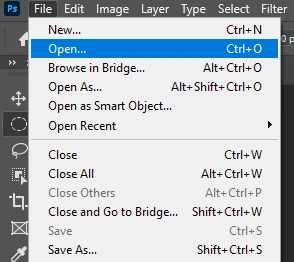

- To access the Crop tool, press “C” or click on its icon in the toolbar.
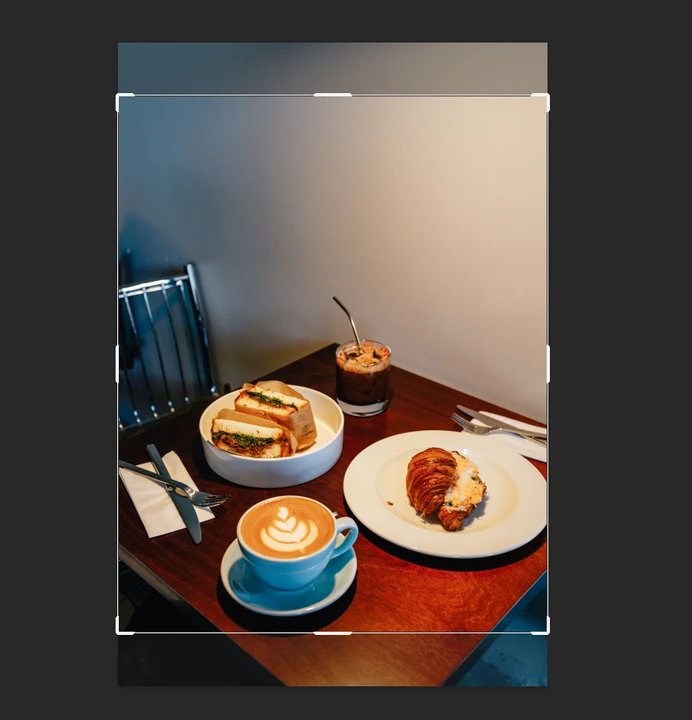
- The borders of the cropping area will appear on your image.
- Make sure that the “Delete Cropped Pixels” option at the top is disabled. Otherwise, you will lose pixels of the cropped out areas.
- You can also go to the Options drop down menu. Here, you can find the “W x H x Resolution” option. It’ll allow you to adjust the cropping area however you want, but only if the boxes to the right are empty and there are no values in them.
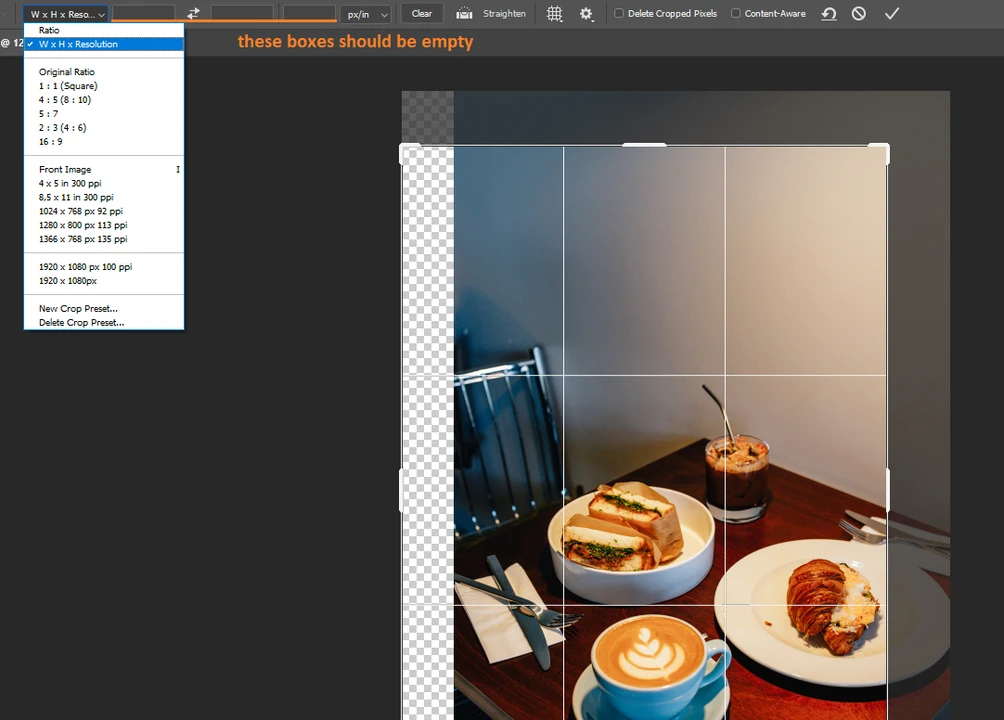
- Alternatively, you can pick the “Original ratio”. This way the original ratio of the height to the width will be locked.
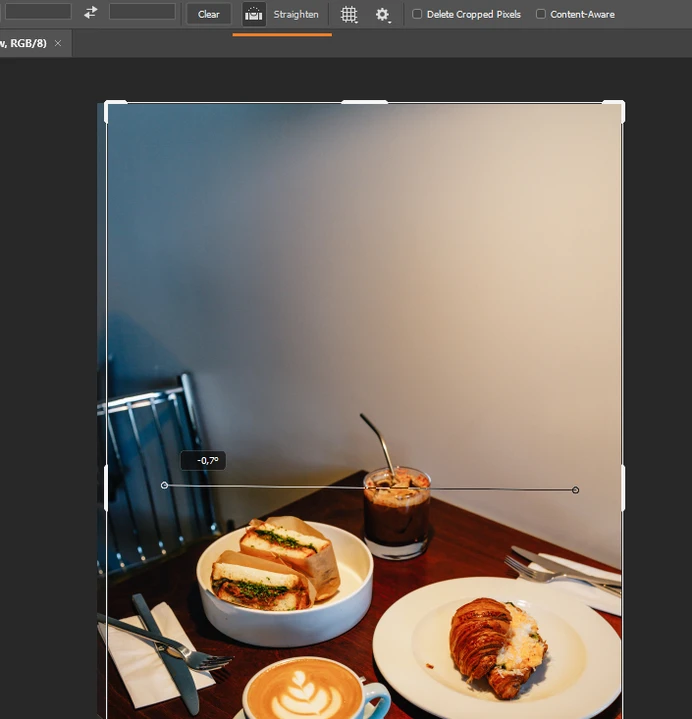
- The ruler icon at the top bar is the Straighten tool. You can use it to fix the tilted horizon.
- If you want to crop your image to improve the composition, it’s a good idea to use the grid overlay. For instance, you can turn on the “Golden Spiral”. To do this, click on the icon of the grid at the top and choose the necessary option.

- Drag the borders of the cropping area to resize it. Position it however you want. Hit “Enter” to apply the cropping.
- Go to File > Export > Export As. Specify the settings if necessary, then click on “Export”. This way, you will have the chance to save your cropped image as a copy in case you want to keep the original unaltered.
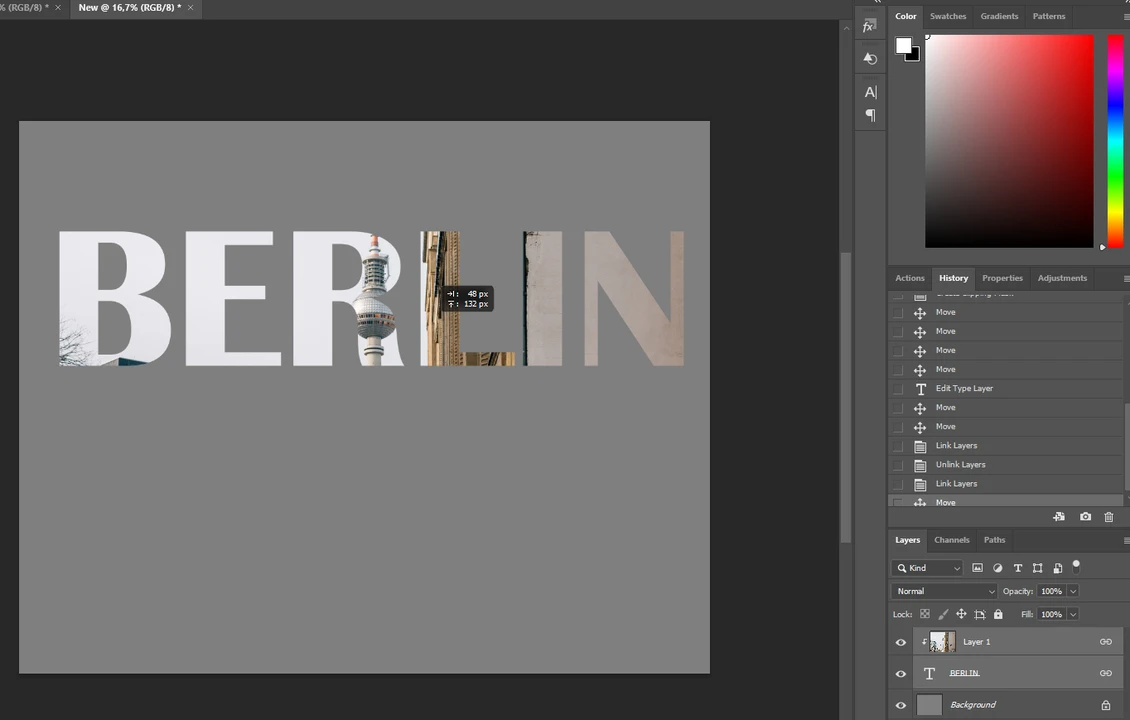
How to Crop an Image in Photoshop Using a Clipping Mask
The Clipping Mask tool will be perfect if you have a big textual layer or some kind of a shape that you want to crop your photo into.
You need to take the following steps:
- Start Photoshop, then open the image that you want to crop.
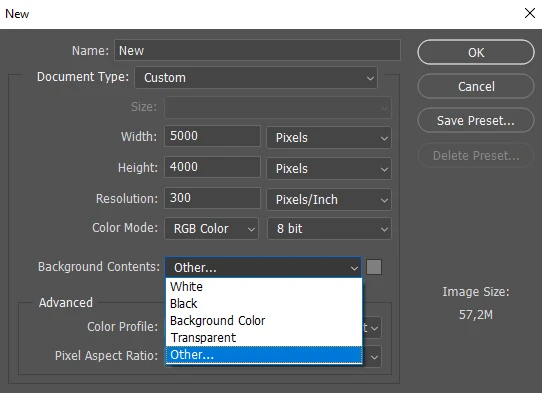
- Create a new file. Go to File > New. Specify the settings. Your new image can be white, black, transparent, or you can choose “Other” in the “Background Contents” and pick any other color you want. For instance, let’s go with grey.
- Click “OK” and you’ll see your new image.

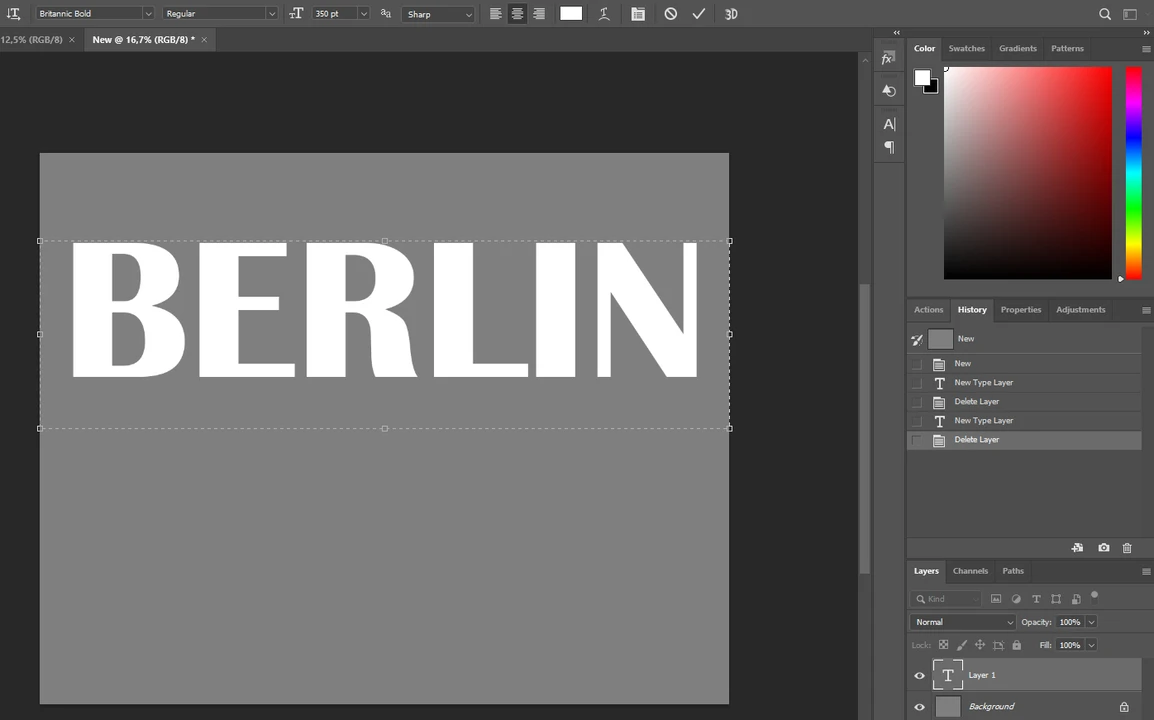
- Select the Text tool and add a string of text to your new file.
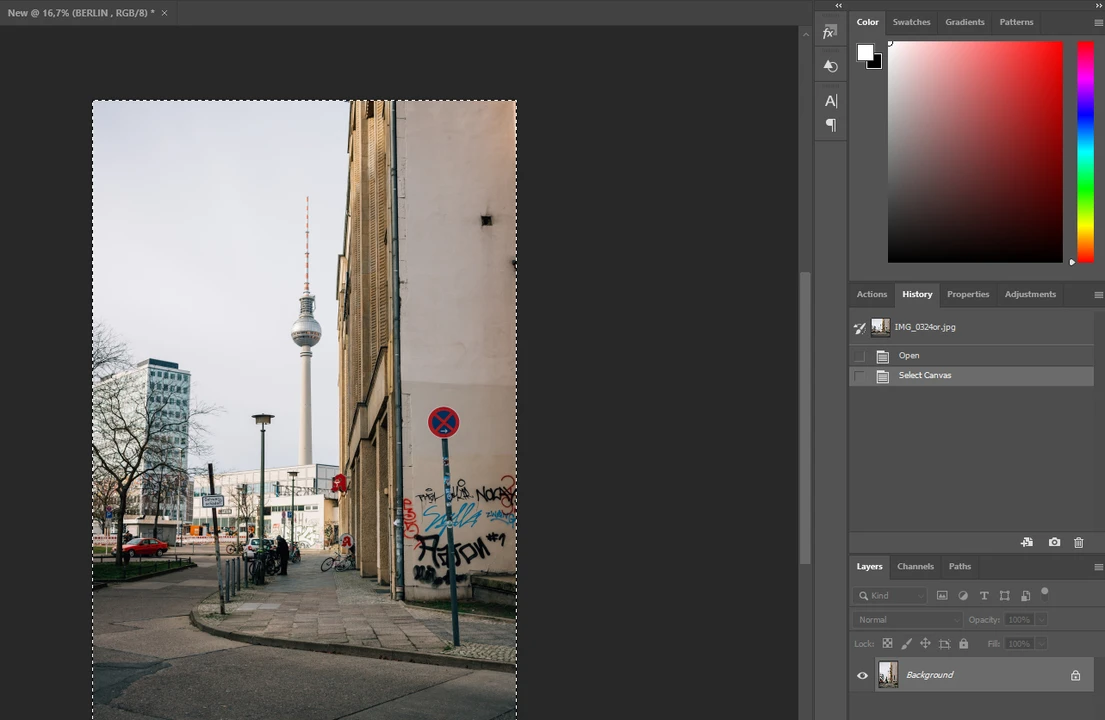
- Go to your photo. Press CTRL / CMD + A, then CTRL / CMD + C.
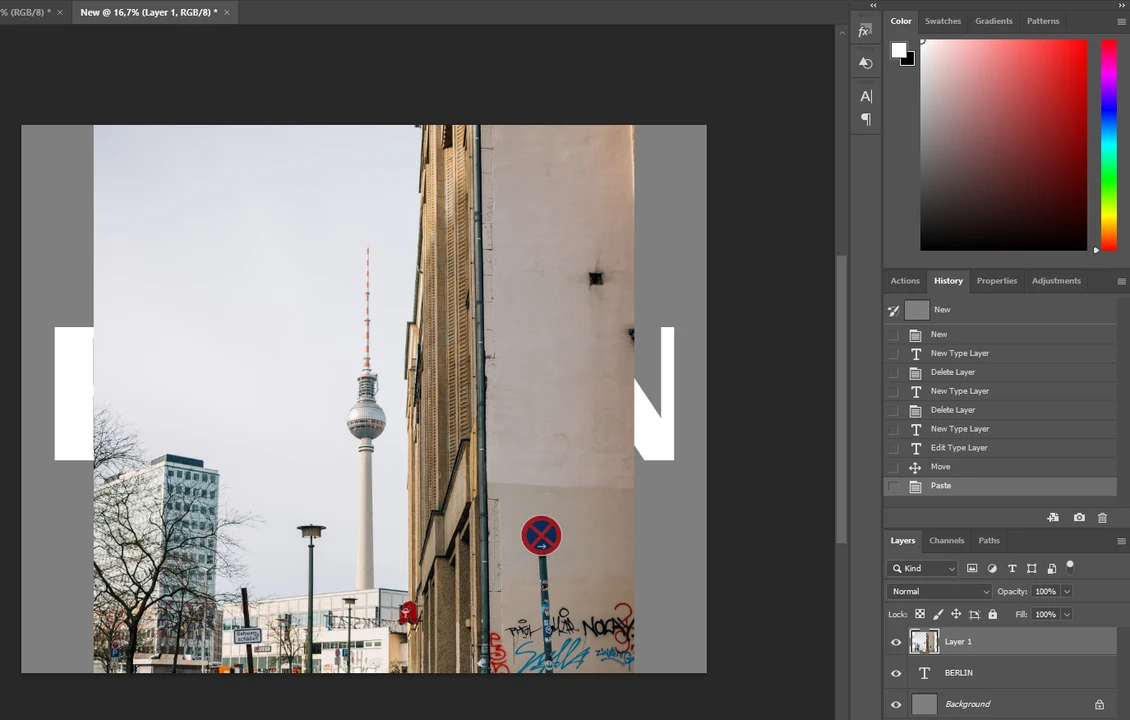
- Switch back to the new file and press CTRL / CMD + V. Your photo will appear on the new layer.
- You can press CTRL / CMD + T to enable Free Transform and make your photo larger or smaller.
- Position the layer with your photo on top of the layer with the text.
- Right-click on the layer with the photo and select “Create Clipping Mask.” Your photo will be cropped into the shape of your text.
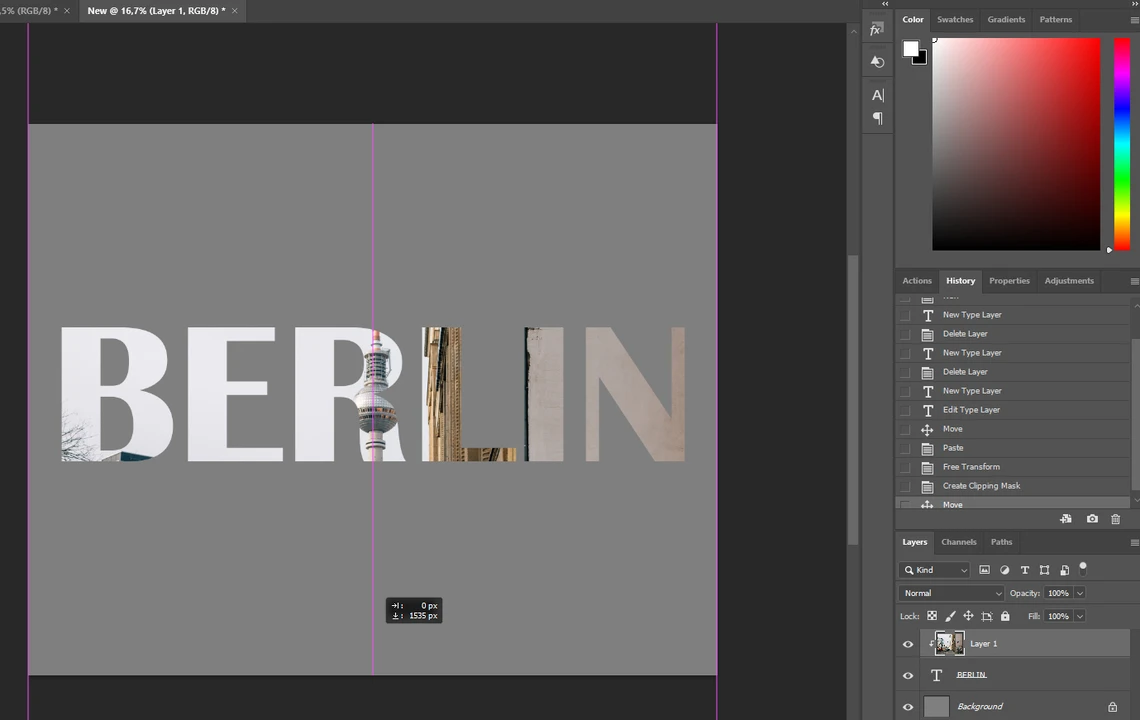
- You can move the text if you want. You can also move or transform the photo itself.

- You can also select both the text and the photo layers by holding SHIFT and clicking on the second layer. Then click on the chain icon to link these two layers together. This way, you’ll be able to move the text around the grey image, but the photo in the text will stay the same.
- Once you are happy with your cropped image, export it by going to “File” > “Export” > “Export As…”
How to Crop Photos to a Specific Pixel Size
As you might have guessed, this method will come in handy if you need your cropped images to be of a specific pixel size. For instance, you need to post your photo on a website or social media platform that has certain size requirements.
This simple process includes the following steps:
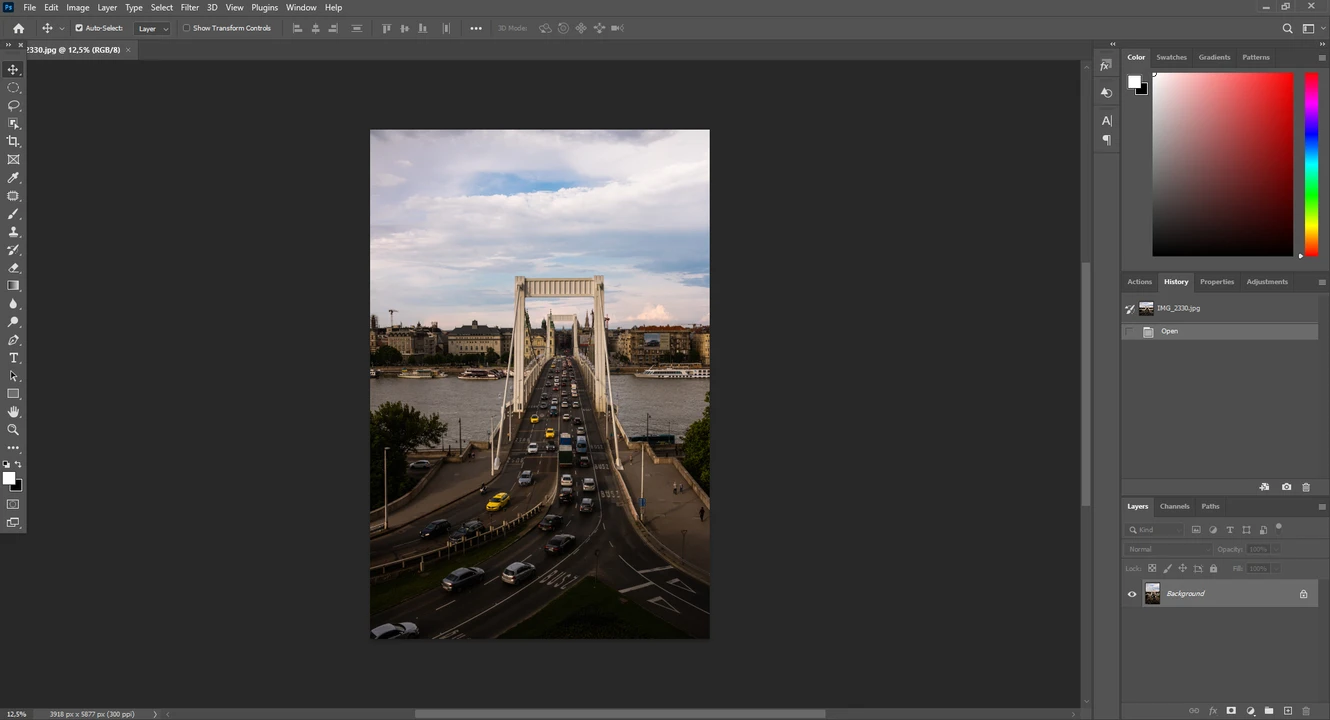
- Start Photoshop and open the image you want to process.
- Press “C” or click on the icon of the Crop tool in the toolbar.
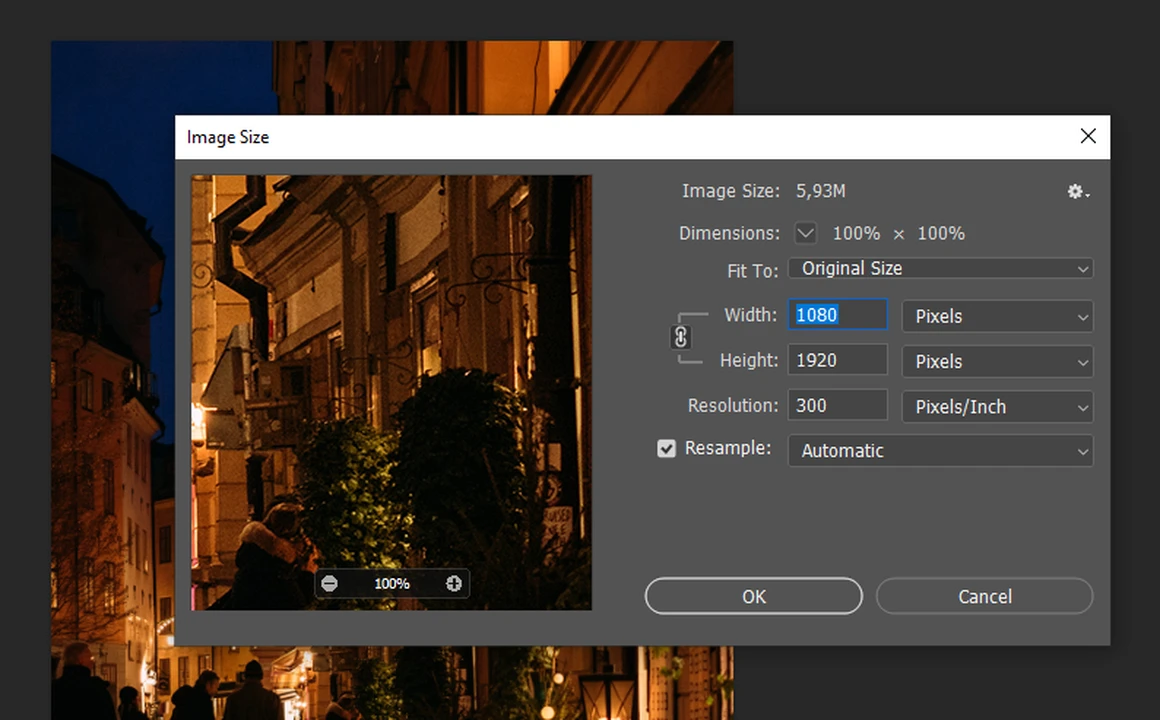
- In the Options drop down menu, select the “W x H x Resolution” option.
- In the empty boxes to the right, type in the necessary values in pixels for the width and height. For instance, type in “1080” and “1920”. The word “px” will automatically appear next to these values, which is short for “pixels”.
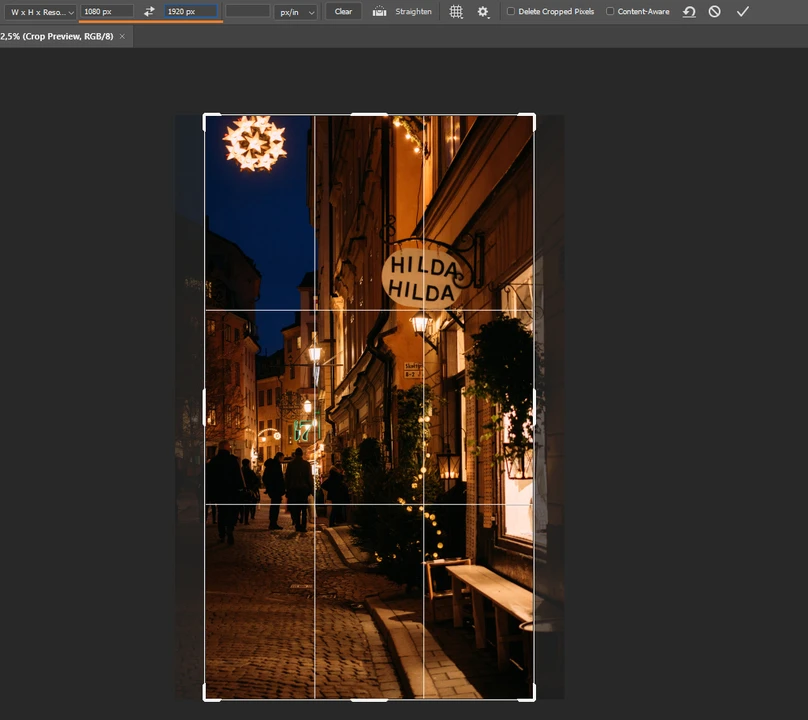
- The third box is for the Resolution. This is how many pixels there are per inch or centimeter, depending on your settings. For instance, if the resolution is 300 ppi, then there are 300 pixels per one inch. You can keep this third box empty or enter a new value. For instance, you can type in 300. You also need to choose whether you want your resolution to be “pixels per inch” or “pixels per centimeter”.

- Adjust the cropping area if necessary and hit Enter to apply the cropping.
- If you want to check the current size of your cropped image, you can go to Image > Image Size. As you can see, the pixel dimensions have changed.
- Once you are ready, export your cropped image. Go to File > Export > Export As…. It’s worth noting that you can change the pixel dimensions and enter a new value for resolution in the export settings as well.
How to Crop an Image to a Specific Aspect Ratio
Maybe you don’t care about pixel dimensions, but you need to change the aspect ratio of your photo. Aspect ratio is the ratio of the height to the width. This is done quite similarly to the previous method where the image was cropped to specific pixel size. Let’s see how you can do this:
- Start Photoshop and open your photo.
- Press “C” or click on the icon of the Crop tool in the toolbar. In the options drop down menu, select the “Ratio” option.
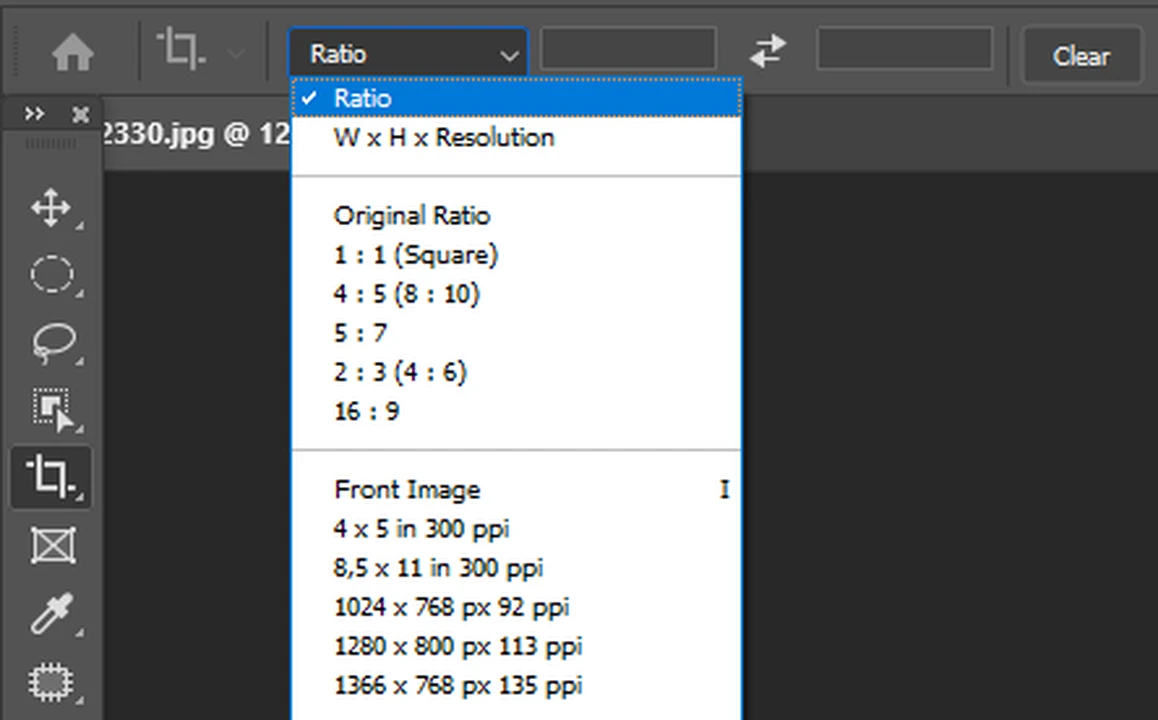
- In the empty boxes to the right, enter the necessary ratio. For instance, it might be 5 x 4. You may also go for one of the popular aspect ratios that Photoshop offers in the Options drop down menu.
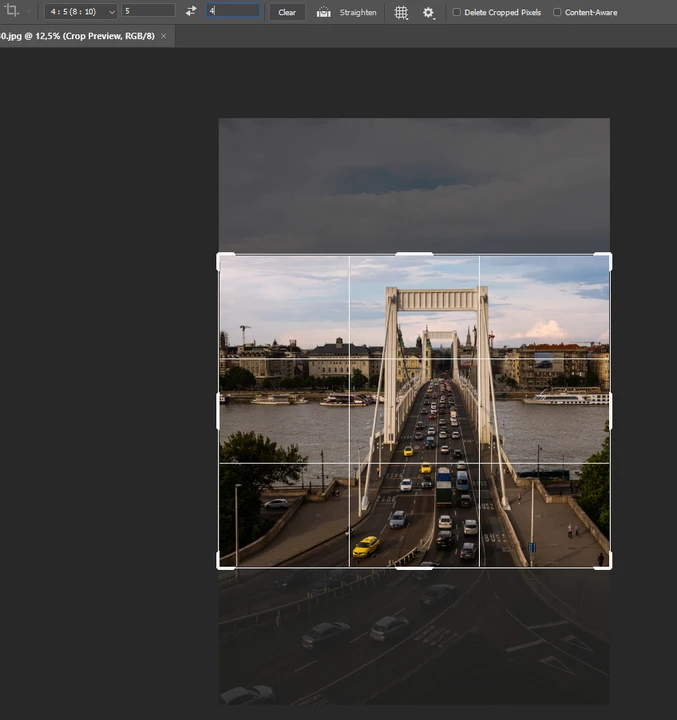
- Change the size and reposition the cropping area, if necessary. Your aspect ratio will be locked.
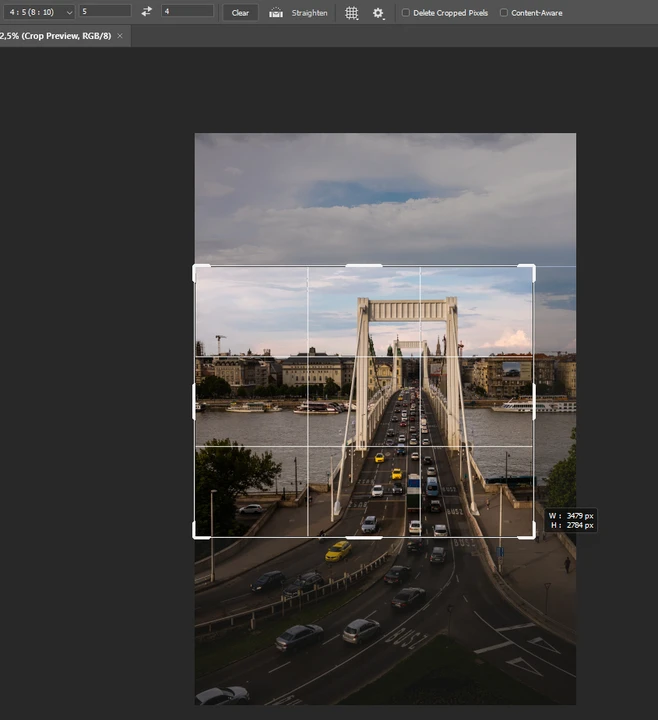
- Hit Enter to apply the cropping.
- Export your cropped image by going to File > Export > Export As….
How to Crop and Rotate a Photo in Photoshop
What if you need to crop an image as well as rotate it? Can you do that in Photoshop? Why, of course, you can! Here’s how you can do this:
- Start Photoshop and open your photo.
- Press “C” or click on the icon of the Crop tool in the toolbar. You can choose whatever option you want in the Options drop down menu.
- Adjust and position the cropping area, then place the cursor outside its borders. You will see a curved line with arrows on both sides. Left-click and hold while rotating the image to the left or to the right.
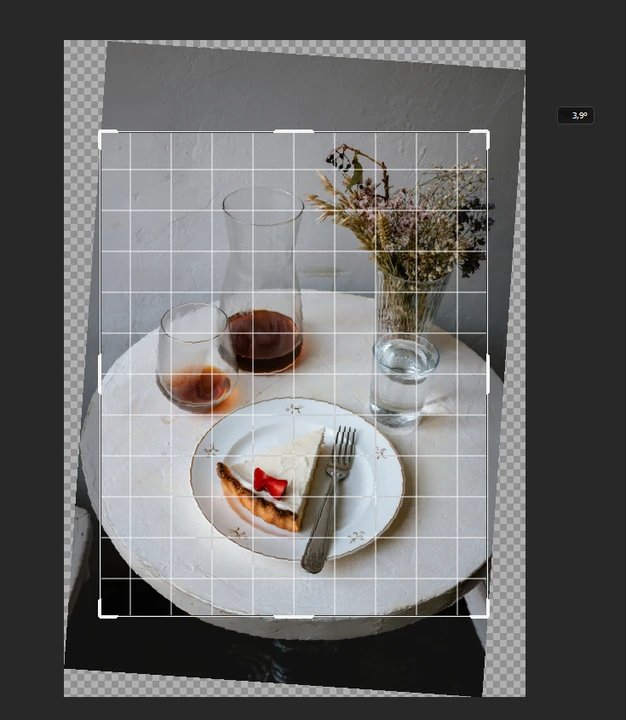
- Once you are done, hit “Enter”. Your image will be cropped.
- Export your cropped image.
Conclusion
Now you’ve learnt how to crop images in Photoshop in several different ways. From now on, you’ll be able to choose one of these methods according to your needs and tasks at hand.
Free Cropping Tools for Specific Image Formats
Want to use a different cropping tool? These guides can help:
How to Crop an Image in Illustrator
How to Crop an Image in Adobe InDesign
How to Crop an Image in Google Slides
How to Crop a Picture into a Circle in PowerPoint