
How to Crop an Image in Google Slides
by  Lina Thorne • Updated · Posted in Crop Photo
If you want your presentation to be engaging and memorable, the majority of your slides should be filled with images. Information that’s presented visually tends to be more easily digestible than text. It’s also remembered better. On top of all that, images can be an efficient way of keeping your audience’s attention. You can even throw in some memes to make people laugh or show only a part of an image first for suspense.

It is also crucial for your images to communicate the information clearly. There shouldn’t be any distractions or obtrusive elements. It should be clear what the key elements of your images are. It might be a good idea for all the images in your presentation to have one and the same aspect ratio to create cohesion. How can you achieve all this? The answer is simple – cropping.
It’s pretty quick and unchallenging to crop an image. Yet well-cropped images can really make your presentation more impactful.
If one or several images in your presentation need to be cropped, you’ve come to the right place! In this article you will learn how to crop an image in Google Slides. It’s actually pretty easy and quick. Are new to image editing? Don’t worry, here you will find step-by-step instructions with screenshots that will undoubtedly make things clearer and easier for you.
How to Crop an Image in Google Slides
Since Google Slides has an actual crop tool, you will easily be able to crop your image in under a minute; even if you’ve never done this before. First, you need to open your presentation or create a new presentation in Google Slides, then find the slide where you want to add an image.
Here’s what you’ll need to do next:
- At the top go to Insert > Image. There are several importing options to choose from: import your image from your computer, Google Images, Google Drive account, Google Photos, import an image by providing a link to it or import a photo from your device by selecting the Camera option. Choose the option that you need, find the necessary image, then insert it into your slide.
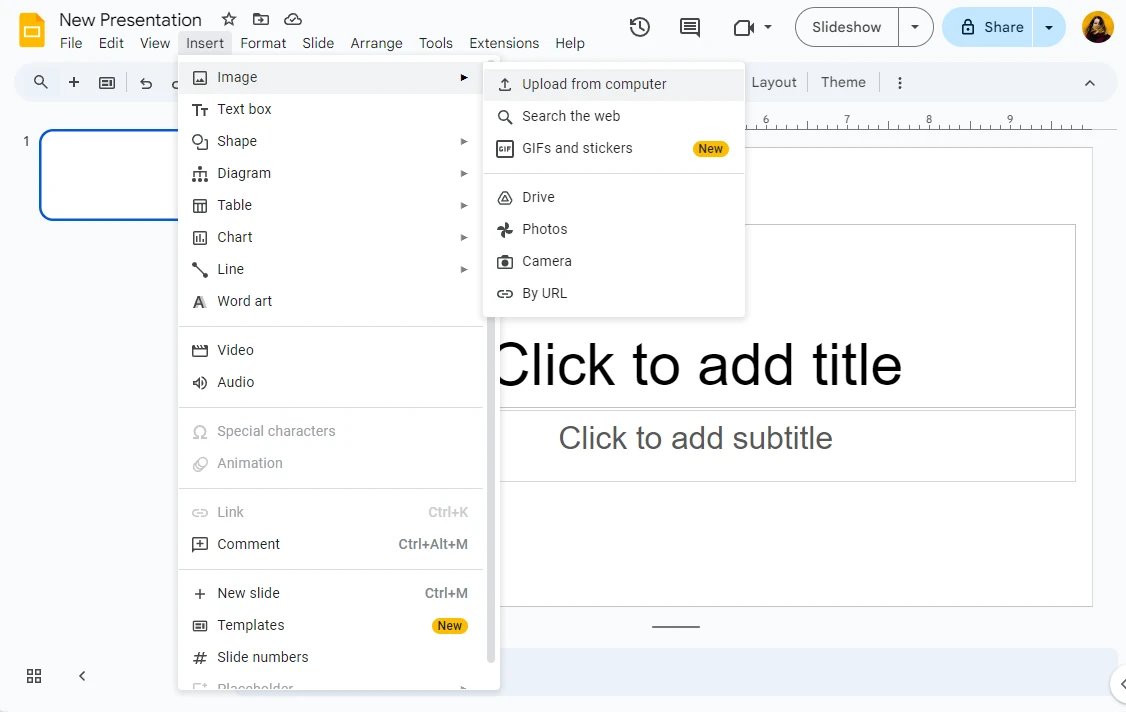 If you want to upload an image from your PC or laptop, you can actually drag the necessary image from its folder and drop it right onto your slide.
 - Double-click on the image. Alternatively, you can click on the Crop button in the toolbar.
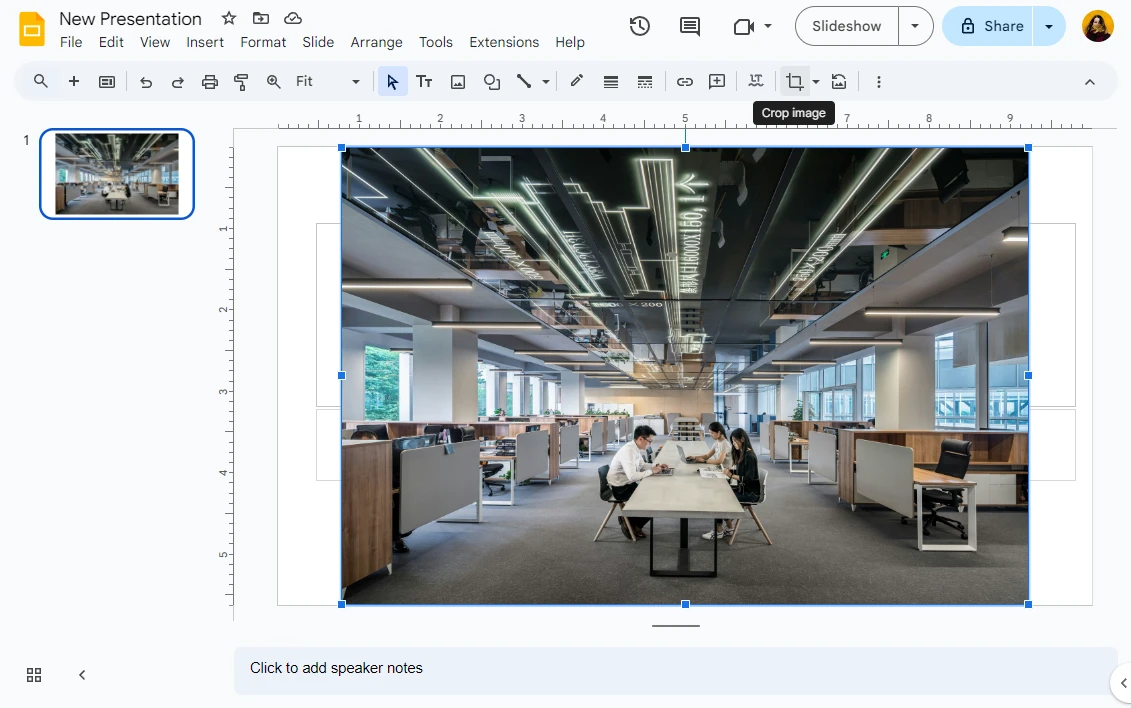
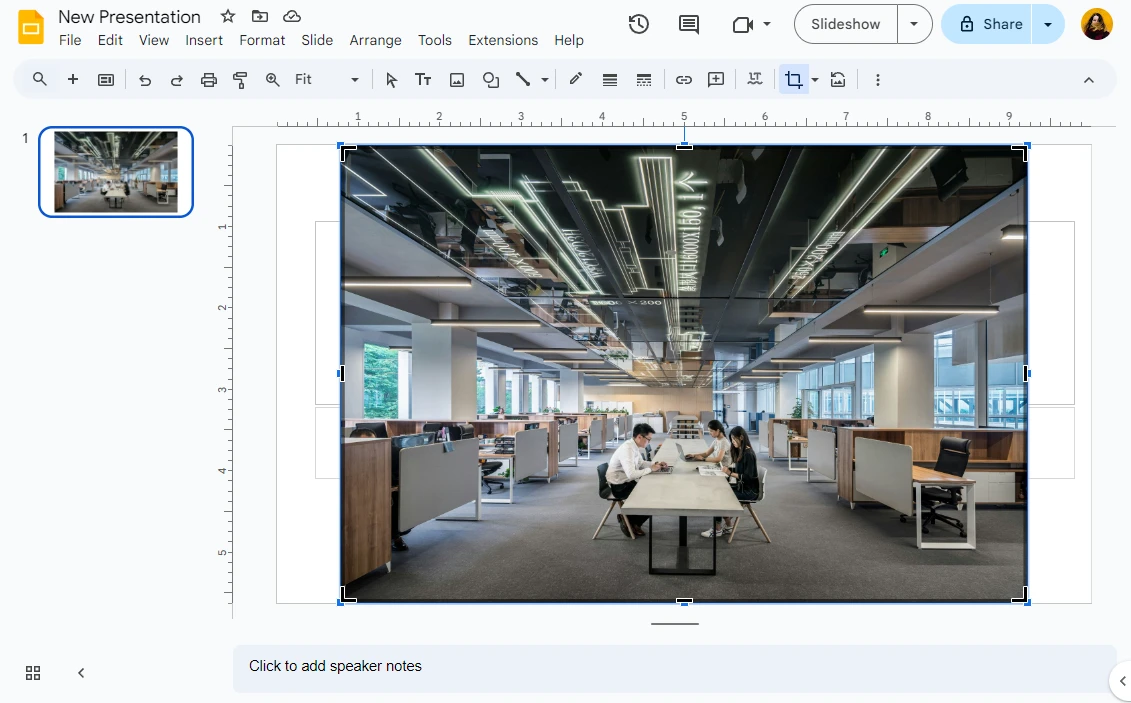
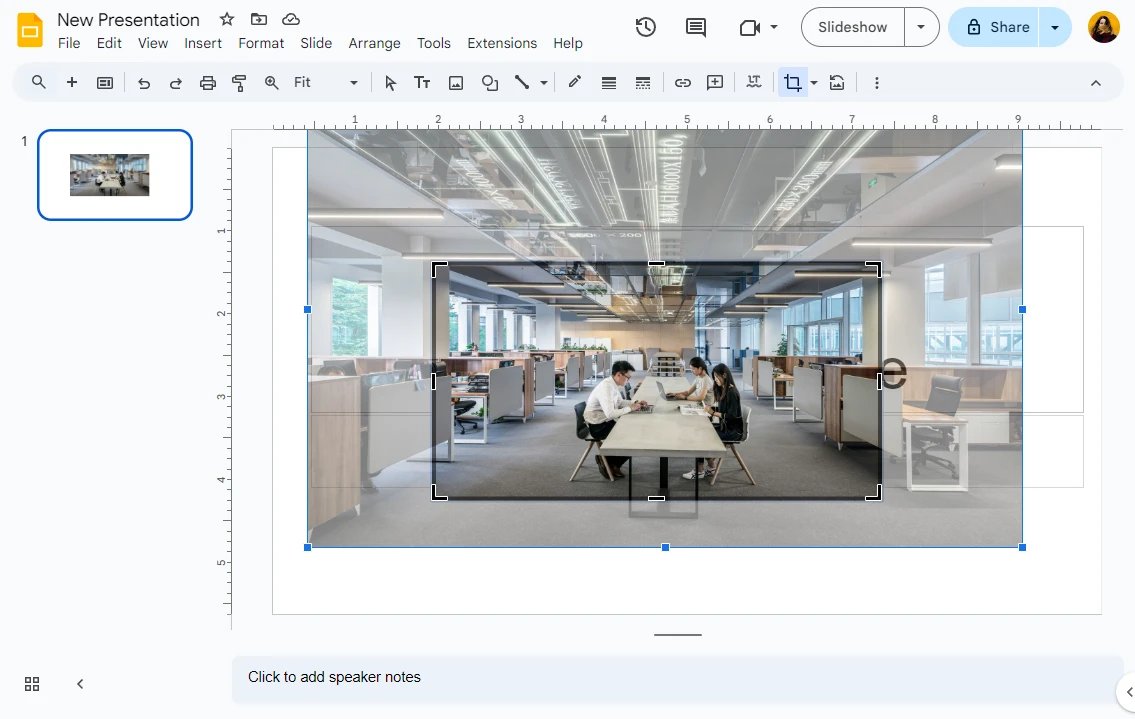
- You will see the black cropping handles show up on your image. It means that the crop tool is enabled.
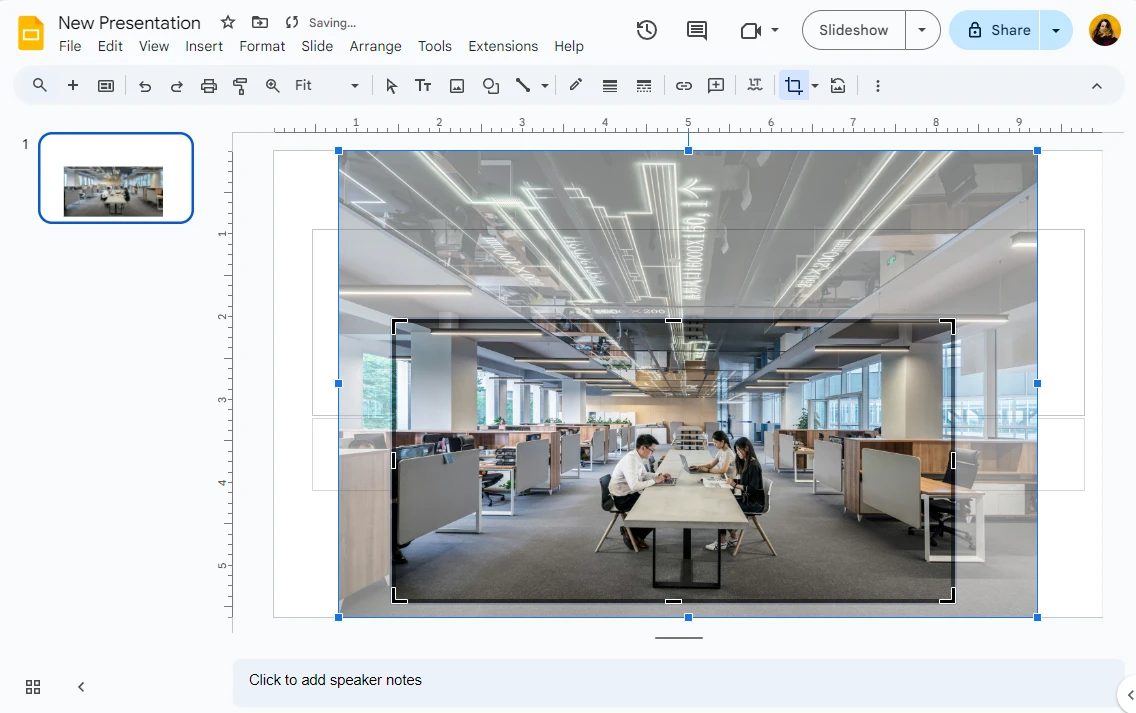
- In Google Slides you can crop your image freely. It means that you can change the cropping area however you want. Drag the black handles inwards to edit the cropping area.
- If you want to maintain the original aspect ratio, hold the Shift key while dragging either of the corner handles. Please note that if you drag a side black handle – a handle that allows you to adjust either the height or the width – the aspect ratio won’t be maintained even if you hold the Shift key. So, it’s highly important to use a corner black handle. Without maintaining the original aspect ratio, your image might get stretched and distorted in a bizarre way.
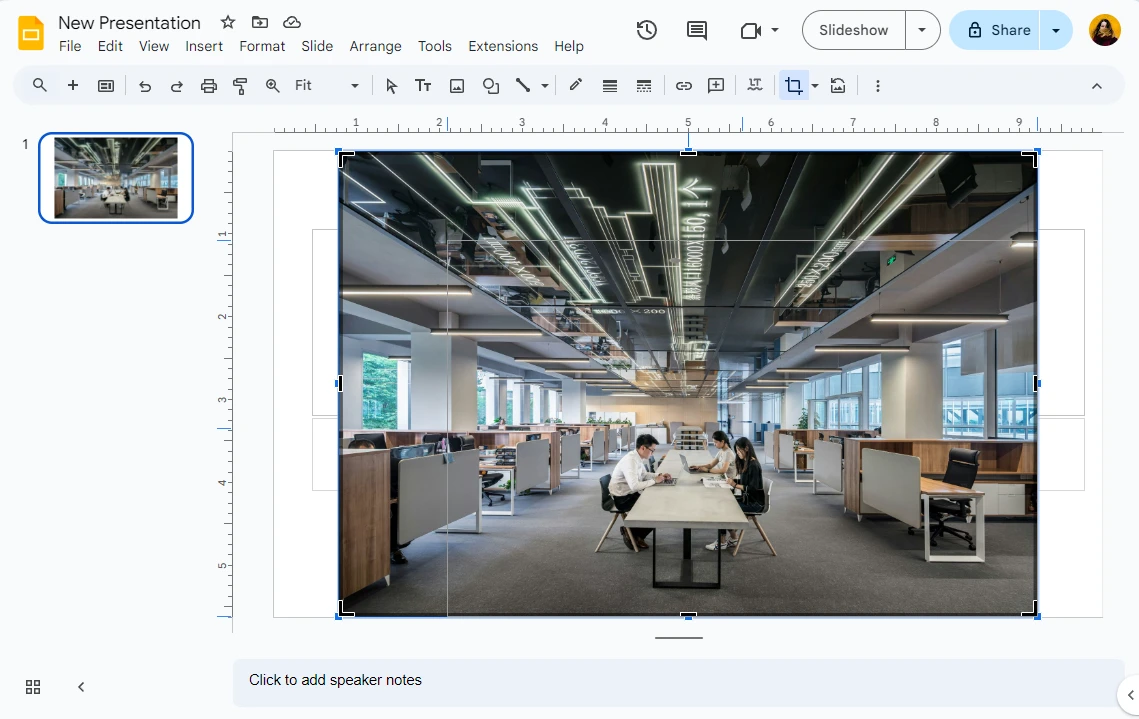 Please note that there are no presets with popular aspect ratios. You won’t be able to enter your own aspect ratio, either. So, if you need to crop your image in Google Slides into a perfect square, for instance, you will need to do so manually. Google Slide’s crop tool also lacks any compositional gridlines. You might have come across the Rule of Thirds gridline that divides an image into nine equal rectangles. The Rule of Thirds is a compositional rule, and its gridline can help compose an image better. There’s no such gridline in Google Slides. So, improving image composition might be tricky.
 - It is possible to reposition the cropping area, but it can be a bit challenging. So, it might be better to reposition the image itself by dragging it with the cursor, if you need to adjust its placement inside the cropping area.
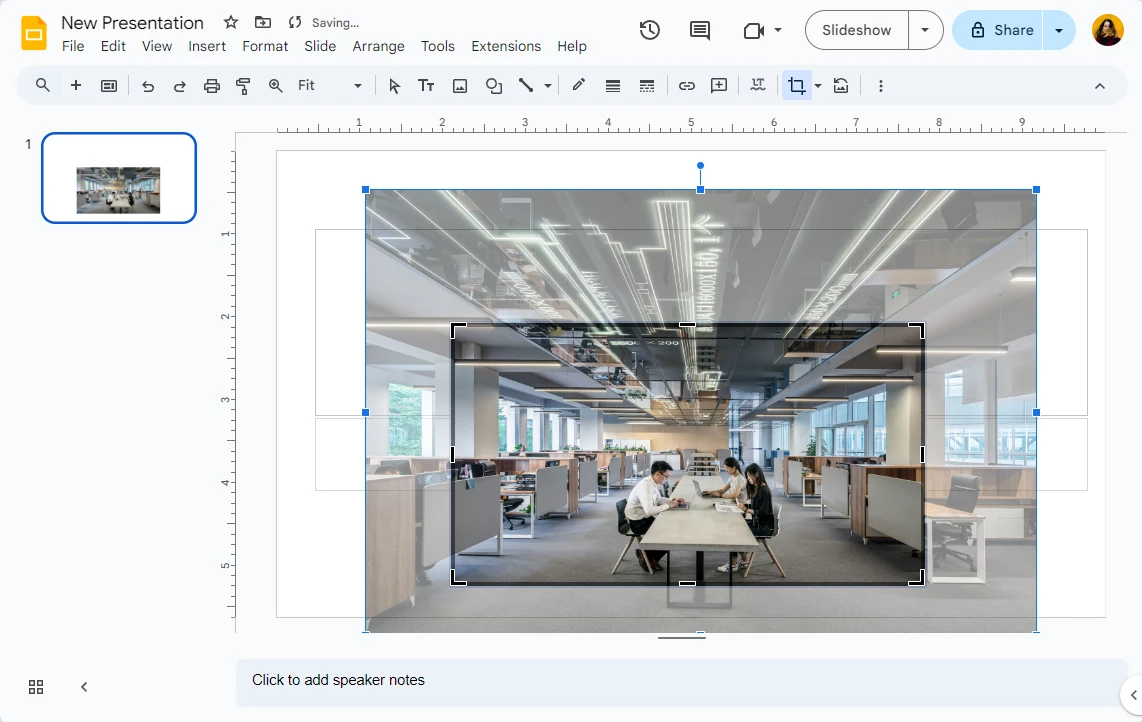
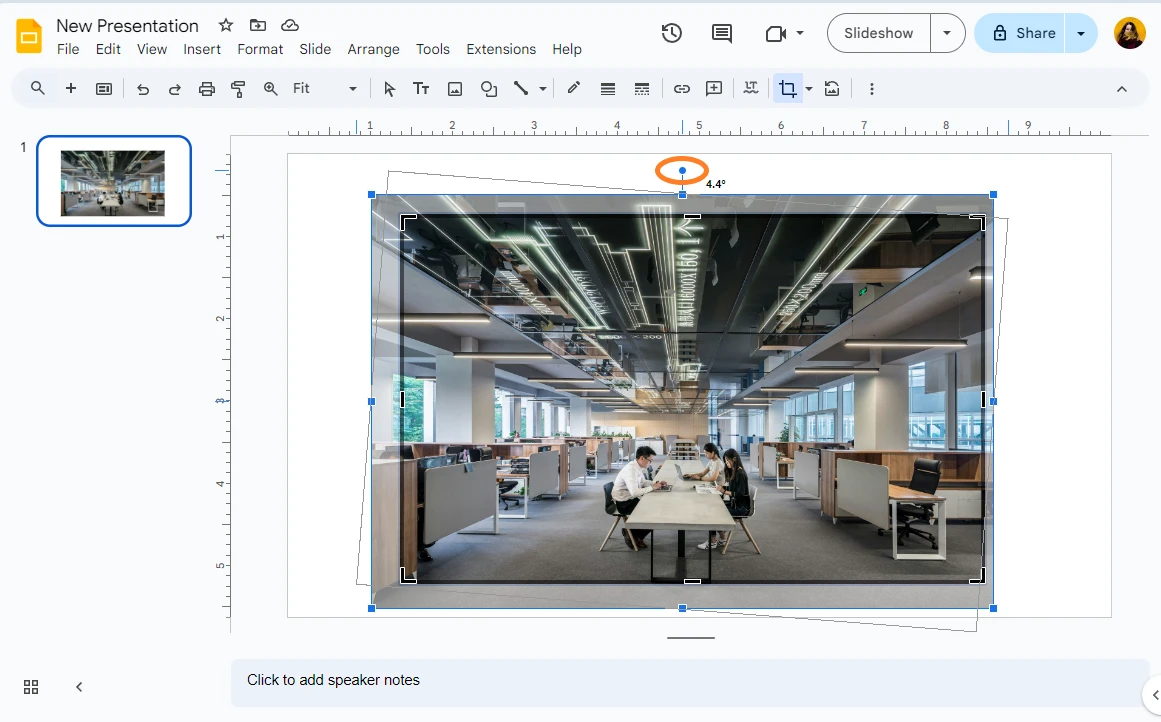
- Use the rotation handle at the top to rotate your image. It can be very useful if you need to straighten the horizon, for instance.
- When you’re ready, press Enter to apply the changes. Now, you’re image in Google Slides is cropped!
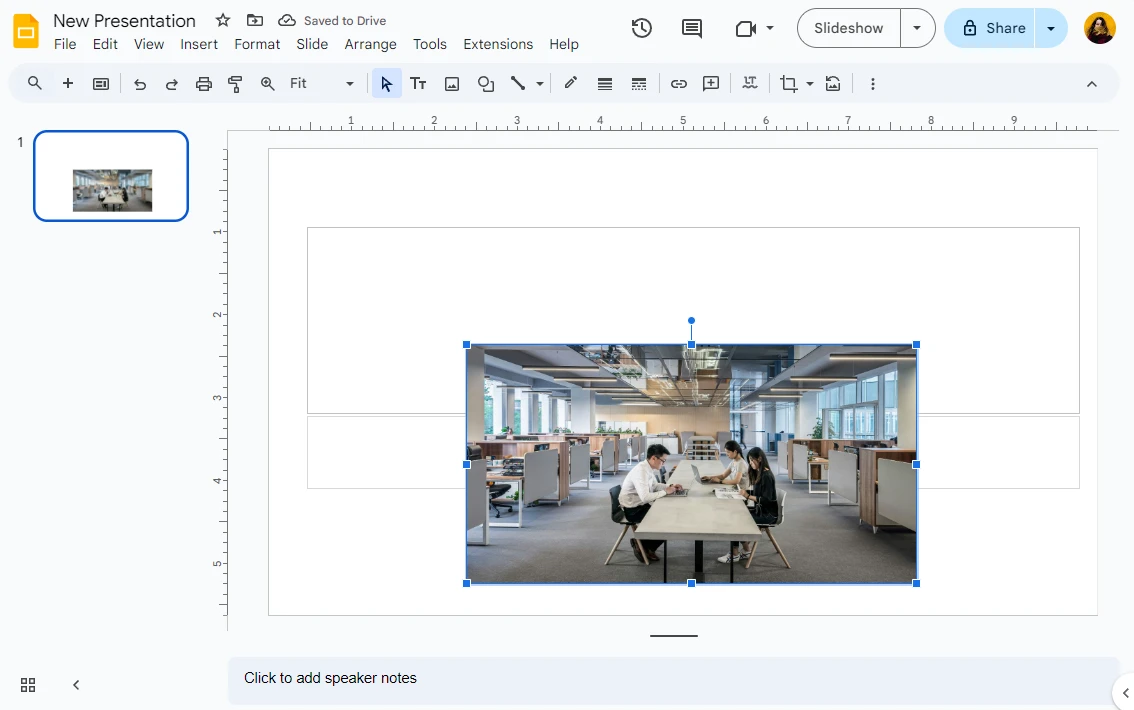
- If you want to, you can add a border to your cropped image. First click on the Border color icon and select the color that you want.
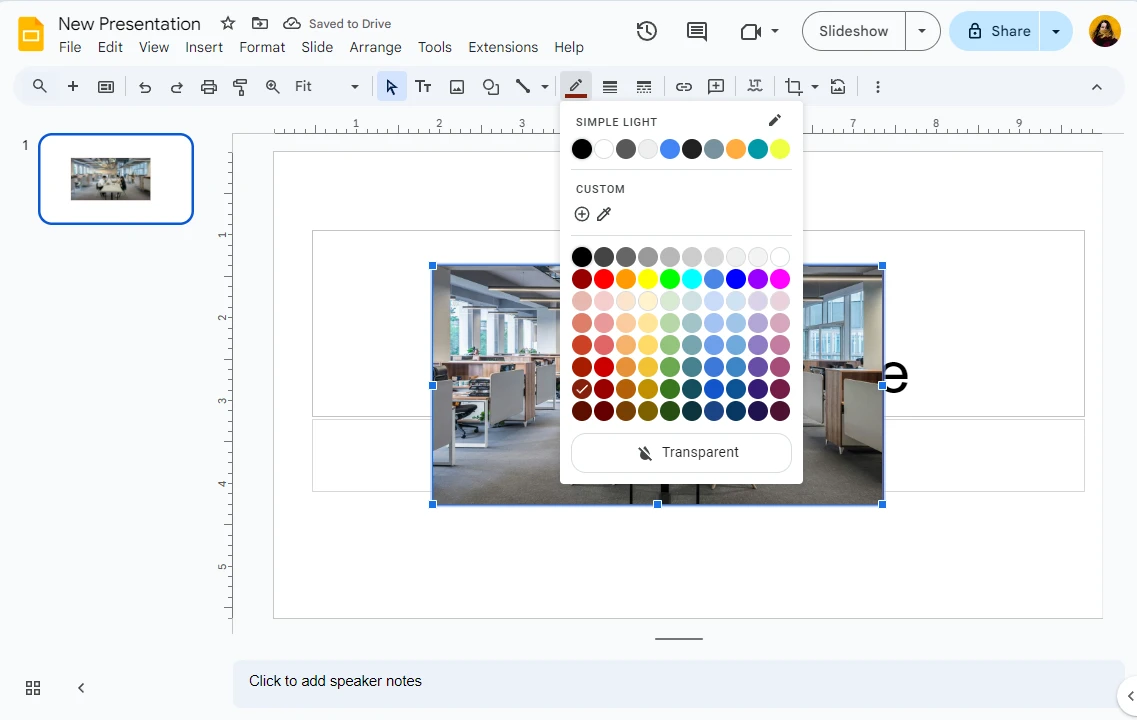
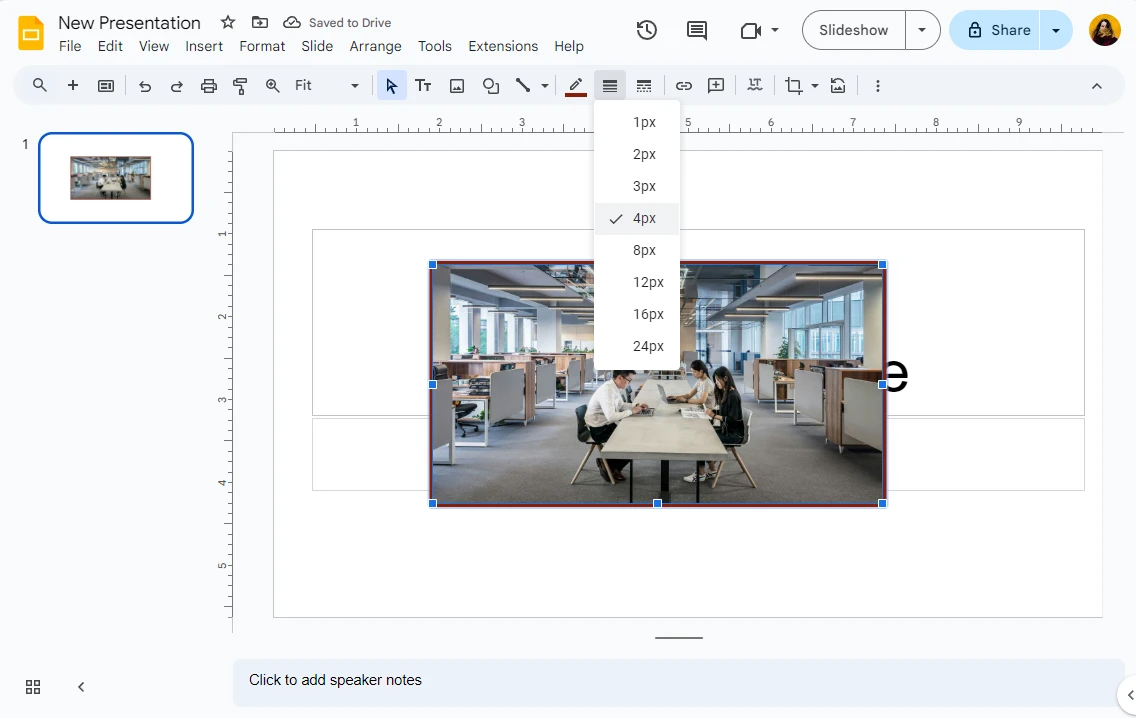
- Then click on the Border Weight to make the border thicker or thinner. If you want the border to be dashed, click on the Border Dash button and select the option that you like.
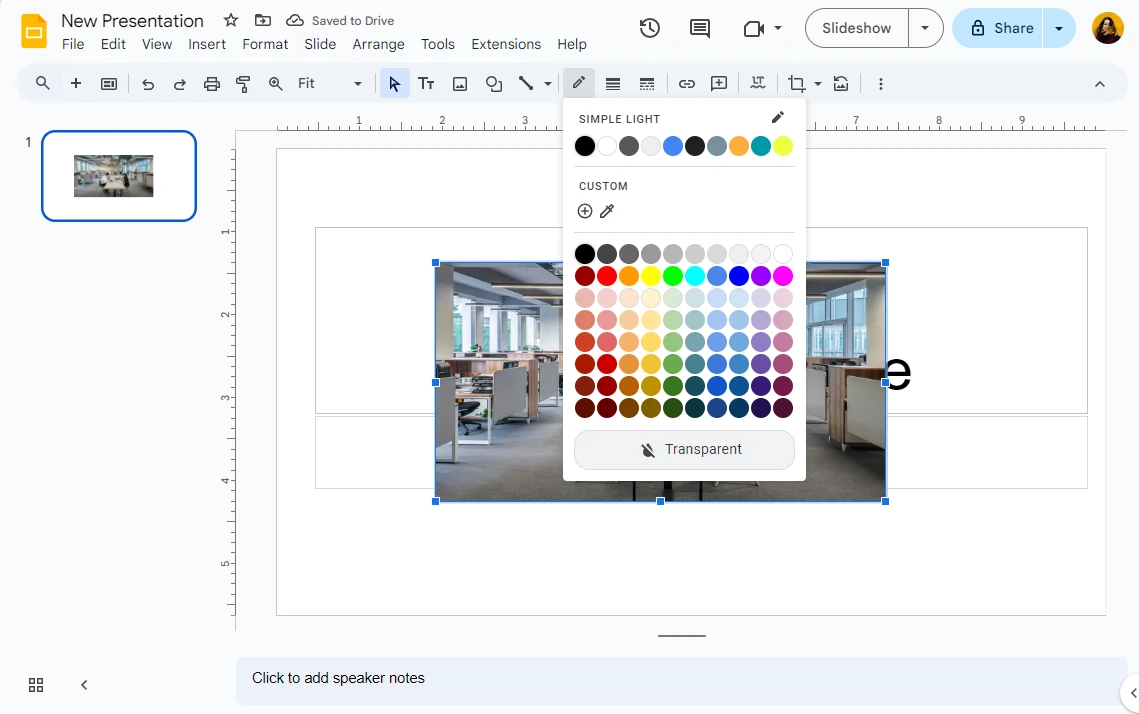
- If you don’t like the border, you can use the CTRL / CMD + Z shortcut to undo the last change you made. Alternatively, you can go back to the Border Color and select the Transparent option. The border will disappear.
- Let’s say that you want to re-crop your image a bit differently after applying the changes. Just double-click on the image to enable the Google Slides crop tool again. Make the necessary tweaks to the cropping area and press Enter again.
That’s it!
Please note that image cropping in Google Slides is non-destructive. It means that the original image stays completely intact no matter where you imported it from. So, you can crop and re-crop it as many times as you want. There’s no need to create a copy of an image before importing it into Google Slides, either.
As you may know, Google Slides have a mobile version which can be used on Android and iOS devices. The process of cropping an image there is pretty similar. The difference is that there are icons instead of buttons due to the fact that a smartphone’s screen is smaller. To put it simply, on a computer, you had to click on the Insert button – in the mobile version this button is an icon. So, once you open the necessary presentation or create a new one, you will need to tap on the Picture icon to insert an image. By tapping on the Crop icon, you will be able to crop your image.
How to Crop an Image in Google Slides to Gradually Reveal It
Here’s an idea. In your presentation you can show only a part of an image, ask people what they think is depicted in it. Show another part of an image and ask them again. Then finally reveal the whole image. This can be great if you are a teacher or a professor and want your students to make predictions, for instance.
What’s great about this idea is that it’s very easy to do:
- Insert your image into a slide. Resize and reposition it if necessary.
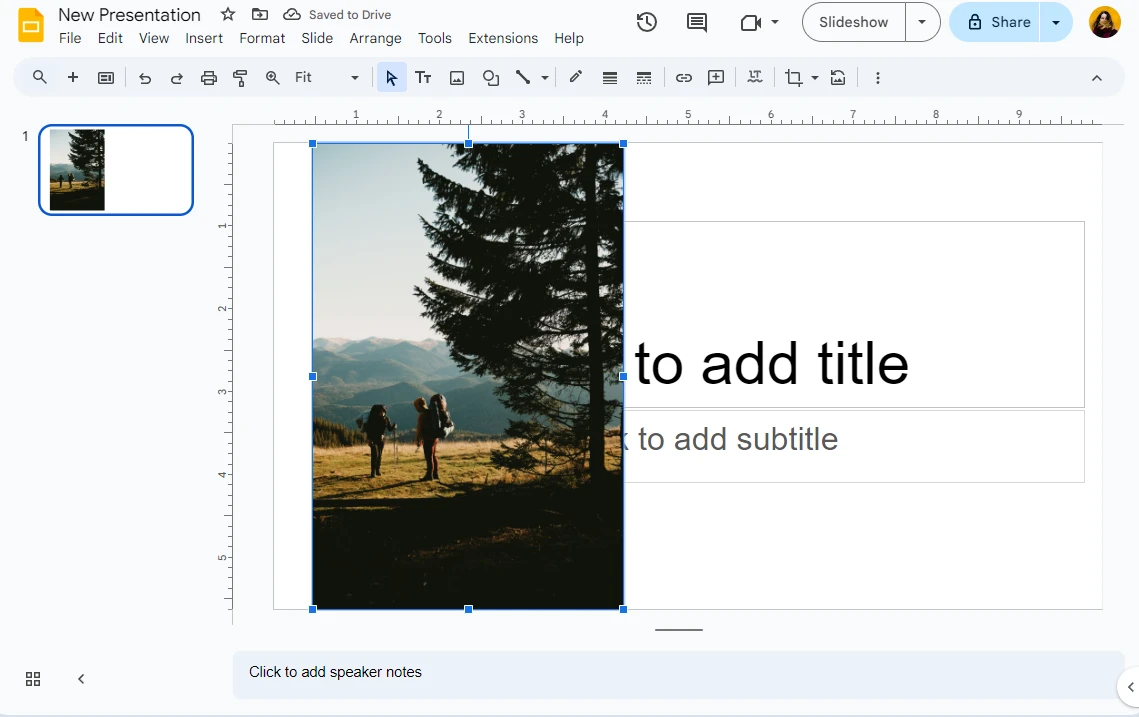
- Crop it.
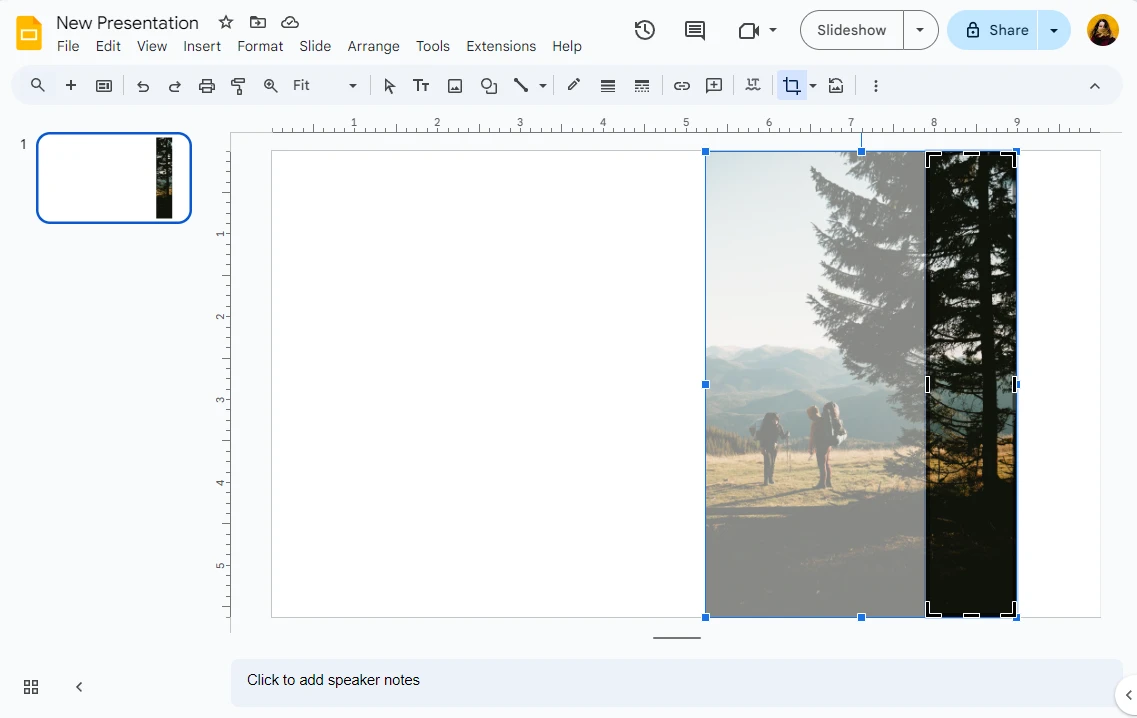
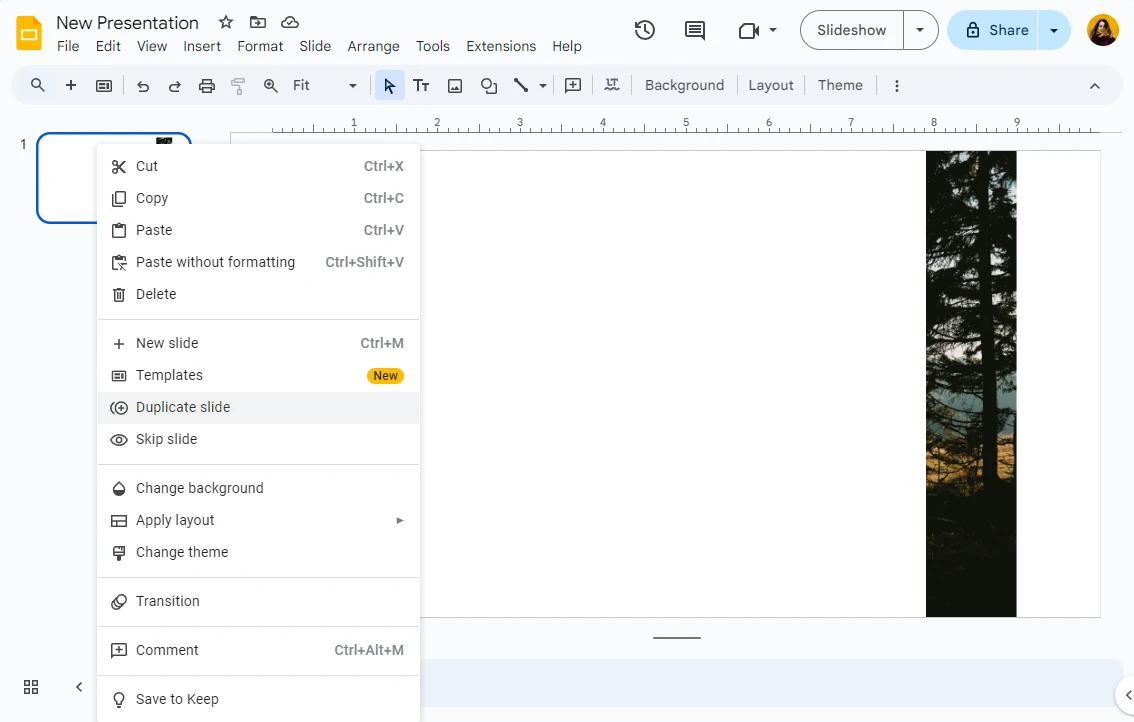
- Right-click on your slide and select Duplicate slide.
- Switch to the duplicated slide and double-click on the image. Adjust the cropping area, revealing another part of the image.
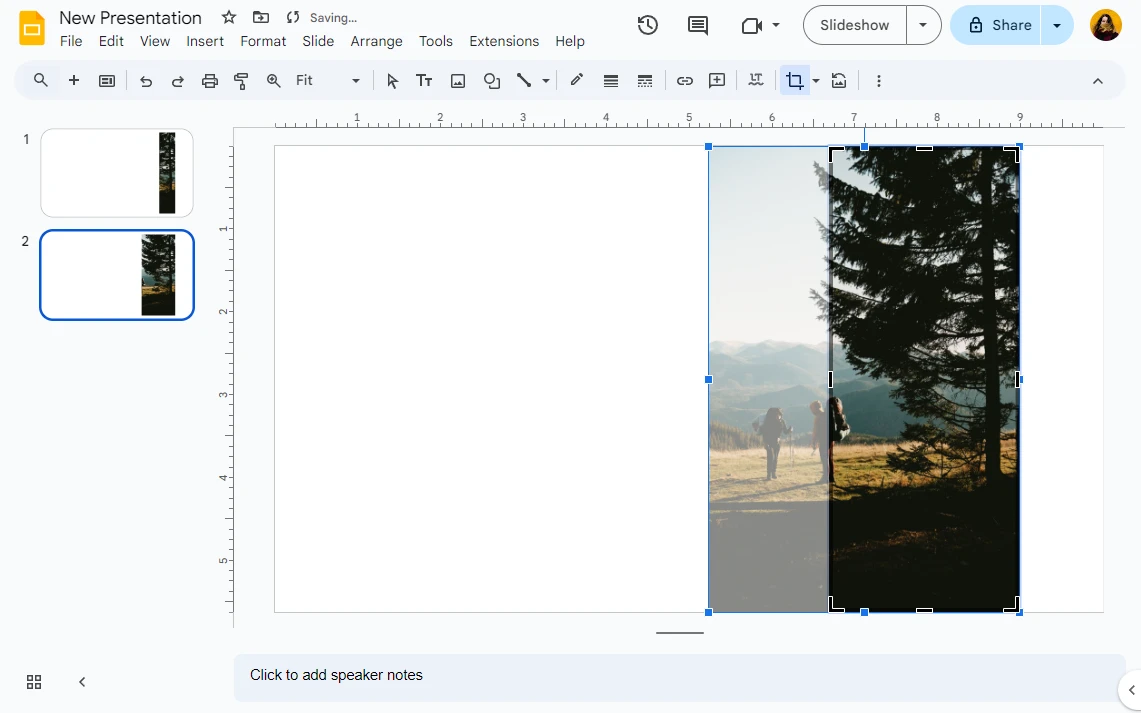
- Duplicate the slide again, switch to the newly duplicated slide and reveal the whole image.
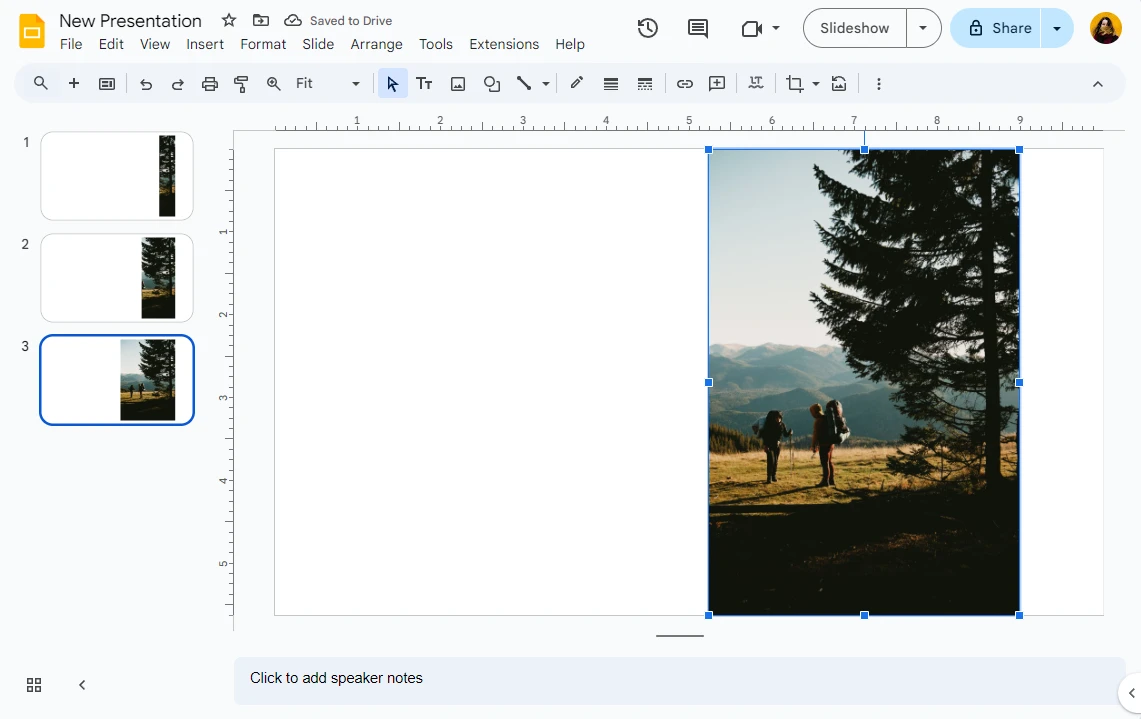
All done!
There’s something that you need to know. Unfortunately, it’s not possible to crop multiple images in Google Slides in one go. If you insert multiple images into a slide, then select all of them with the cursor, the Crop button will disappear. There won’t be a crop option in the drop-down menu that shows up when you right-click on the image, either. Therefore, if you need to crop multiple images, you will need to do it one by one.
Watermarkly vs Google Slides
If you can crop an image right in Google Slides, why bother looking for an alternative, right? Switching between the apps is also not particularly convenient.
Well, if you have to crop one or two images in Google Slides every once in a while, there’s no need to look for an alternative, indeed. But what if you need to crop multiple images on a daily basis? Or what if you need to crop images to certain aspect ratios? Or both? In Google Slides you will have to crop one image after another, which can take quite a while. And it’s not possible to crop images to certain aspect ratios at all, so you will need to achieve the necessary result manually and by eye. Which is probably going to be a nearly impossible task.
Worry not! Watermarkly has come to the rescue!
On Watermarkly’s website for watermarking photos and basic image editing, there’s a photo cropping app. Similarly to Google Slides, it works in a browser, so to use it, you will only need a device that’s connected to the Internet. Thanks to its uncomplicated and intuitive interface it’s perfect for beginners. Yet despite its simplicity, Watermarkly’s image cropper does offer some flexibility and different options for cropping.
In fact, it has several advantages over Google Slides.
First of all, it offers ready-made presets as well as freeform cropping. In addition to this, you can enter your own aspect ratio or pixel dimensions if none of the ready-made options are suitable for you. You will simply need to select the No constraints option if you want to adjust the cropping area however you want.
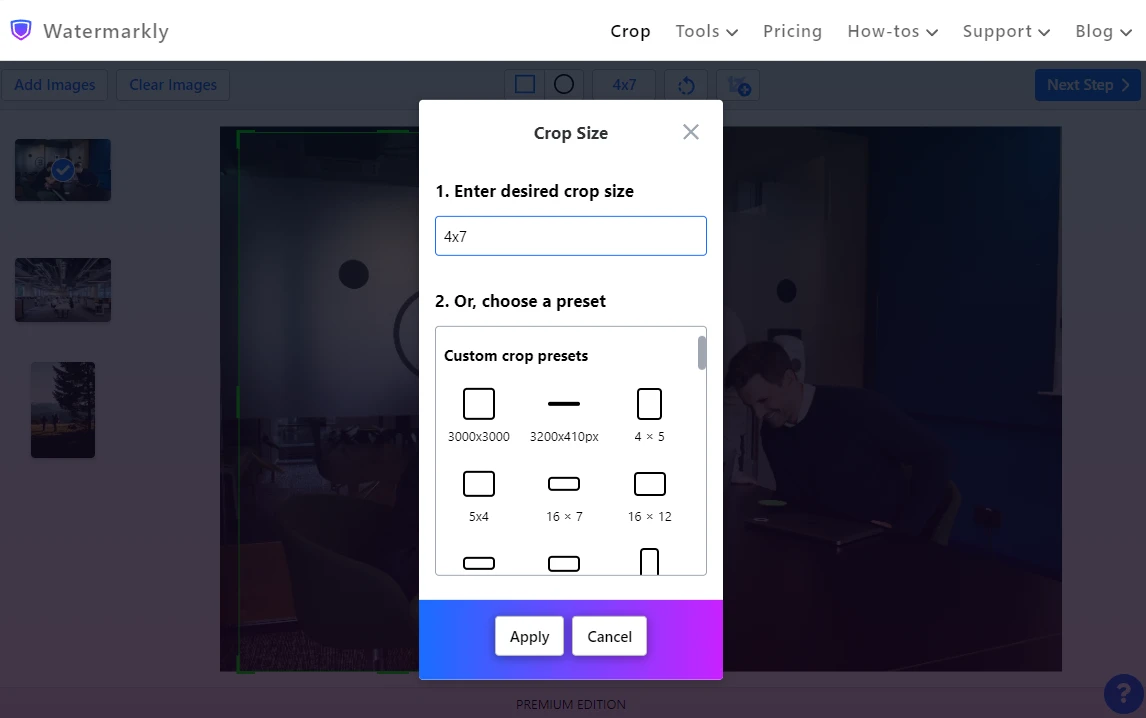
If you want to use a cropping preset, select the one that you need from the menu. There are presets with popular aspect ratios and presets for social media; if you choose the latter not only the aspect ratio but also pixel dimensions will be changed. Additionally, you can crop an image into circle as well.
If you want to crop your image to improve its composition, it can be easily done in Watermarkly’s app, because it has the Rule of Thirds gridline. Position the key elements on either of the four intersections or along the lines of the gridline – this way, you will ensure that the viewers’ attention will gravitate to them right away.
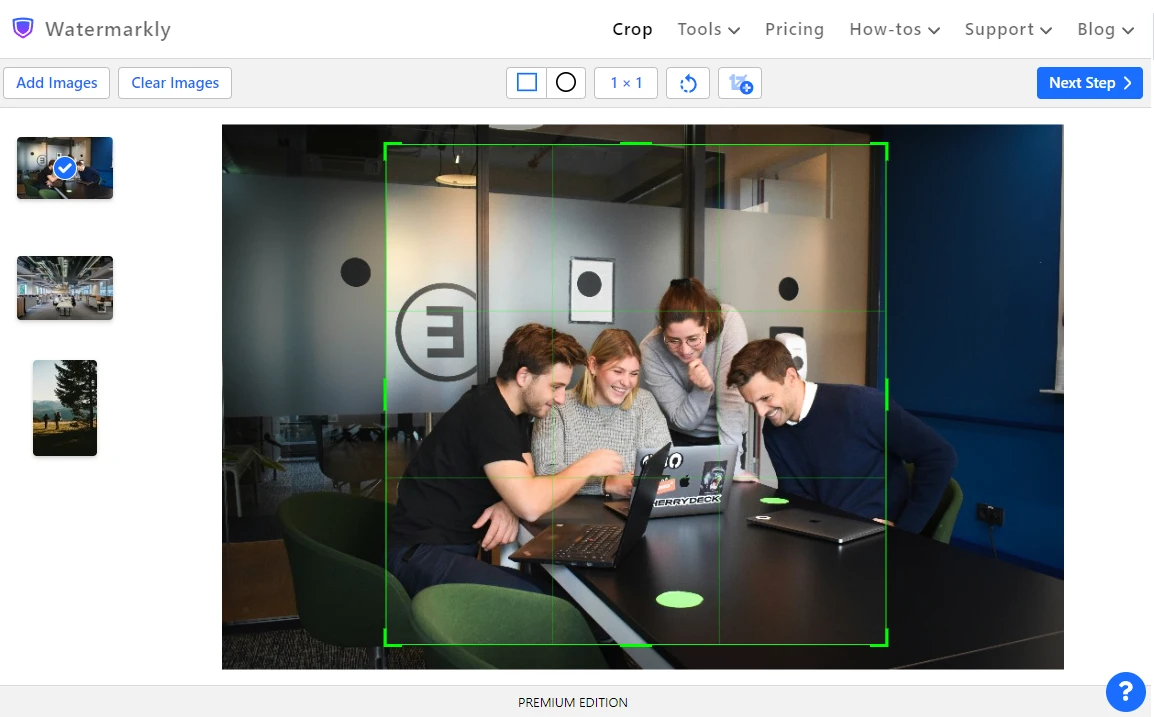
Watermarkly’s crop tool supports batch-processing, which means you’ll be able to crop multiple images in one go. You will be able to crop every image in the batch in a different way. In other words, you can set different aspect ratios for different images. Or you can crop all the images to one and the same aspect ratio, making some minor tweaks to the size and placement of the cropping area. Yes, you will need to adjust the cropping area on each image manually. But it won’t be too tedious or time-consuming, nonetheless.
Additionally, you can make use of the Add Crop button. By clicking on it, you will duplicate the selected image. You will be able to set the cropping area differently on this duplicated image and as a result, after the cropping is done, you will get two – or more, depending on how many times you clicked on the Add Crop button – cropped versions of one and the same image. Isn’t it convenient?
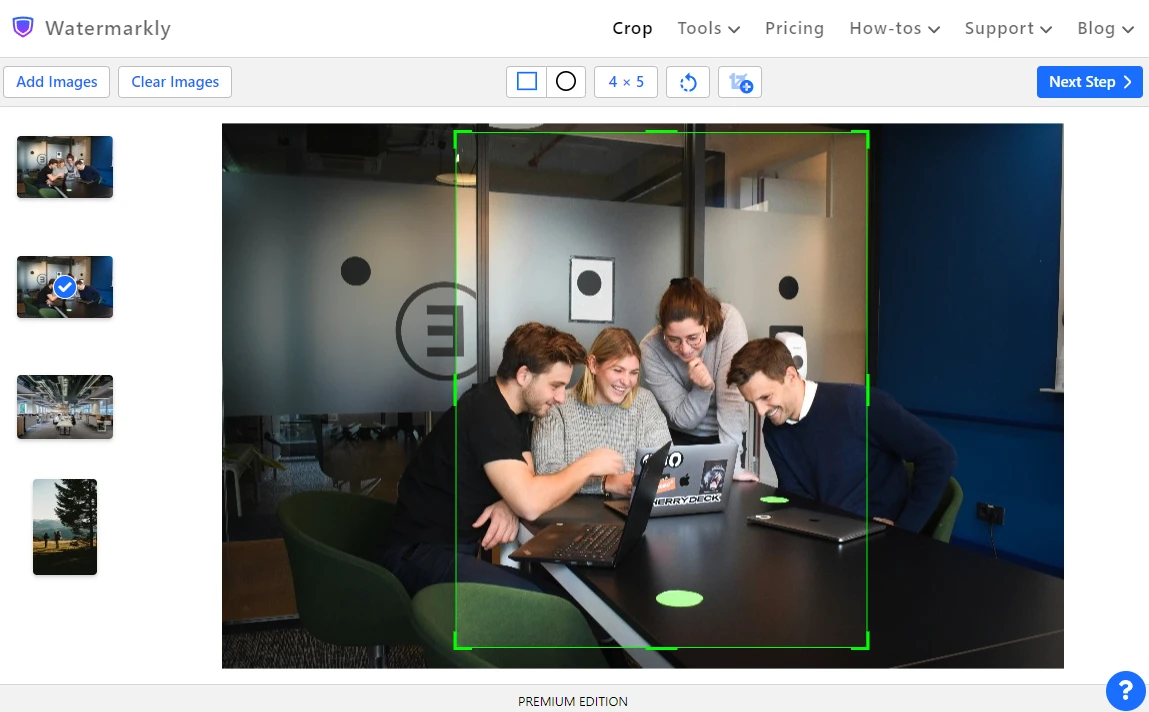
On top of all that, Watermarkly never changes the original files! Cropping in Watermarkly is destructive. But the app automatically creates copies of your images, then crops them, while the originals remain untouched.
It’s fair to note that there are a couple of minor disadvantages.
If you want to crop your image to reveal it gradually, it might be a bit of a challenge to do this in Watermarkly. You can try to use the Add Crop button, but then aligning the cropped images on different slides will probably be difficult and tedious. So, if that’s what you want, you should probably crop your image in Google Slides.
Secondly, it’s not possible to add borders to your cropped images in Watermarkly. You will need to do that as well as add any other effects like shadow or reflection in Google Slides after you import your cropped images.
And, of course, you will need to switch between the apps. In other words, you will need to crop your images in Watermarkly first, then insert your cropped copies into your Google Slide presentation. Some people might consider this a disadvantage. Nevertheless, Watermarkly can really help you optimize the cropping process and save some precious time.
Watermarkly is a website that offers a selection of basic image editing tools. Here, you will be able to add a watermark to videos, watermark PDFs and photos, add text to a photo, and more. Watermarkly is perfect for making some quick changes and preparing your images not only for a presentation but also for sharing them online.
Final Thoughts
This article has equipped you with knowledge of how to crop an image in Google Slides and easily make the necessary adjustments to an image right on a slide. This method is ideal if you need to crop a few pictures as quickly as possible. But it definitely won’t be suitable for cropping dozens or even hundreds of images.
And, unfortunately, there are no cropping presets in Google Slides.
Luckily, if you need to change the aspect ratio or if you want to save some time when cropping a large batch of images, you can use Watermarkly’s online app for cropping. With it, you will be able to get the results you need in a convenient and time-efficient way!