
How to Crop an Image in Adobe InDesign: Step-by-Step Guide
by  Lina Thorne • Updated · Posted in Crop Photo
Adobe InDesign is a professional software for designing page layouts for books, brochures, posters, and interactive PDFs. It’s built around a frame-based model: text resides in text frames, graphics live in graphic frames, and composition is managed by arranging and formatting these frames. InDesign is ideal for editorial workflows where changes are frequently made to layouts and their elements.
Cropping in InDesign is non-destructive. No pixels are permanently deleted. You simply reframe and reveal parts of an image within your layout. It’s a flexible, reversible process that allows you to experiment with composition without changing your original image file.
This beginner-friendly guide features instructions on how to crop an image in InDesign using different methods:
- by adjusting the image within the frame;
- by making changes to the frame itself.
You’ll also find out how to crop an image into a circle or any other shape, and even how to turn some text into a frame, then place your image into it.
How to crop an image in InDesign
Before we get to the instructions, there are a couple of things that you need to know.
First, it’s not an image editing app. For this reason, if you try to actually import a JPEG image or a PNG image via File > Open, you’ll run into an error. Instead, you need to place an image into your document. Meanwhile, you won’t have any issues if you try to directly open an image in Adobe Photoshop or Adobe Illustrator.
Second, your image will be placed inside a frame, which is like a holding container. The frame defines what area of the placed image is visible. In Adobe InDesign, you don’t make changes to the image itself. What you see inside the frame is a linked preview.
How to crop an image in InDesign without changing the aspect ratio
This first cropping method is the quickest and easiest. It’s useful when you need to maintain the original aspect ratio. Say, you have an image where the composition is slightly off. Maybe there’s too much empty space at the top, and you’d like to get closer to the subject. This method involves resizing the image itself without making any changes to the frame.
Here’s what you need to do:
- Open Adobe InDesign and create a new document by clicking on New File.
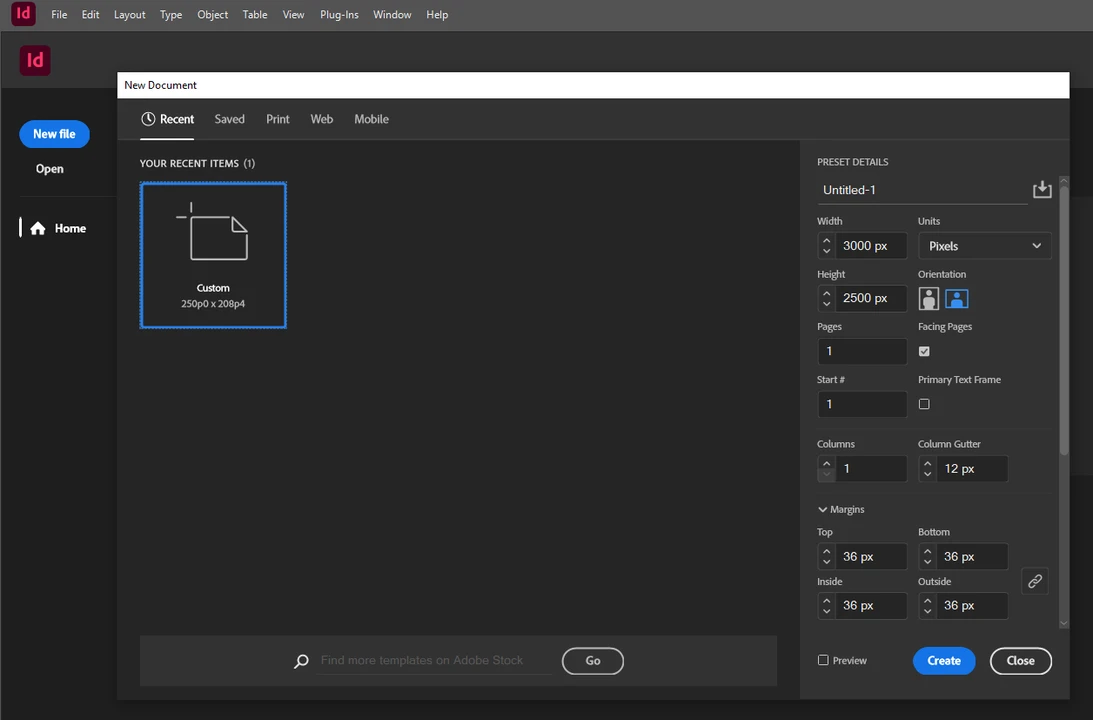
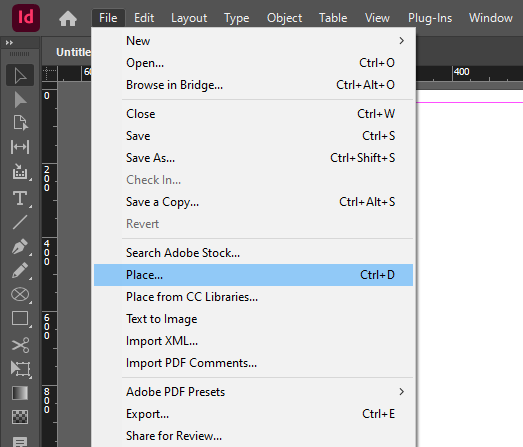
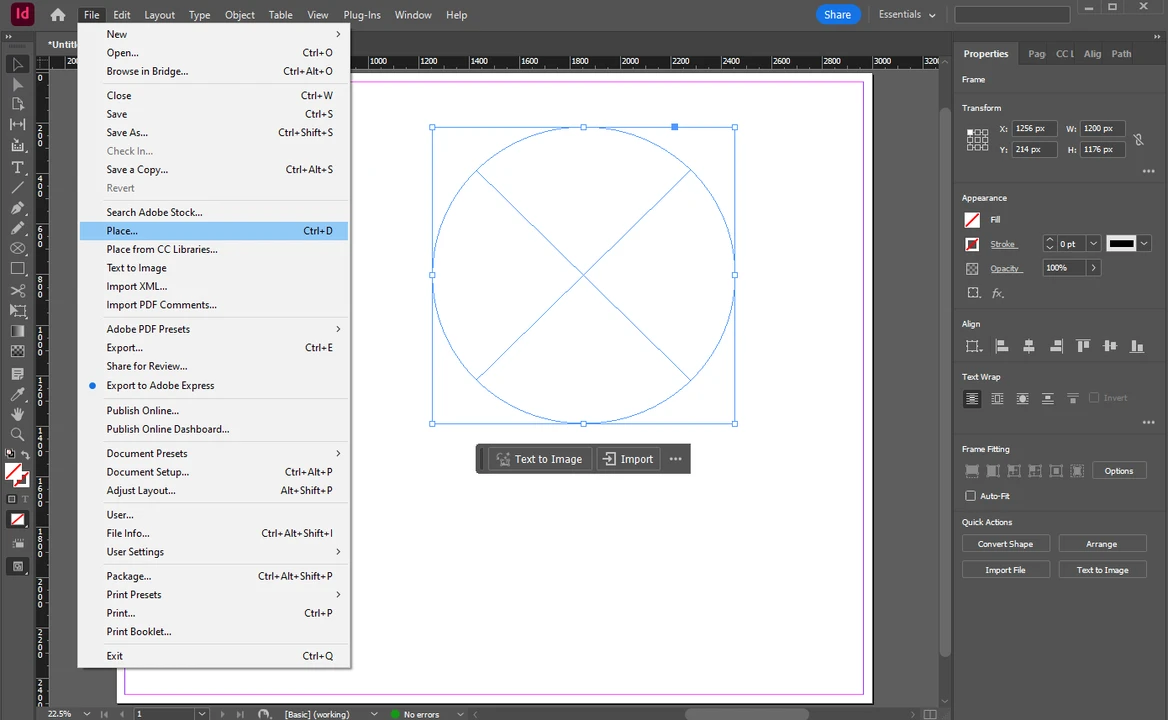
- Add your image to your document by going to File > Place. Alternatively, you can use the shortcut CTRL + D on Windows or CMD + D on Mac.
- Click on the spot in the document where the image should be placed. Once the image is placed, you’ll see a blue box with sizing handles around it. This is the frame.
- Select the Selection Tool in the toolbar or press V on your keyboard.
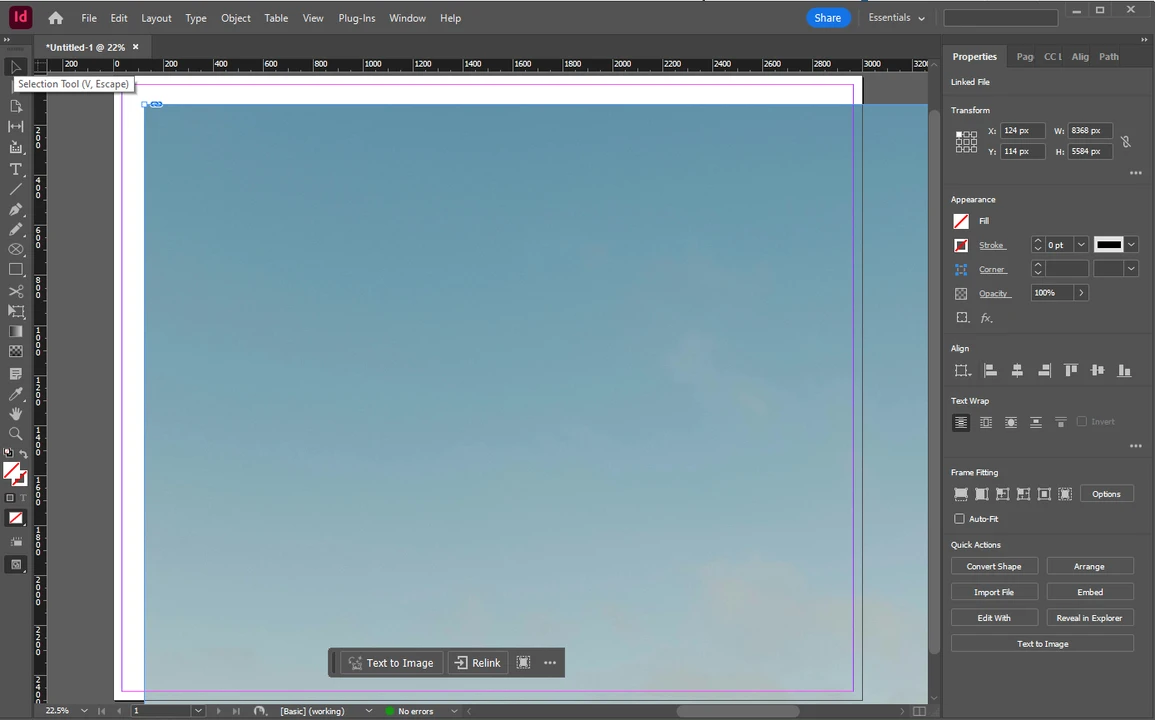
- Is your image too big? Don’t try to simply drag the edges of the frame! You’ll end up cropping it. And surely, this is what you want…but cropping an image that is too big can be tricky. So, to achieve better results, you need to resize your image first. Hold both SHIFT and CTRL / CMD while dragging the edges of the frame. That’s how you can resize your image and the frame at the same time.
- Once the image is resized, switch to the Direct Selection Tool by clicking on its icon in the toolbar or pressing the A key. Then click on the image. You’ll see a brown box – it means that the image inside the frame is selected.
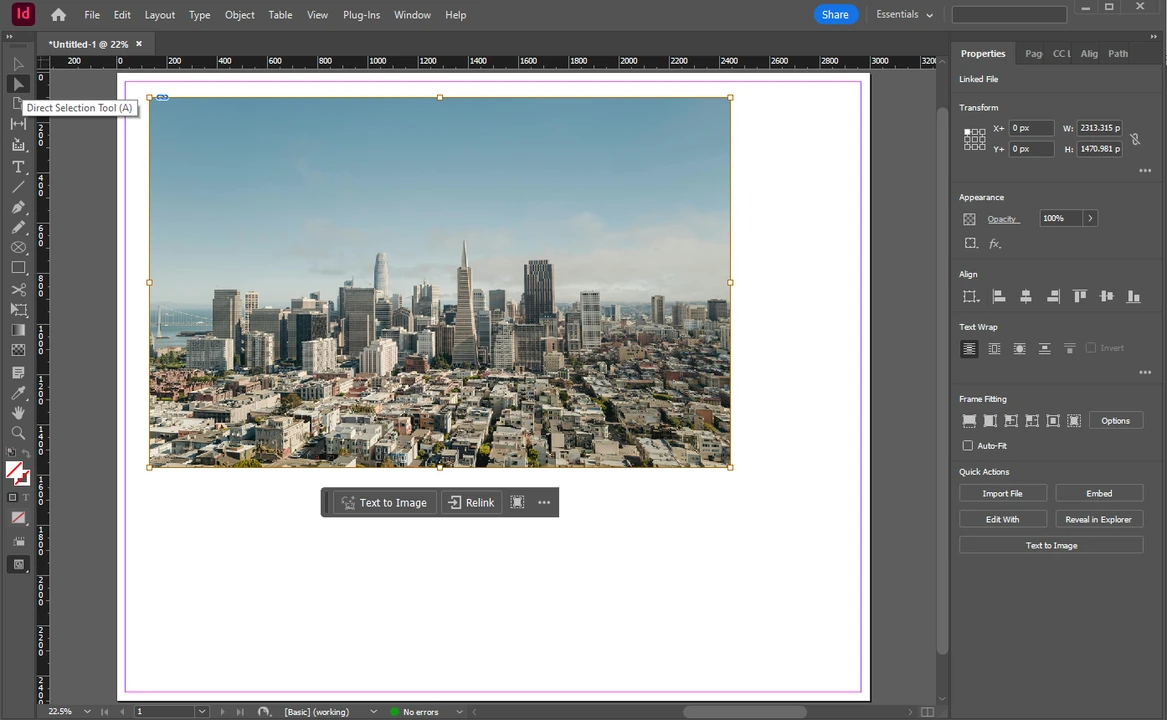
- Grab the corner of the brown box and drag it. You can hold SHIFT to maintain the aspect ratio and avoid weird image distortion.
- As soon as you let go, you’ll see that some parts of your image aren’t visible anymore.
- If you need to reposition the image inside the blue frame, click on the image itself, then reposition it.
That’s it! Your image is now cropped, but the aspect ratio stayed the same. Quite easy, right?
How to crop an image in InDesign and change the aspect ratio
What if you need to crop your image to change its aspect ratio? Then, you need to use this second method, which involves adjusting the blue frame.
Here’s how it works:
- Create a new document and place your image into it. Resize it, if needed.
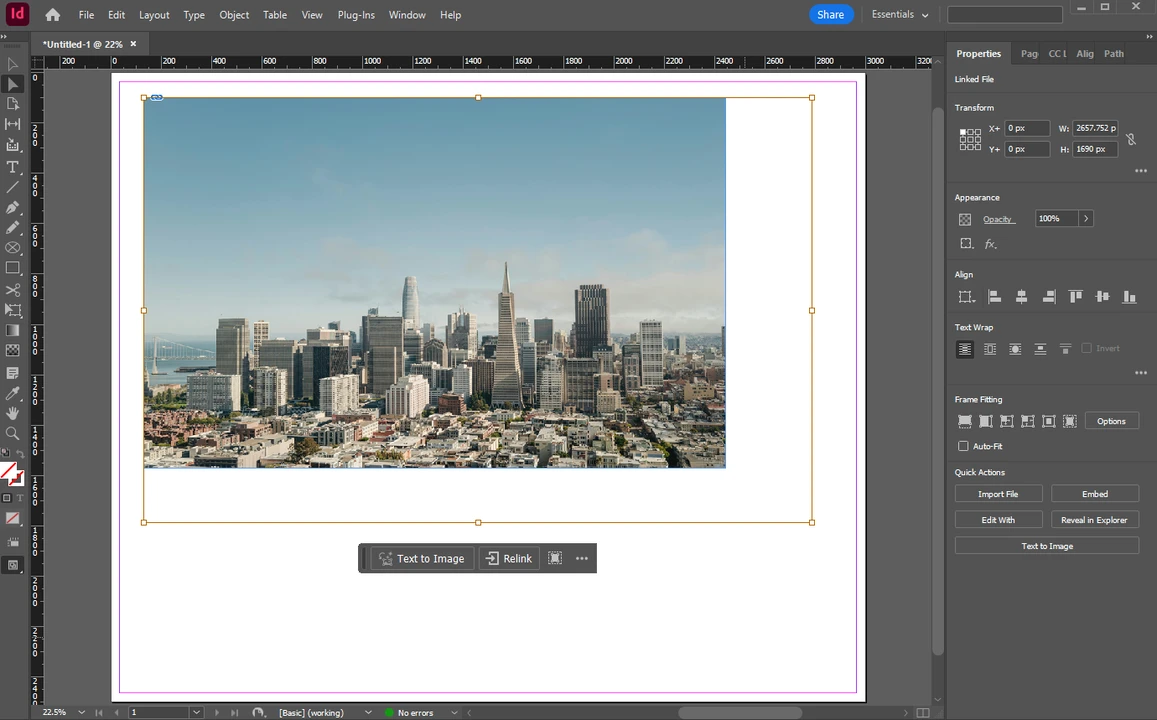
- Select the Selection Tool, then click and drag any of the blue frame’s sizing handles inward.

- The aspect ratio is different now. But you don’t know what aspect ratio you have now since you’re doing everything manually.
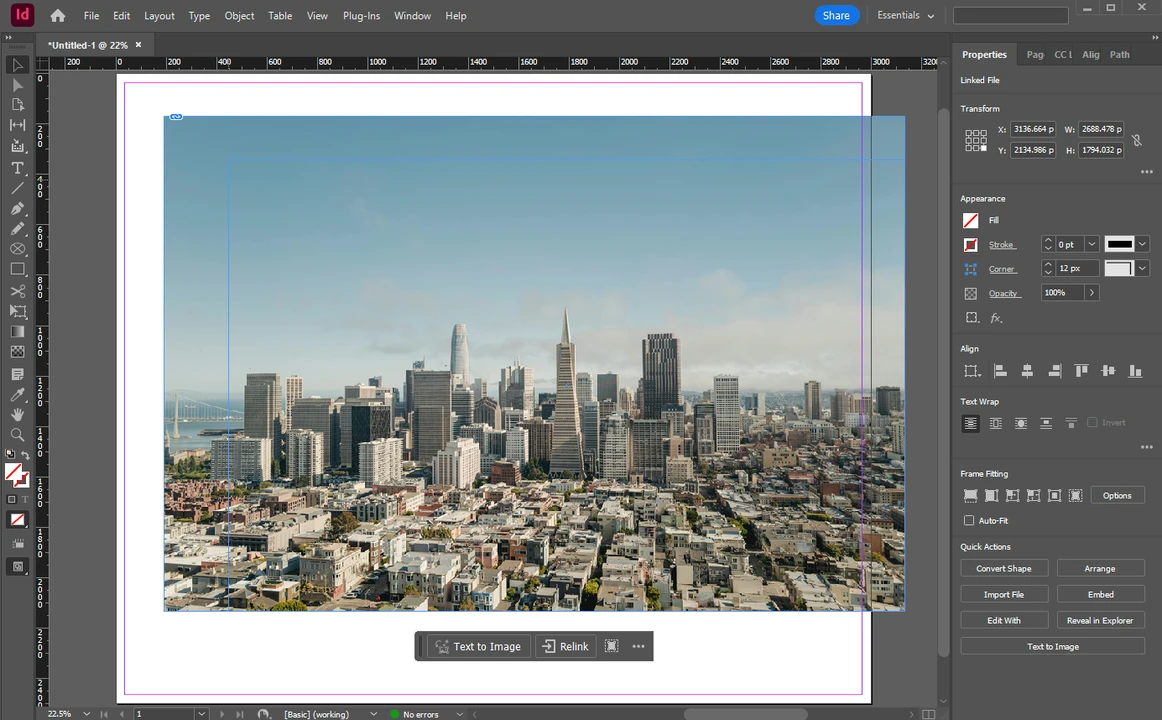
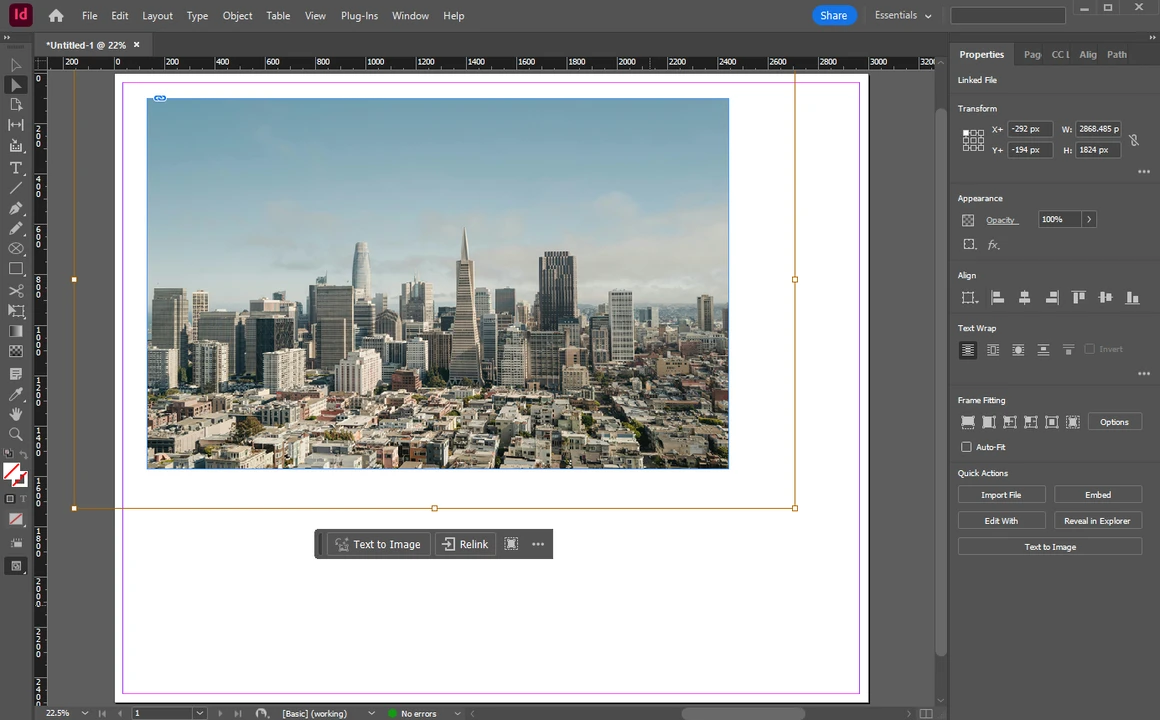
- What if you need to crop an image in InDesign with more precision? There’s a way! Make sure the frame is selected, then go to the Properties panel on the right. In the Transform section, enter new values for the width and height in pixels. For instance, if you want a perfect square, enter something like 2000x2000px.
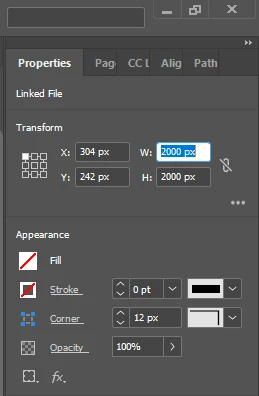
Before you do that, though, make sure that the link icon is crossed. This means that the current aspect ratio is not fixed. When the link icon is active, the height will change as soon as you change the width and vice versa. This feature can be useful if you need to change the pixel dimensions of the frame while maintaining the current aspect ratio. - If you want to adjust which part of the image is visible, double-click on the image with the Selection Tool. Once you see the brown box, resize and reposition the image within the frame.
All done!
As you’ve noticed, you need to enter values in pixels. If you’ve ever worked in Photoshop or any other image editor, you know that it’s possible to enter the necessary aspect ratio – e.g., 4:5. Unfortunately, InDesign doesn’t allow you to do this. So, you’ll need to calculate the necessary pixel dimensions using an online aspect ratio calculator, which can be inconvenient.
How to crop an image into a circle in InDesign
The previous two methods allowed you to crop an image into a rectangle or a square. But what if you need to crop it into a circle? Or some other shape? Of course, this is also possible in InDesign!
Just follow these steps:
- Create a new document in InDesign, but don’t place your image just yet.
- In the toolbar, right-click on the Rectangle Frame Tool to reveal the hidden tools: the Ellipse Frame Tool and the Polygon Frame Tool.
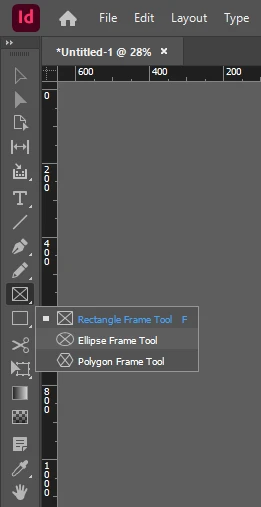
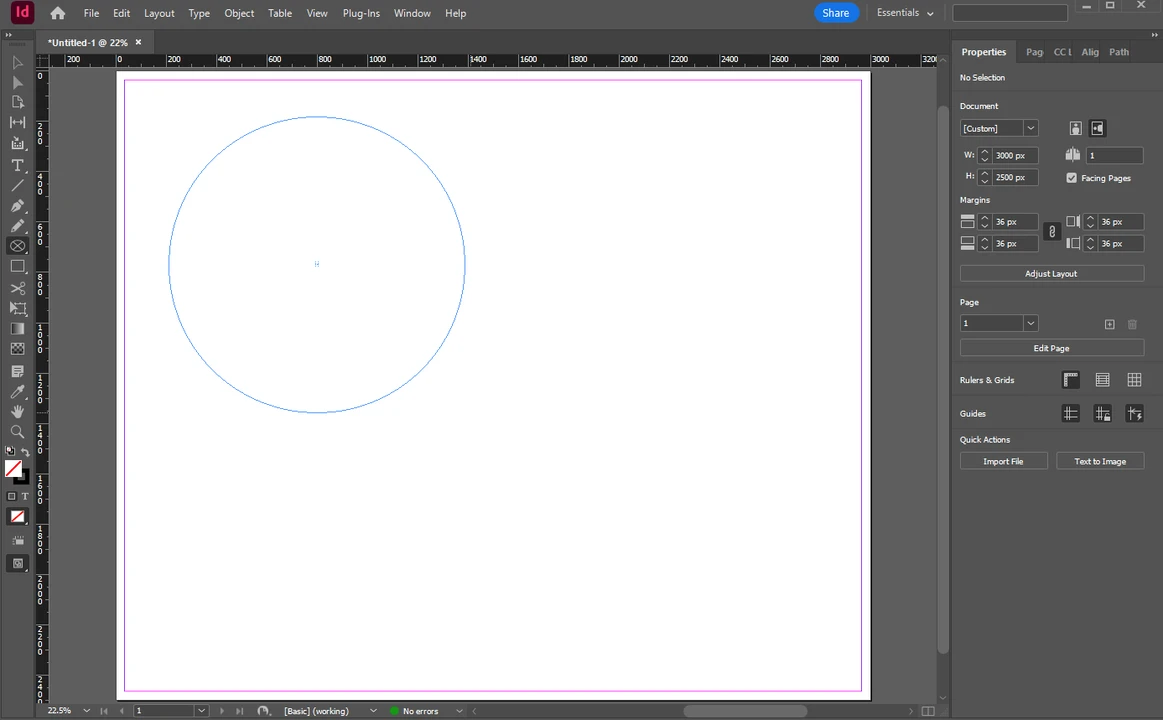
- Since you want to crop an image into a circle, choose the Ellipse Frame Tool. While holding the SHIFT key, click and drag to draw a perfect circle in your document.
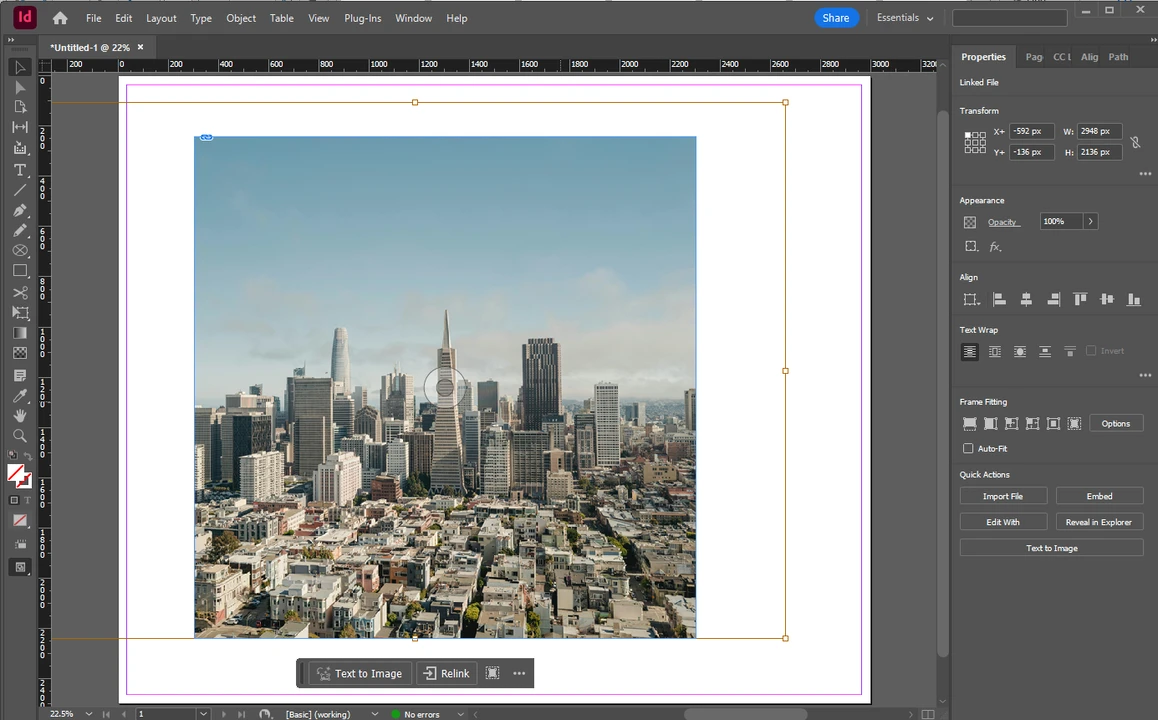
- With your circle frame selected, place your image by going to File > Place.
 The image will be placed right into the frame and, thus, cropped into a circle.
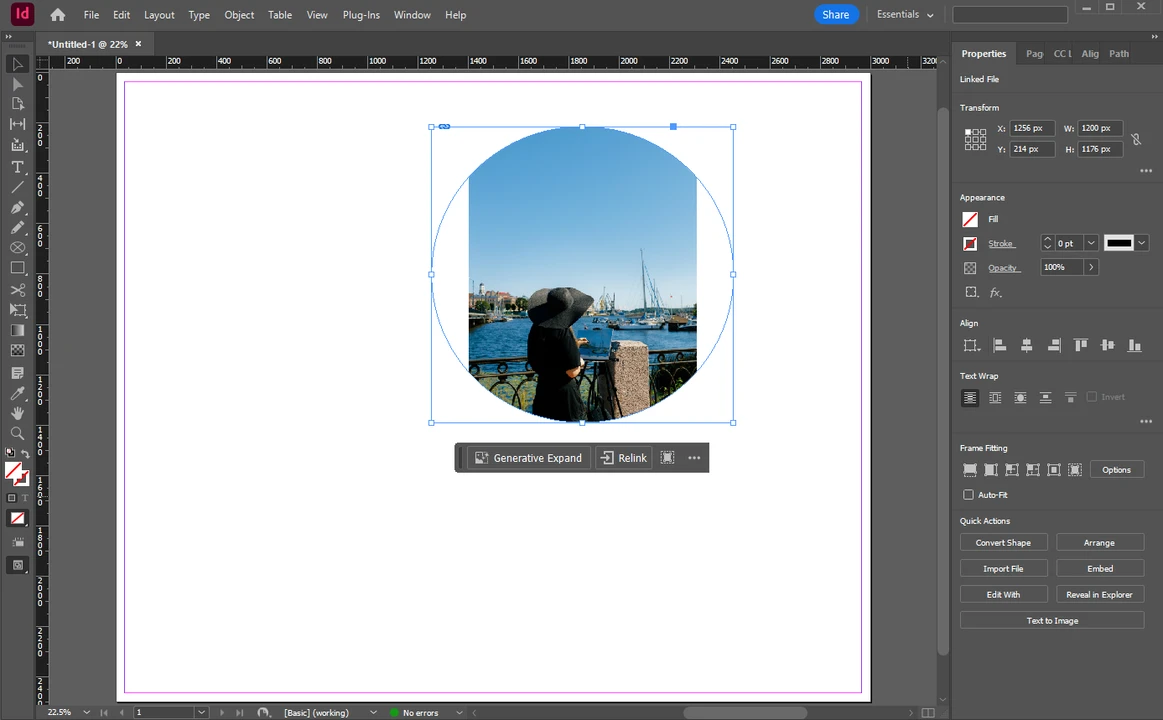
- You may need to fit the image to the frame. To do this, right-click on the framed image and choose Fitting.
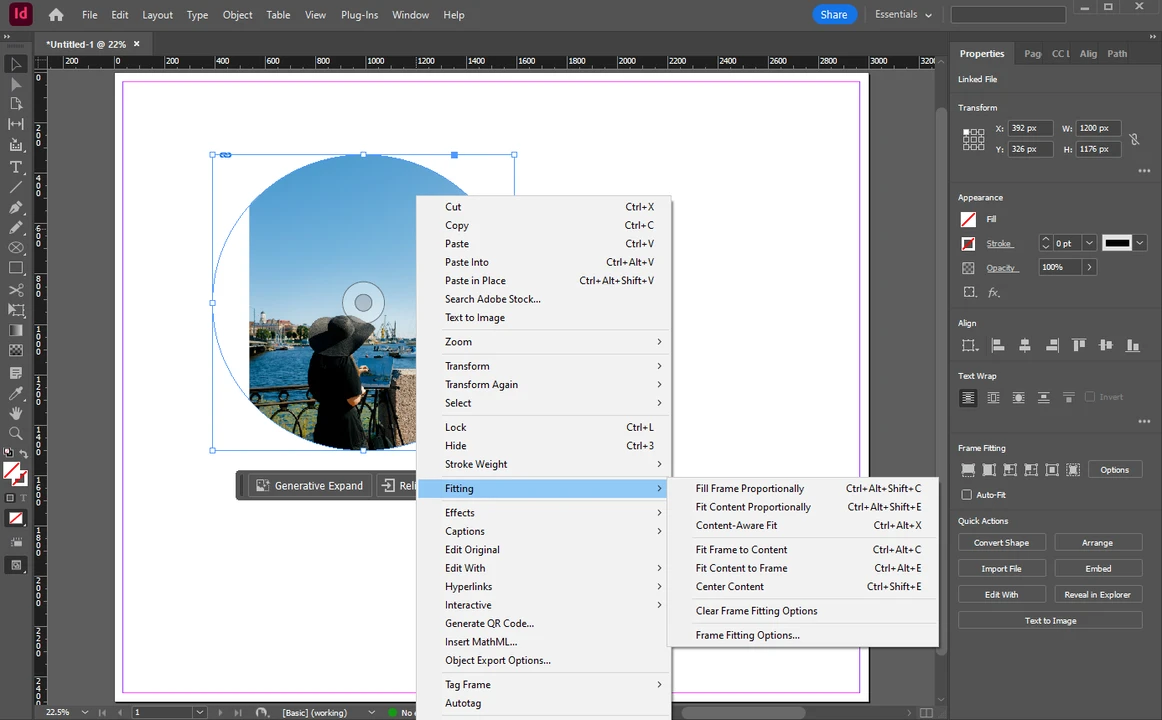 You’ll see several key options under Fitting:
Fill Frame Proportionally resizes the image to fill the entire frame. But unlike the Fit Content to Frame option, there won’t be any distortion. There won’t be any blank spaces, either.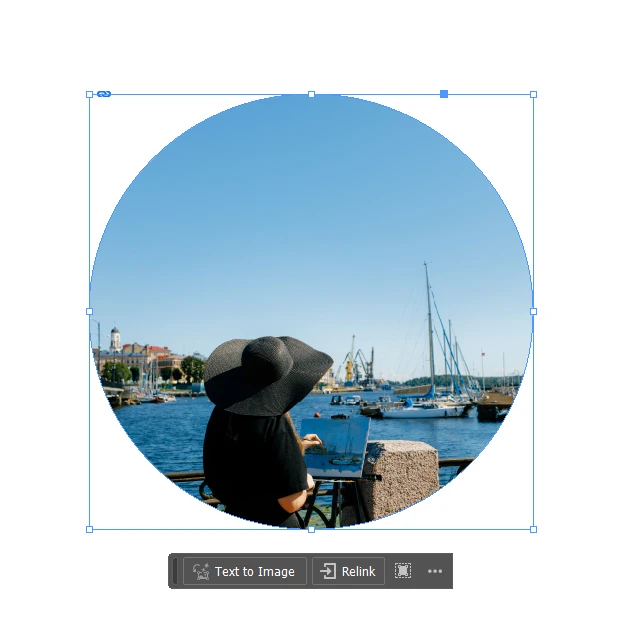
Fill Content Proportionally resizes the image to fill the frame while also maintaining the aspect ratio of the image. As a result, you will end up with some blank spaces.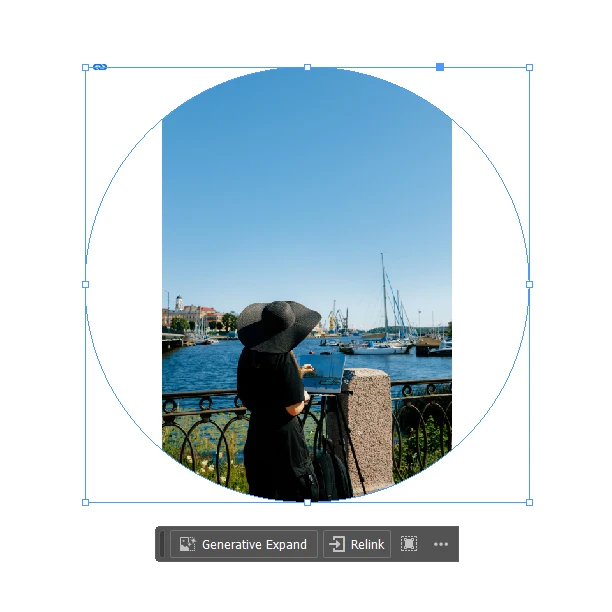
Content-Aware Fit is similar to the Fill Frame Proportionally option. The difference is that it takes into account the context and the focal point of the image, then automatically repositions and resizes it into the frame.
Fit Content to Frame resizes the image to fill the entire frame, but it might mess up the proportions, and the image will look distorted.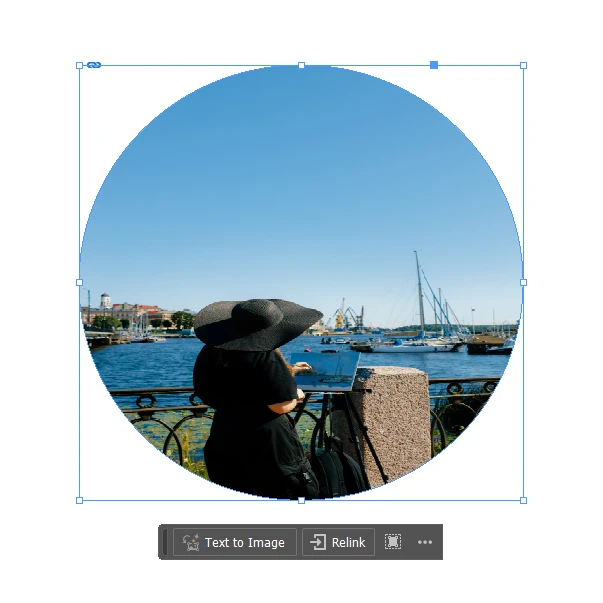
Fit Frame to Content resizes the frame to match the original image’s pixel dimensions. This can mess up the shape of the frame. For instance, if your original image is rectangular, your frame will turn into an oval instead of a perfect circle.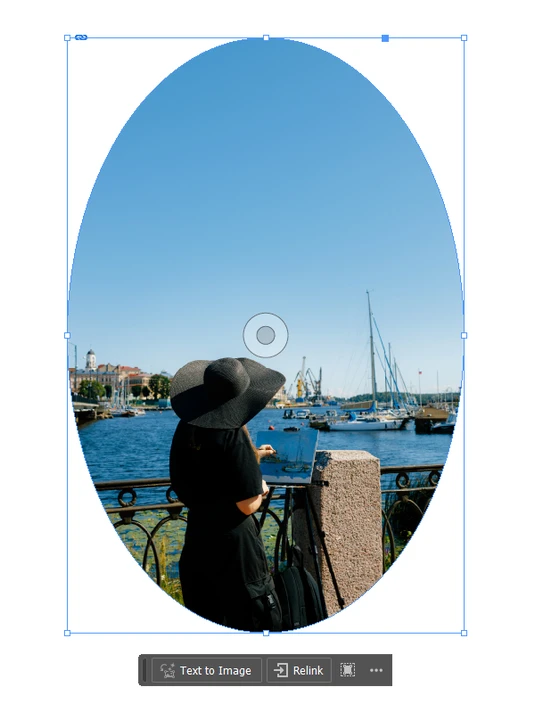
Center Content centers the image within the frame without resizing it. - Choose the required fitting option.
- Do you need to make some fine-tuning? Enable the Selection Tool, then double-click inside the frame to activate the image. Reposition and resize the image within the circle frame until the composition looks right.
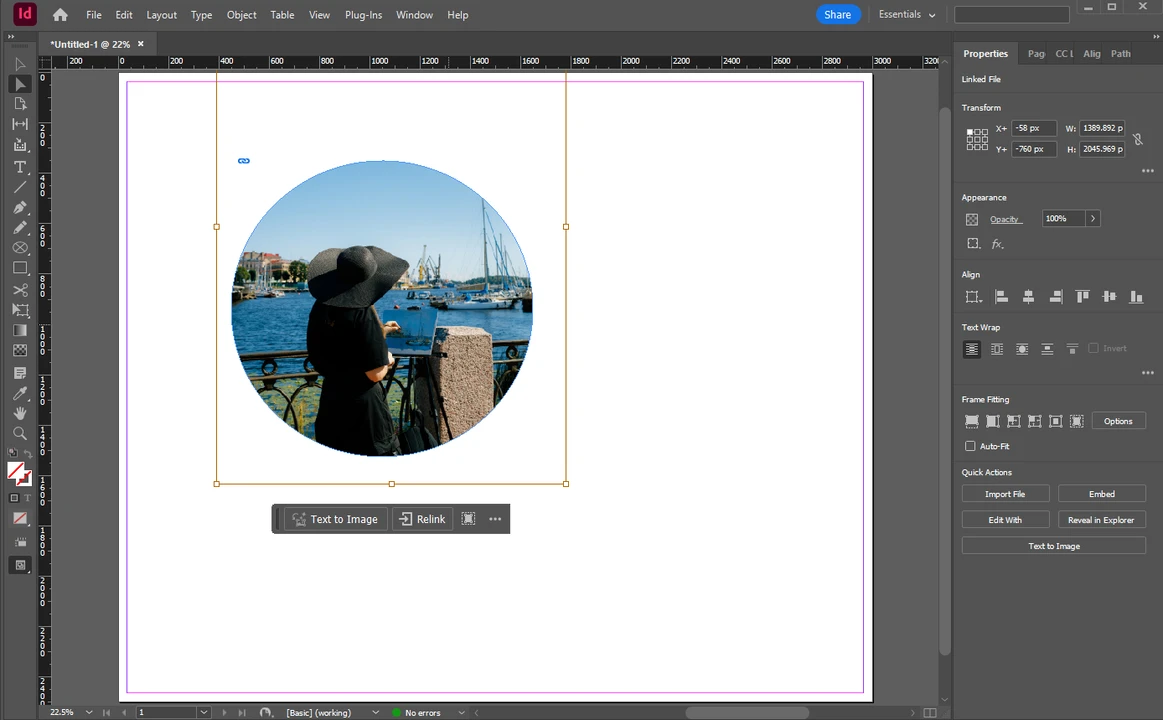
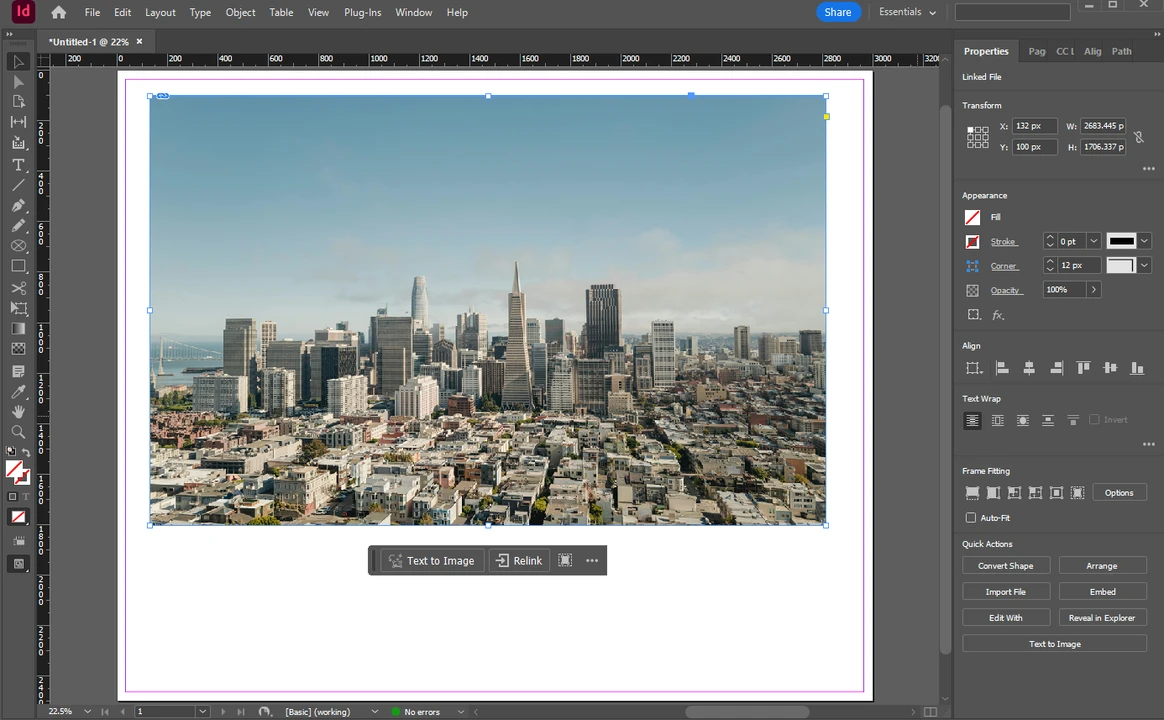
- If you want your cropped image to have a solid-color outline, go to the Appearance section in the Properties panel. Then increase the number of pt for the Stroke.
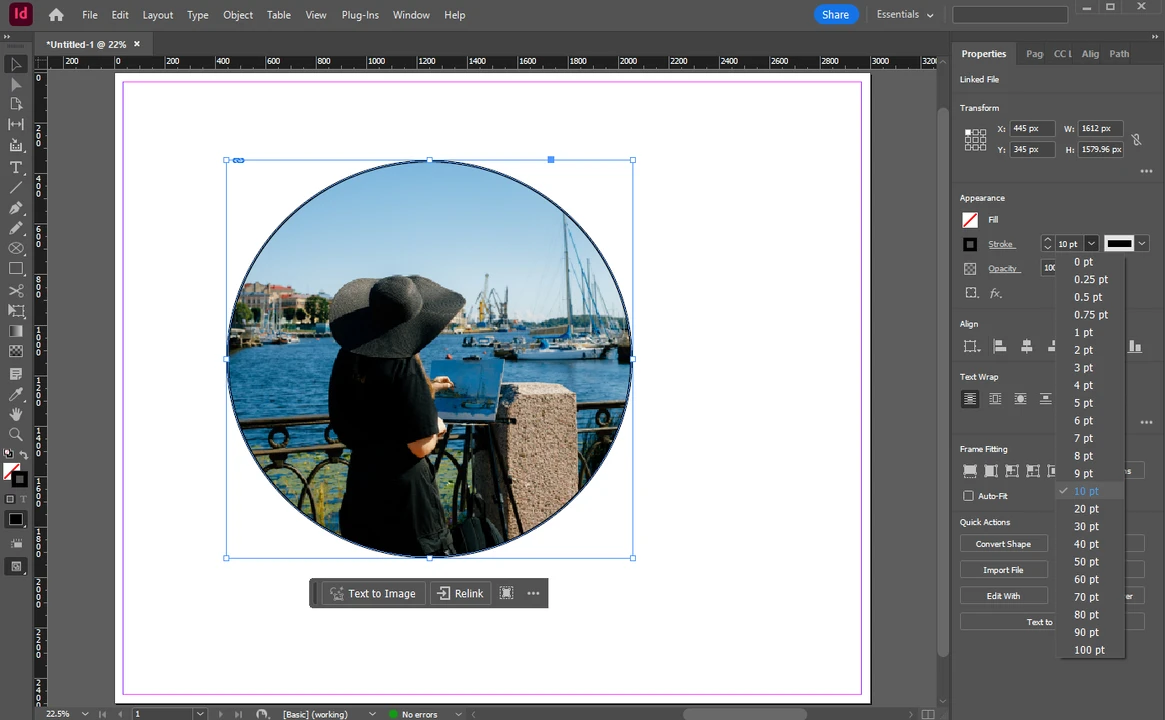
And now your image is cropped into a circle!
You can use this method for cropping your image into any other shape – simply select the Polygon Frame Tool instead of the Ellipse Frame Tool. Then, before you draw, you can double-click the tool icon to set the number of sides and star inset.
Additionally, to create a more complex custom shape, you can draw a path with the Pen Tool, then select the path, right-click, and choose Content > Graphic to convert it into a graphic frame.
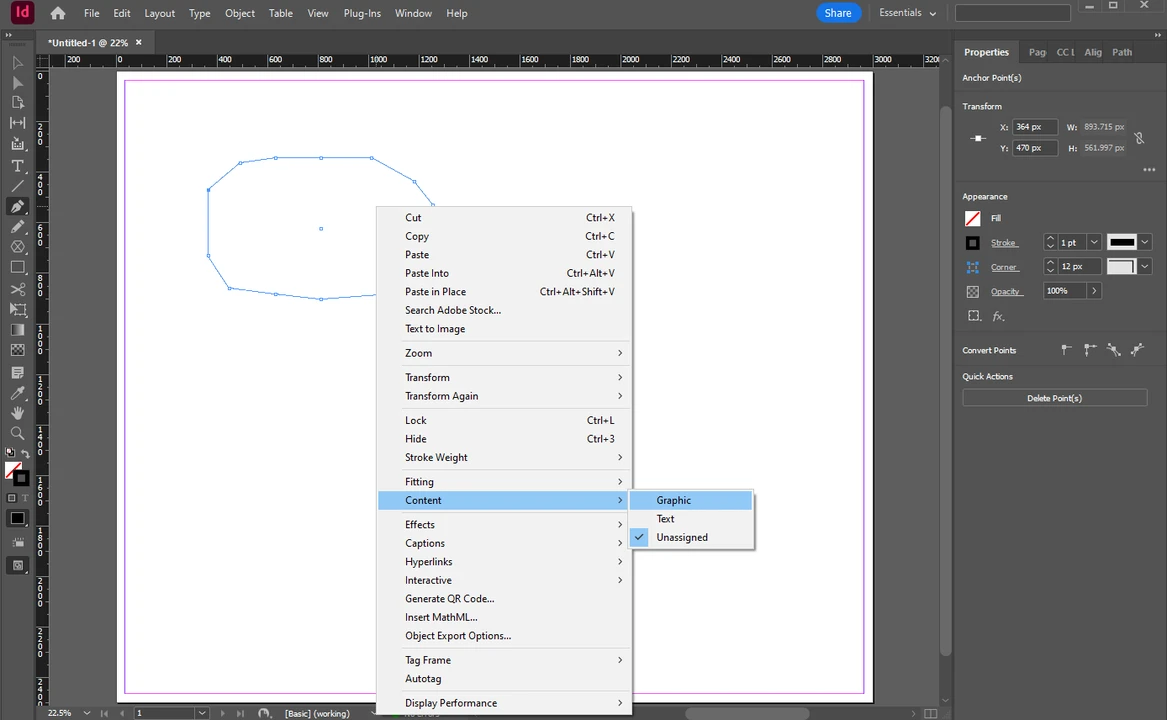
Then, place your image inside it.
How to change the shape of the frame in InDesign
What if, at some point, you change your mind and realize that you want your circle-cropped image to be a square?
Luckily, it’s pretty easy to change the shape of the frame:
- Select the frame.
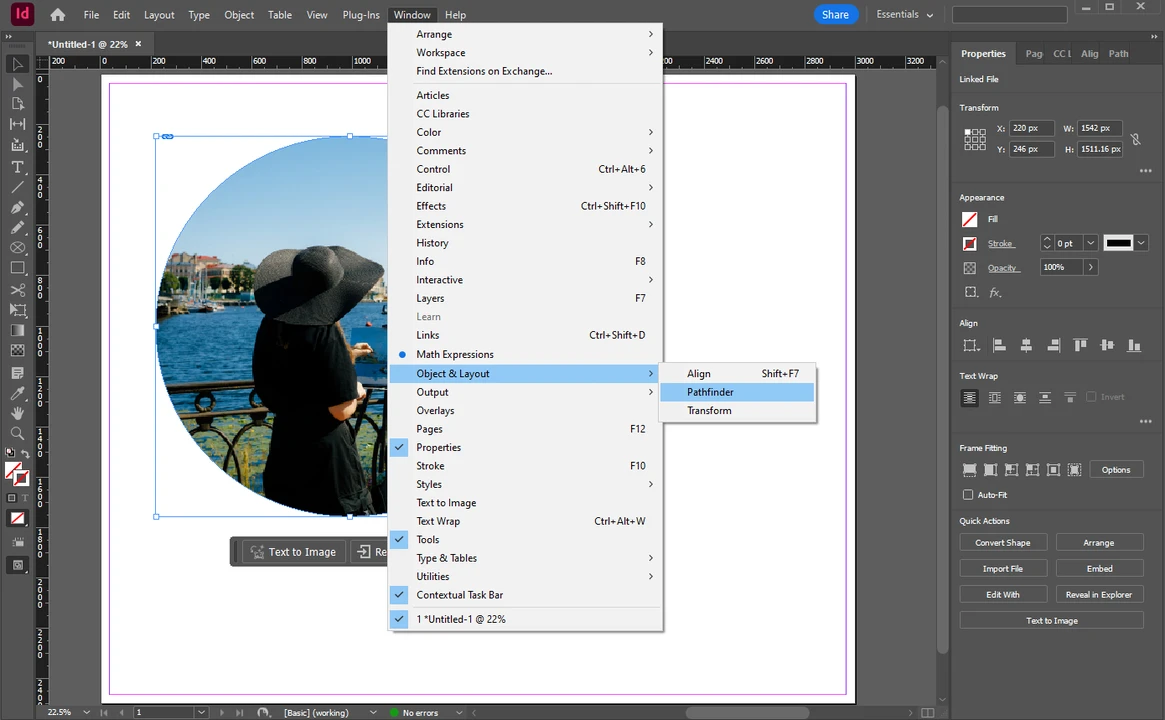
- Go to Window > Object & Layout > Pathfinder. This will reveal the Pathfinder panel.
- Select one of the shapes in the Convert Shape section. For instance, it can be a rectangle.
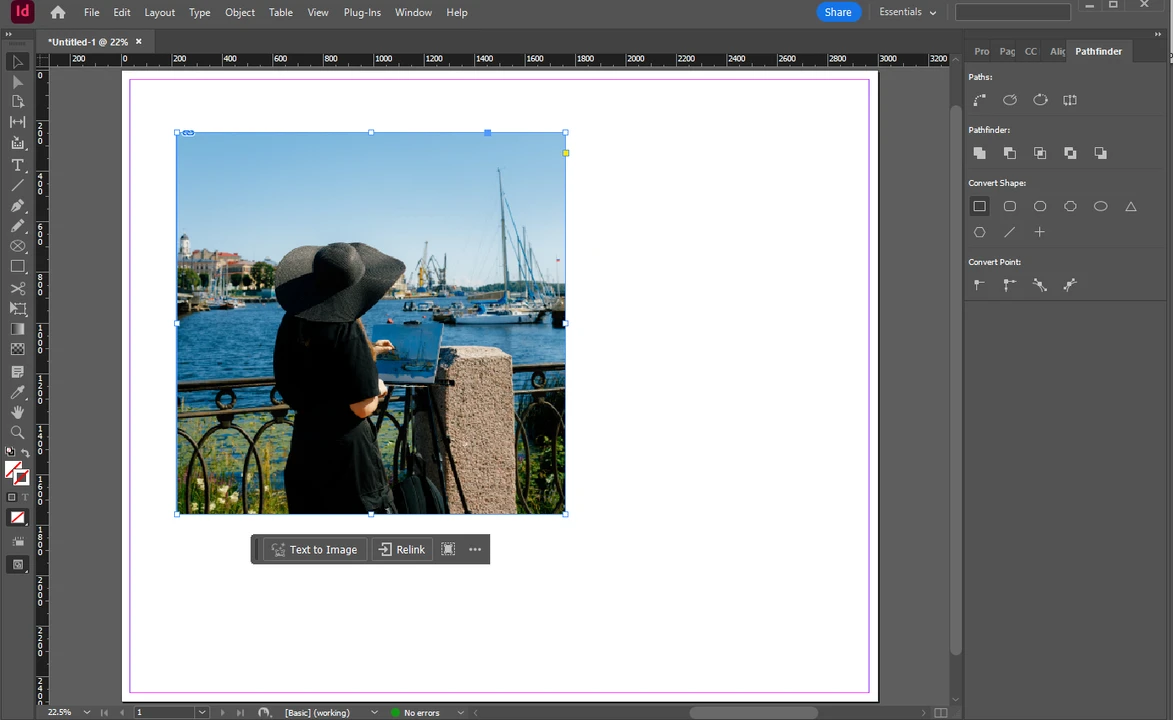
Voila! Your image is no longer circle-shaped!
How to use text as a frame to crop an image in InDesign
This last method is for those who want to get a little creative. You’ll crop your image into the shape of whatever text you want:
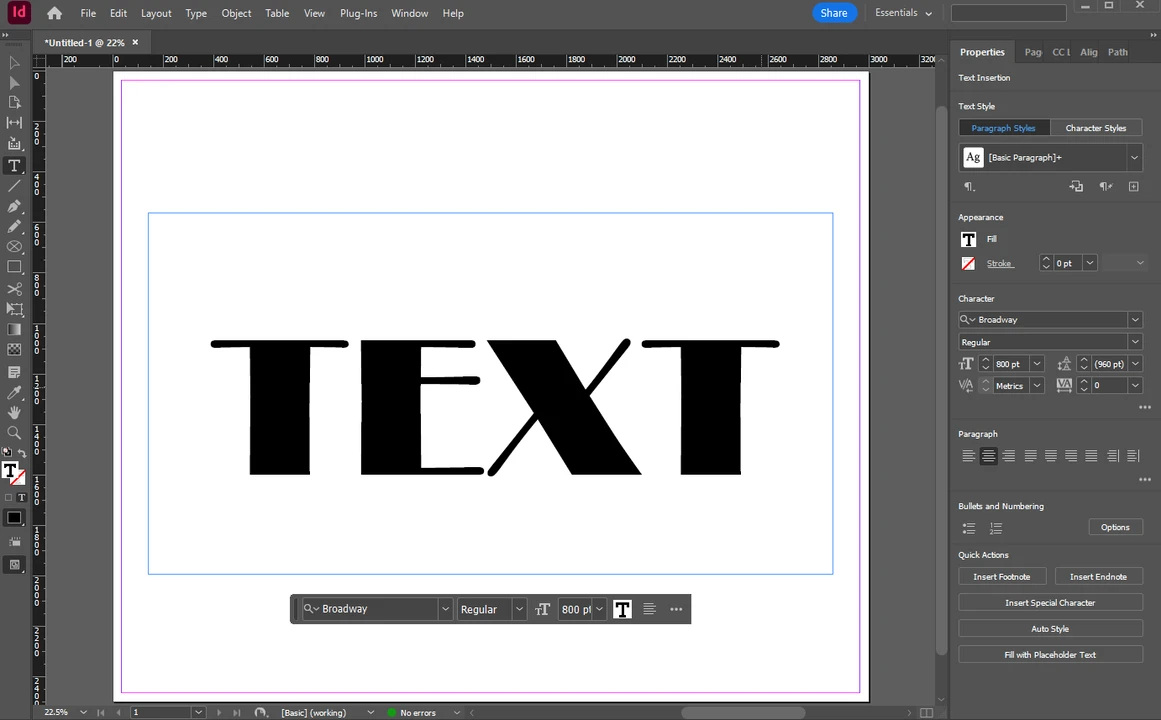
- Create a new document, then select the Type Tool (T) in the toolbar and type in your text. Adjust its size and placement if necessary.
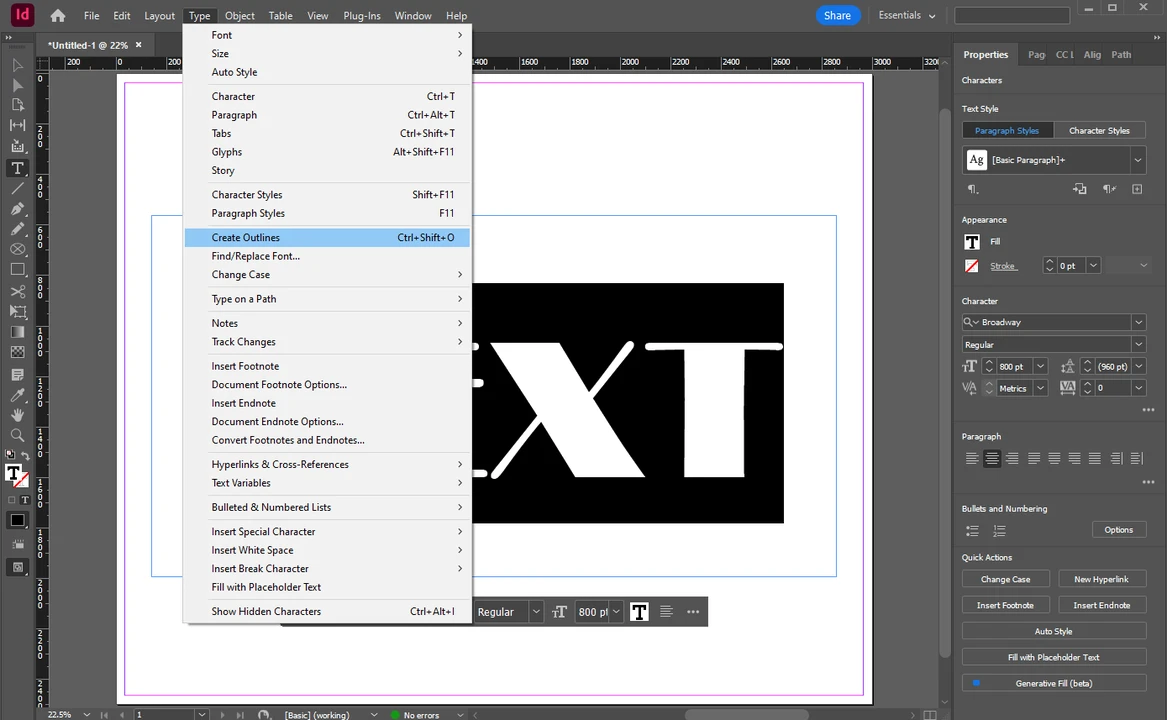
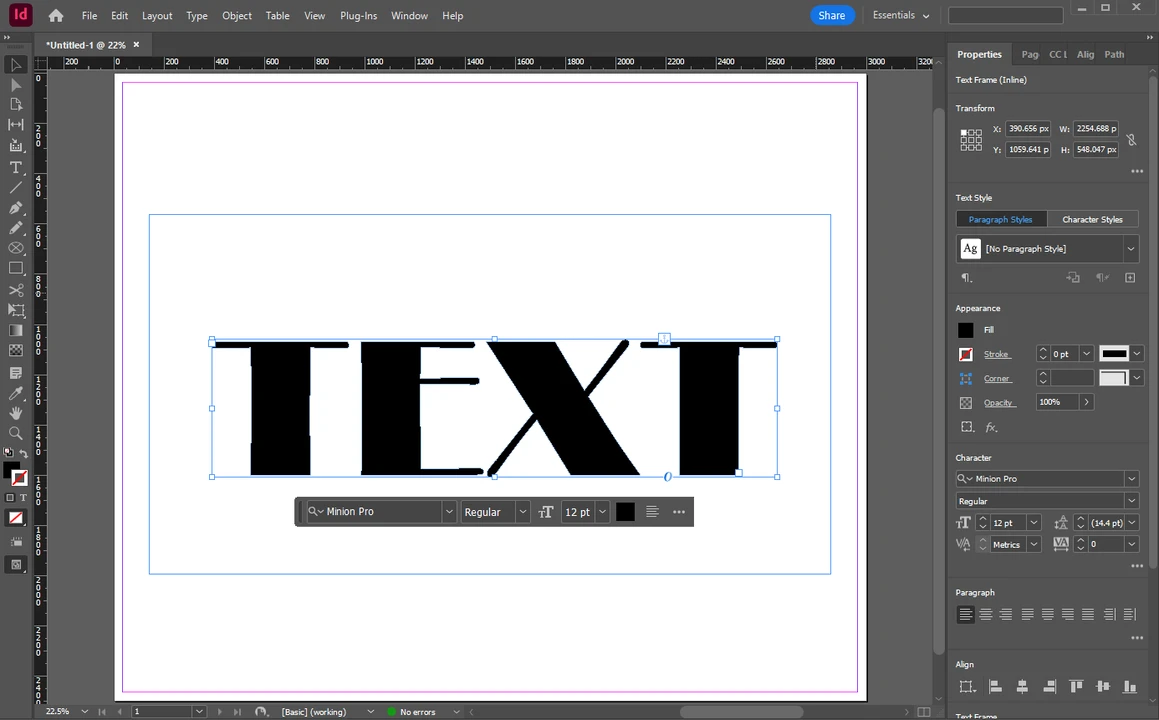
- Select the text with the cursor, then choose Type > Create Outlines.
 If you end up with several separate objects, select them all and choose Object > Paths > Make Compound Path. Once you do this, they will turn into a single frame.
 - Switch to the Selection Tool and select the new frame.
- Go to File > Place to place your image.
- Double-click on your image, then resize and reposition it. You can also give a try to different fitting options and see which one works best.

And now you have your image in the shape of your text. Pretty cool, right?
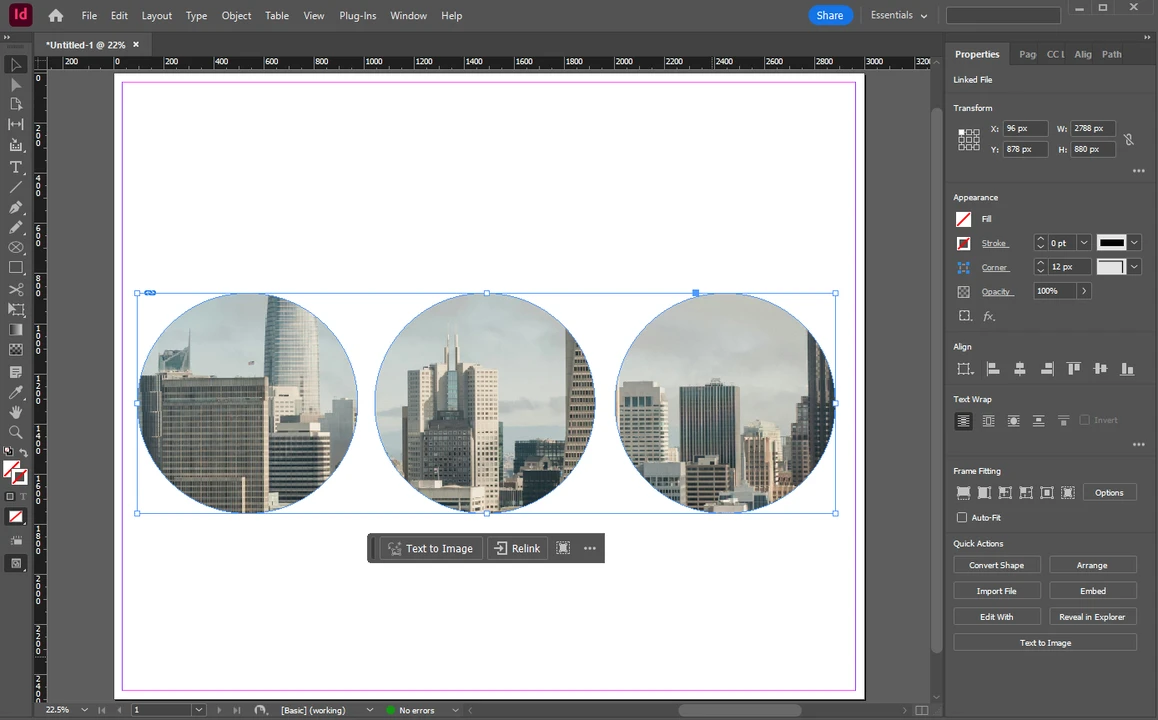
Here’s a tip. You can also use the Make Compound Path feature to turn multiple frames into a single one. For example, you can draw three perfect circles on your document. Then select all of them with the cursor and go to Object > Paths > Make Compound Path.
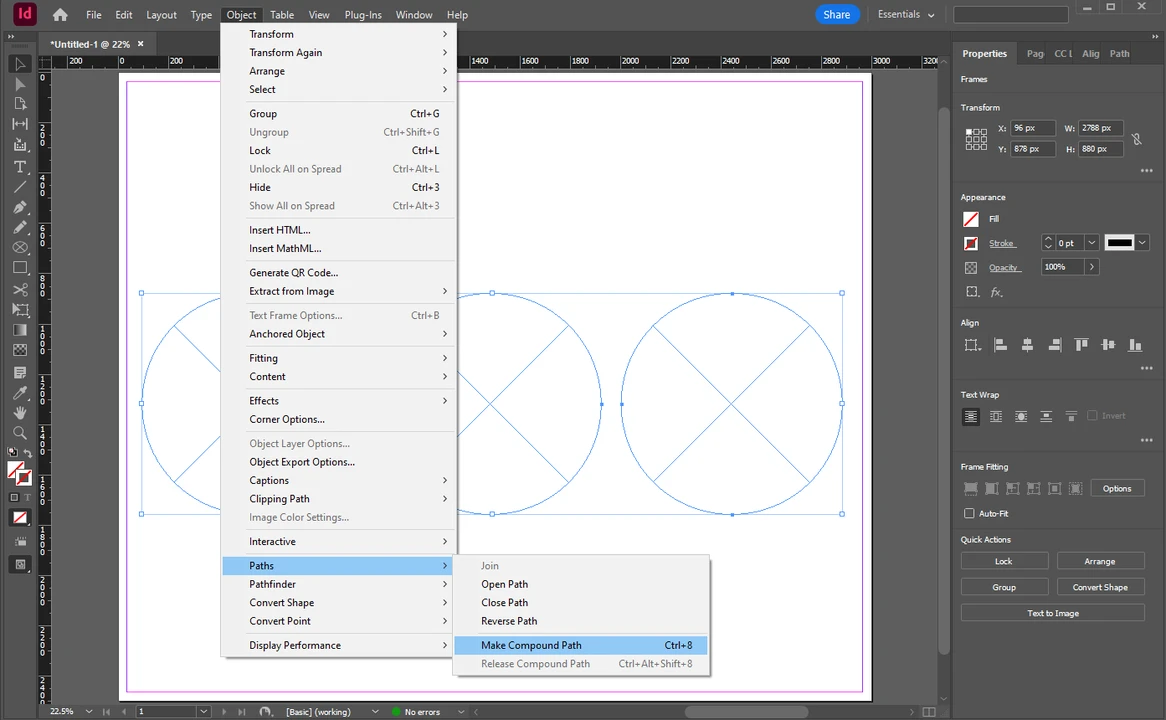
This will turn them into a single frame, and you’ll be able to place a single image into three of these circle frames at the same time.
How to export a cropped image in InDesign
Do you want to know how to export your cropped image in InDesign? It’s pretty easy:
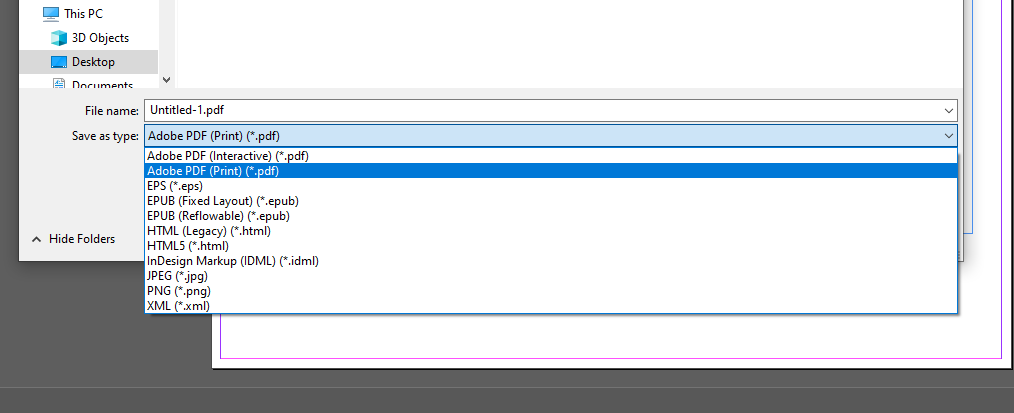
- Go to File > Export.
- Choose the location for your document. If you need a different file format, open the Save as Type drop down menu and select the necessary option and click on Save.
- Set the export settings.
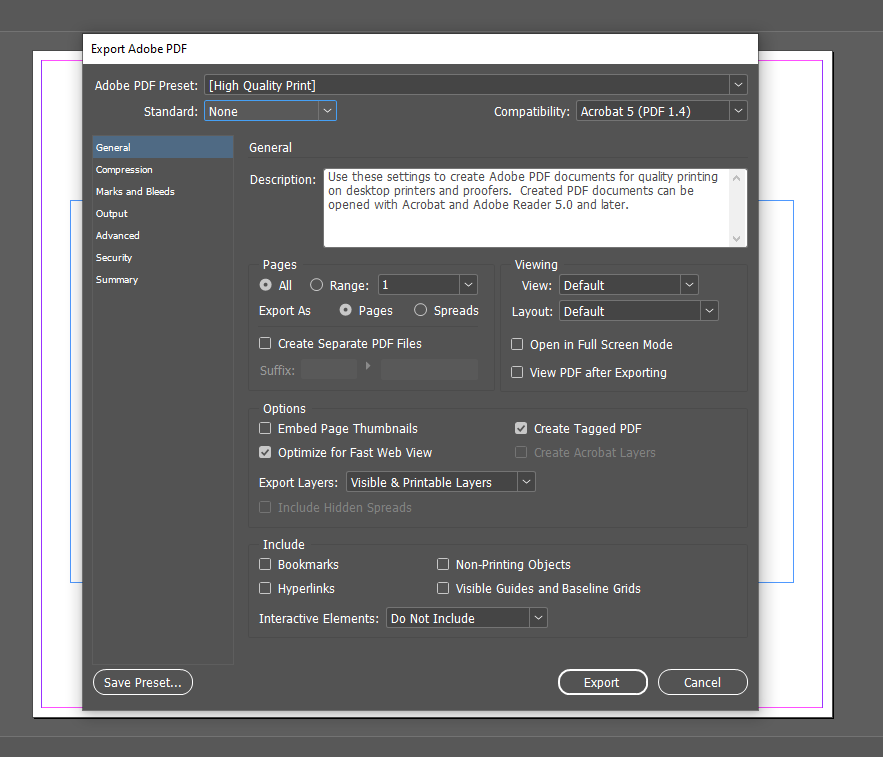
- Click on Export.
When the export is done, open your exported file and check whether everything looks correct.
What if you need to crop multiple images?
All the different methods we’ve covered involve cropping only one image at a time. But what if you need to crop several images in one go? Maybe you want to fill out the entire page with square or circle images?
Well, as an option, you can create one shape as the master frame, duplicate it, then place images into each frame. But this might be time-consuming.
Luckily, there’s an alternative. You can use Watermarkly’s online image cropper, which allows you to batch-crop images. It’s pretty easy and straightforward:
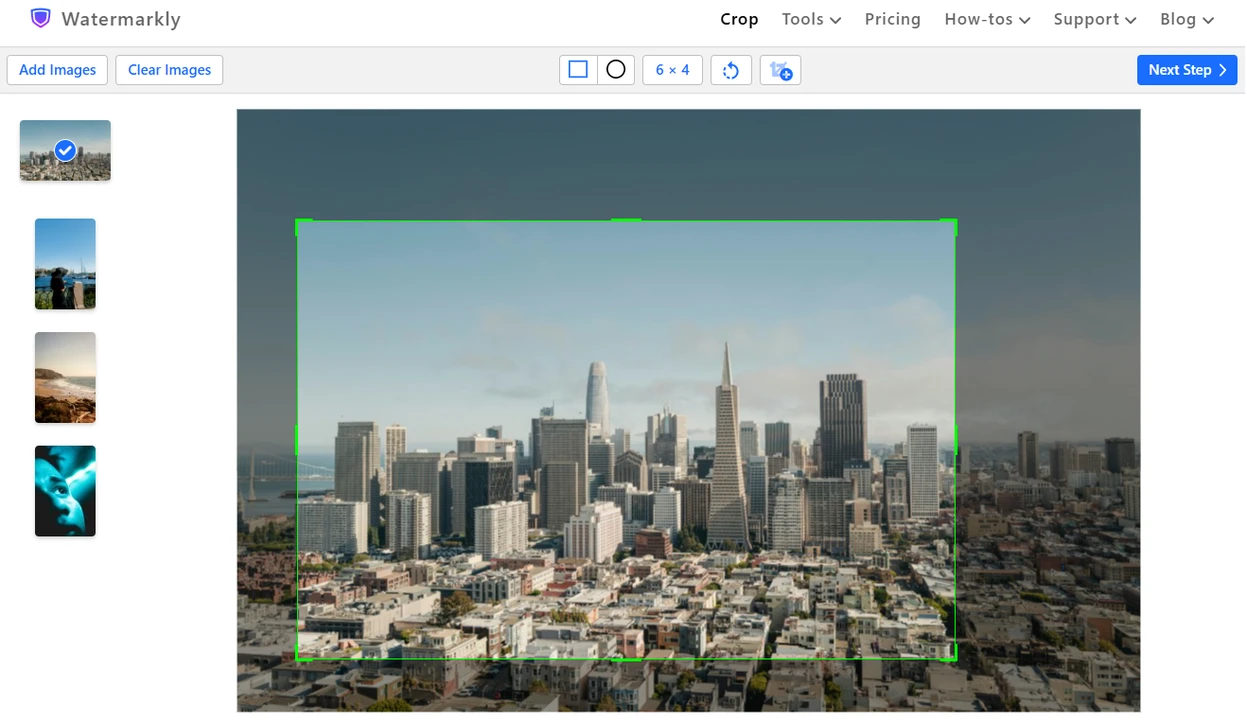
- Open Watermarkly’s image cropper in your browser, then import your images.
- Select the rectangle or the circle shape.
- If you select the rectangle, you can click on No Constraints to open the drop-down menu. Here, you can enter your custom aspect ratio or pixel dimensions. You can also select a cropping preset. That’s right, here, you won’t have to calculate anything. You can simply enter the necessary aspect ratio or choose a preset.
- Resize and reposition the cropping area on the image. In Watermarkly, you’re not working with the frame and the image separately.
- Repeat this process with every image in the batch. You can apply one and the same aspect ratio to all images or select different shapes and aspect ratios for each image.
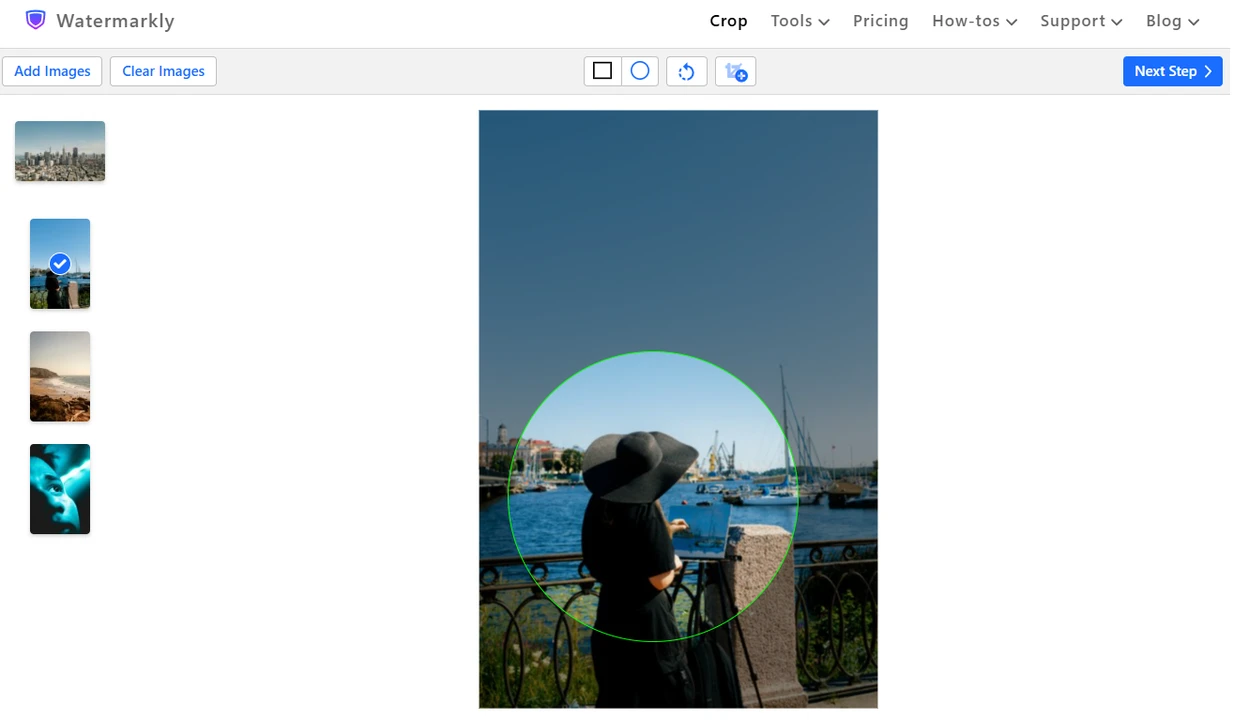
- Have you made all the adjustments? Click on the Next Step button.
- Set the export settings, then click on Crop Images.
- Wait for the processing to finish and download your images to your device.
All that’s left to do is to create a document in Adobe InDesign and place your already cropped images into it!
Note: If your images are all in the same format, you can use a dedicated tool such as Crop JPG, Crop PNG, or Crop GIF.
Cropping in Watermarkly is destructive. The original images won’t be changed. All the changes will be applied to automatically created copies. However, if at some point, you’d want to change the shape of your image, you will need to re-crop the original, then place the new cropped copy into your document in InDesign.
Also, it’s only possible to crop images into a circle, rectangle, or square in Watermarkly. If you need a wider selection of shapes or create a custom shape, you’ll need to use InDesign.
Nevertheless, if you’re sure that you don’t want to change the shape of your images and you’re in a rush, using Watermarkly’s image cropper can actually make things a bit easier and quicker.
Conclusion
Cropping images in Adobe InDesign is an essential skill for those who often use this layout-designing software. It offers a lot of flexibility, allowing designers to refine their compositions on the fly without altering the originals permanently.
Remember, the frame is the window, and the content is the view. You can change the size and shape of the window and adjust the view behind it anytime you want. Now that you know that cropping in InDesign is powerful and incredibly easy, you’ll be able to do it efficiently and get the results you need.
Interested in trying a different cropping app? Check out these guides to get started:
How to Crop an Image in Illustrator
How to Crop an Image in Photoshop
How to Crop in a Circle in Photoshop
How to Crop an Image in Google Slides
How to Crop a Picture into a Circle in PowerPoint