
How to Crop a Video on Any Device: iPhone, Android, Mac & Windows
by ![]() Lina Thorne • Updated · Posted in Video Editing
Lina Thorne • Updated · Posted in Video Editing
Cropping is one of the easiest, yet most effective editing techniques that every content creator, a social media enthusiast, or someone who wants their videos to look cleaner and more polished needs to master. It can really make a world of a difference! It allows you to remove unwanted parts of the frame, focus on the main subject, fix the overall composition, and adapt one and the same video for different platforms.
There are plenty of free and paid tools that you can use to perform this simple task. In this detailed guide, we’ll explore the difference between trimming and cropping as well as find out why cropping videos can be beneficial. Here you will learn how to crop your video no matter what device you’re using – iPhone, Mac, Android, or Windows. Don’t worry, video editing experience isn’t required!
What’s the Difference Between Cropping and Trimming a Video?
Sometimes the terms cropping and trimming are used interchangeably. And both of these video editing techniques can be easily done in pretty much any video editor – Adobe Premiere, CapCut, and even native apps like Photos on iPhone. But they are actually completely different. So, it’s important for you to understand the difference between them.
Trimming a video involves deleting parts of the timeline – either from the beginning, end, or middle of a video. It shortens the duration of your video. The visible area of the video remains the same.
You can trim a video to:
- Remove awkward pauses or mistakes.
- Get rid of unnecessary footage.
- Split a long clip into smaller segments.
- Make your video file smaller.
Example: You can turn a 2-minute video with lots of pauses and awkward moments into a 30-second clip that consists of only what’s important.
Cropping a video involves making changes to the visible area of the video frame. It’s pretty much the same as cropping a photo. When you crop a video, nothing happens to the timeline, so the duration of the video remains the same.
You can crop a video to:
- Remove distractions or unwanted objects from the edges of the frame.
- Focus more closely on your subject.
- Change the aspect ratio and adapt your video for different platforms.
- Reframe a shot for better composition.
Example: If you have a video that is shot horizontally with the 16:9 aspect ratio, you can crop it to the 9:16 aspect ratio, thus turning it into a vertical clip for TikTok.
Why Cropping a Video Can Be Beneficial
Here are the key reasons why you should consider cropping your videos:
1. Focus on the subject
Cropping allows you to draw all the attention to the main subject – be it a person or an object. It ensures that your audience won’t miss what really matters. You can quickly and easily get rid of the background noise – clutter, passersby, or empty space – without re-shooting anything.
2. Remove distractions
Is there something in the corner of the frame that ruins the shot? Some kind of a logo, a sign, or an unintentional photobomb? Don’t delete the entire video just yet. Instead, try to crop the distraction out.
3. Optimize for different platforms
Different social media platforms require different aspect ratios. TikTok, Instagram Reels, and YouTube Shorts favor vertical videos with the 9:16 aspect ratio, whereas traditional YouTube videos are all in the 16:9 horizontal format. By cropping your video, you can easily change the aspect ratio and adapt your footage for different social media platforms.
4. Improve composition
You might not always have the time to compose your video properly or the luxury of telling people to repeat what they’ve just done; especially if you’re shooting an event. Fortunately, it’s really easy to fix the composition in post with the help of cropping.
Important Tips
- You can both trim and crop your videos. But to get the best results and preserve good quality, it’s better to trim redundant bits of your video first. And only then, reframe your video with the help of cropping.
- Don’t over-crop. Trimming doesn’t affect the quality of your video. But cropping does. So, if you crop out more than half of the frame, you can experience some serious quality loss. Also, work with high-resolution footage whenever possible.
- It’s a good idea to create a copy of your original file and then make all the changes to the copy. This way, you’ll always be able to revert to the original.
- Most apps allow you to undo recent changes. In Premiere Pro and CapCut (desktop), use Ctrl+Z on Windows or Cmd+Z on Mac. In mobile apps, look for the Undo arrow.
How to Crop a Video on iPhone
It’s perfectly possible to crop a video right on your iPhone using the native Photos app. Follow these steps:
- Open the Photos app and select the necessary video.
- Tap Edit, which can be found in the top-right corner.
- Tap the Crop icon. It looks like a square with arrows.
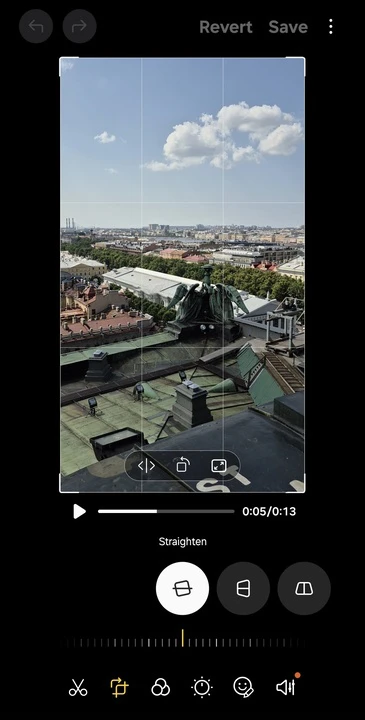
- Adjust the frame by dragging the corners. Reposition the frame with your finger. Everything outside the frame will be cropped out.
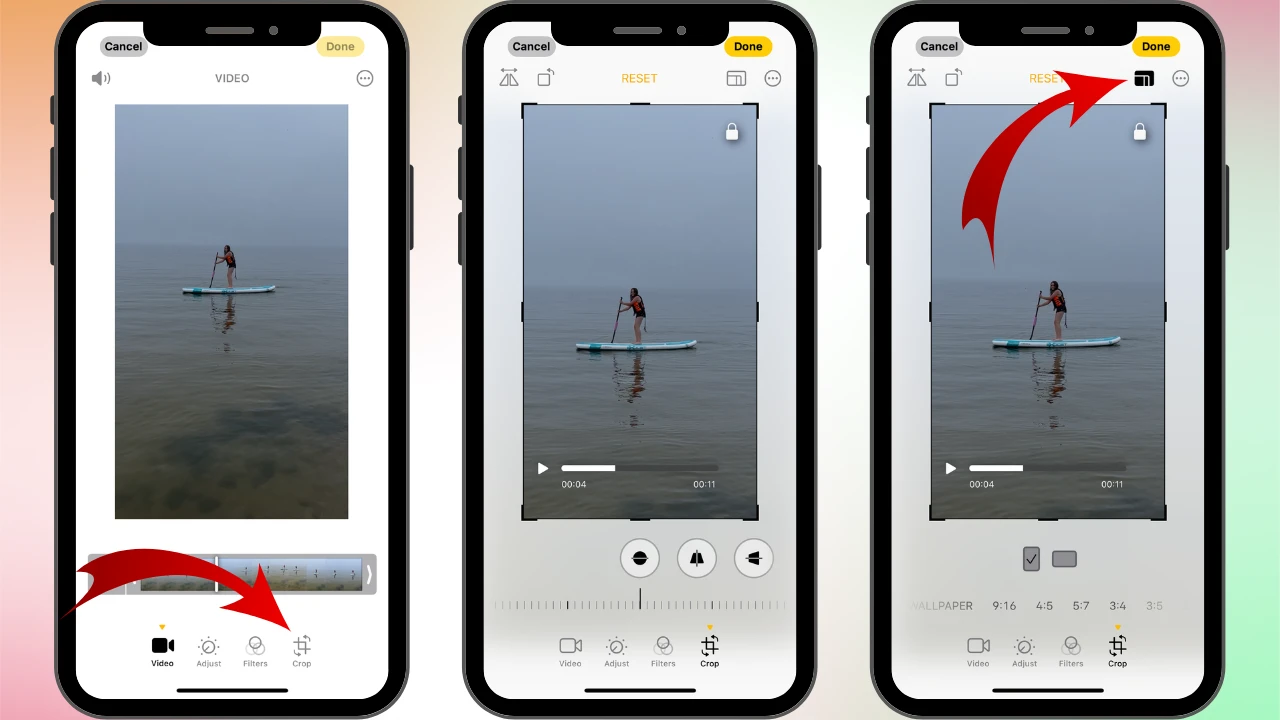
- The Straighten slider at the bottom allows you to rotate the video.
- You can also tap on the Vertical and Horizontal icons. They allow you to make changes to the vertical and horizontal angles of the video.
- There are also presets with common aspect ratios. Tap the Aspect Ratio icon in the upper right – it looks like overlapping rectangles. Then pick the necessary ratio.
- Tap Done to save the changes.
That’s it! You’ve successfully cropped your video on iPhone without any third-party apps!
How to Crop a Video on Mac
As you may know, the Photos app is also available on Mac. And coincidentally, the best way to crop a video on a Mac is also by using this very app.
The process is pretty much the same:
- Open Photos on your Mac, then find and open the necessary video.
- Click on Edit in the upper right.
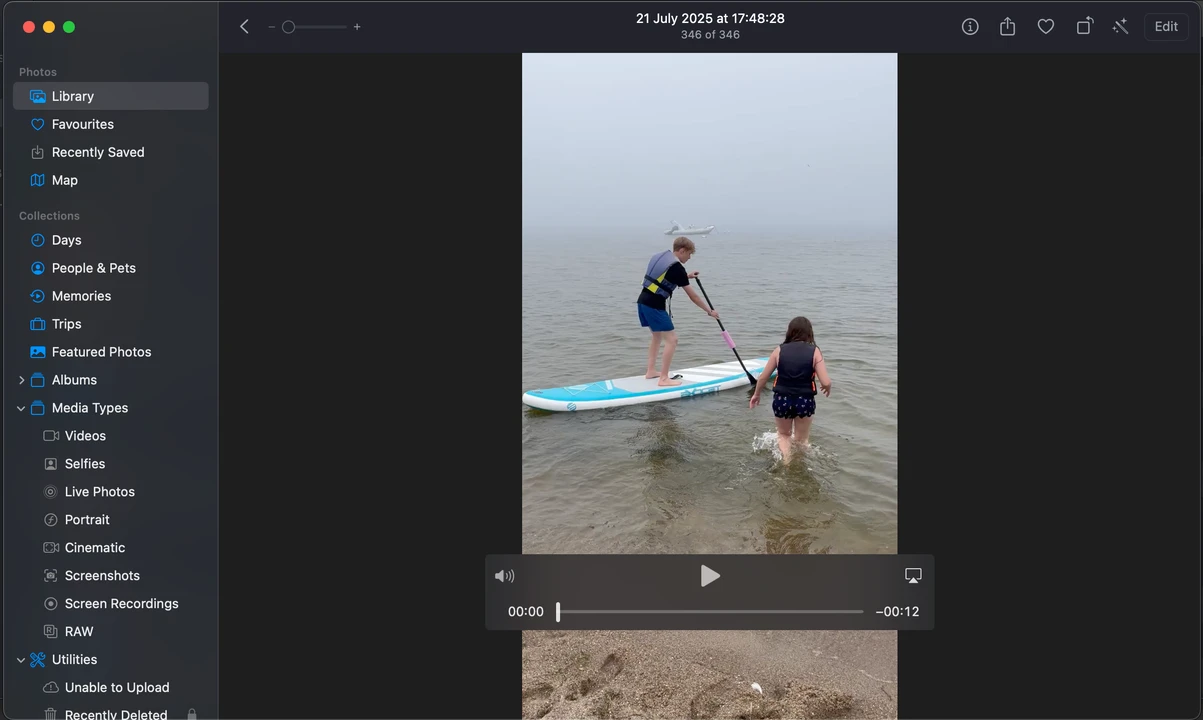
- Go to the Crop tab.
- Once you see the white borders around the frame, adjust them.
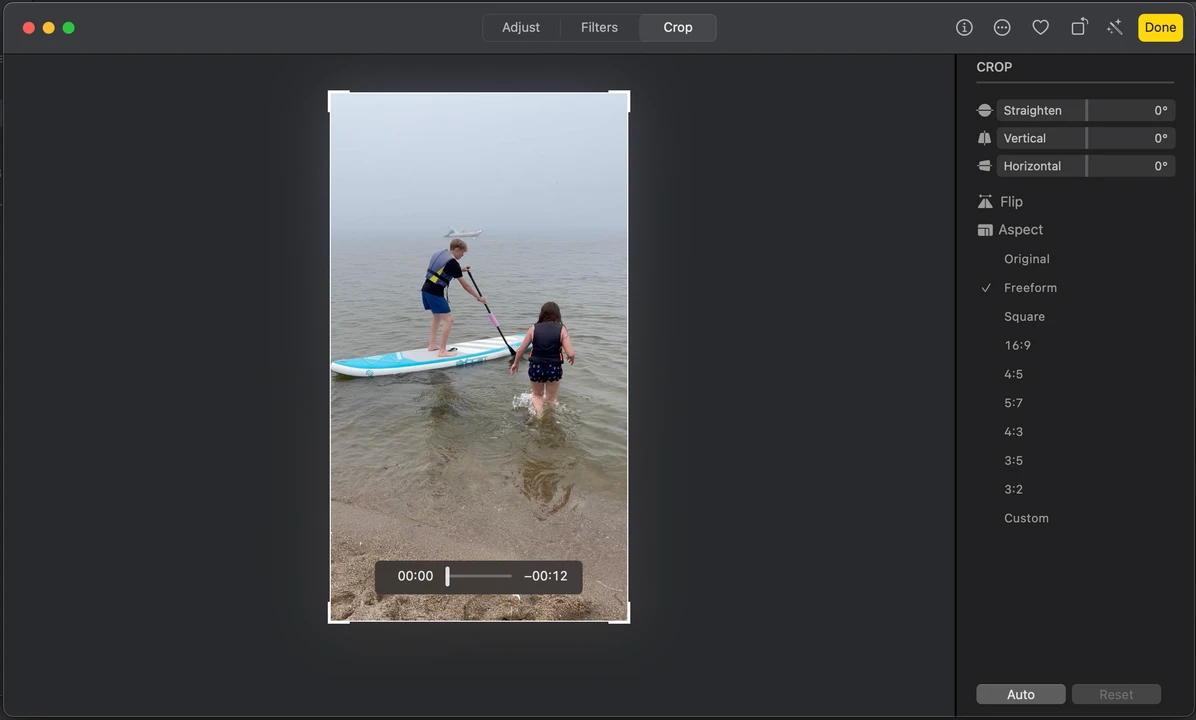
- If needed, pick the desired aspect ratio in the panel on the right. Here you can also change the angle of your video.
- Click on Done to save the changes.
All done!
If you checked out other tutorials on video cropping, you may have come across methods that involve using QuickTime or iMovie. Unfortunately, the QuickTime Player only allows you to trim a video. There’s no cropping feature.
It is possible to crop a video in iMovie, though. After importing your file, you’ll see the Crop icon above the video in the viewing section. But the downside of this method is that you won’t be able to change the aspect ratio – iMovie doesn’t allow this. You will only be able to enlarge a certain portion of the video. So, if you need to maintain the original aspect ratio and do some basic cropping, then iMovie can be a good choice for you.
How to Crop a Video in Adobe Premiere Pro
Adobe Premiere Pro is an advanced video editor that can provide more control and precision. It can be used on both Mac and Windows.
However, you will need to pay for it since it’s not available for free. On top of that, even though cropping itself is not a complicated task, Adobe Premiere’s interface might look intimidating and too complex for beginners. So, this method is mostly suitable for those who want to learn more about video editing.
Here’s what you need to do:
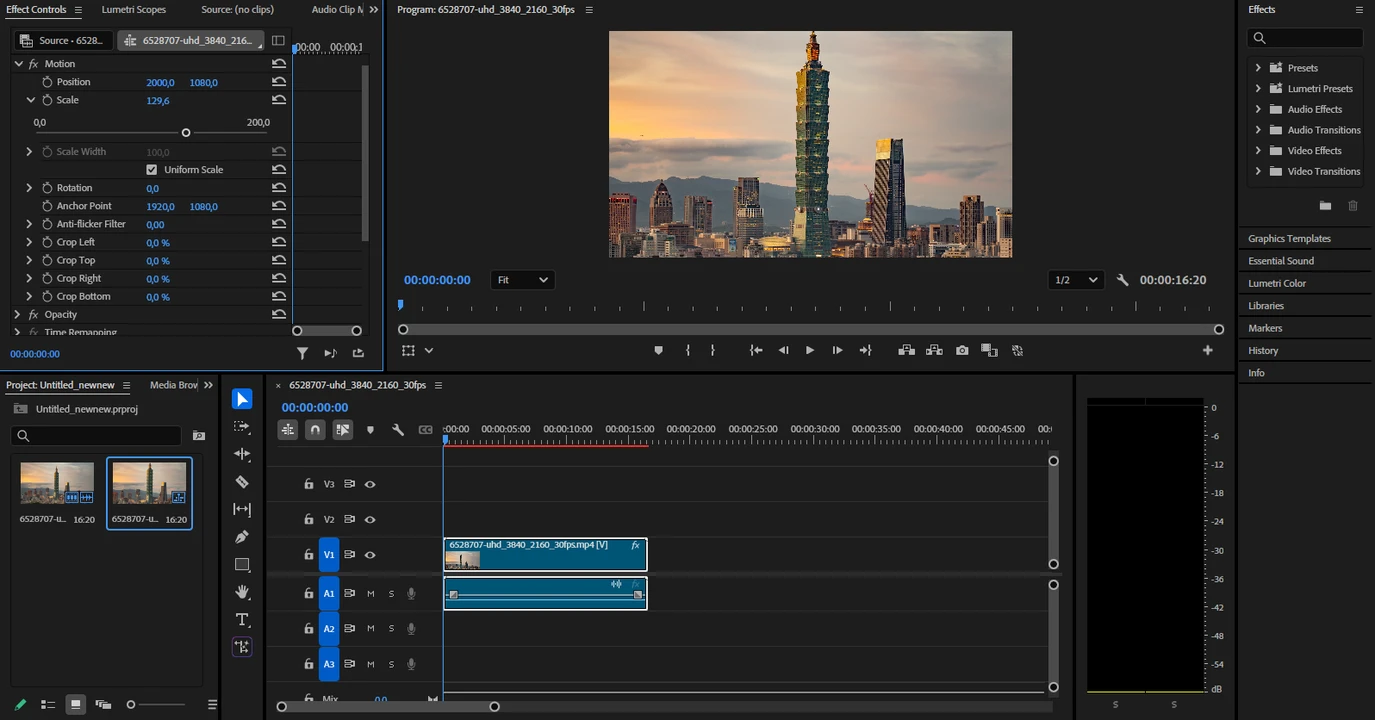
- After you open Adobe Premiere Pro, import your video and drag it onto the timeline.
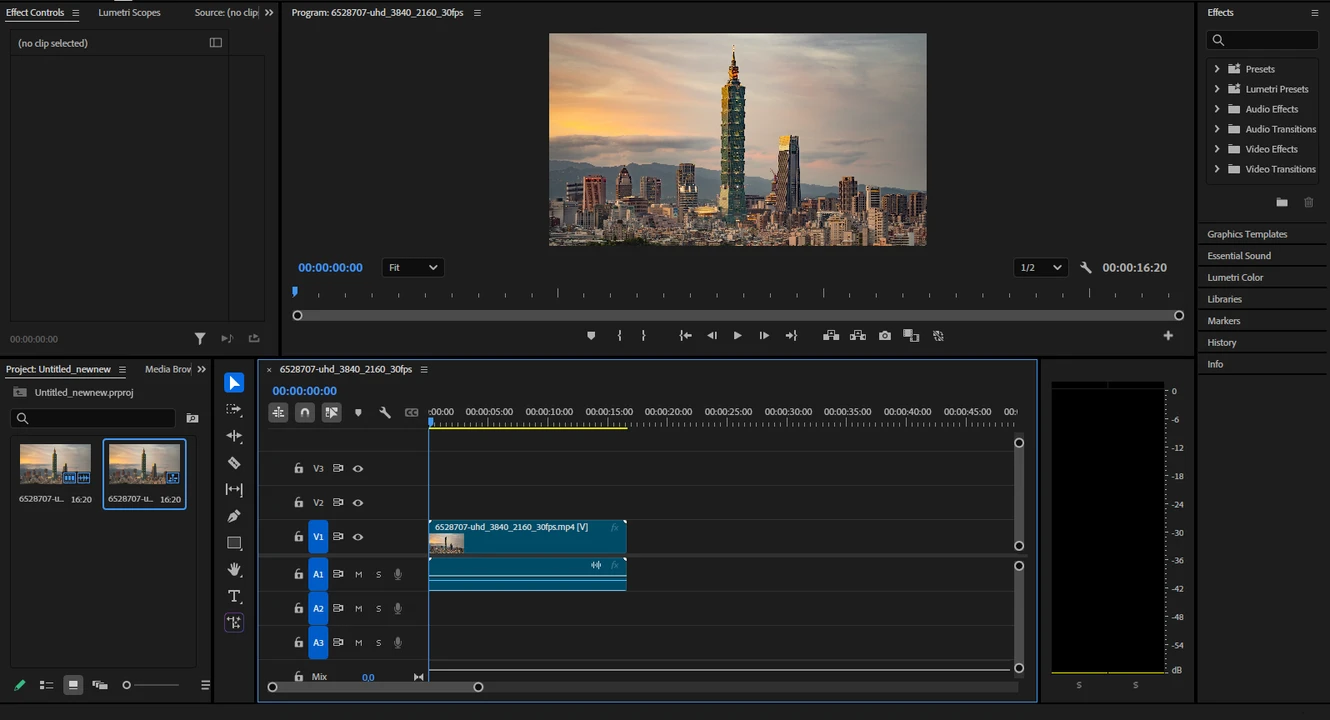
- Select the clip on the timeline and go to the Effect Controls panel.
- Under Motion, adjust: ◦ Scale (zoom in/out). ◦ Position (change the position of your video).
- Alternatively, if you need more control, you can apply the Crop Effect. Go to the Effects section on the right. Then navigate to Video Effects > Transform > Crop.
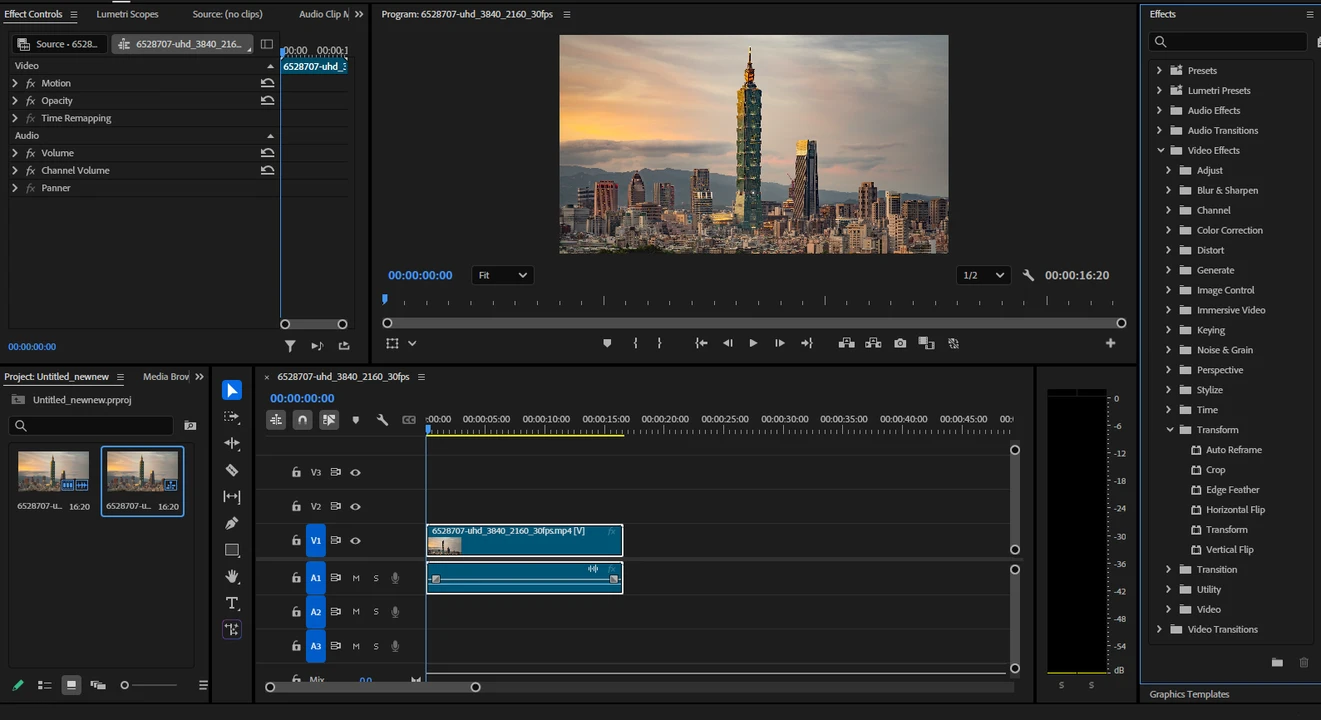
- Drag the Crop effect onto your clip in the timeline.
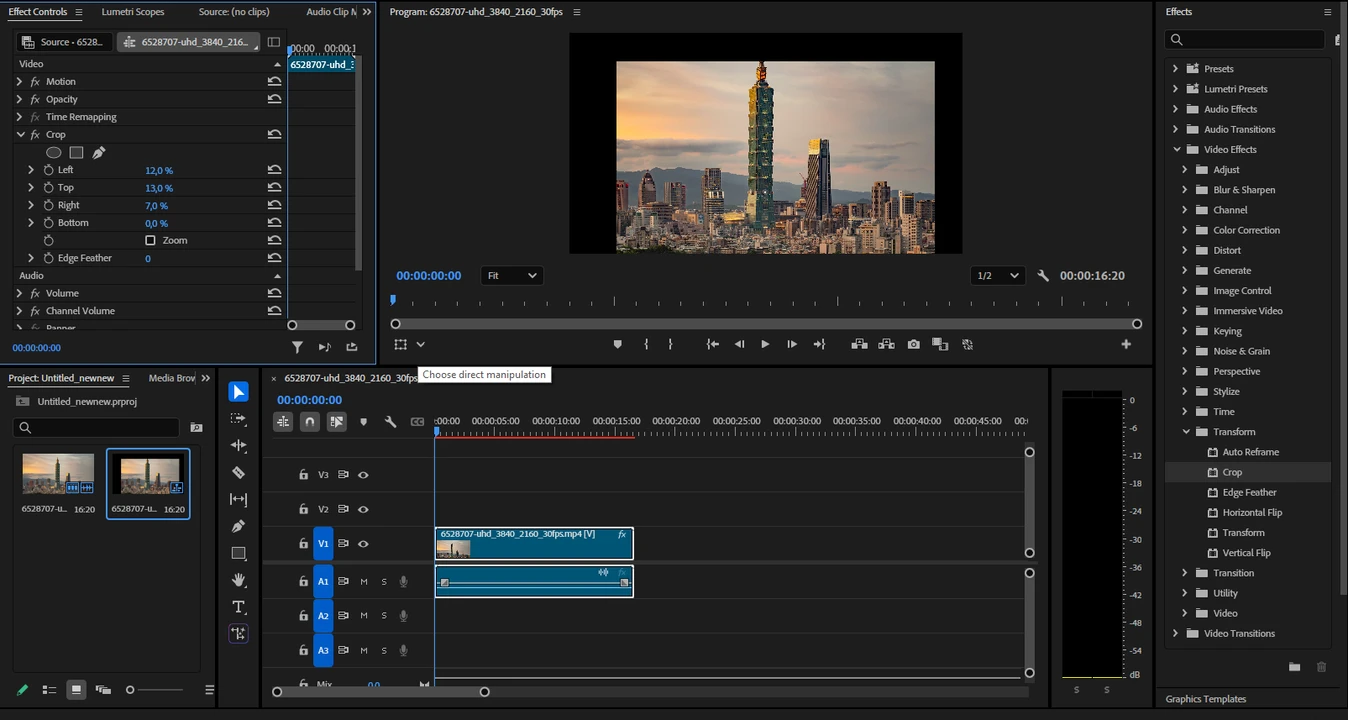
- In the Effect Controls, adjust the numbers for Top, Bottom, Left, Right. Please note that, unlike previous methods, here you’ll need to enter the numbers. Luckily, you’ll see the changes right away and can easily make any further tweaks.
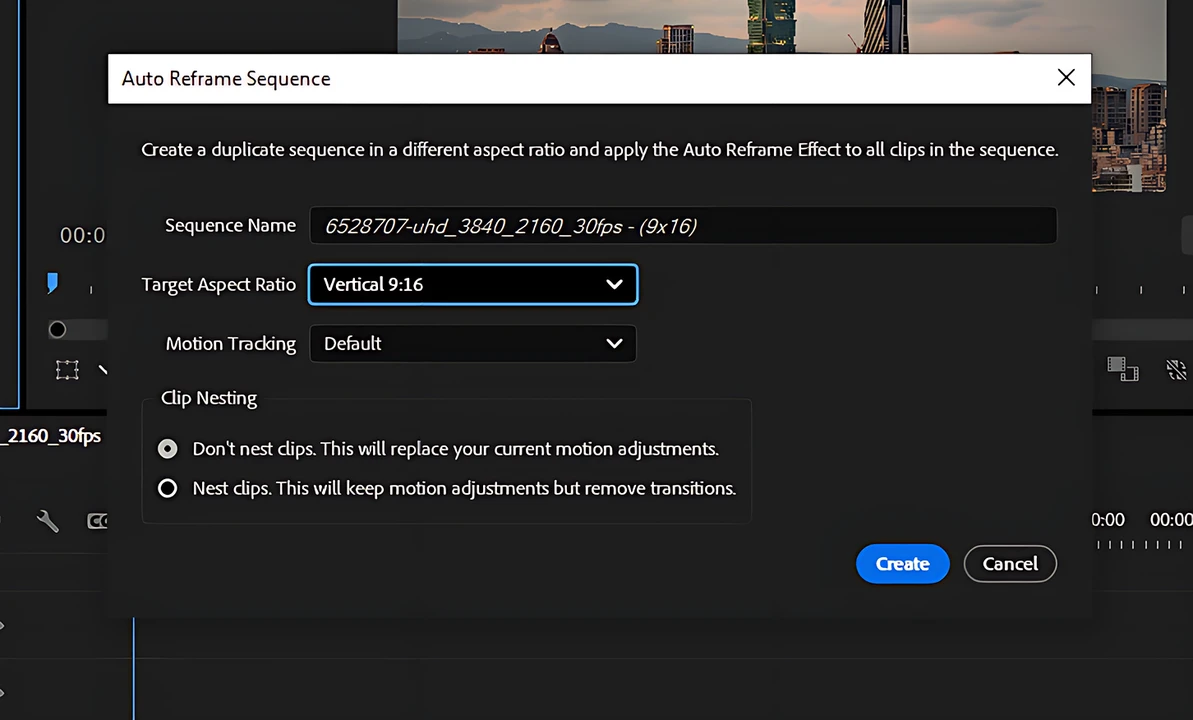
- If you want to change the aspect ratio, select the clip on the timeline, then go to Sequence > Auto Reframe Sequence.
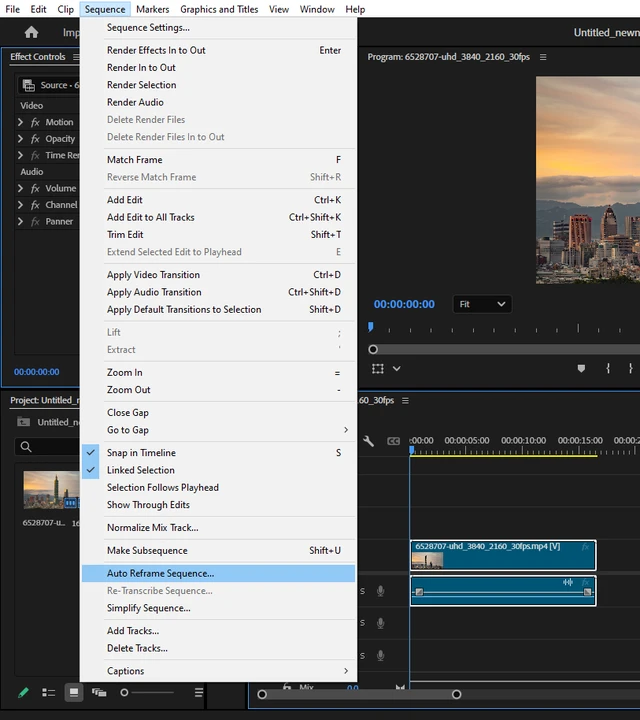
- Click on the Target Aspect Ratio menu and choose the necessary option, then click on Create.
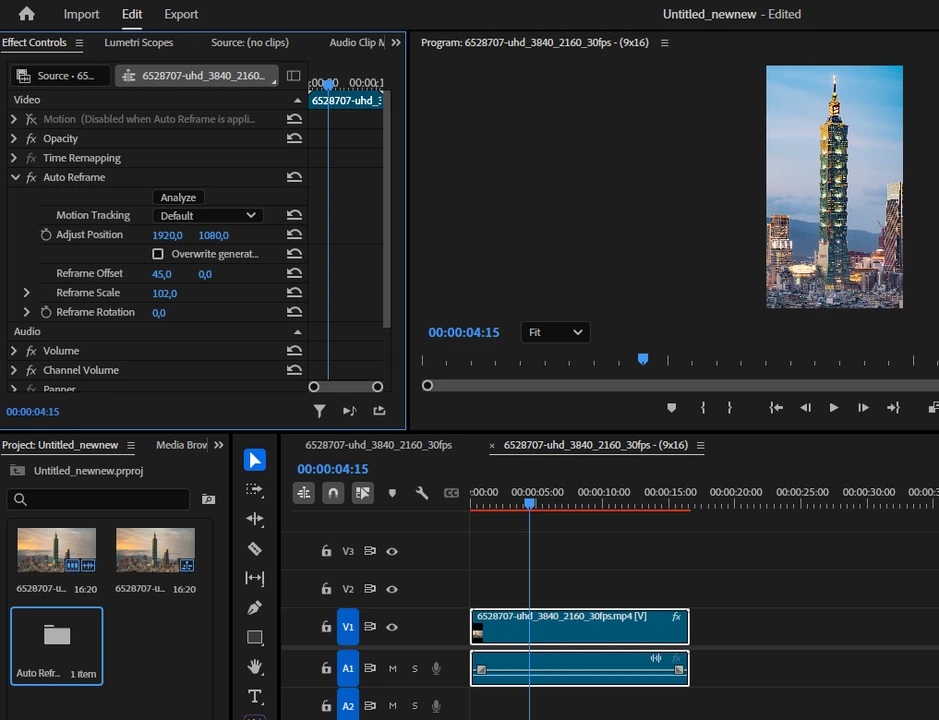
- If you want to make some adjustments, go to Effect Controls > Auto Reframe.
- When you’re ready, click on Export at the top. Enter the name of your file, then choose where it should be saved. In the Format menu, pick the necessary format. For instance, H.264, which will create an MP4 file.
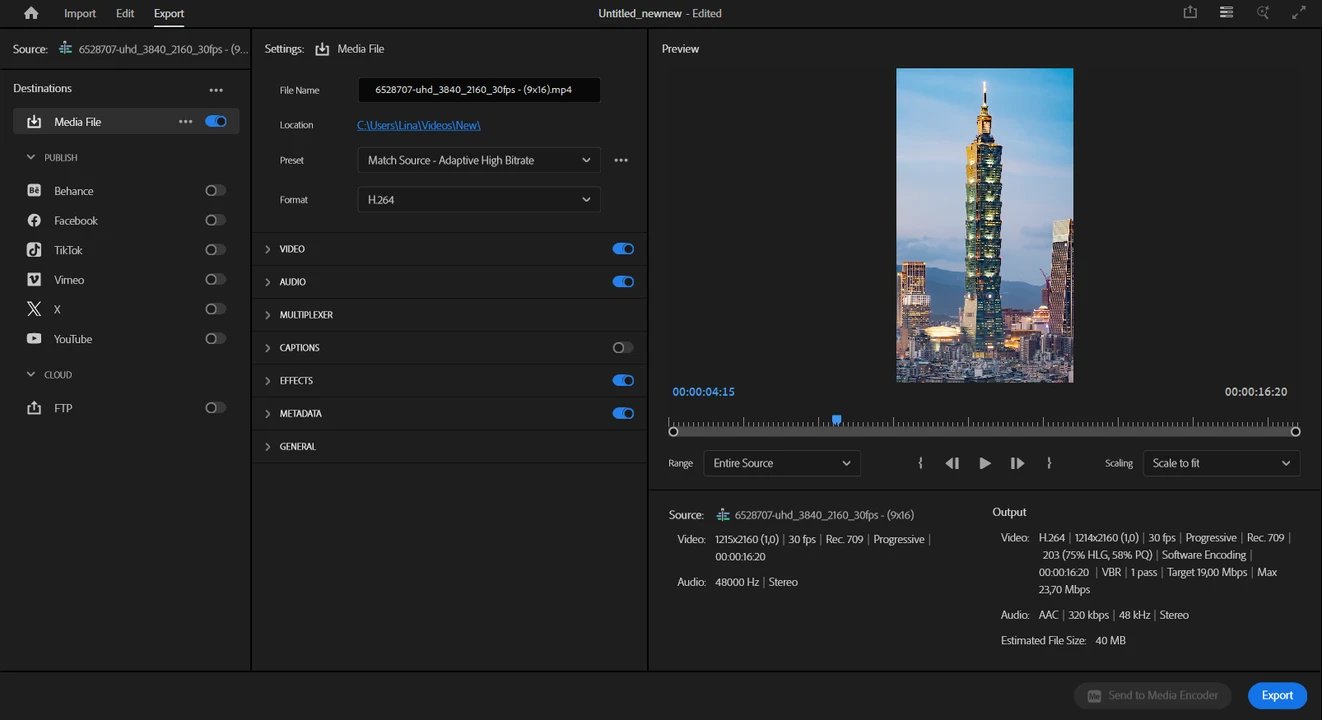
- Make any other adjustments in the settings, then click on Export.
That’s it! Your video is now cropped!
Without a doubt, you will have a lot more room for experimentation here. But if you are looking for a quick and easy way to crop your video, it would be better to opt for a different method.
How to Crop a Video on Android
You’ll be glad to know that cropping a video on Android is also as easy as cropping it on iPhone. And yes, you can use a native app for this. However, what you need to keep in mind is that a wide range of smartphone models and brands run on Android. Therefore, the steps might differ slightly depending on the device that you’re using.
Let’s take a look at how you can crop a video on Samsung Galaxy:
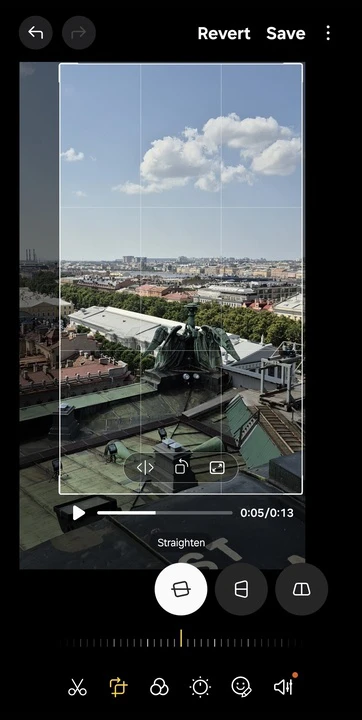
- Open the built-in Gallery app and find the video that you want to crop.
- Open the video, then tap the Edit button, which looks like a pencil.

- Tap the Crop button, which looks like a square with arrows.
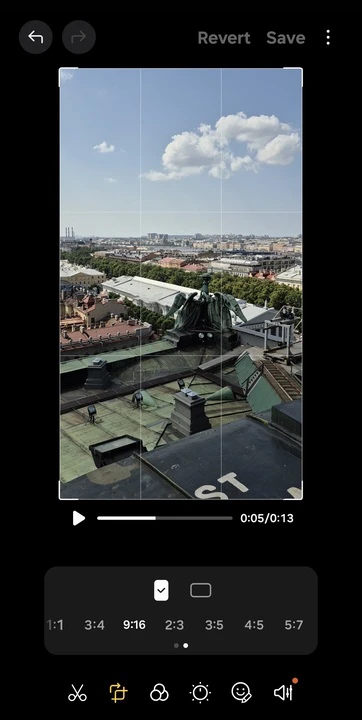
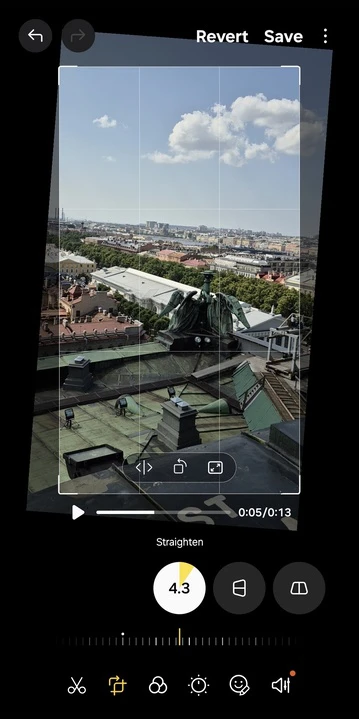
- Once you see the white borders, adjust the cropping area.
- Samsung offers presets with common aspect ratios. Tap on the button that looks like a rectangle with arrows inside – this will open the list of presets.
- It’s possible to rotate your video as well as change the angle vertically and horizontally.
- When you’re done, tap on Save. Please note that the changes will be applied to the file that you’re editing. Alternatively, you can tap on three vertical dots and select Save copy.
As you can see, this is pretty quick and effortless!
How to Crop a Video on Android using a Third-Party App
In case you want more flexibility or if it’s not possible to crop a video in the built-in gallery app on your device, you can opt for a third-party app. The process is very similar and requires only a couple of extra steps.
Let’s take a look at how you can crop a video using InShot:
- Download InShot from Google Play and install it.
- Open the app, tap on Video, then select the necessary file.
- Select the clip on the timeline by tapping on it, then scroll the toolkit until you see the Crop option. Select it.
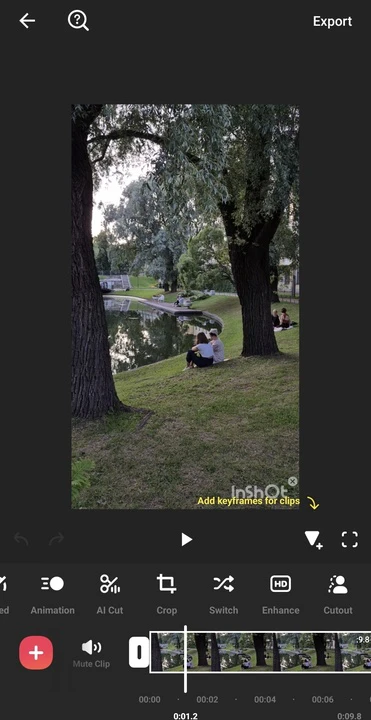
- Adjust the white borders of the cropping area.
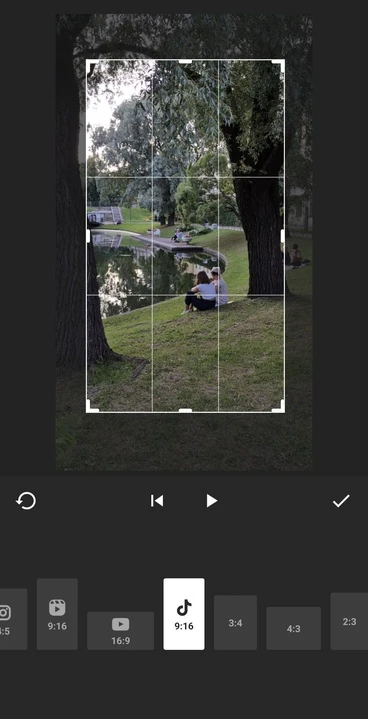
You can do freeform cropping or select the desired aspect ratio.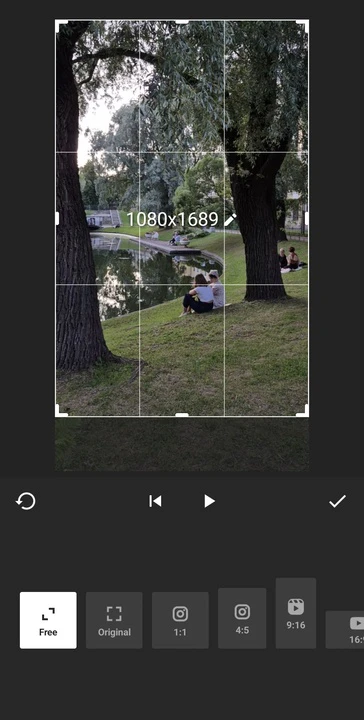
- Tap on the checkmark to apply the changes.
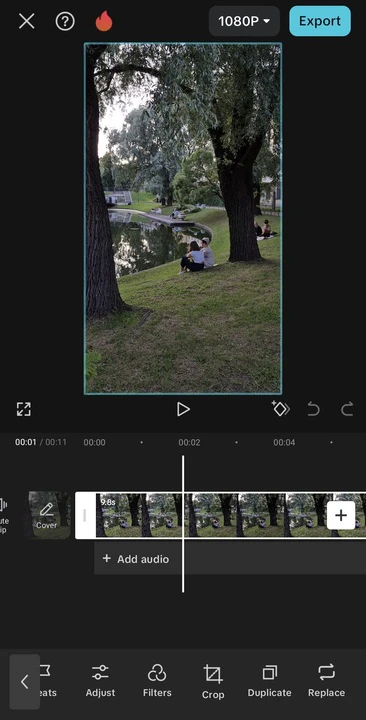
- Make any other changes if necessary. For instance, it’s possible to trim your video here.
- Tap on Export at the top to save your video.
If you don’t want to use InShot, you can give a try to PowerDirector or Wondershare Filmora.
Third-party video editors are usually easy to use and offer a broader selection of editing tools and features. But please note that most of them, including InShot, tend to add a watermark to your video in the free version.
Here’s a tip
As an option, you can give a try to a browser-based app. For instance, Adobe offers an online tool specifically for cropping videos. You simply upload your video, adjust the cropping area, then download the cropped copy. Super quick and easy! But what you need to keep in mind is that this method is more suitable for working with small videos. Browser-based apps tend to have file size limits, so it will be impossible for you to upload a large video. On top of that, online apps usually work more slowly compared to desktop and mobile apps. And you need good internet connection, otherwise the whole process will take forever.
How to Crop a Video in CapCut
CapCut is a powerful video editor with lots of different tools and features. The best thing about it, though, is that it’s unbelievably easy to use. So, it’s perfect not only for amateurs, but for beginners, too!
On top of all that, CapCut offers a mobile app for iPhone and Android as well as a desktop app for Mac and Windows. Isn’t it great?
Here’s how you can crop a video in CapCut on a smartphone:
- Download and install CapCut, then open the app and tap New Project.
- Select your video and tap Add.
- Tap the clip on the timeline to select it, then find the Crop option and choose it.
- Drag the edges of the cropping area. Alternatively, choose a preset with the aspect ratio, then resize and reposition the cropping area.
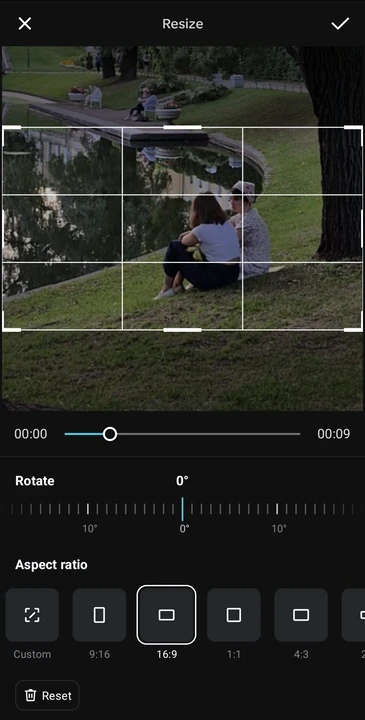
- It’s possible to change the angle of your video, too.
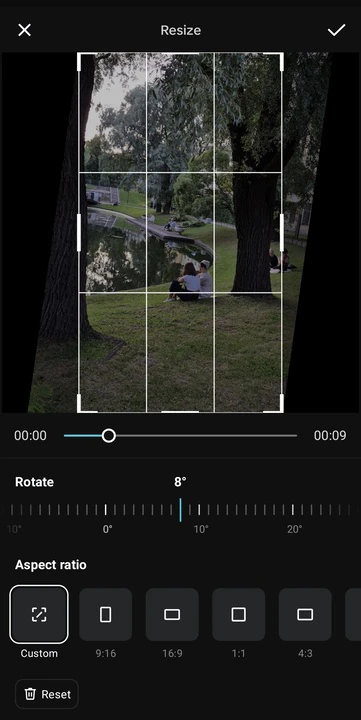
- Tap the checkmark to apply the changes.
- Make any other adjustments if needed.
- Tap 1080p and adjust the export settings. Then tap Export.
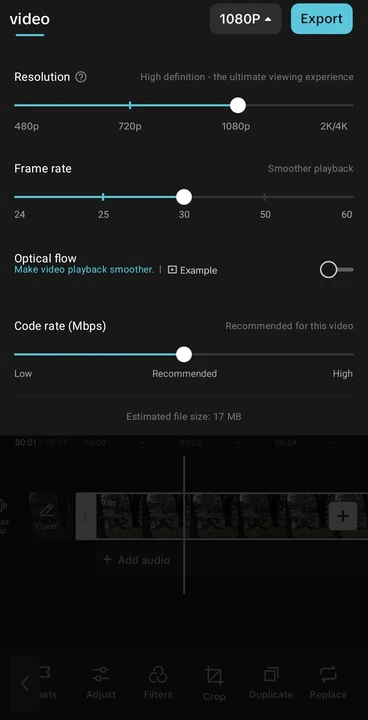
An edited copy of your video will be saved to your gallery.
Say, you want to crop a video on Windows, but don’t want to deal with Adobe Premiere Pro. Unfortunately, there’s no built-in app for cropping videos on Windows, so you have no other choice but to use a third-party app. And there’s no better option than using CapCut for desktop!
Here’s what you need to do:
- Open CapCut, create a new project, and import your video.
- Drag the video onto the timeline.
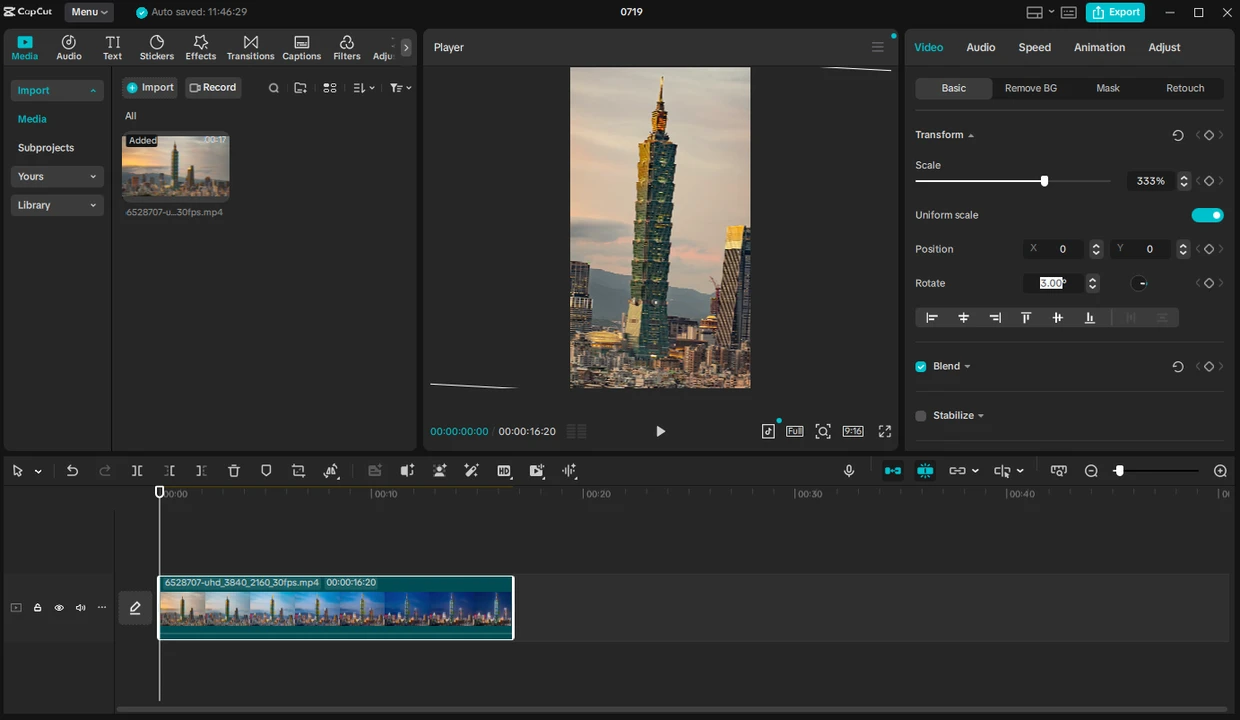
- If you want to change the aspect ratio, click on the Ratio button under the video. Then select the necessary option.

- After the aspect ratio is changed, resize and reposition your video using the cursor.
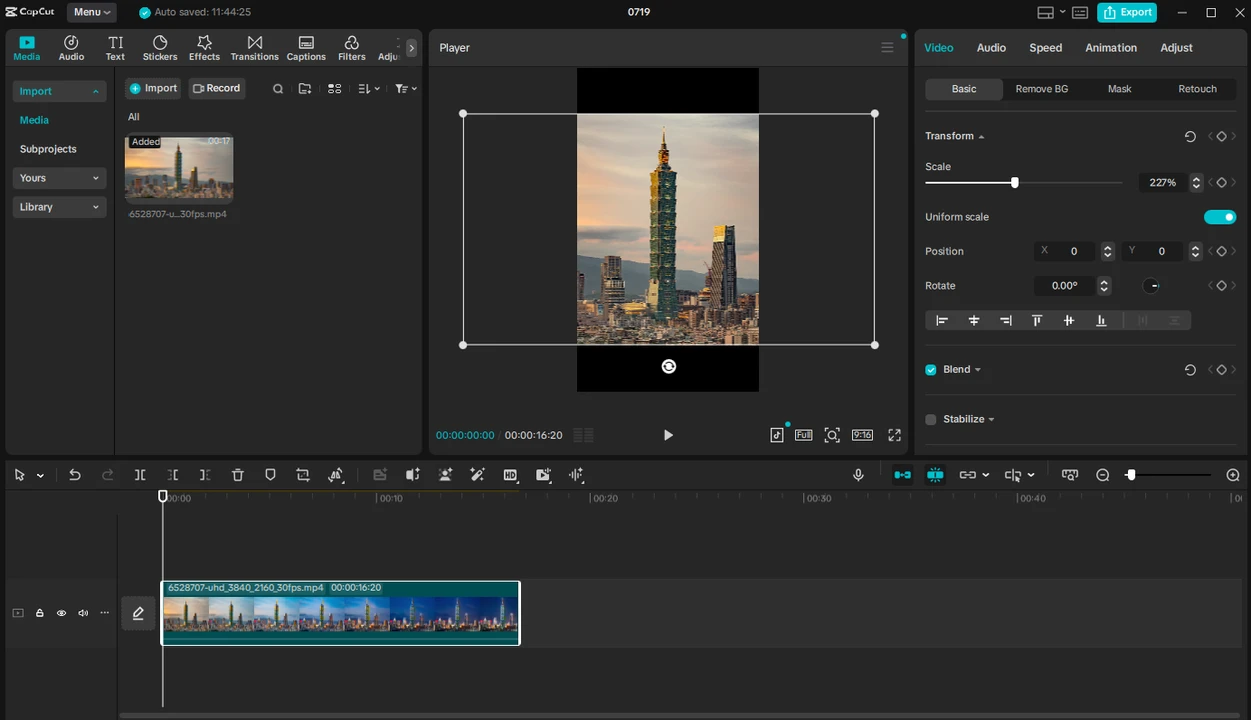
- You can rotate the video, if necessary, as well.
 There’s an alternative! The desktop version of CapCut offers the auto-reframe feature. To use it, go to the Video tab on the right, then choose Basic and enable the Auto Reframe option. Choose the necessary aspect ratio, image stabilization, and camera movement speed. Finally, click Apply. Your video will be reframed automatically.
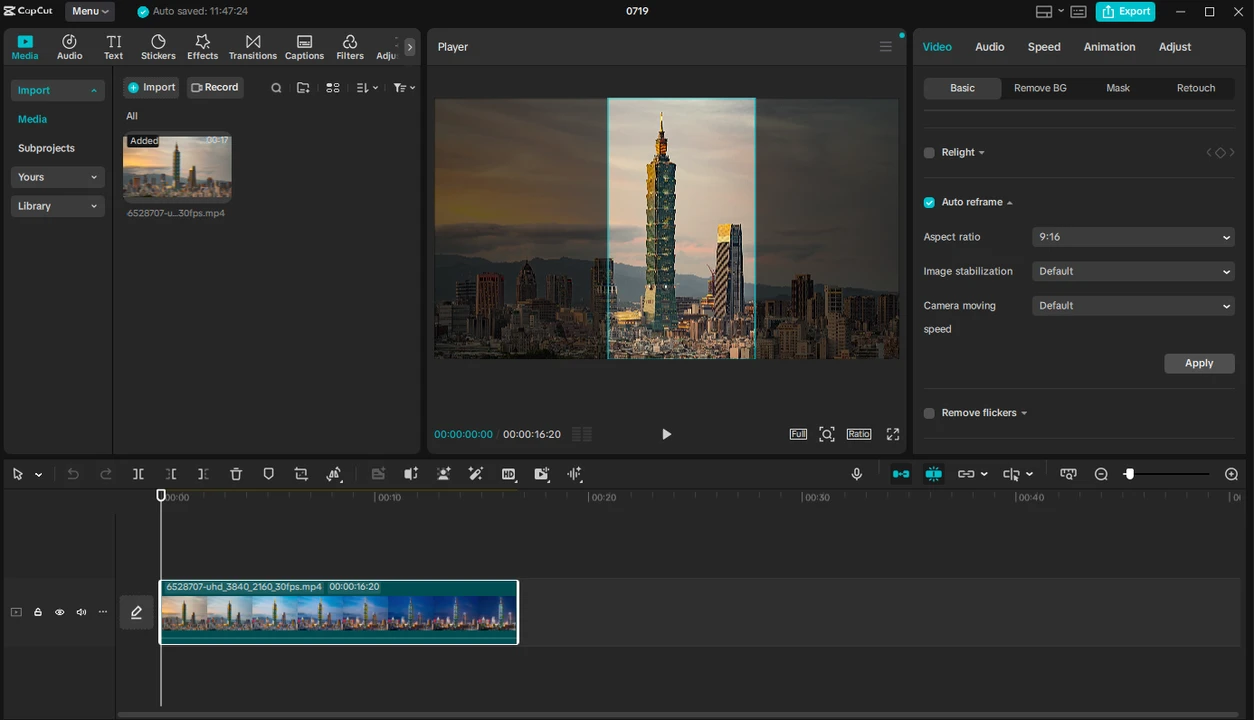
- When you’re ready, click on Export, adjust the export settings, and click on Export again.
That’s it!
Conclusion
Cropping is a simple yet effective editing technique that can help you prep your content for different platforms, remove unwanted elements, and improve the overall composition.
Luckily, there are plenty of built-in and third-party apps that make it super easy to crop videos on any device. Cropping on a smartphone – whether you are on iOS or Android – is perfect for small and simple tweaks since you can use built-in apps in most cases. If you are new to video editing, go for the desktop version of CapCut – it’s beginner-friendly, yet very powerful. And if you want to learn more about video editing and aren’t intimidated by complex interfaces, go for Adobe Premiere Pro – it’s perfect for amateurs and professionals.