
How to Сrop a Picture into a Circle in PowerPoint
by ![]() Lina Thorne • Updated · Posted in Photo Editing
Lina Thorne • Updated · Posted in Photo Editing
When giving a presentation, you need to keep people’s attention. Your goal is to present your information in an engaging and easily digestible way. Otherwise, people will lose their interest pretty quickly.
A great way to achieve this is to include images in your presentation. Visual content is extremely popular these days – it’s widely used in marketing, you see it all over the Internet. This is due to the fact that it is much easier and quicker for people to perceive information when it’s presented in a visual form.
For instance, if you present some data in text form and in the form of some kind of a chart – say, a pie chart – you will see that your audience will remember the pie chart better. Therefore, if you want people to remember what you were saying, you need to add as much visual content as you can into your presentation.
Another thing to remember is that your visual content has to look good and clear. Sometimes you need to combine both some words and a picture or two on one slide. In this case, people tend to make the images smaller. But as a result, some crucial details might get lost due to not being clear enough.
How can you solve this issue? Well, by cropping your images, you can get rid of the parts that aren’t very crucial. Once your image shows only what’s truly necessary, you will be able to make it bigger. Thus, people will see it clearer.
In addition to this, you can crop your images into different shapes. This will make your presentation more captivating and exciting. For instance, you can crop circle images – this can be incredibly useful if you have some portraits in your presentation.
Do you want to know how to crop a picture into a circle in PowerPoint? You’ll easily be able to do it in a couple of minutes even if this is your first time creating a PowerPoint presentation.
This article will teach you how to crop a single picture or several images into a circle in PowerPoint at the same time. With these detailed instructions, you’ll be able to create striking and attention-grabbing round images within just a few clicks! You will also learn about an alternative to PowerPoint that will make the cropping process faster and easier; especially, if you need to crop batches of images pretty often.
Let’s get started!
How to Crop a Picture into a Circle in PowerPoint with Crop to Shape
This is the easiest way to crop an image into a variety of shapes. Here’s how you can do it:
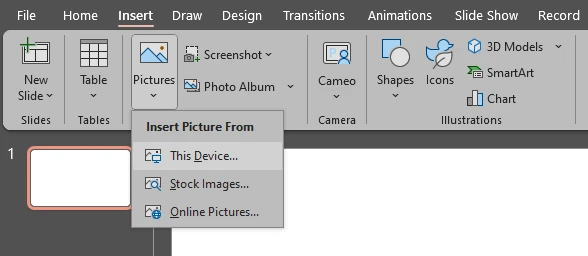
- Go to Insert > Picture, then choose where you want to upload your file from and import your picture. Alternatively, you can simply drag your image from its folder and drop it onto your slide.
- Double-click on the imported image to select it. The Picture Format tab will now be visible at the top.
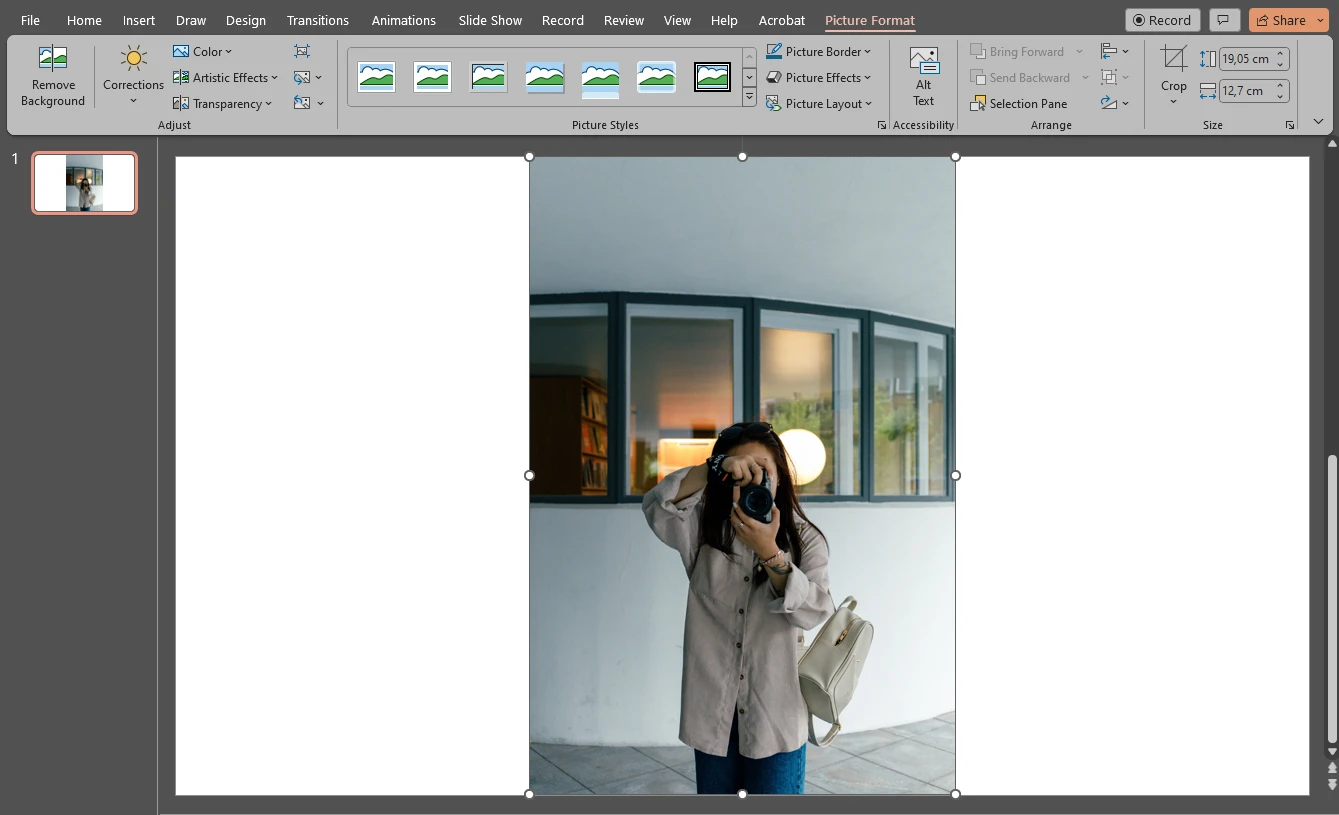
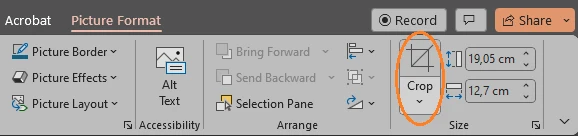
- Go to the Picture Format tab. At the right end of the ribbon, you will find the Crop button. Click on it.
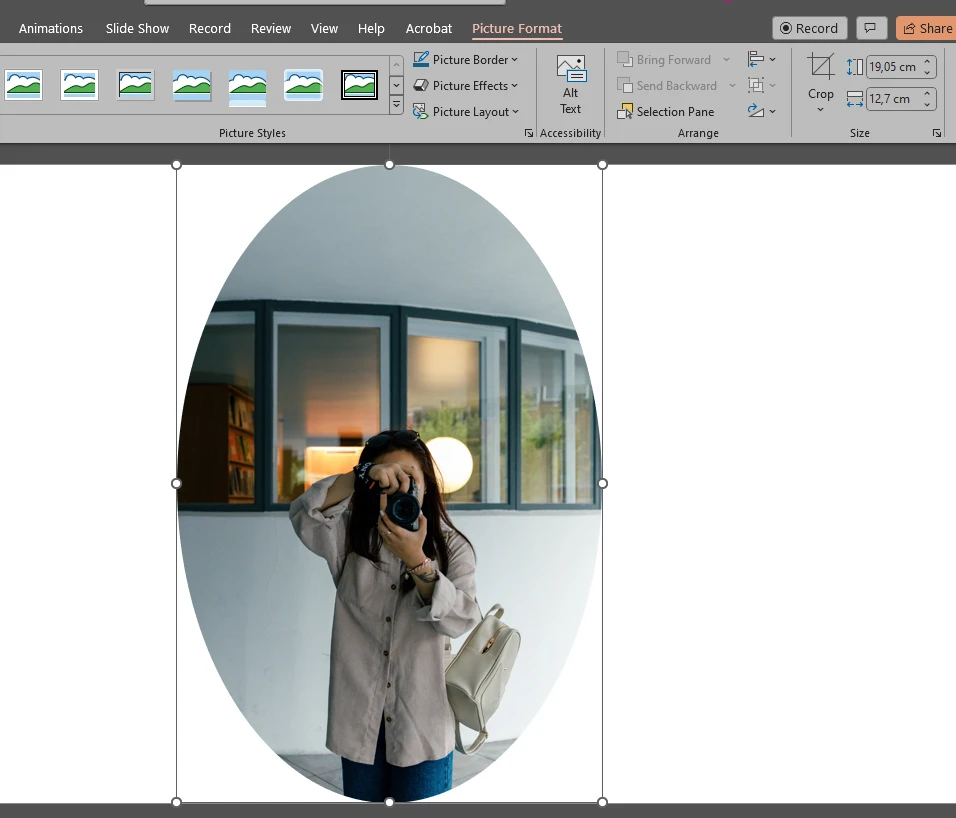
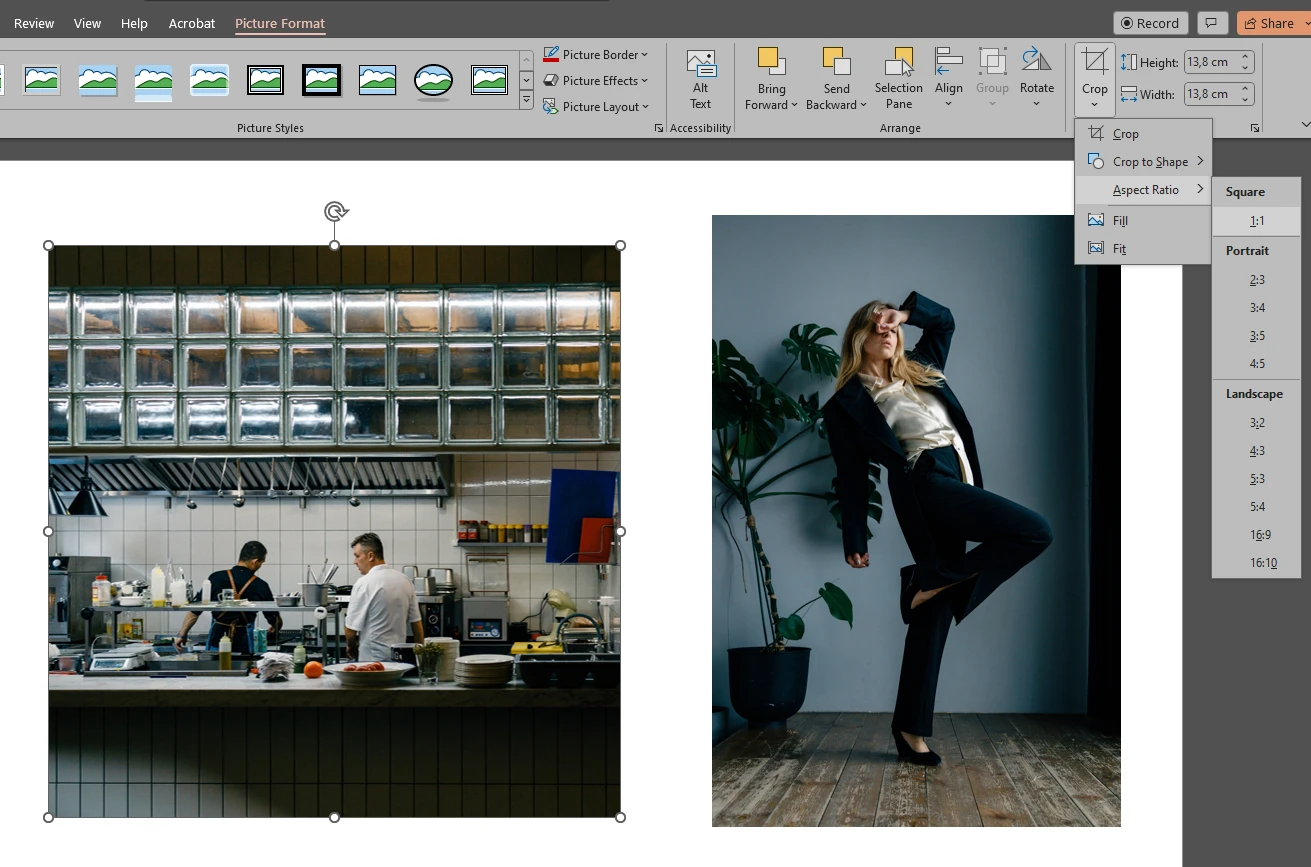
- Next, select Crop to Shape. A flyout menu will appear. There, you will find an amazing selection of different shapes. You won’t see a circle here, however. What you need to do is pick the oval from this menu.
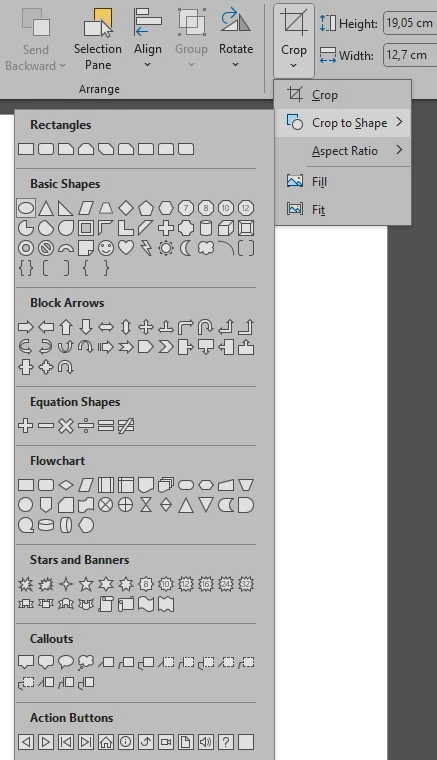
- Now, whether you get an oval or a circle depends on the aspect ratio of your original image. In other words, if you imported a square image, then you will get a perfect circle right away. But if your image is rectangular, you will get an oval. That’s okay. This is fixable.
- Click on the Crop button again and go to Aspect Ratio > 1:1.

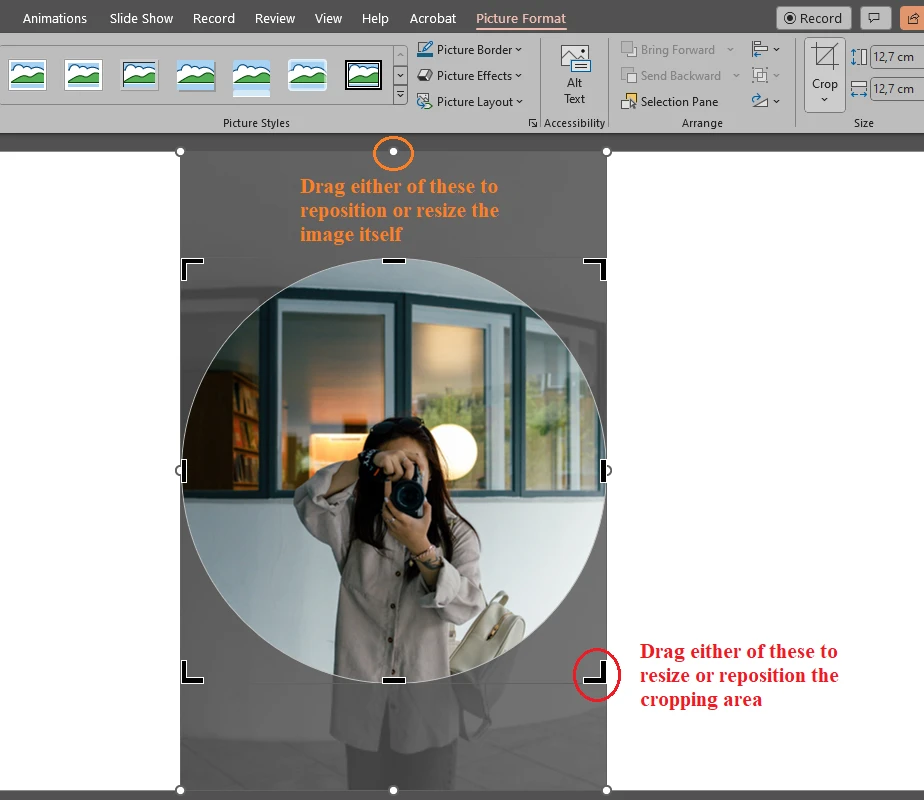
Please note that if this doesn’t work, you will need to undo a couple of last steps to revert to the rectangular image. After that, you’ll need to change the aspect ratio to 1:1 first and then crop to the oval shape. - Drag the black borders to adjust the size or position of the cropping area. Everything outside the circle will be cropped out. If you want to resize the image itself or reposition it, use the white circles.
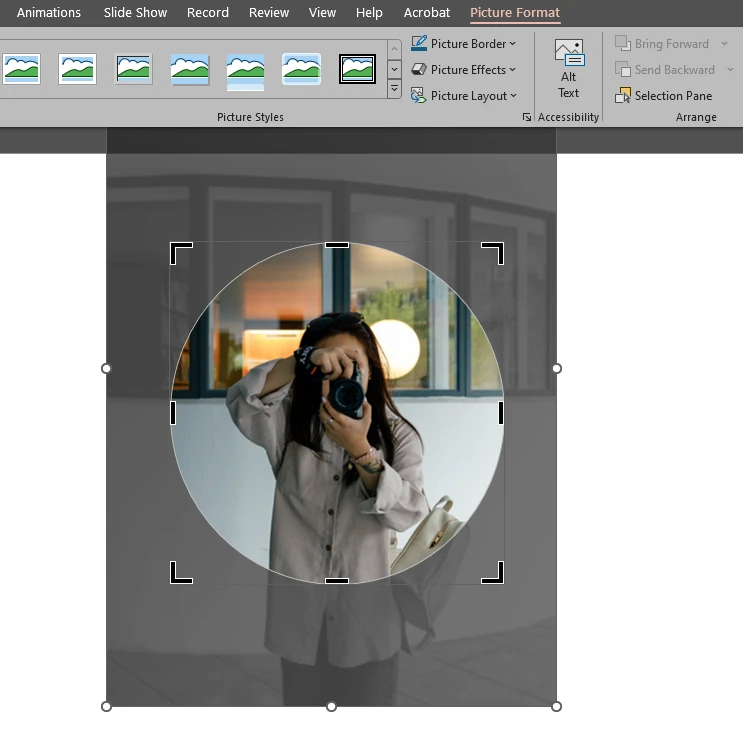
- Press Enter, once you are done. Now, your image is cropped into a circle!

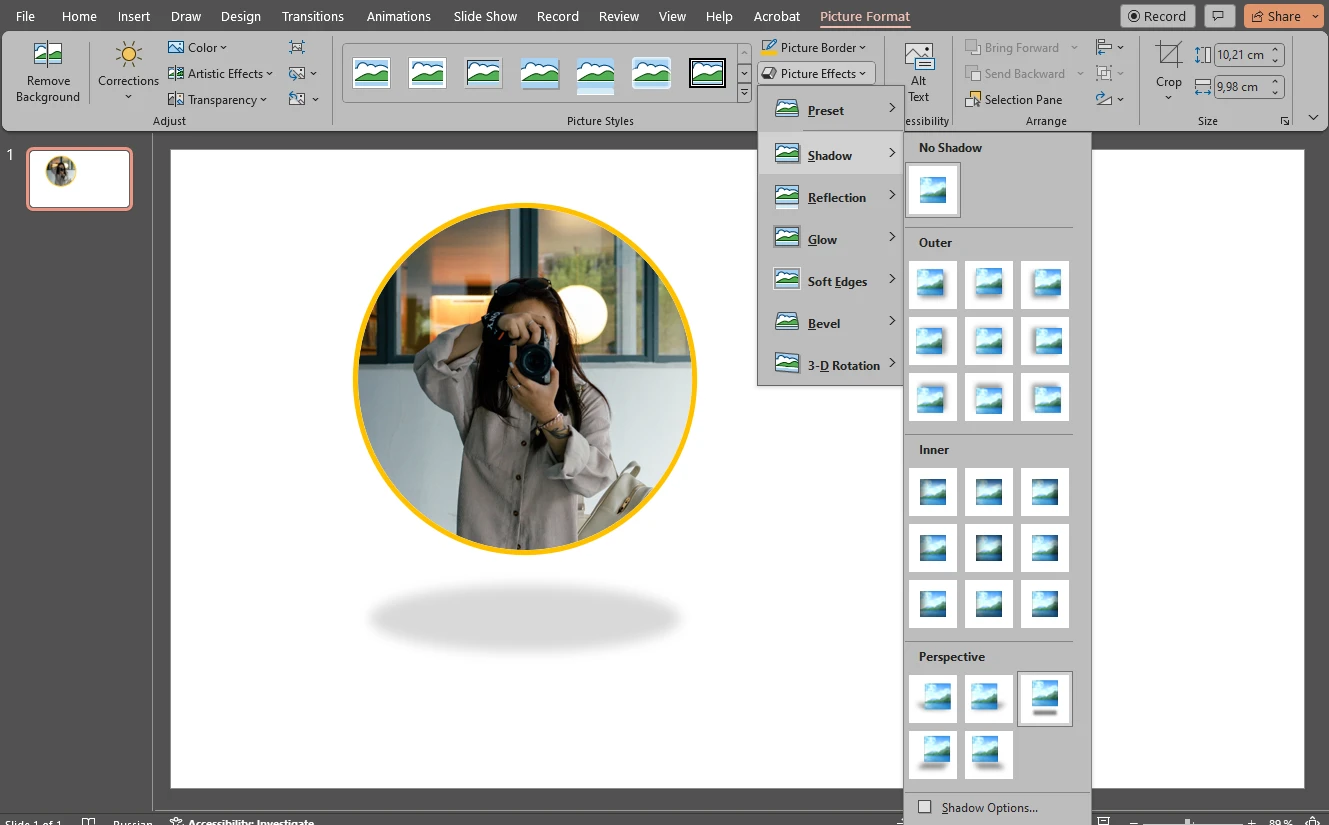
- If you want to jazz up your round image, in the Picture Format tab, you can add a border or an effect to it. For instance, you can add a shadow underneath your picture. There’s a vast selection of different options. If you hover over an option with the cursor, you will see the preview of it on your image.
How to Crop a Picture into a Circle in PowerPoint by Filling a Shape with It
In the previous option, you imported the image, then changed its shape. Here, it’s the other way around. You create a circle first, then insert your image into it. It might sound a bit complicated, but it really isn’t. Let’s take a look:
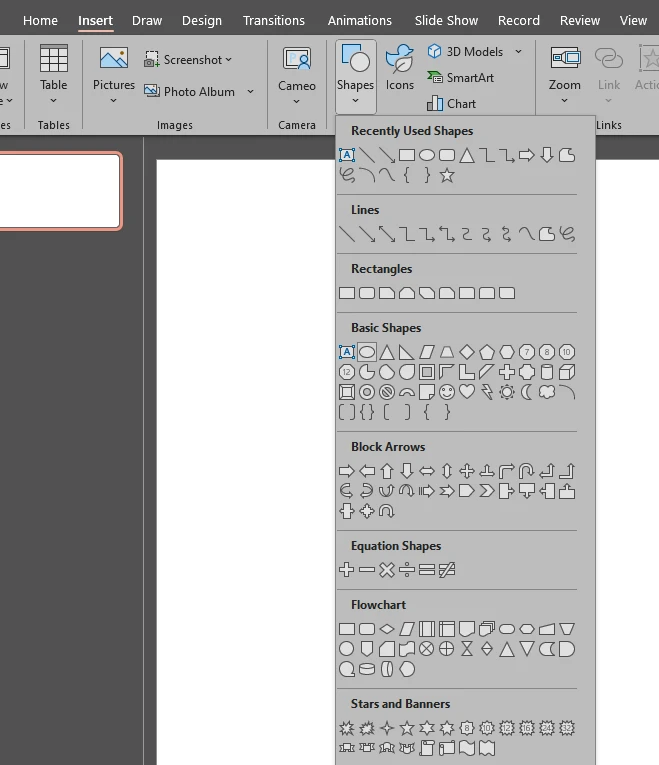
- Open your slide. Don’t upload the necessary image just yet! Instead, go to the Insert section at the top. Click on the “Shapes” icon to open the menu of shapes and pick an oval.
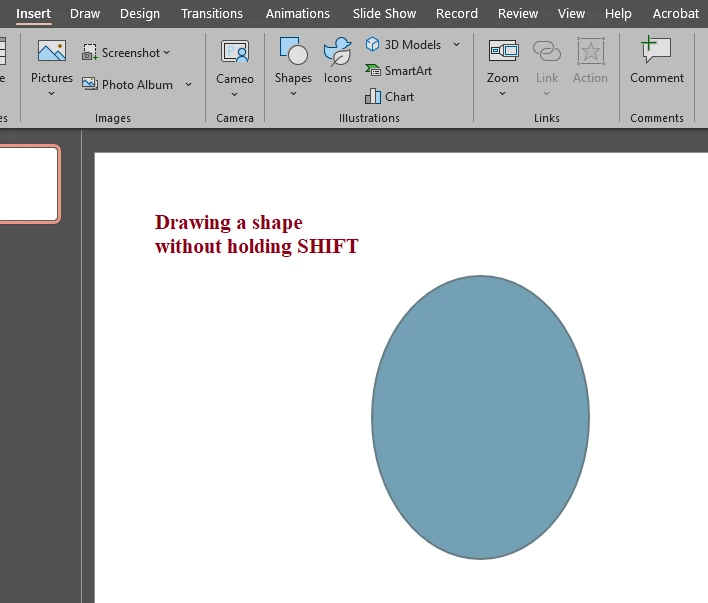
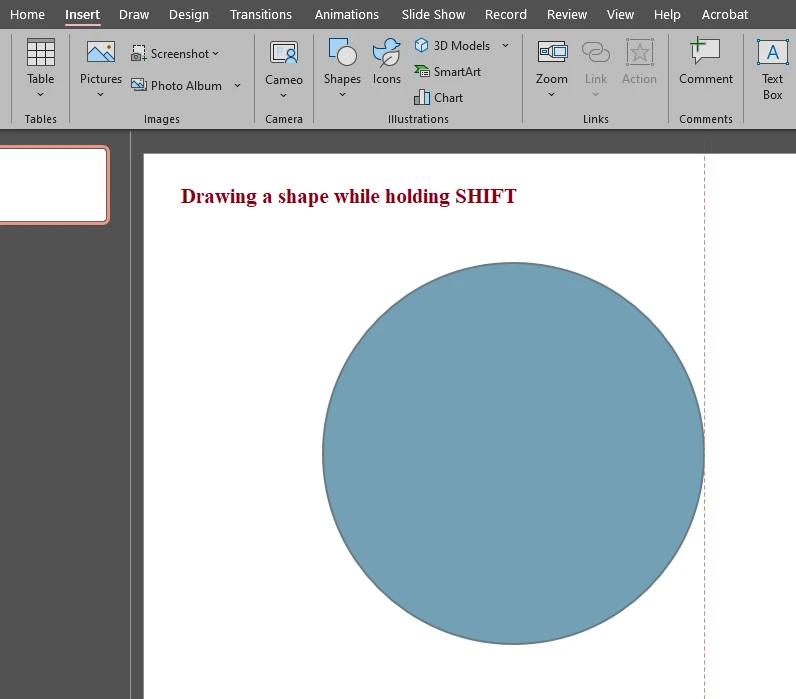
- With your cursor, draw the shape on your slide. While drawing, hold SHIFT to create a perfect circle.
- Once your shape is drawn, right click inside it, then go to Fill > Picture.
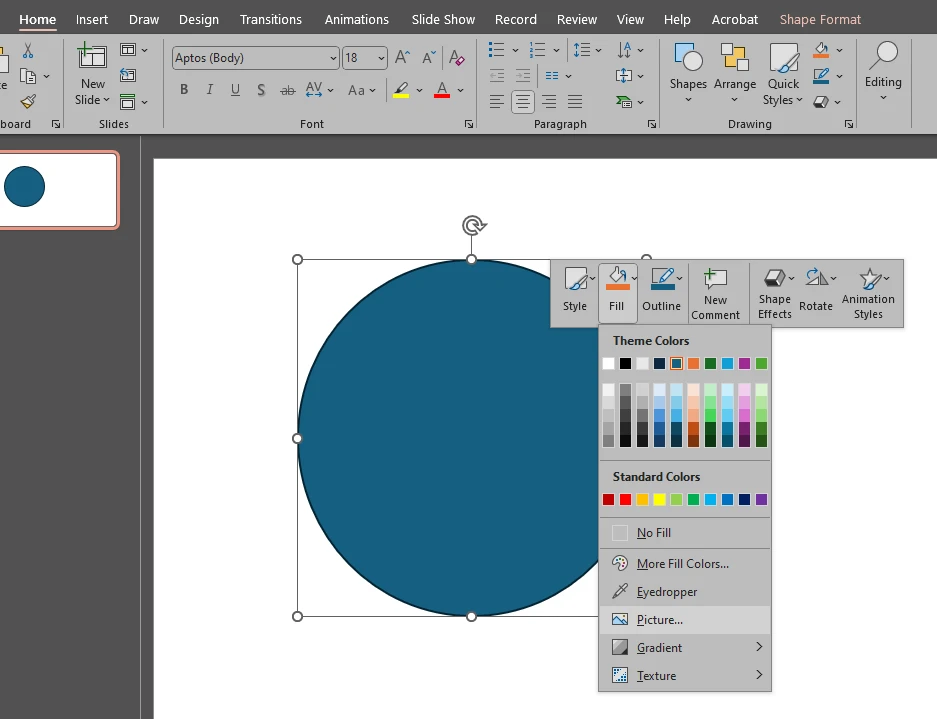 Pick where you want to source your file from and import your image.
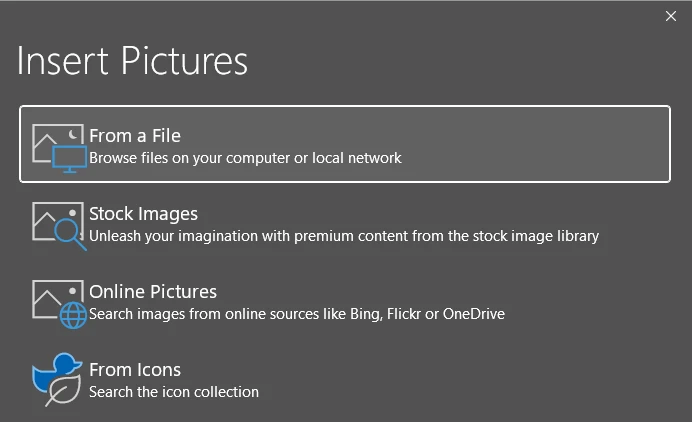
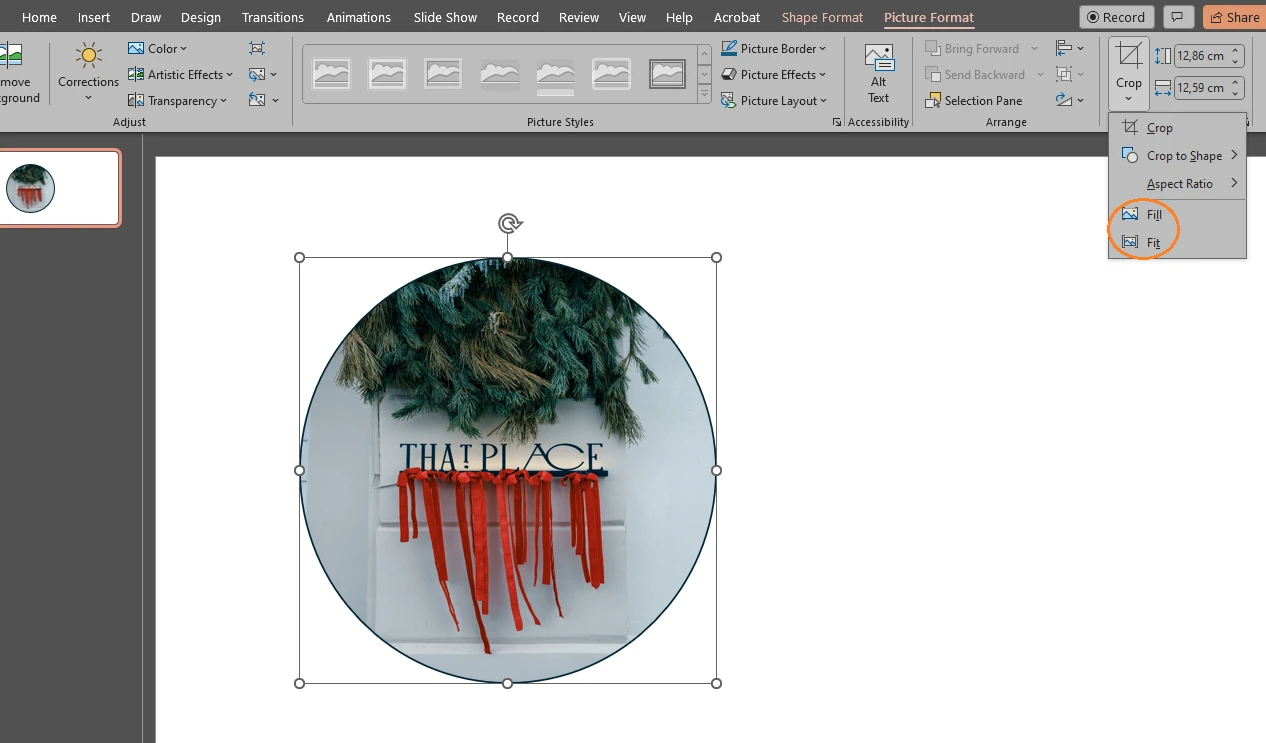
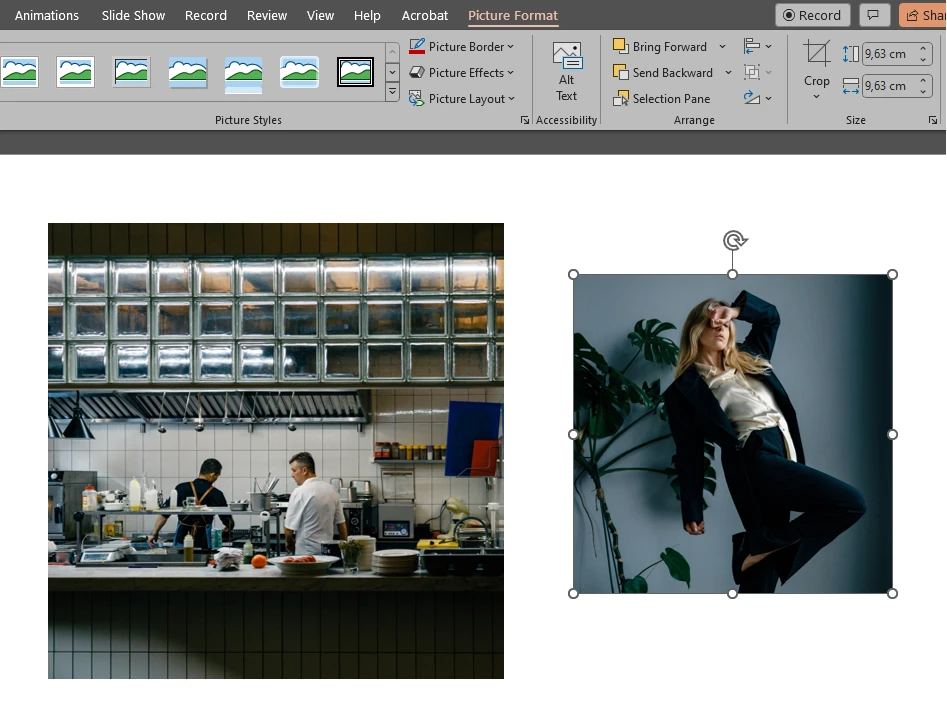
- The circle shape will be automatically filled with the picture. However, as you can see, your image now looks distorted. This is due to the fact that your original image doesn’t have the 1:1 aspect ratio. This is probably not the result you want. So, how can you fix this?

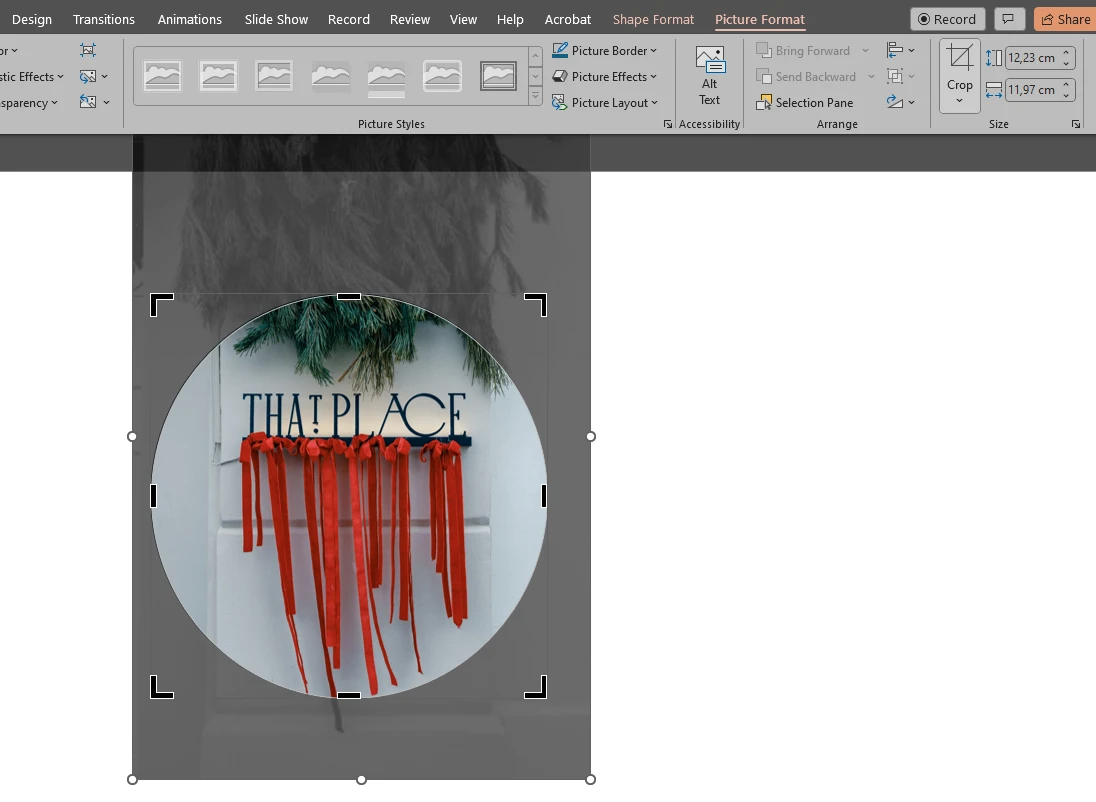
- Open the Picture Format tab at the top. Go to Crop, then choose Fill or Fit.
 As the names suggest, with the Fit option, the entire image will be fit into the shape. The original aspect ratio of the picture will be maintained. Therefore, if you have a rectangular image, it will probably look much smaller and there will be some empty space at the margins.
 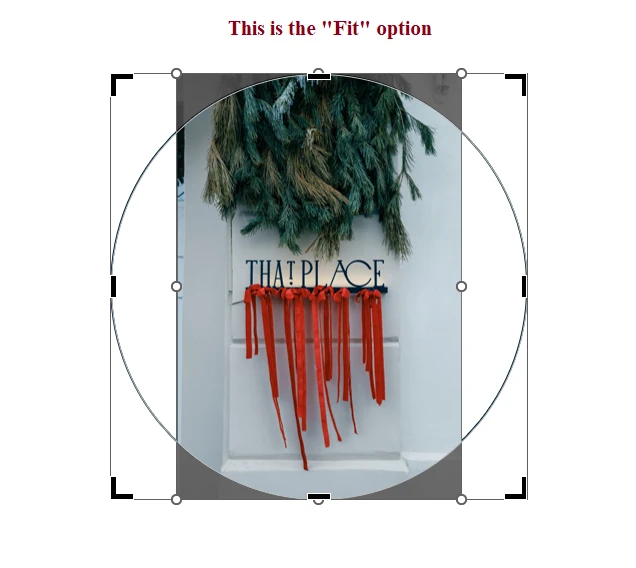 With the Fill option, your circle shape will be filled entirely with your image. Please note that some parts of the original image will be cropped out.
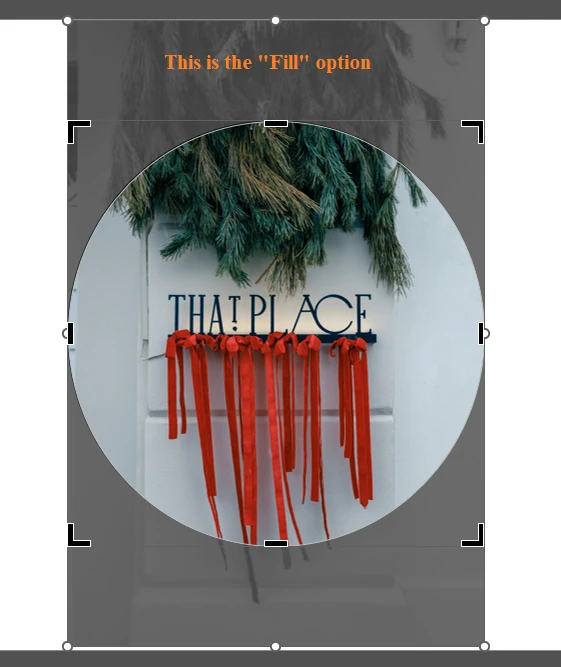
- Go for the Fill option – this will fix the issue with distortion. With the cursor, you can adjust the placement and the size of your cropping area or the image itself. Take a look at the previous method to see how this is done.
- Press Enter to apply the changes.

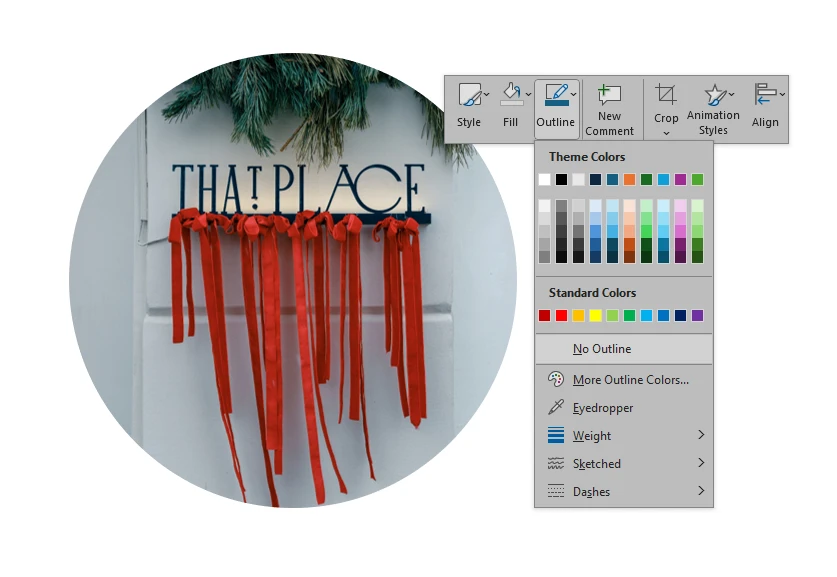
- Another thing that you probably noticed is that there’s an outline around your image. If you don’t like it, you can remove it by right-clicking on the image, then selecting Outline > No Outline.
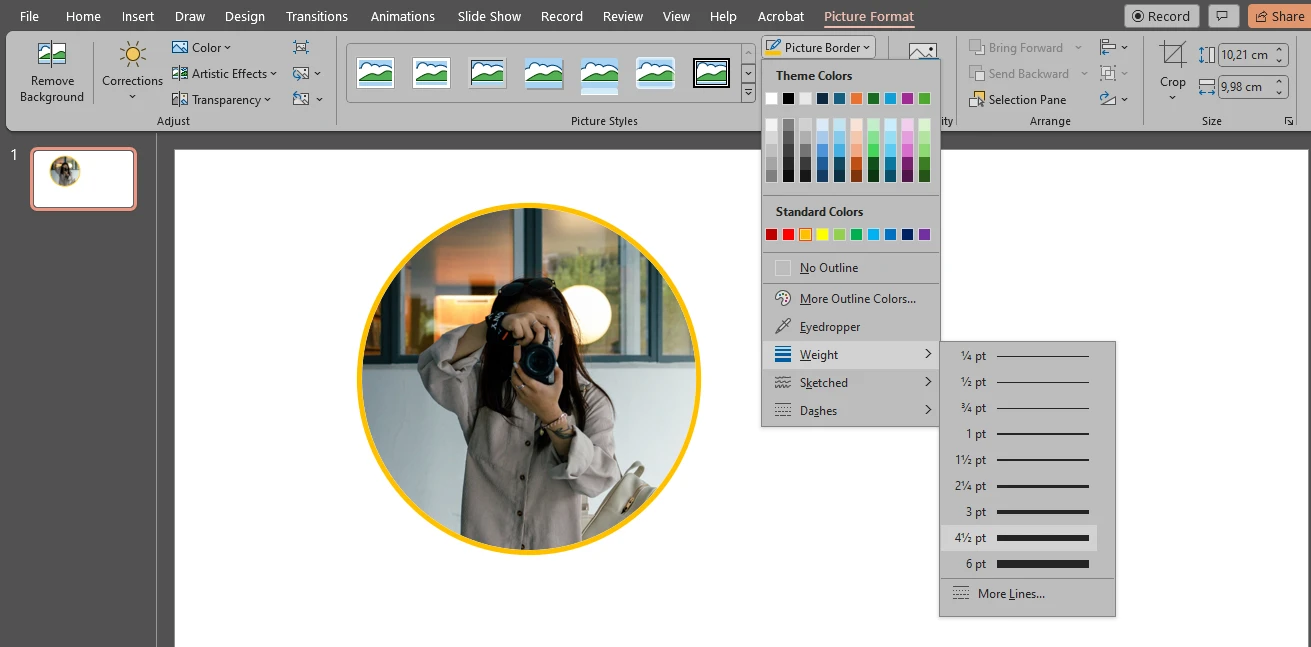
- If you think that the outline makes your image stand out, but you want to change its color and thickness, right-click on the image and select Outline. In the Outline menu you can pick a different color for the outline. In the Weight section, you can make the outline thicker or thinner.
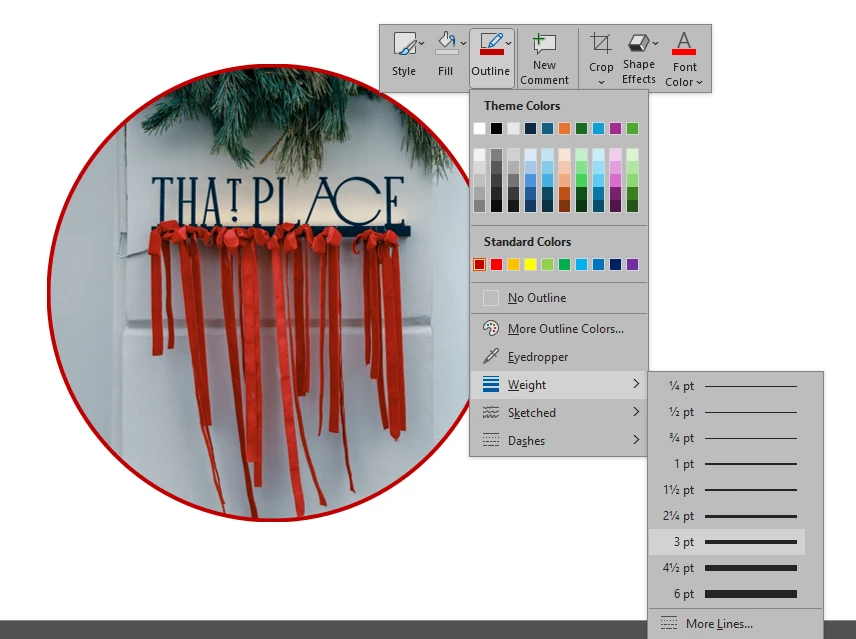 It’s also possible to make the outline look like it’s sketched or turn it into dashes.
  There’s plenty of room for experimentation!
Remember to press “Enter” or click outside the image, when you are done with all the editing.
How to Crop Several Images into a Circle in PowerPoint
What if you have more than one image on a slide and you want to crop all of them into a circle? This isn’t difficult, either. In fact, you’ll need to use the method that was already shown to you above. But there are a couple of changes. This is how you can do it:
- Import your pictures into the presentation.

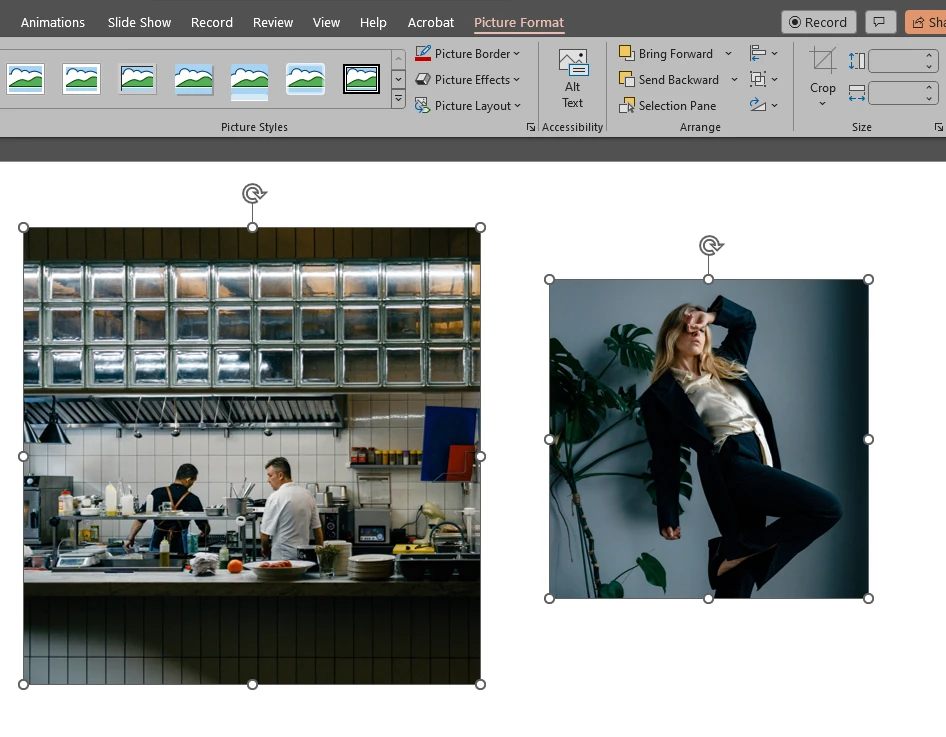
- To crop pictures into a circle in PowerPoint, first, you’ll need to change the aspect ratio of each image separately; if your images are rectangular, that is. If you imported square images, you can skip this step. Select the first image, then go to Crop > Aspect Ratio > 1:1.
- Repeat this with all the images that you want to crop into a circle in PowerPoint.
- Now that all of the necessary images have the shape of a square, it’s time to select them. Click on the empty space on your slide, then drag the cursor. You will see this grey selection area – it needs to cover all the necessary images.

- Once the selection area covers all the necessary images, release the mouse button. Voila! All the images are selected.
- Open the Picture Format tab. Next, go to Crop > Crop to Shape and select an oval. As you can see, only the Crop to Shape option is available. This is why you had to change the aspect ratio first; otherwise, you would’ve turned your images into ovals instead of circles.
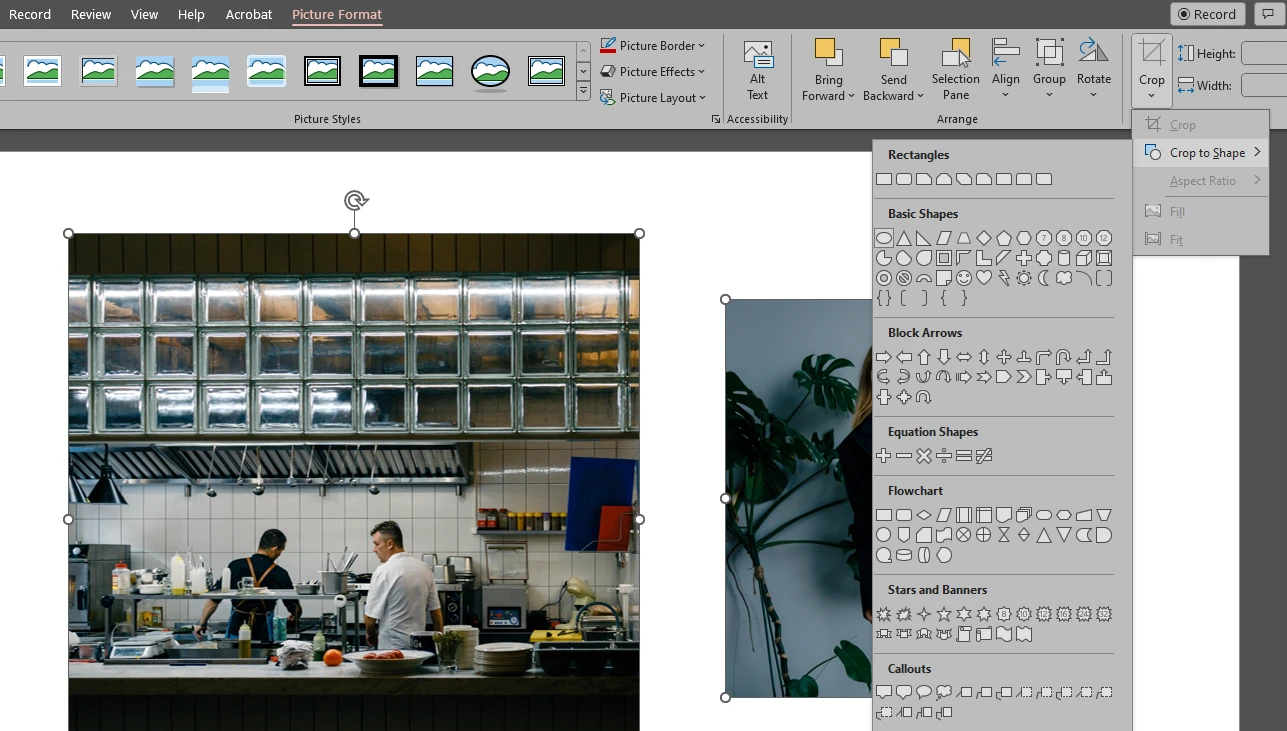
- All your images are now cropped into a circle!
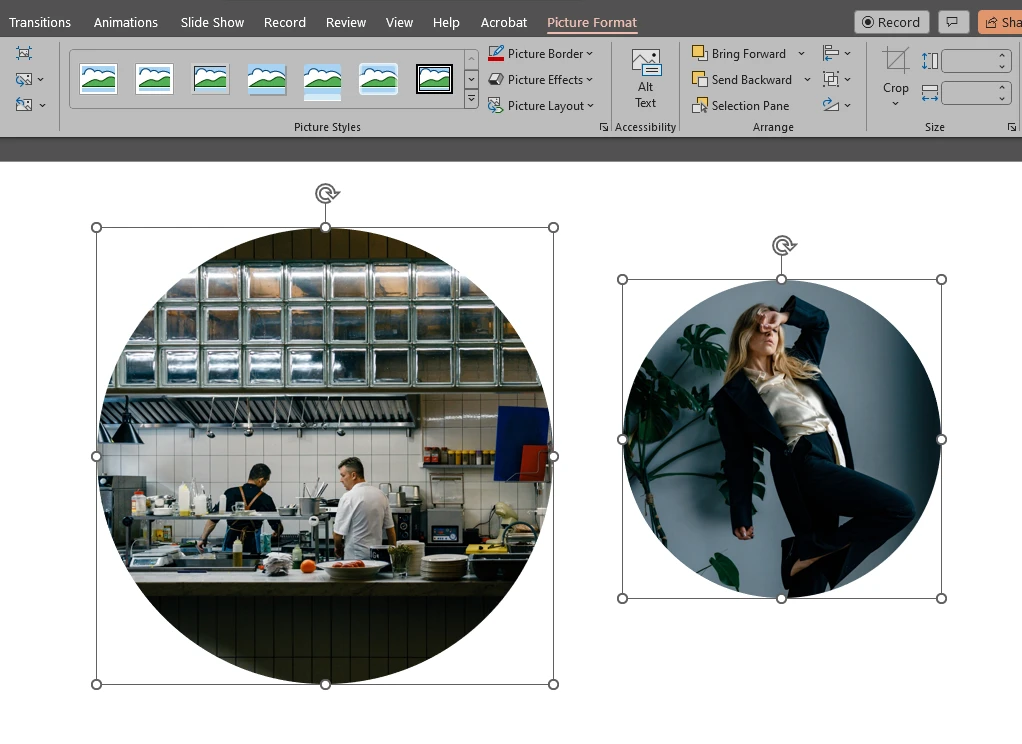
While all of the images are selected, you’ll be able to reposition and resize them with your cursor as a group. If you want to make one image smaller and the other one bigger, you will need to deselect them. Next, select one of the images, edit it, then select the other image and edit it, too. All the tweaking should be done on each image separately.
A Faster Way to Crop Pictures into a Circle
Cropping a picture into a circle in PowerPoint is quite straightforward and uncomplicated; unlike, say, in Photoshop. This software is easy to comprehend and master, and at the same time it’s rather powerful. It doesn’t matter if you are a beginner or a pro, you’ll still be able to get good results within minutes. If all you need is to crop a single picture into a circle in PowerPoint, then there’s a high chance that you won’t really need any alternatives.
However, presentations usually consist of multiple slides. What if you need to crop pictures on every single slide? What if some slides have only one image, while others – several images, and all of them has to be cropped? In PowerPoint, you won’t be able to select all the images in your presentation, then crop them in one go. You’ll have to repeat the entire cropping process for each slide separately. This might be quite tedious and time-consuming.
Fortunately, there’s a quicker way to crop images into a circle. You can use Watermarkly for that!
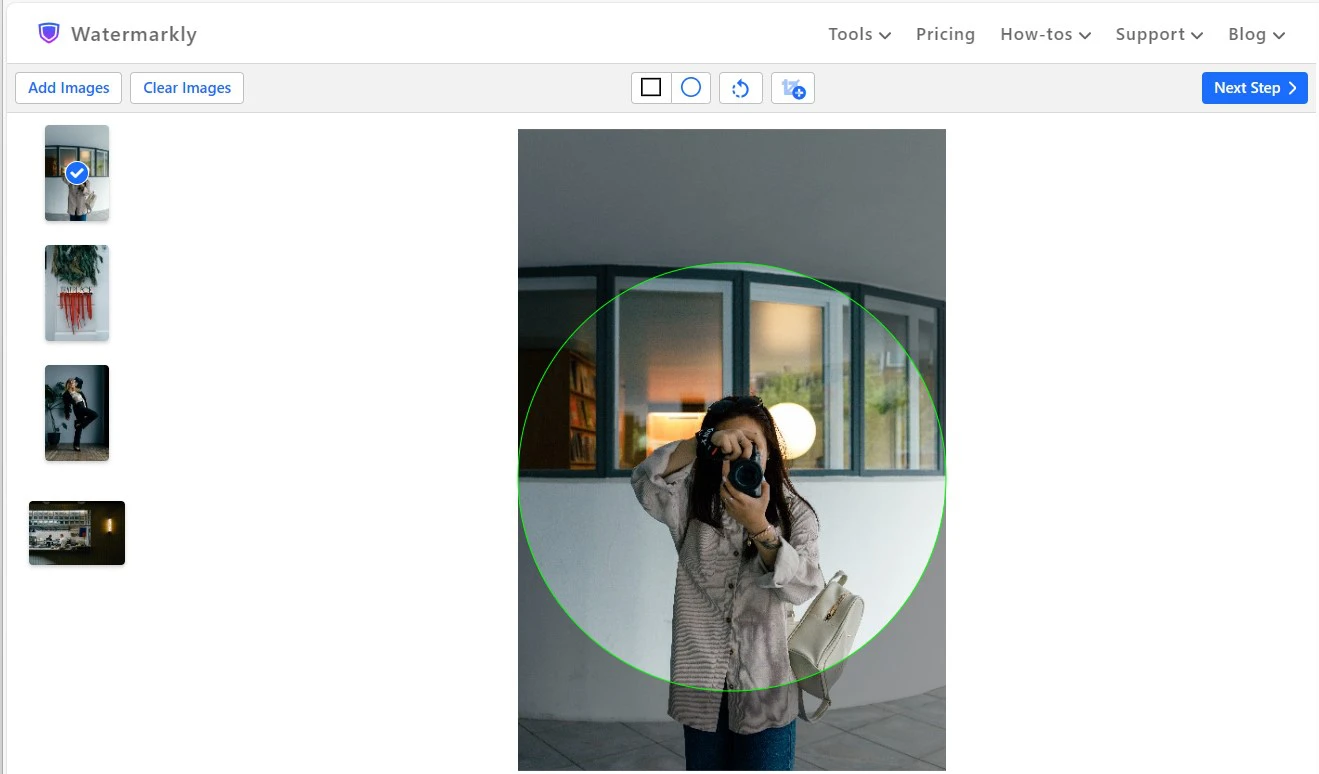
Watermarkly is an app that works in a browser and supports batch-processing. You won’t have to download and install it, so it won’t take up any of your device’s memory space.
Unfortunately, Watermarkly doesn’t support the format of PowerPoint presentations. Therefore, you won’t be able to upload your presentation into the app and do all the necessary editing. However, there’s a solution to this problem. You can simply [crop images into a circle before you import them into your presentation.
The biggest advantage that Watermarkly has over PowerPoint is batch processing. You can upload as many images into the app as you need and crop them into circles, rectangles and squares in one go. Another benefit of Watermarkly is that you will get a circle-shaped cropping area right away without changing any aspect ratios; no matter if you upload a square image or a rectangular one.
You can crop images in a single batch differently. For instance, you can crop some images into a circle and other images into a square. What’s more, you can duplicate an image while you are in the app, then crop it in a different way. To put it simply, you can crop one and the same image into a circle and a rectangle within a few clicks. Then you can see which version will look better in your presentation.
With Watermarkly, you can crop a batch of images, then simply insert them into the slides of your PowerPoint presentation. It will definitely take you less time and effort than if you had to crop images on each slide separately.
Watermarkly is a browser-based app, so you can use it on any internet-connected device and any operating system. There’s a mobile version of PowerPoint. Naturally, it’s much easier to create slides on a computer, a laptop or, at least, a tablet. Smartphone screens tend to be quite small for this task. However, it is perfectly possible to do some minor tweaks using the mobile version – for instance, edit some text or replace one image with another while you are on the go. Thus, you can crop your images in Watermarkly first, then insert them into your presentation in PowerPoint – no matter where you are or what device you’re using.
Watermarkly produces cropped images without any borders. It may be a drawback for you. But generally speaking, images without borders tend to look more neat and professional. Thus, if you need to create in PowerPoint a presentation for your work, it might be better for your round images not to have any borders.
There’s another benefit. What if you need to straighten the horizon? Or what if your image will look better if you tilt it just a bit? This cannot be done in PowerPoint. But that’s not the case for Watermarkly! There’s a slider with the help of which you can tilt your entire image to the left or to the right.
On Watermarkly’s website you will find a variety of tools for some basic image editing. For example, you can add a watermark to your image. This way, no one will be able to steal it from your PowerPoint presentation. Another free option is add text to photo.
To Sum Up
If you want your audience to pay attention and remember the majority of information you tell them, including visual content in your PowerPoint presentation is a must. Also, it might be a good idea for your images to have different shapes. It will take you only a couple of minutes to crop a picture into a circle in PowerPoint. As this article showed you, it’s not a very challenging and complicated task to do. You also learnt about a third-party app. It can process batches of images quickly, so it can be extremely useful for you if you need to crop pictures into a circle in PowerPoint quite often. With Watermarkly, your workflow will be much quicker and easier!
More articles
How to Add a Watermark in PowerPoint
How to Blur a Part of an Image in PowerPoint
How to Compress Images in PowerPoint
How to Crop a Picture into a Circle
How to Crop in a Circle in Photoshop
How to Make an Image a Circle in Google Slides