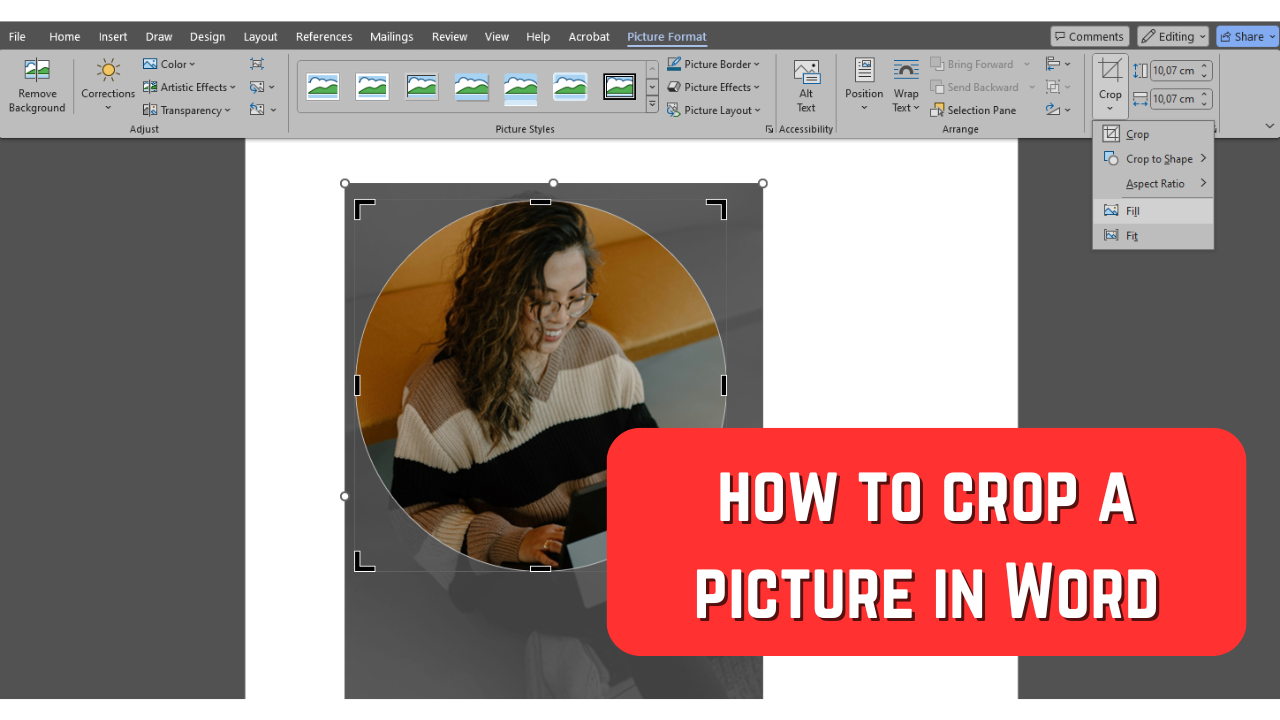
How to Crop a Picture in Word
by  Lina Thorne • Updated · Posted in Crop Photo
Cropping images might seem like something basic but it can actually be quite powerful. By cropping an image you can get rid of some unnecessary parts or distractions in the background. It can aid you in guiding the viewers’ attention to the key elements as well as drastically improve composition and bring more balance and harmony into an image.
Lastly, you might need to simply change the aspect ratio or the shape of an image. For instance, if you turn rectangular images into squares, they might give your overall document a more refined look.
People tend to use Microsoft Word to create documents, write stories, essays or personal letters, and so on. If you work with text a lot, you’re probably pretty familiar with this software. Let’s say that you are in the middle of creating a document and you realize that a couple of images that you want to insert into it need to be cropped. Well, there’s no need to switch to some special image editing software. This task can be done right in MS Word!
Knowing how to crop an image in Word can be incredibly beneficial. It can help you create a professional-looking report or elevate a personal letter. Here, you will be able to do not only some basic freeform cropping, but also crop to a specific shape or crop to an aspect ratio. Our detailed instructions will help you get the desired results easily within just a couple of minutes.
How to Crop an Image in Word
Let’s kick off with the basics. You might be under the impression that cropping a picture in Word is a challenge, but it’s actually super simple and will take you less than a minute; even if you have no prior experience in image editing.
Let’s see how you can do this:
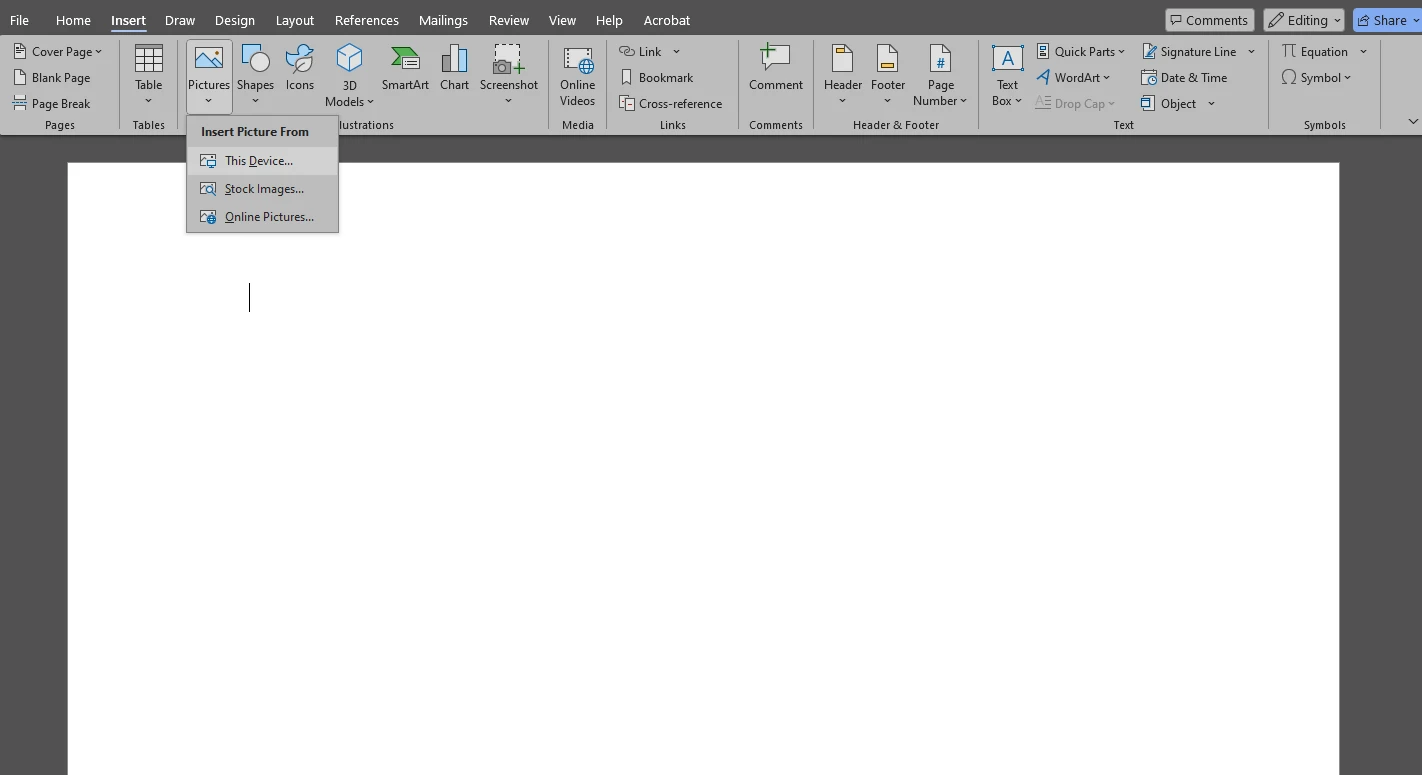
- Open your document in Microsoft Word, find the spot where you want to insert your image. Then go to Insert > Pictures and import the necessary picture.
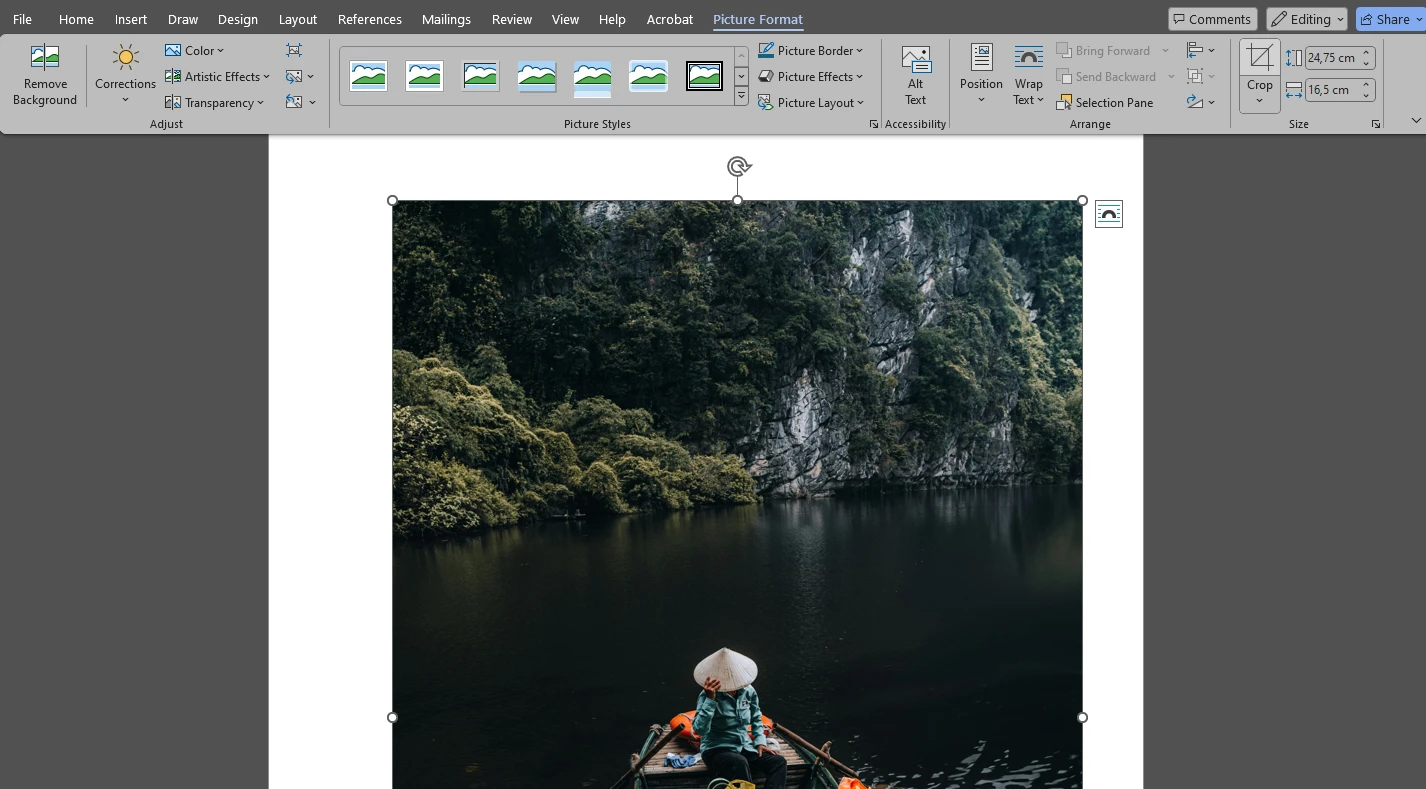
- Now that your image is inserted, select it by clicking on it. In the ribbon, go to the Picture Format tab and click on the Crop button which sits at the right end of the ribbon.
- You will see the black cropping handles appear on your picture.
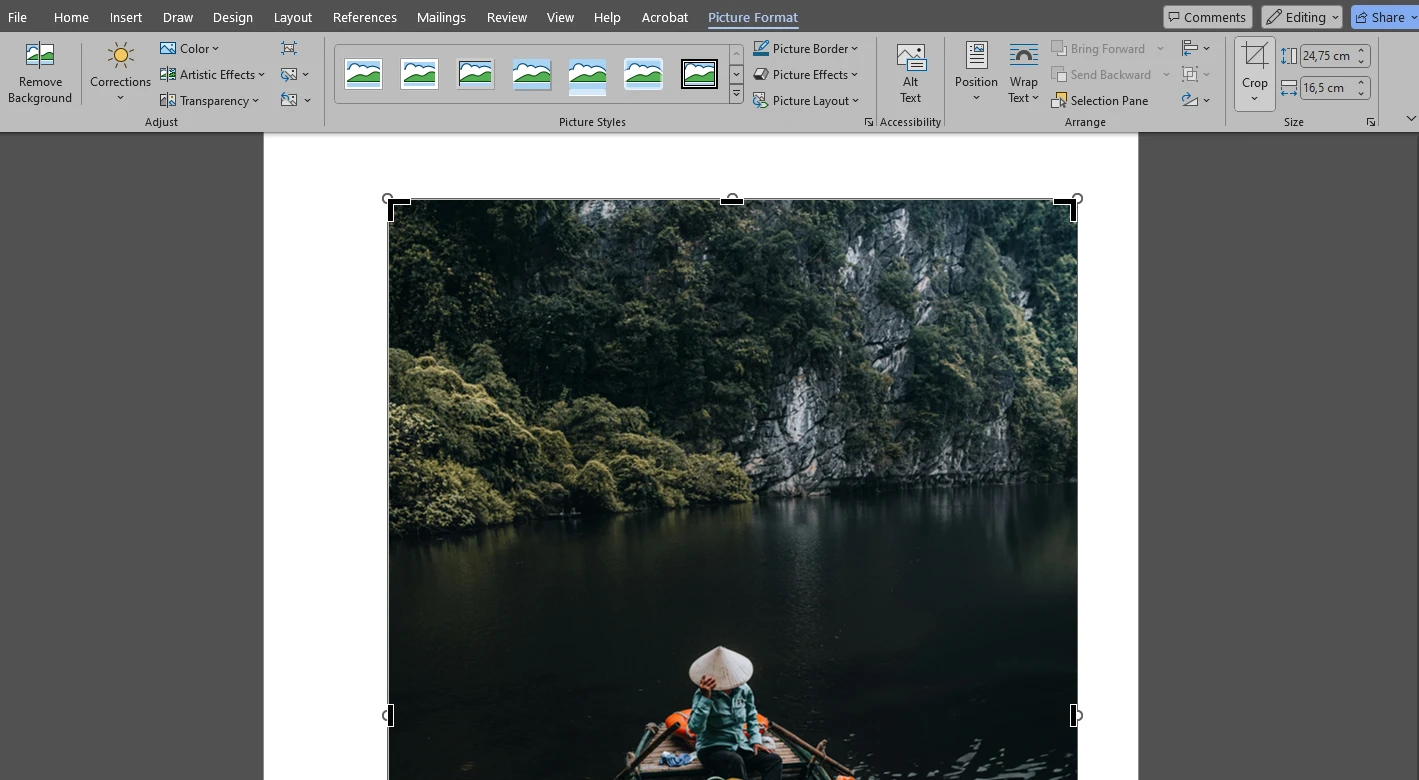
- Drag the cropping handles with the cursor to crop your image in Word. Everything outside these handles will be cropped out.
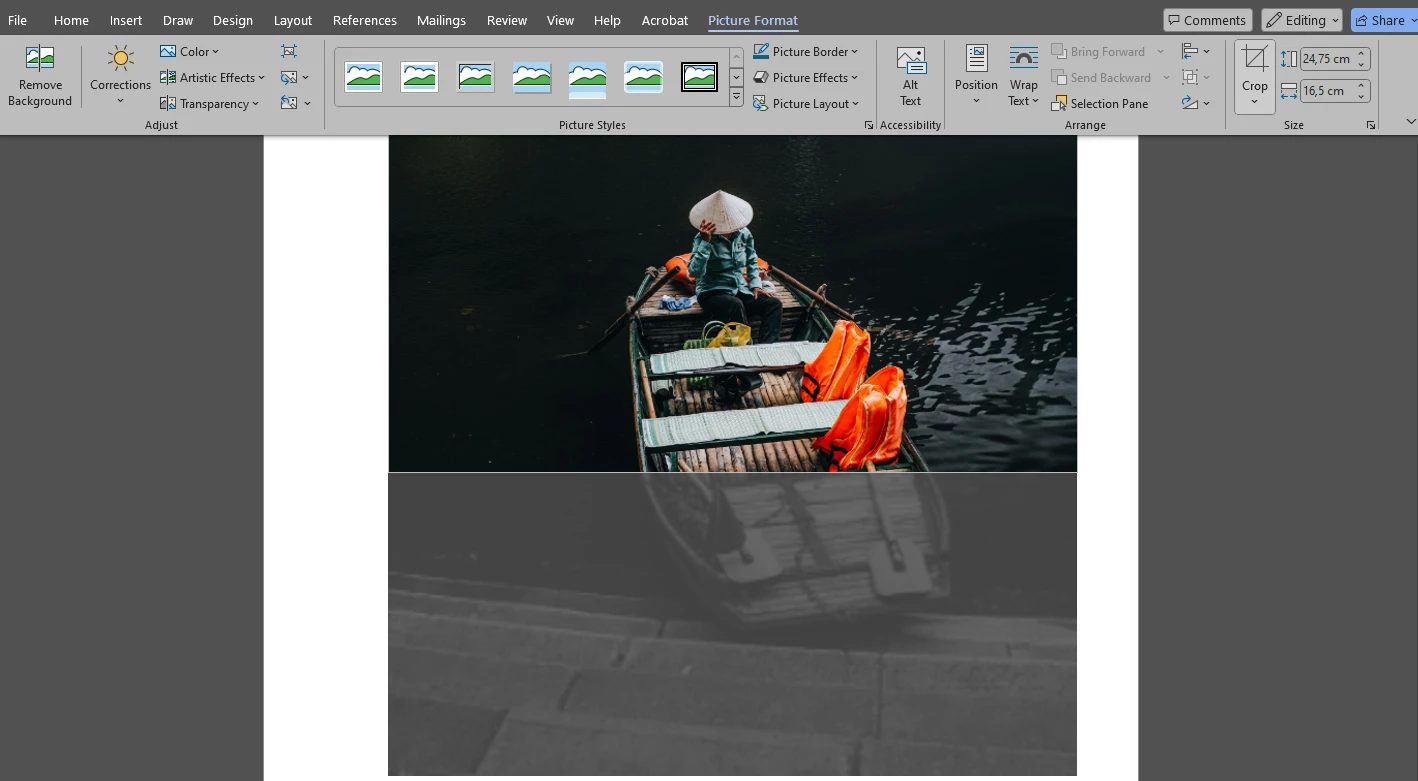 Please note that this option allows you to change the height and the width of your image however you want.
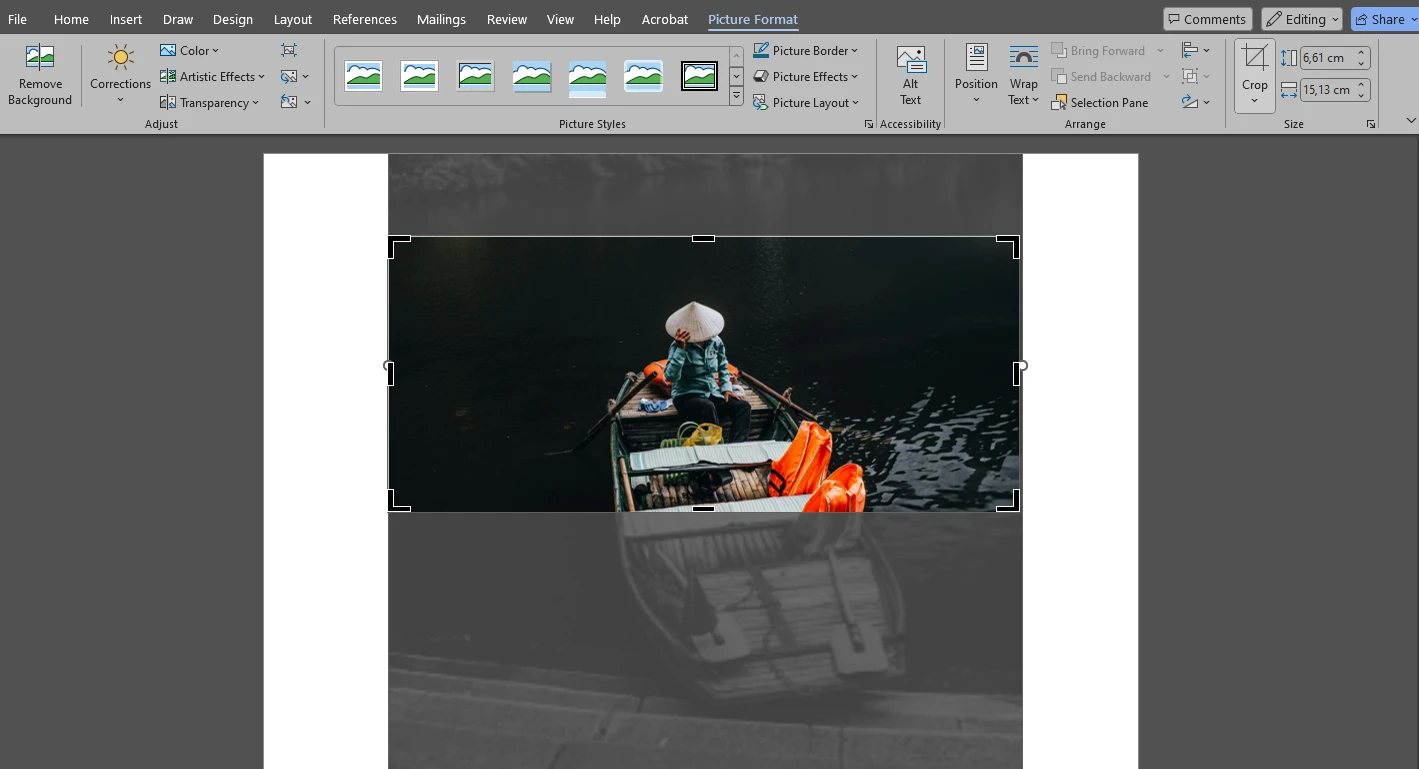
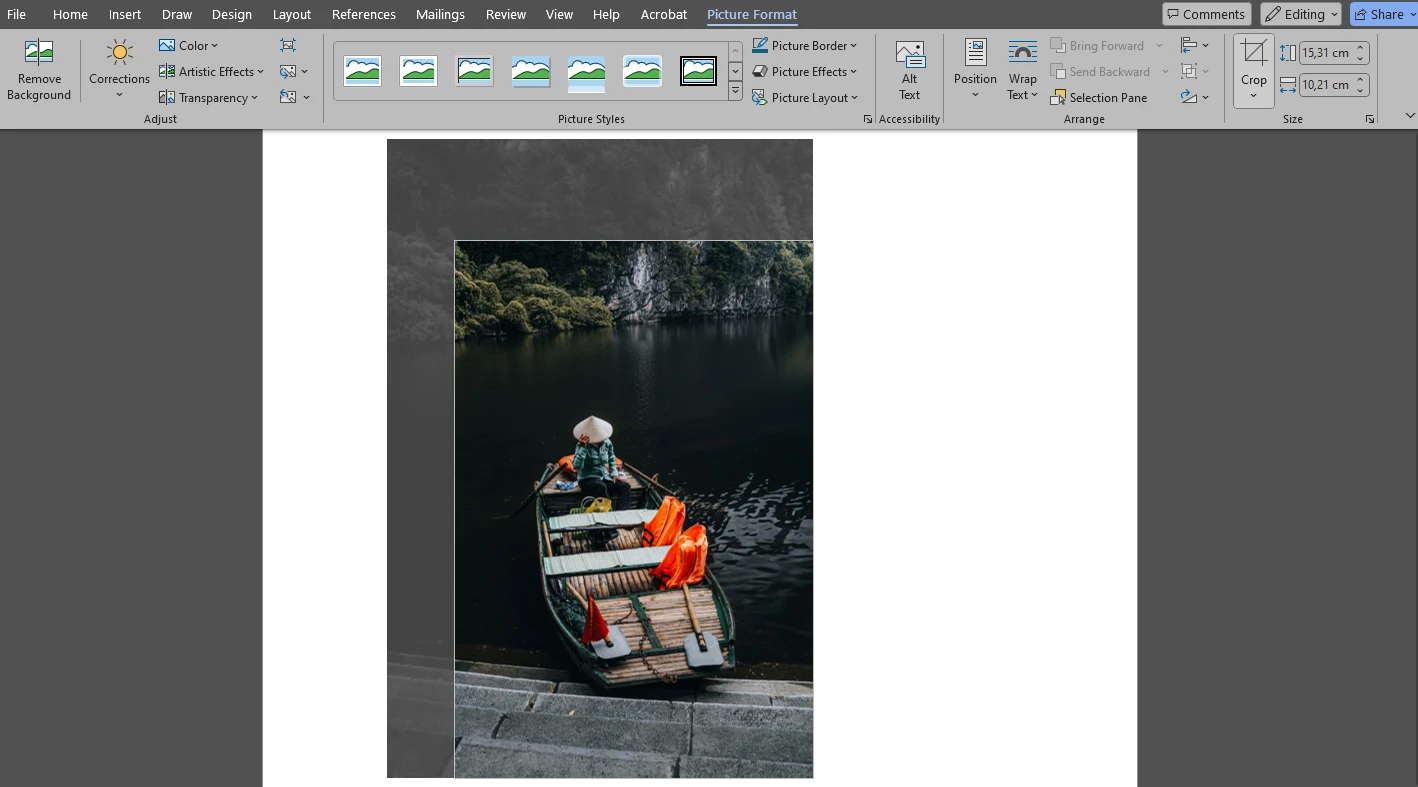
- If you need to crop an image equally on two parallel sides, drag the cropping handle of one side inward while holding CTRL / CMD.
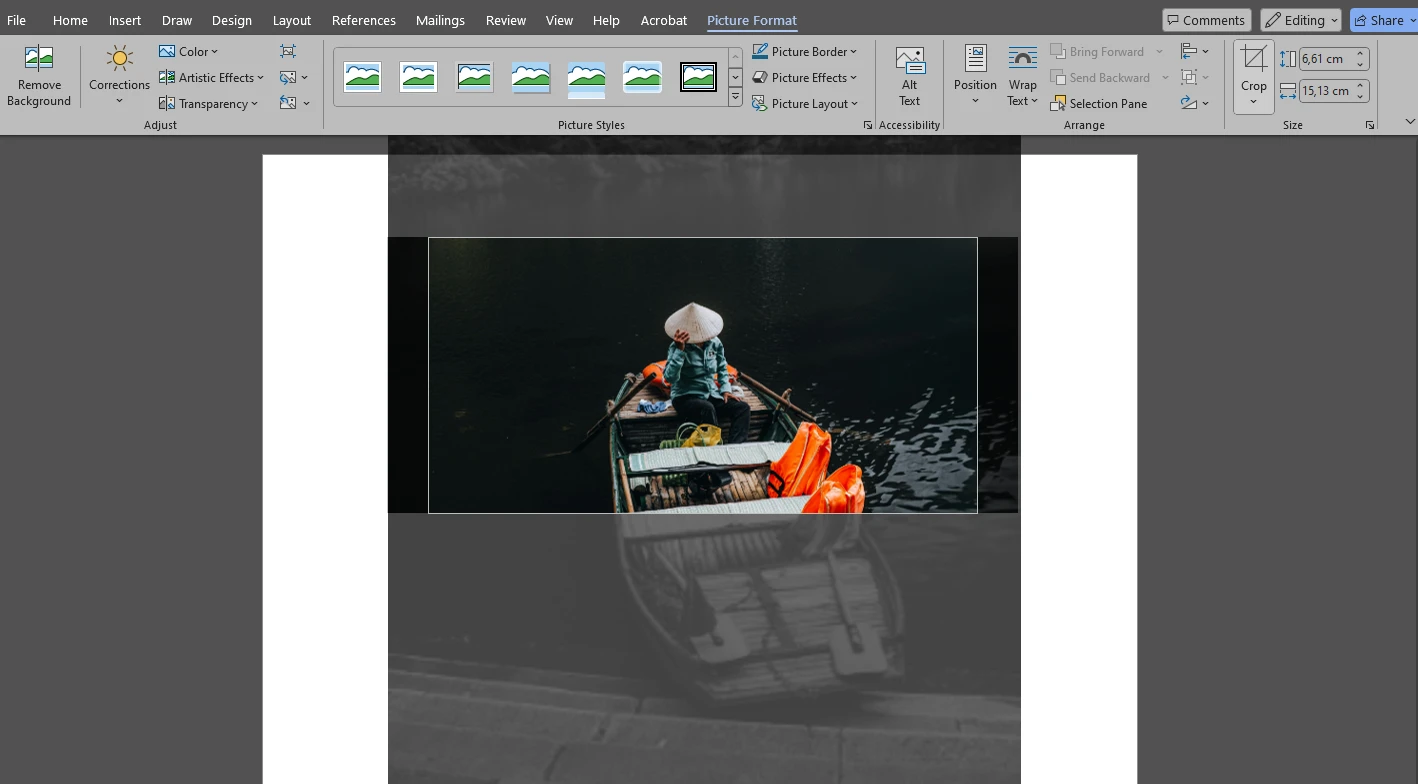
- What if you need to change the position of your cropping area? Well, you can do that by re-adjusting the cropping handles. Alternatively, you can reposition the image itself with the cursor. In MS Word it’s better to reposition and resize the image itself rather than the cropping area. Repositiong the cropping area itself is rather tricky.
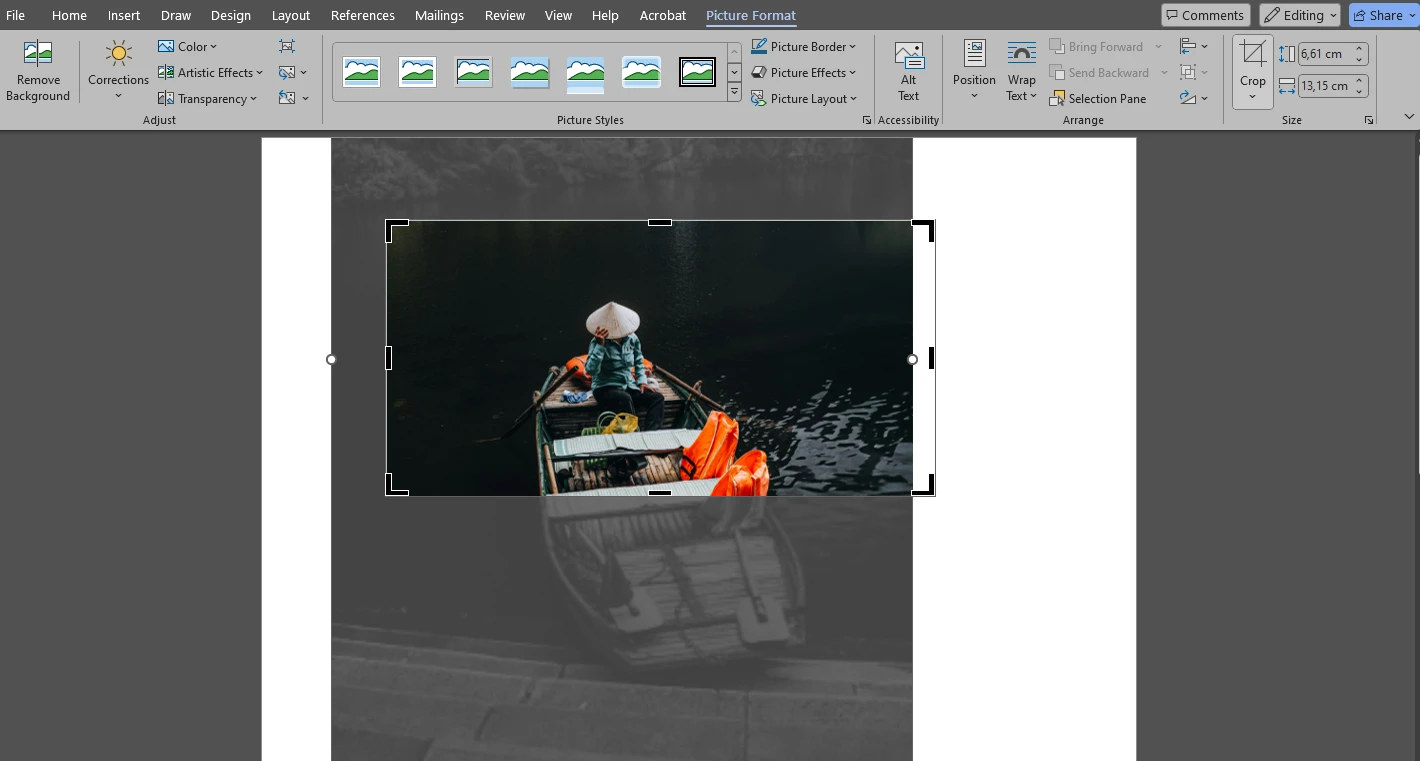
- If you realize that the horizon needs to be straightened or you just want to tilt your image ever so slightly, you will need to rotate your image before cropping it. This can be done with the help of the rotation handle that’s above the selected image. Once your image is rotated, crop it.

- Are you happy with the cropping? Press Enter to apply the changes.
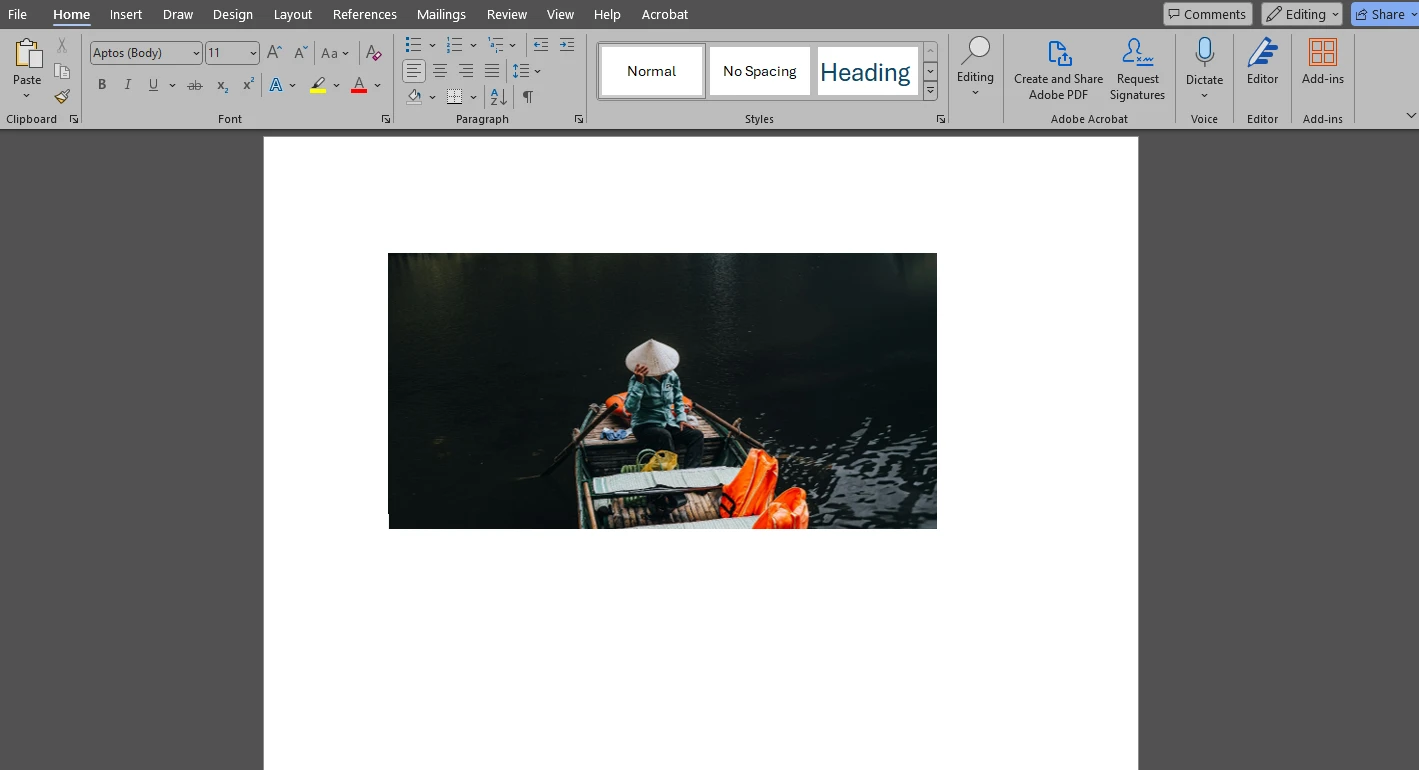
That’s it!
Please keep in mind that when you insert an image into a Word file, Word automatically creates a copy of it. This means that if you crop a picture in Word, the cropped copy will exist only in your Word file. So, you don’t need to create a copy of your original file. Nothing will happen to it anyway.
How to Crop an Image in Word to a Specific Aspect Ratio
In case you don’t know, an aspect ratio of an image is the proportional relationship between its width and height. When an aspect ratio is locked, if the width is changed, the height will be changed automatically. Usually, if you don’t want your image to get distorted or stretched awkwardly, it’s vital for you to maintain the aspect ratio.
First, if you want to keep the original aspect ratio of an image, you should hold Shift while dragging one of the corner cropping handles.
Alright. What if the aspect ratio needs to be changed? What if you want to turn a rectangular image into a perfect square? Luckily, you can also achieve this in Microsoft Word!
Follow these steps:
- Once the image is inserted and selected, go to Picture Format > Crop > Aspect Ratio and pick the option that you need. For instance, 1:1.
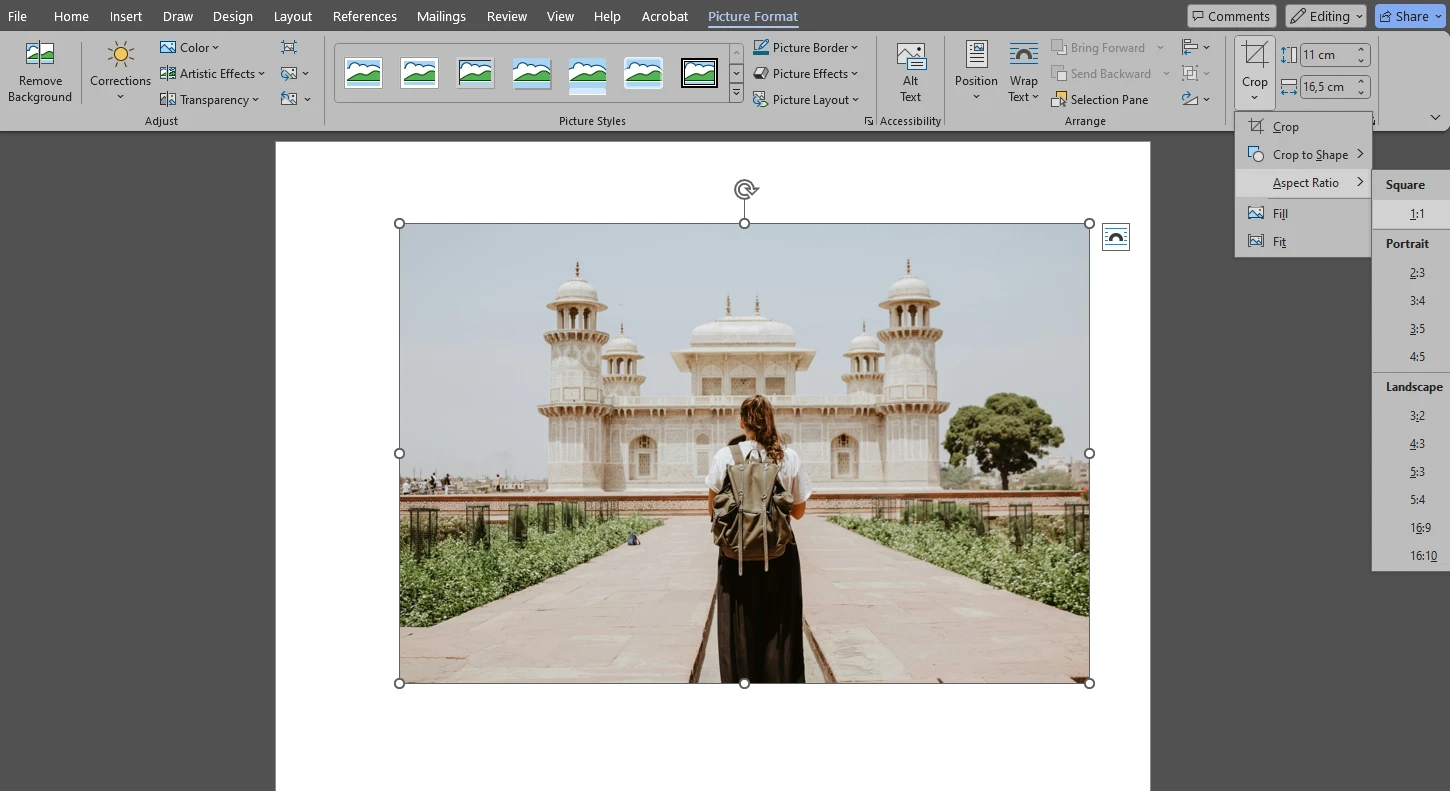
- Your cropping area in Word will now have the necessary aspect ratio.
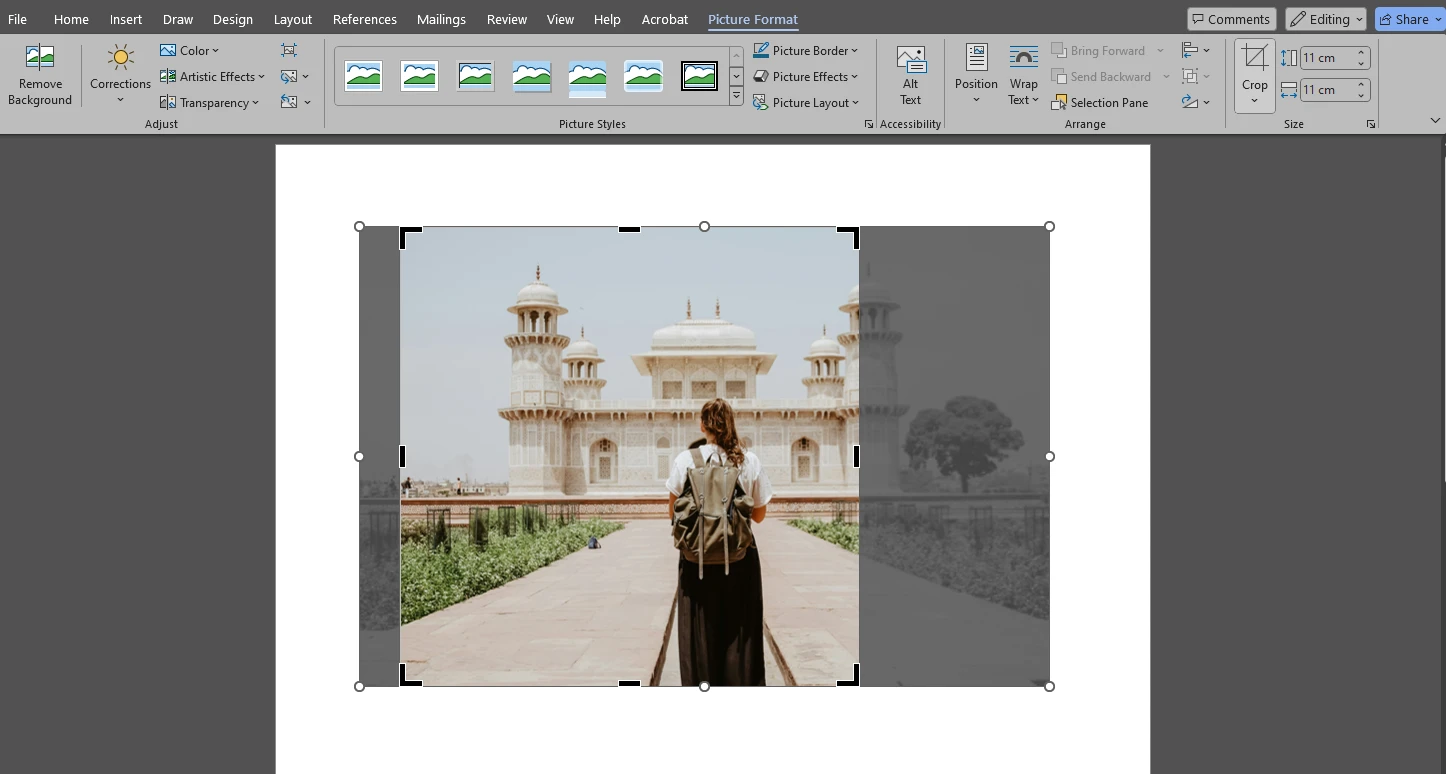
- Make the necessary adjustments.
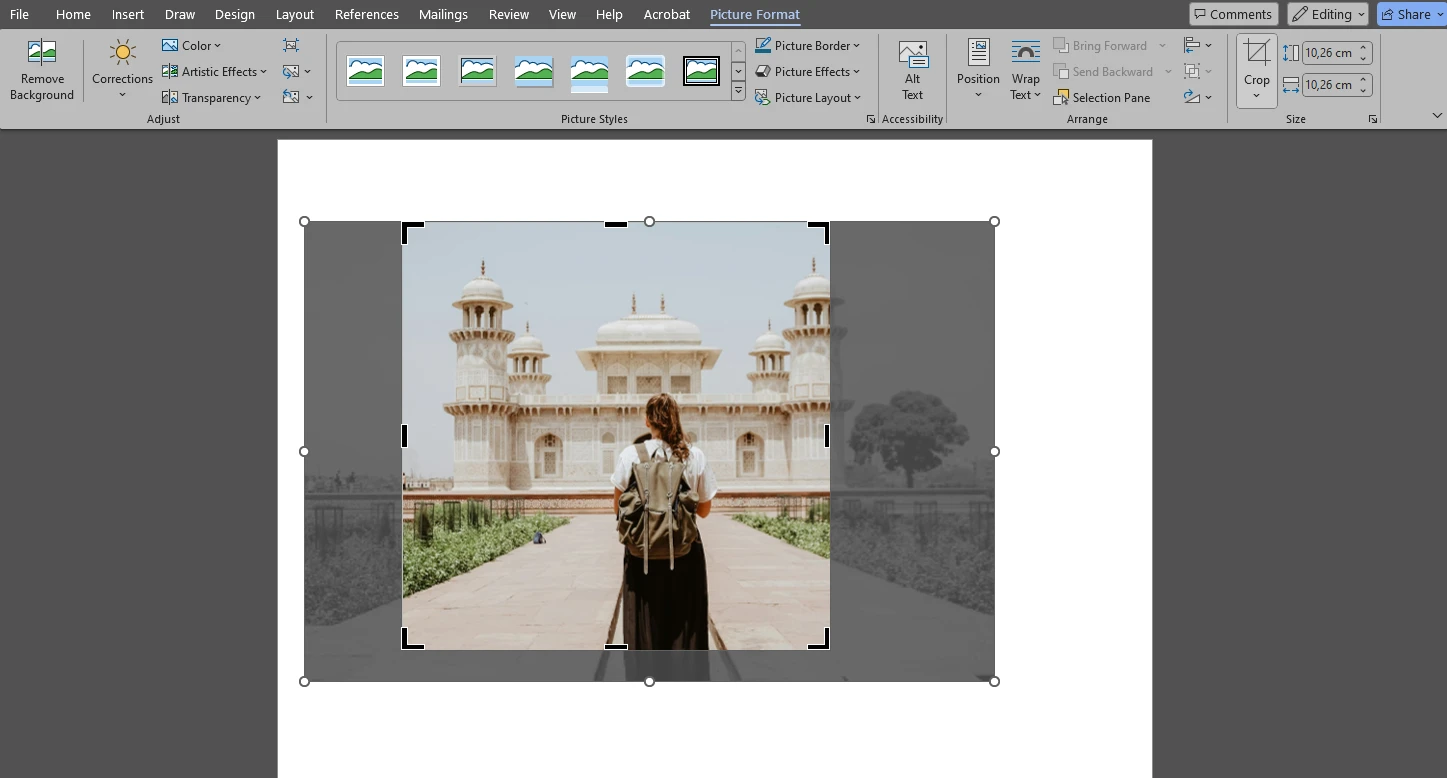
- Please note that even though you selected a specific aspect ratio, you need to hold Shift while dragging one of the corner sizing handles. Otherwise the aspect ratio might get messed up.
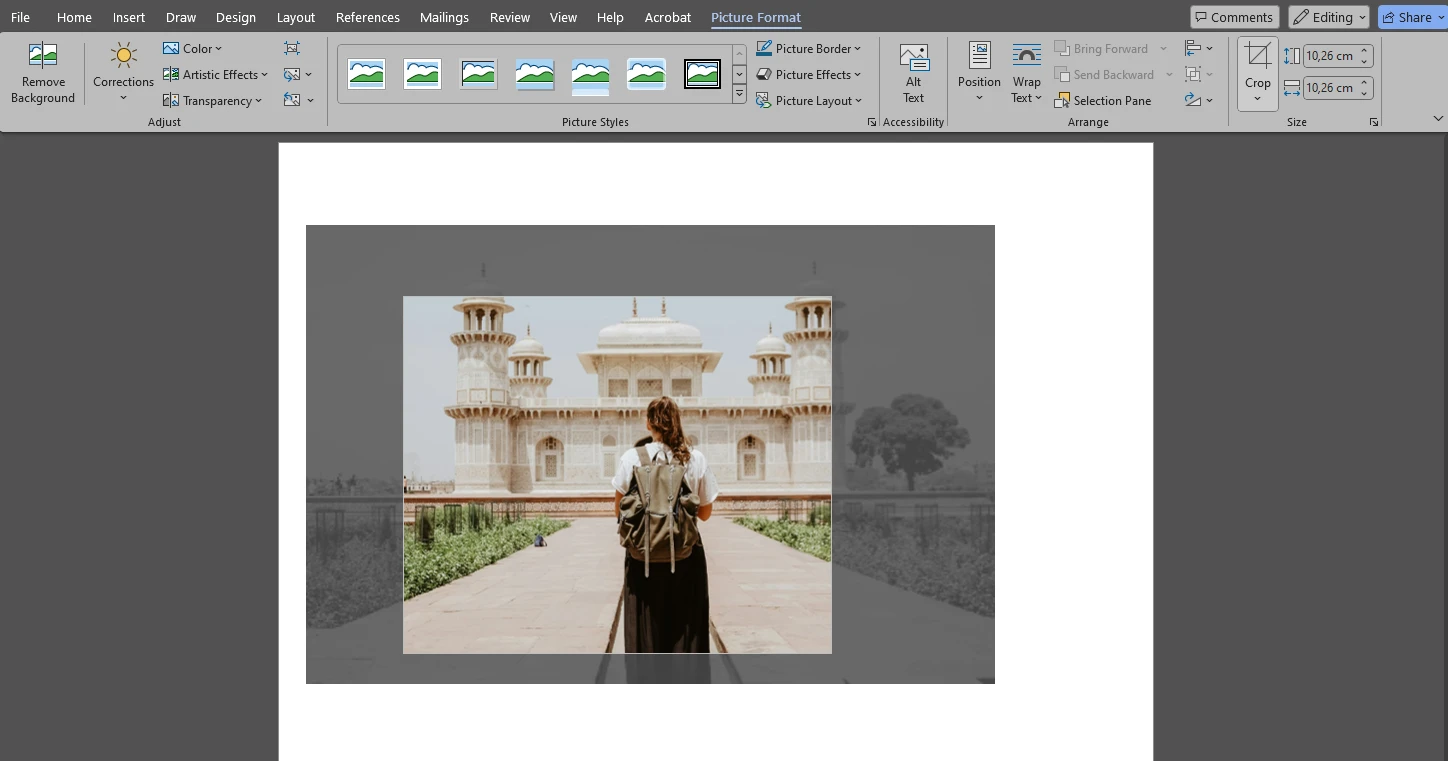
- When you’re ready, press Enter or click outside the image.
Now you can easily change the aspect ratio of your image. It’s a great way to improve composition. Although, it’s worth noting that Word’s crop tool doesn’t offer the Rule of Thirds gridlines – or gridlines for any other compositional rule, for that matter. For this reason, getting a well-balanced image might be a bit of a challenge.
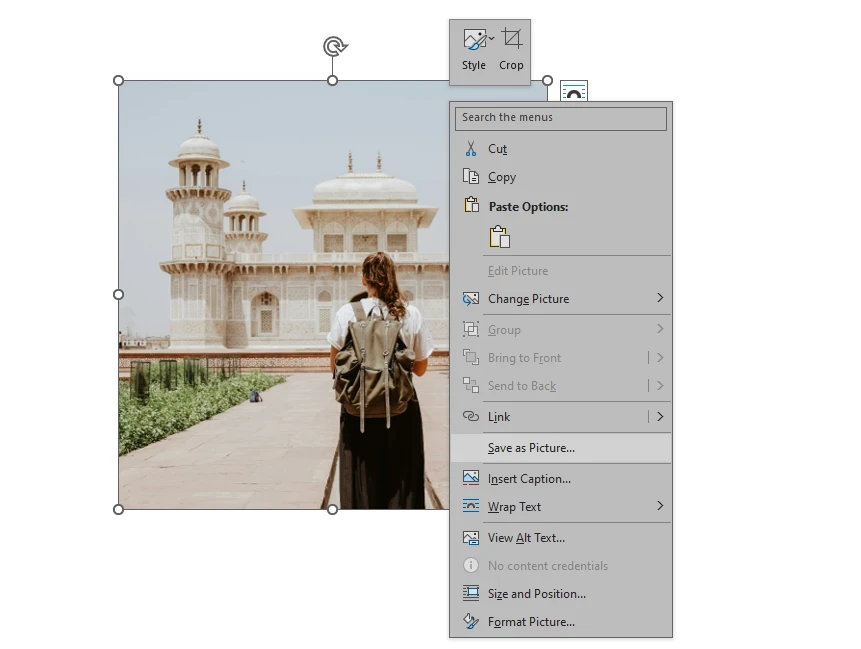
Here’s a tip. If you want to save your cropped image as a file, right-click on it, then pick the Save as Picture option in the menu. Choose the export folder and save your image. You can save it as a copy or replace the original file with it.
How to Crop a Picture into a Shape in Word
The previous two methods allow you to crop an image without changing its shape drastically. But what if you want to crop an image into a circle, a start or any other shape? Yep, you can do that in Word, as well.
It’s astonishingly easy:
- After you insert your image and select it, go to the Picture Format tab, choose Crop > Crop to Shape.
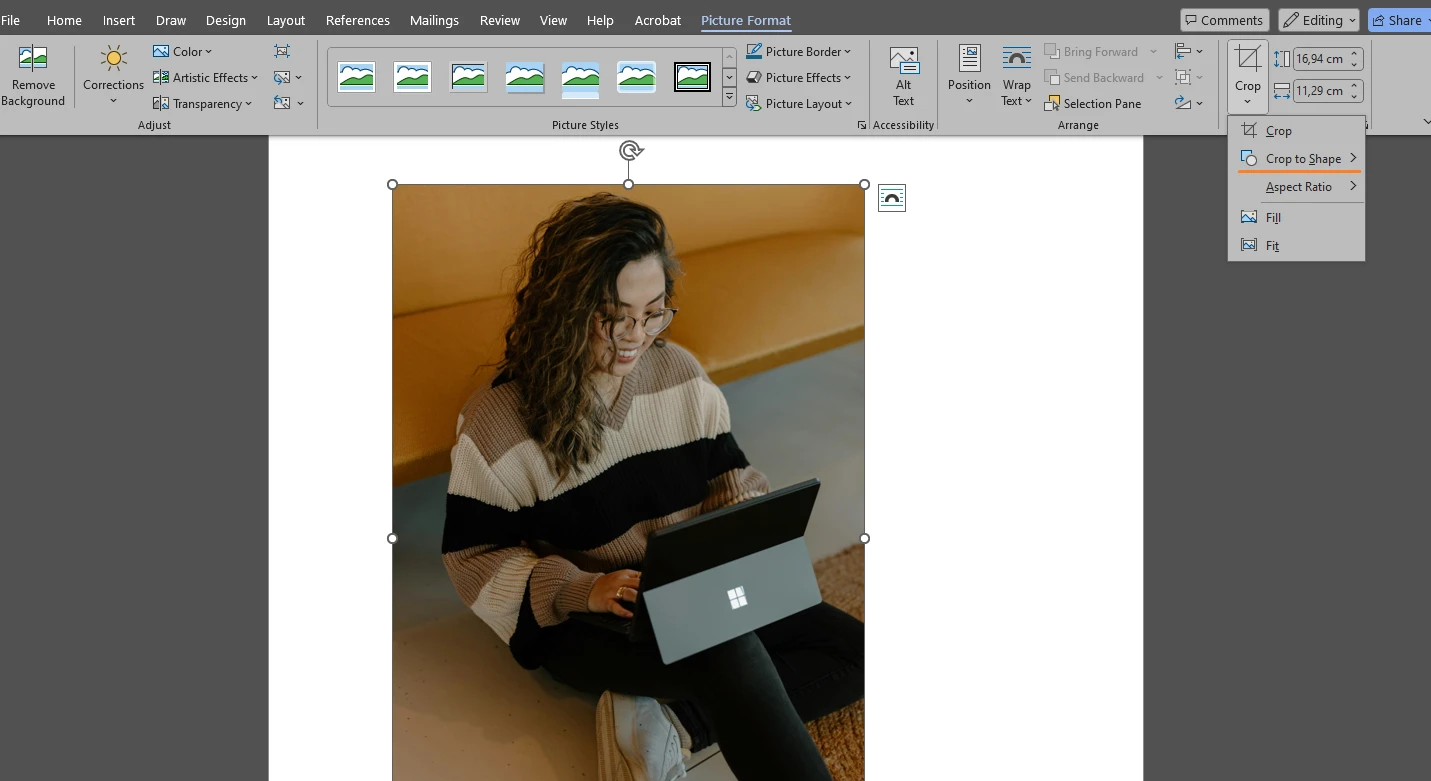
- You will see a flyout menu with a variety of different shapes. Pick the shape that you need.
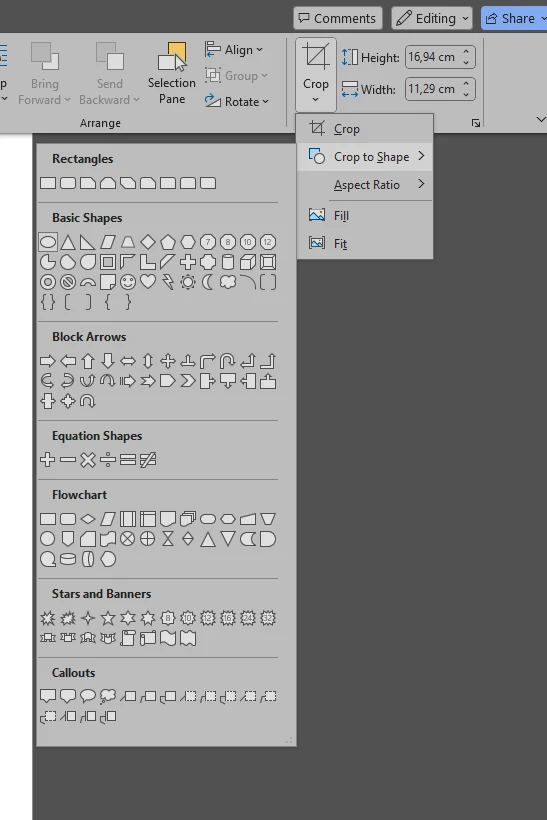
For instance, Word allows you to crop your image into the shape of a heart.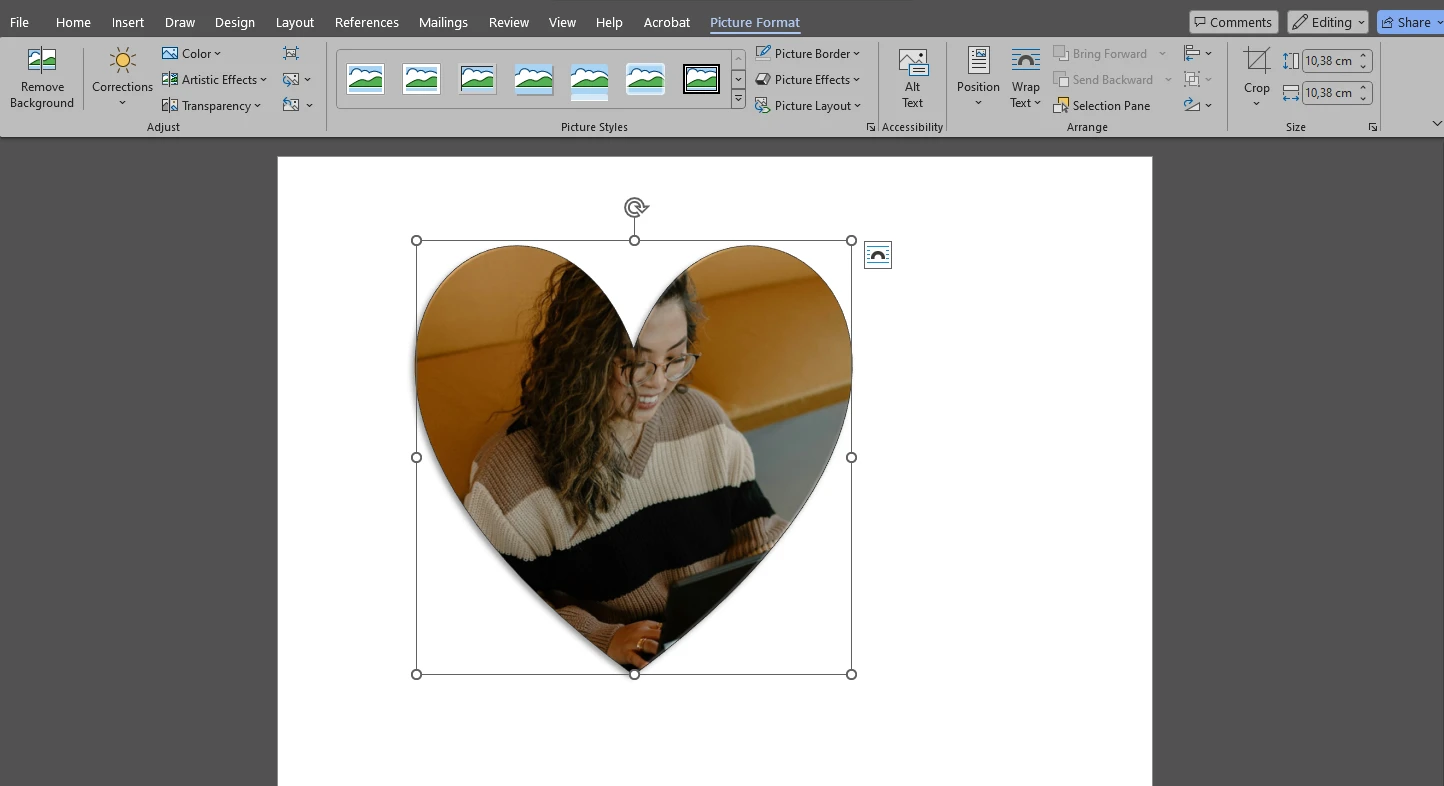
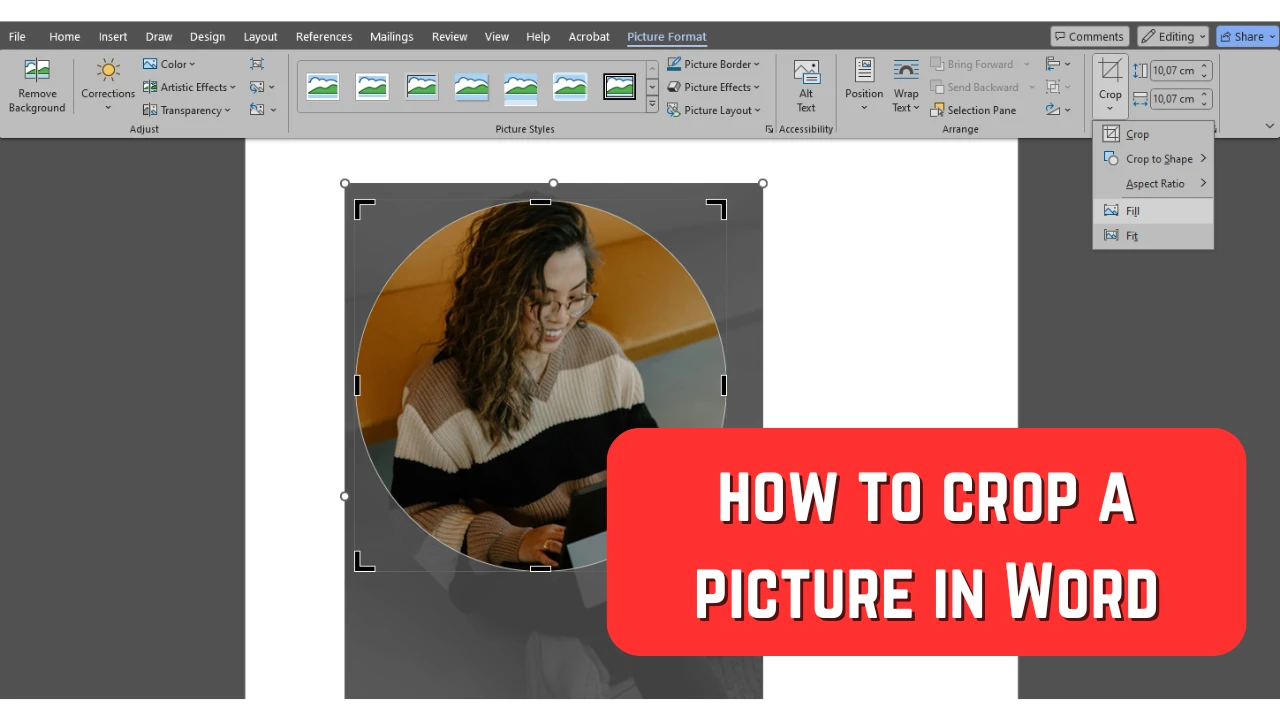
- As you might have noticed, there’s no circle here. Then how can you crop a picture into a circle in Word? Well, if that’s your goal, you need to select the oval shape.
- If the original image is square, you will end up with a perfect circle right away. But if your image is rectangular, it will be cropped into an oval. Don’t drag the resizing handles just yet!
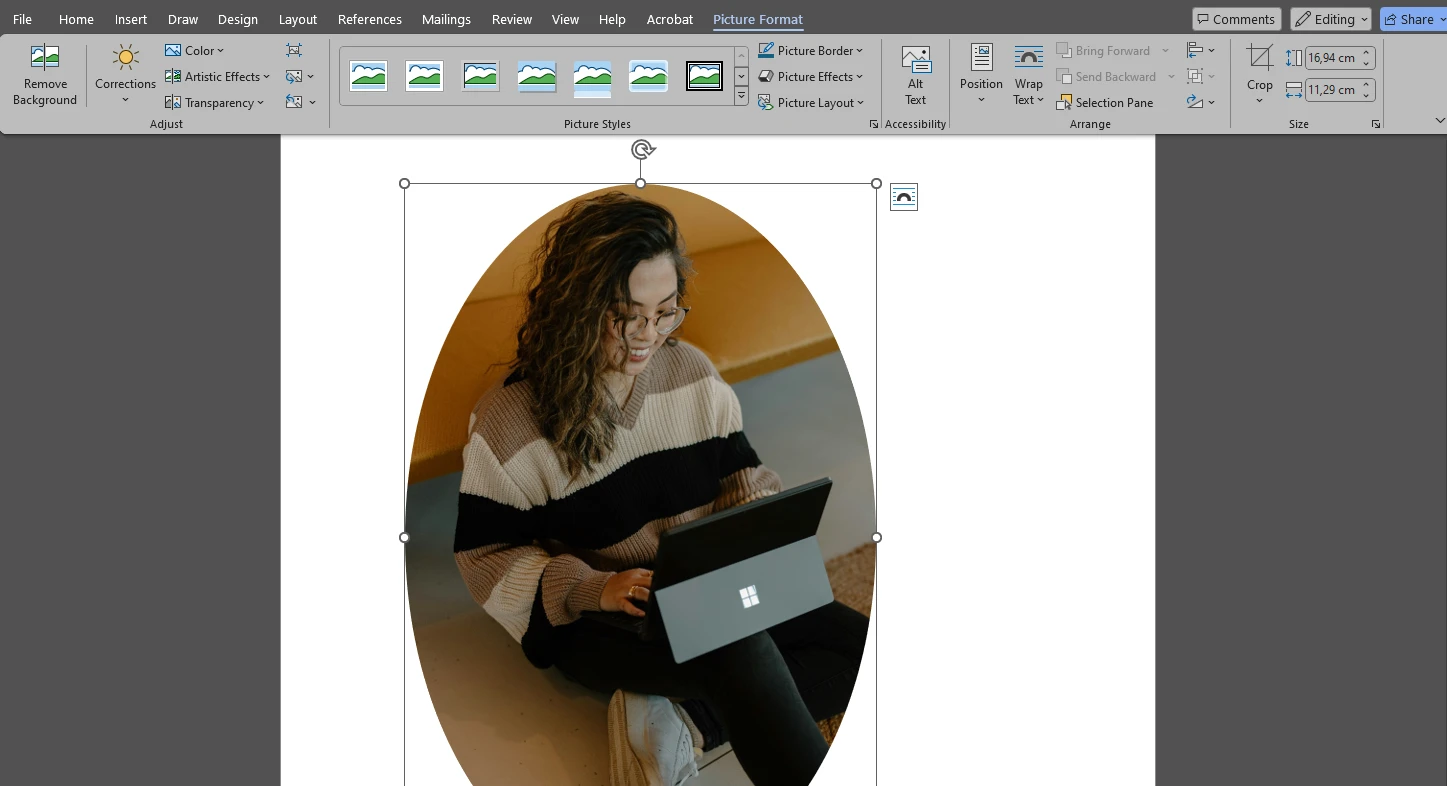
- What you need to do instead is open the Crop menu in the ribbon again and select Aspect Ratio > 1:1.
 This will turn an oval into a circle instantly!
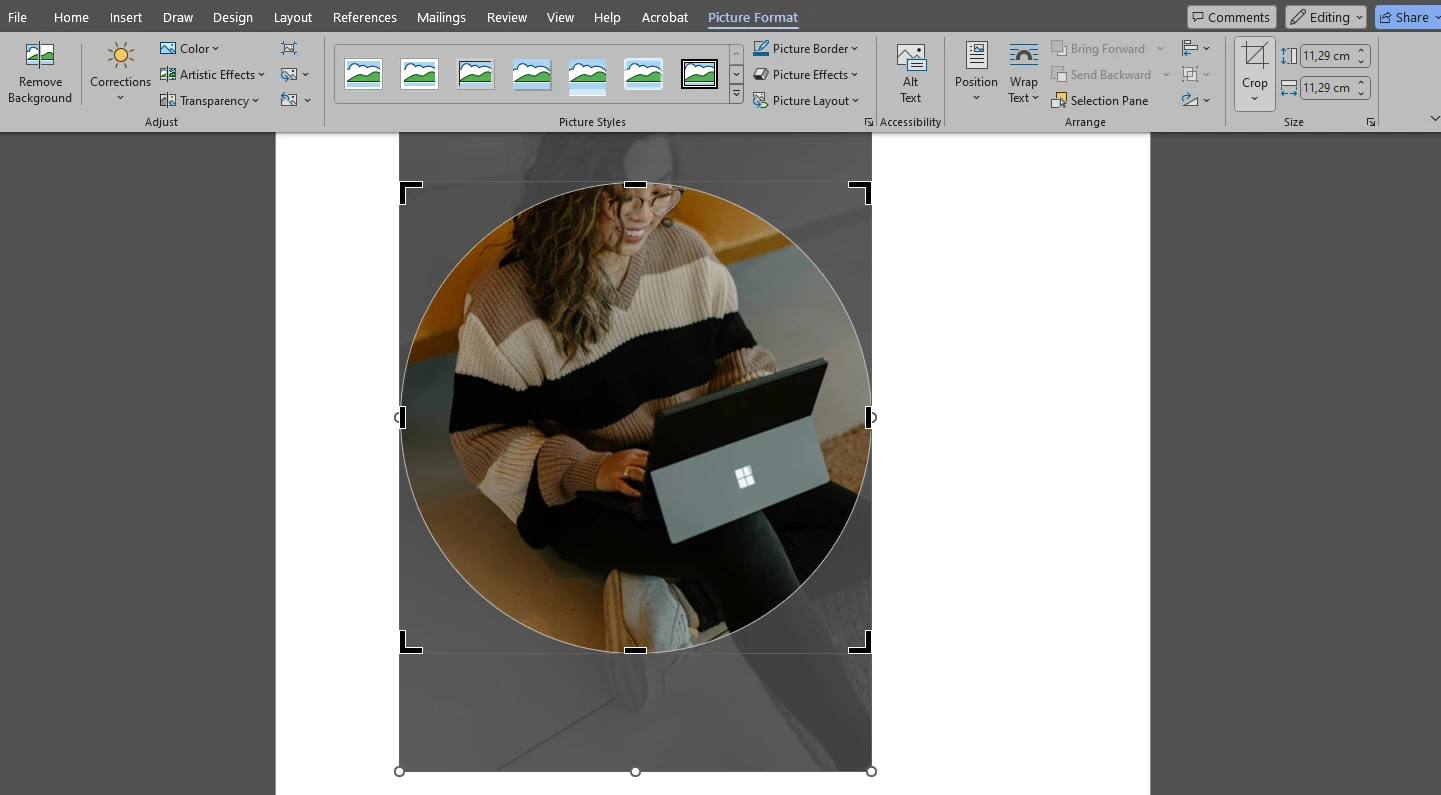
- Use the cursor to make the necessary changes to the cropping area and adjust the placement of your image inside the circle. Drag the white circular handles to make your image bigger.
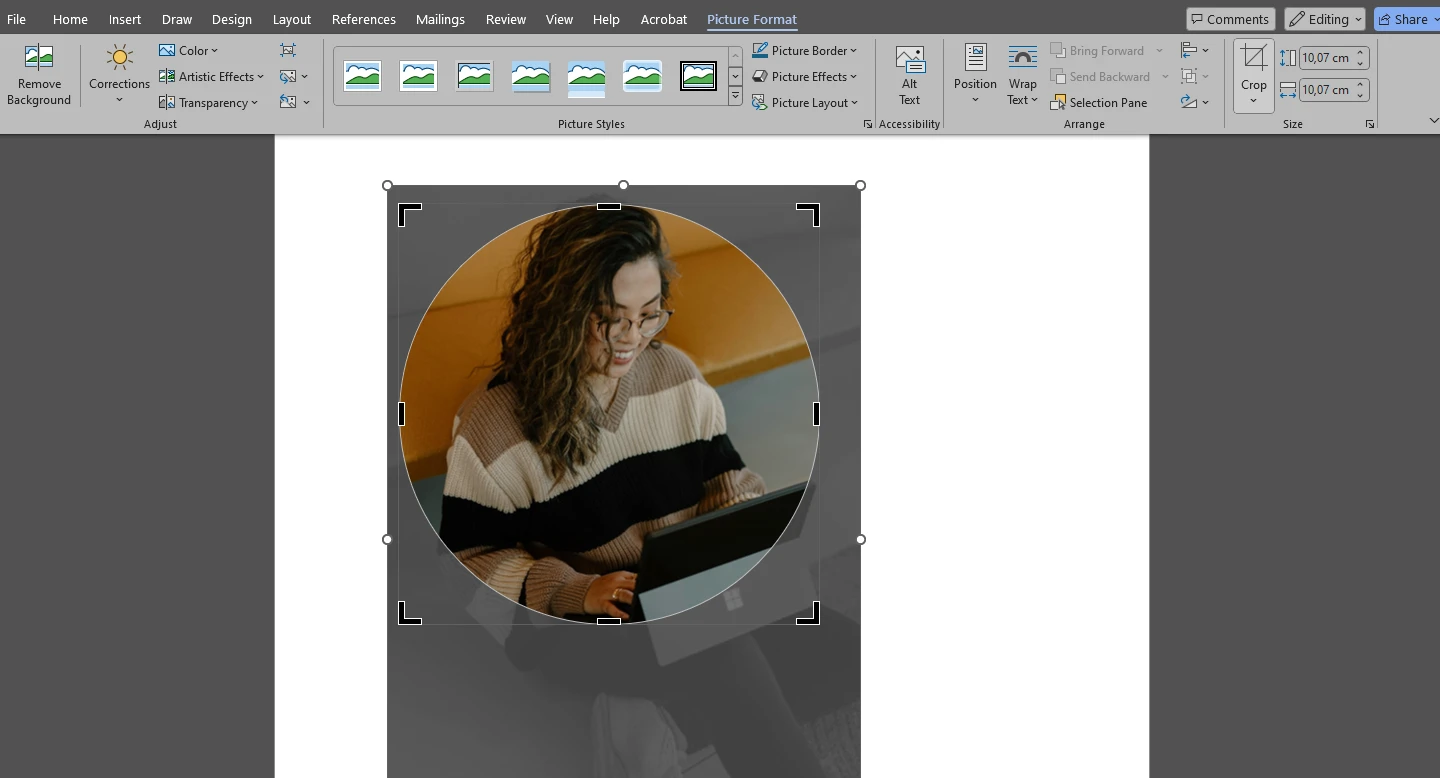
- When adjusting the size or placement of your cropping area in Word, hold the Shift key. Otherwise, you might accidentally turn your circle back into an oval.
- You can also experiment with the Fill and Fit options in the Crop menu.
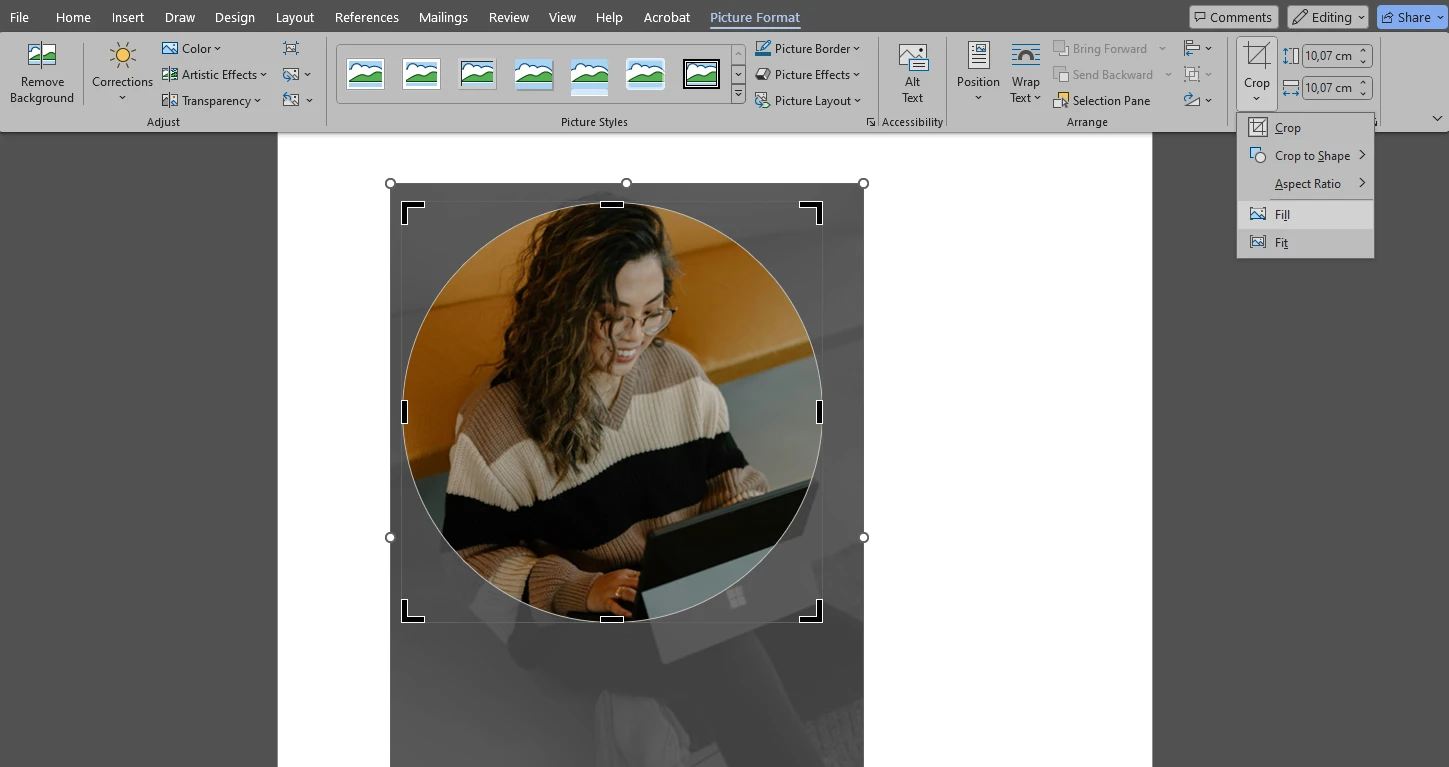 If you go for the Fill option, your image will basically fill the entire shape. Some parts of the image will be cropped out.
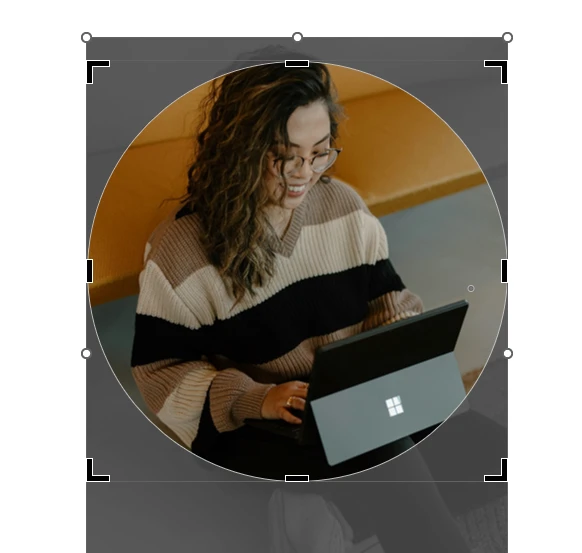
The Fit option will give you an entirely different result. If you go for it, your whole picture will be fit into the shape of your choice. But since only a part of your shape will be filled with an image, other parts of it will be empty, which might look a bit awkward.
- To apply the changes, press Enter.
- Let’s say that you want to slightly change the placement of your image after you applied the changes. If that’s the case, press the Undo button at the top or use the CTRL / CMD + Z shortcut. Unfortunately, this is the only way. For instance, in PowerPoint, you can double-click on the image to make some further adjustments. But in Word you can only undo the step of applying the changes. Remember to press Enter again when you’re done.
- Additionally, you can embellish your circle-shaped image if you want to. You can add a thin or thick border to it, then pick a color. You can add an effect – a shadow or a glow, for instance. There’s a nice selection of various effects and other editing options in the Picture Format tab.
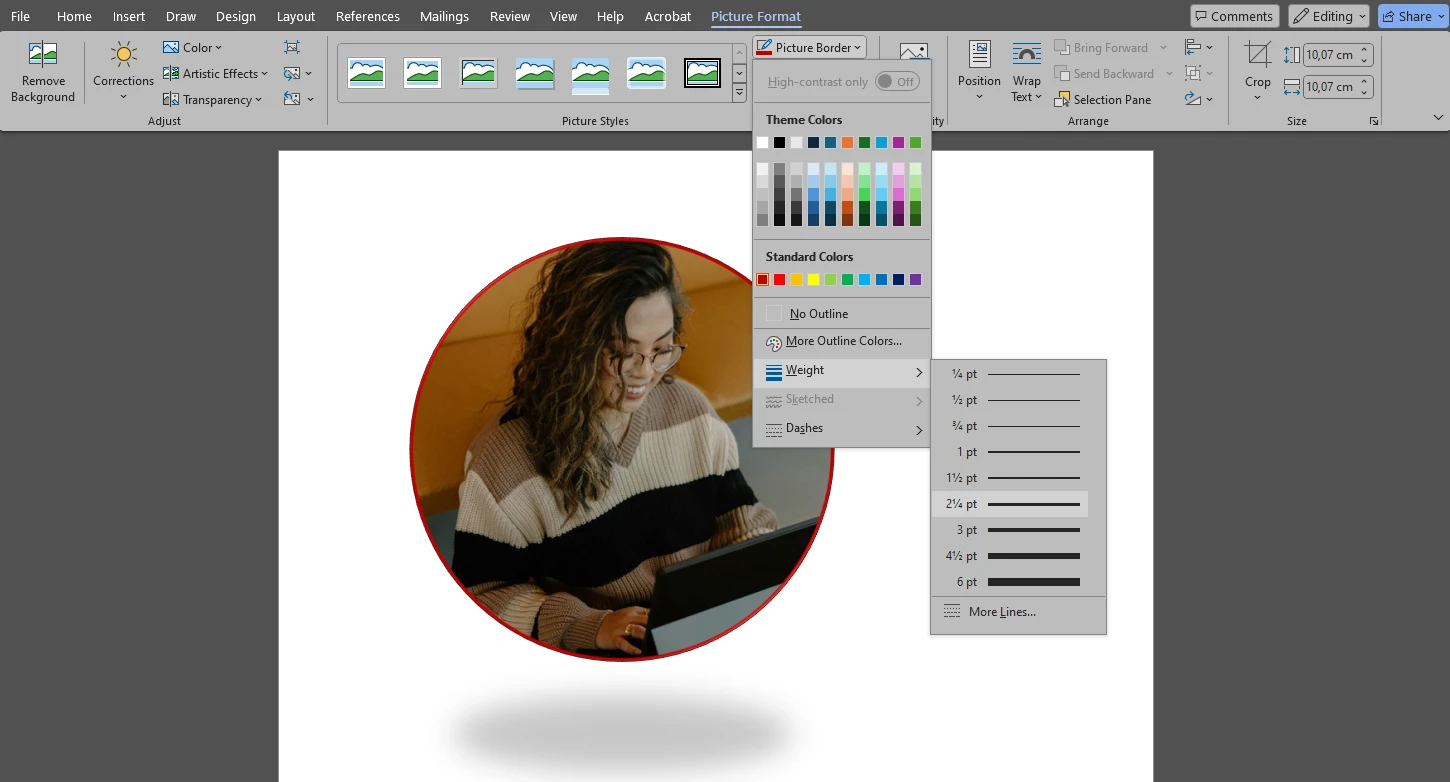
All done!
Cropping images into a circle is great for portraits, because this shape is similar to the shape of a human face, plus all the attention will be focused right on the main subject. In addition to this, cropping an image in Word into a non-standard shape tend to be surprising to people and therefore, attention-grabbing. So, it might be a good idea to experiment with different shapes.
How to Crop Multiple Images Quickly
It’s not particularly difficult to crop a picture in Word. This process is pretty similar to cropping in PowerPoint and definitely not as complicated as cropping in Adobe Photoshop. All you need to do is click a couple of buttons, make some adjustments and that’s it. Microsoft Word itself is a fairly easy to use software.
But what if you have dozens of images in a single Word document and you want to crop all of them?
Well, unfortunately, you can’t select multiple images and crop them in Word. The only way to do this is to crop pictures one by one, which can take quite a while.
Or you can make use of an alternative option!
You can use Watermarkly, which is a website that offers a selection of online apps for basic image editing, including a photo cropping app. It works right in a browser, which means that you won’t need to download or install it. Your images won’t be uploaded to any servers, either. Your files, data and devices will be perfectly safe and sound.
Since Watermarkly’s cropping tool was designed specifically for cropping, it has several advantages over Microsoft Word. The main one is that it supports batch-processing, so you can easily upload as many images as you need, then crop them in one go!
You only need a browser and an internet connection to use Watermarkly. Which means you can crop your images almost anywhere you want. MS Word does have a mobile version, which includes the Insert menu. So, you can use it to insert an image into a Word document on a smartphone. It’s also possible to crop an image before inserting it, but in this mobile app you can’t crop a picture to a specific aspect ratio or crop it to a shape. Only freeform cropping is available.
Fortunately, you can crop your images using Watermarkly, then insert them into your Word document – right on the go! It will undeniably be less tedious and time-consuming than cropping each image in Word separately.
Alright, let’s take a look at how you can crop multiple images in Watermarkly:
- Open Watermarkly’s website and pick the Crop Photos tool in the Tools menu.
- Import your images into the app. You can upload them from your device, one of the supported cloud storages or by providing a link to it.

- Go to the “No constraints” menu.
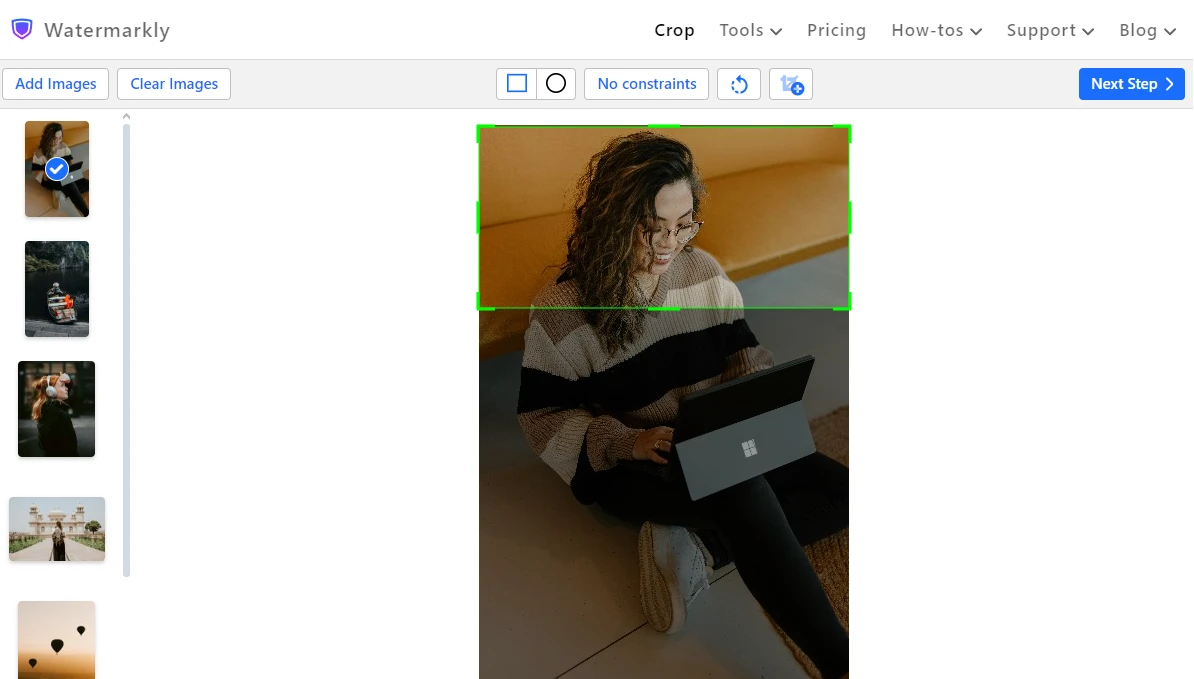 Here, you can enter specific pixel dimensions or aspect ratio. There’s also a selection of cropping presets – presets with commonly used aspect ratios as well as presets for social media. If you select any of the presets, the aspect ratio will be locked and maintained no matter what; no need to hold the Shift key. If you keep the No constraints option, you will be able to do freeform cropping.

- Watermarkly also saves your cropping settings, so you will be able to reuse them. You will find your previously used crop settings in the No constraints menu the next time you use the app.
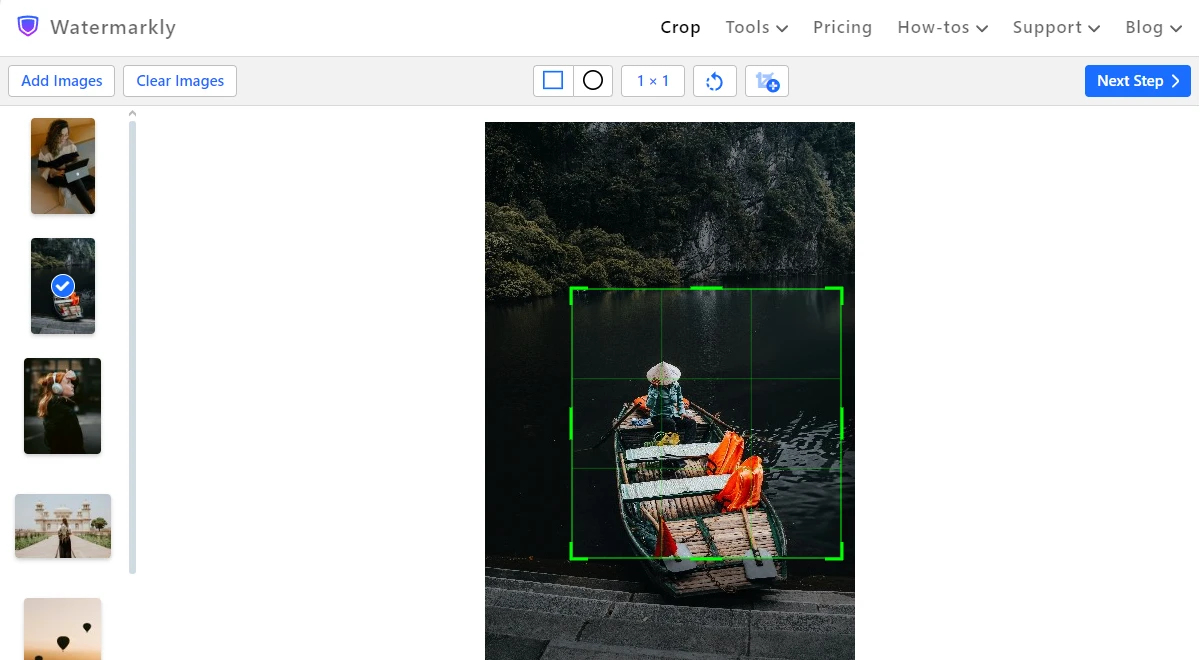
- Use the cursor to adjust the size and position of your cropping area. Here you need to reposition and resize the cropping area itself, not your image. Watermarkly also has the Rule of Thirds gridlines which are extremely helpful for improving composition.
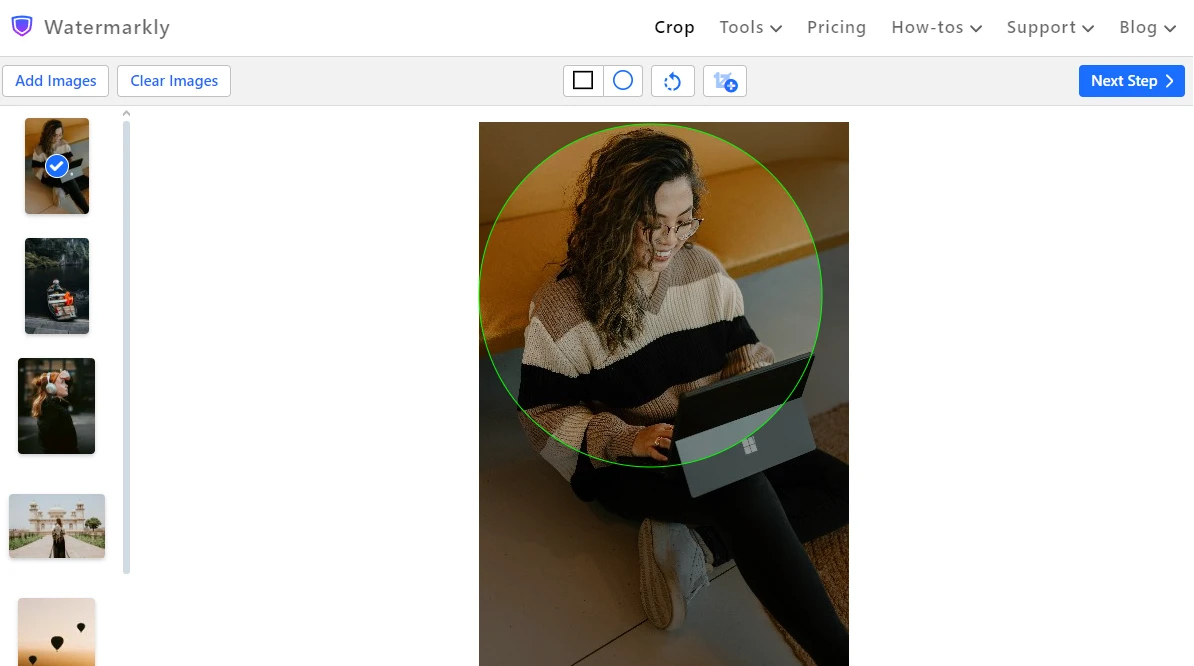
- It is possible to crop an image into a circle. Just click on the circle at the top and the shape of the cropping area will change. Please note that you can crop an image only into a rectangle, square or circle in Watermarkly. You won’t be able to use an oval shape or a star shape. On the bright side, you can crop an image into a perfect circle in Watermarkly much quicker – no need to change the aspect ratio to 1:1.
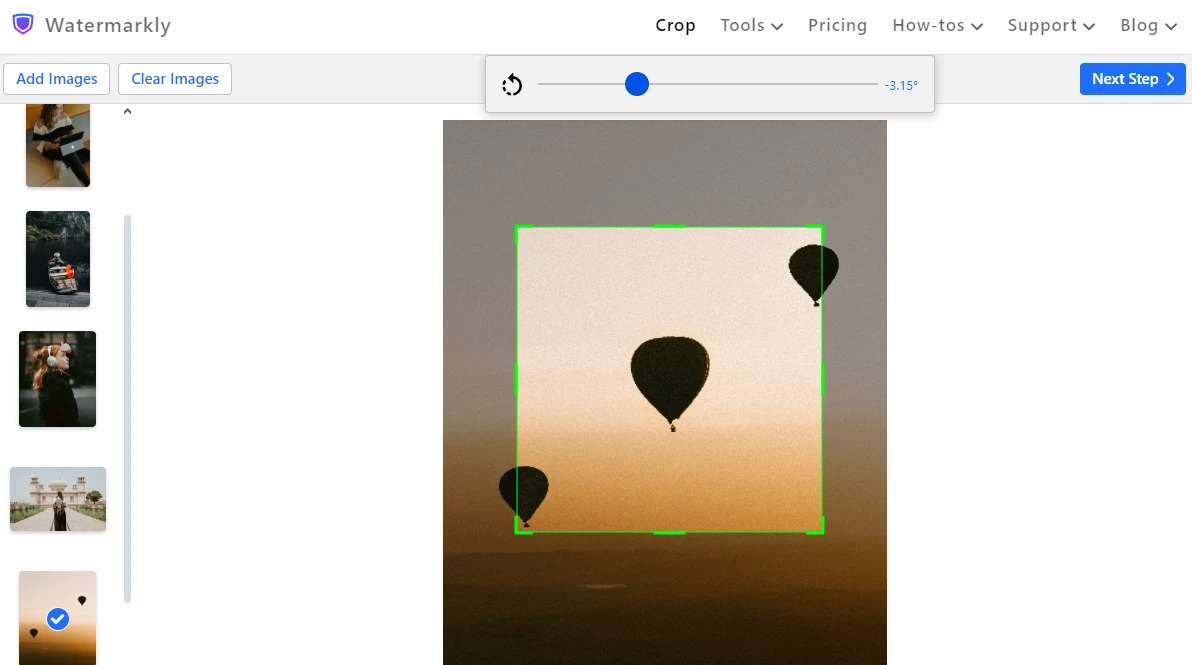
- Use the slider to tilt your image. It can help you with straightening the horizon. This slider works much smoother and more precise than Word’s rotation handle. And you can tilt your image at any point of the editing process!
- You can click on the Add Crop button to create a copy of an image. You can adjust the cropping area on the duplicated image in a different way or even pick a different shape for it.
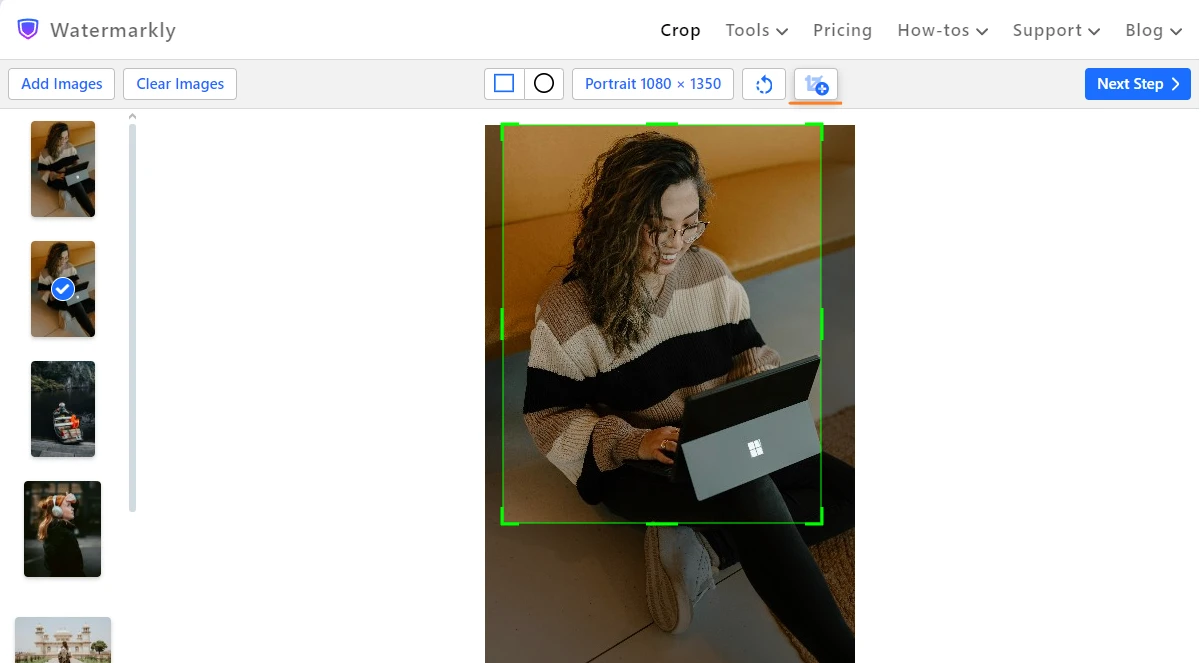
- Each image in the batch can be cropped differently or you can crop all the images to one and the same aspect ratio.
- In the export settings you can click the Preview button to open the Preview section.
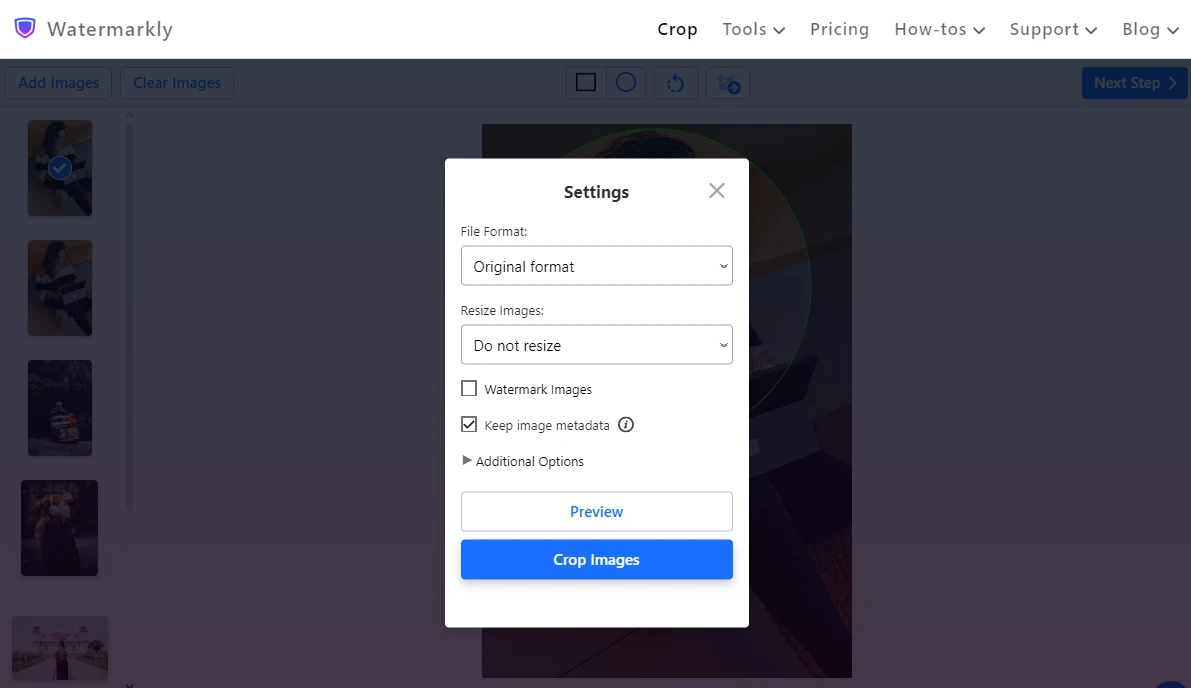
- In the Preview section you can see what your images will look like after cropping. If something needs to be changed, go back to the editing stage.

- Finally, click on the Crop Photos button in the export menu, wait until the app is finished, then download your cropped copies. That’s right, Watermarkly never changes original images – it applies all the changes to the automatically created copies.
Even though you need to adjust the cropping area on each image in a batch separately, the whole process will still be much quicker than cropping one image after another in Word. What’s more, Watermarkly offers you much more flexibility and precision.
There’s a bit of drawback. There are no effects and other embellishments that you can add to your cropped images. You won’t be able to add a border to your images or a reflection effect. At the same time, with Watermarkly, your images will definitely look more professional.
Final Thoughts
If you want to create visually appealing documents that look neat and refined, cropping images is definitely a vital skill that you will need to learn. Fortunately, now you know that cropping an image in Word is not only possible but it’s also pretty easy and quick to do. You can do some basic freeform cropping as well as crop to an aspect ratio, crop to a circle or any other shape.
MS Word is more than enough to crop a small handful of images. But using it to crop dozens of images might not be the best idea. It will be too tedious, inefficient and time-consuming. Watermarkly’s online batch-cropping app will be more suitable for this task – with it, you will be able to crop multiple images in matter of minutes!