
How to Create a Fillable PDF
by ![]() Lina Thorne • Updated · Posted in PDF Editing
Lina Thorne • Updated · Posted in PDF Editing
In our increasingly digitized world, paperwork doesn’t have to involve paper at all, and knowing how to create a fillable PDF can really come in handy. With it, you’ll be able to design interactive worksheets for your kids, make customer surveys as well as collect information through applications or even send out contracts.
In case you’ve never heard of a fillable PDF before – which is highly unlikely since pretty much everyone has come across it at least once in their lives – it’s a PDF document that contains interactive fields which can be completed on a computer, laptop or a mobile device without any special software. Interactive fields can include text boxes, drop-down menus, checkboxes, radio buttons and even areas for a digital signature.
As you may know, editing the already existing content of a PDF is tricky and requires some advanced software. Writing on a PDF – adding some new text elements – is easier, but still involves using some special apps. The beauty of a fillable PDF is that the recipient can simply open your PDF document and enter their information into the interactive fields. Meanwhile, they will be unable to make any changes to the non-interactive parts of the PDF.
Using fillable PDFs can be incredibly beneficial and convenient. And here’s the best part – it’s doesn’t take much time or effort to make them. You don’t even need any expensive software!
In this comprehensive guide, you’ll learn how to create a fillable PDF in three different ways using:
- Adobe Acrobat – an incredibly popular and convenient app for working with PDFs;
- Canva + Sejda – a beginner-friendly combination that can be used for free. Design in Canva, then add interactive fields in Sedja;
- Microsoft Word + PDFgear – this combo is similar to the previous one, but involves using software that you probably already have.
Whether you need to design a form, survey, worksheet, or contract, then make it fillable, keep reading!
Reasons to Create a Fillable PDF
Fillable PDFs can make your workflow much more efficient. They are very beneficial for both personal and professional use.
Here are some key reasons why you might want to create one:
- Ease of Use. Fillable PDFs can be completed directly on users’ computers or mobile devices; even if they are on the go. There’s no need to print or scan them. No need to install any special software. So, you can easily use interactive PDFs for employee onboarding, client feedback, tax documents, etc.
- Professional Look. The PDF format is notable for maintaining a consistent layout across devices. So, your forms will look polished and well-organized no matter who you send them to.
- Error Reduction. Predefined fields (text, checkboxes, dropdowns) will be like guidelines for a person filling out your form. Thus, the risk of them forgetting or missing something will be much lower.
- Time-Saving. Fillable PDFs are faster to complete and easier to distribute. Thus, they streamline data collection for things like surveys, contracts, registrations, etc.
- Environmentally Friendly. If you are looking for a way to cut down on paper usage, you should go digital. Fillable PDFs are definitely a more sustainable choice.
- Information Protection. You can actually add different layers of protection to your fillable PDF. For instance, you can protect it with a password. Therefore, paper documents are not as safe and secure as fillable PDFs.
How to Create a Fillable PDF in Adobe Acrobat
The easiest and quickest way to insert fillable fields into your PDF is to use Adobe Acrobat. Since it’s one of the most wide-spread apps for viewing and working with PDFs, you might already have it on your device. Also, Adobe Acrobat is super easy to use. So, you’ll be able to achieve the necessary results even if you have no prior experience.
Why is it great for creating fillable PDFs? It recognizes form fields automatically, then converts them to fillable ones. This can save you quite a lot of time and effort. And, of course, if you need to insert some fillable fields manually, you can.
Here’s a quick tip. It might be a good idea to create a copy of the original file first, then open it in Adobe Acrobat. This way, you will make all the changes to the copy, while the original file will remain unchanged.
Now, let’s see how you can create a fillable PDF in Adobe Acrobat:
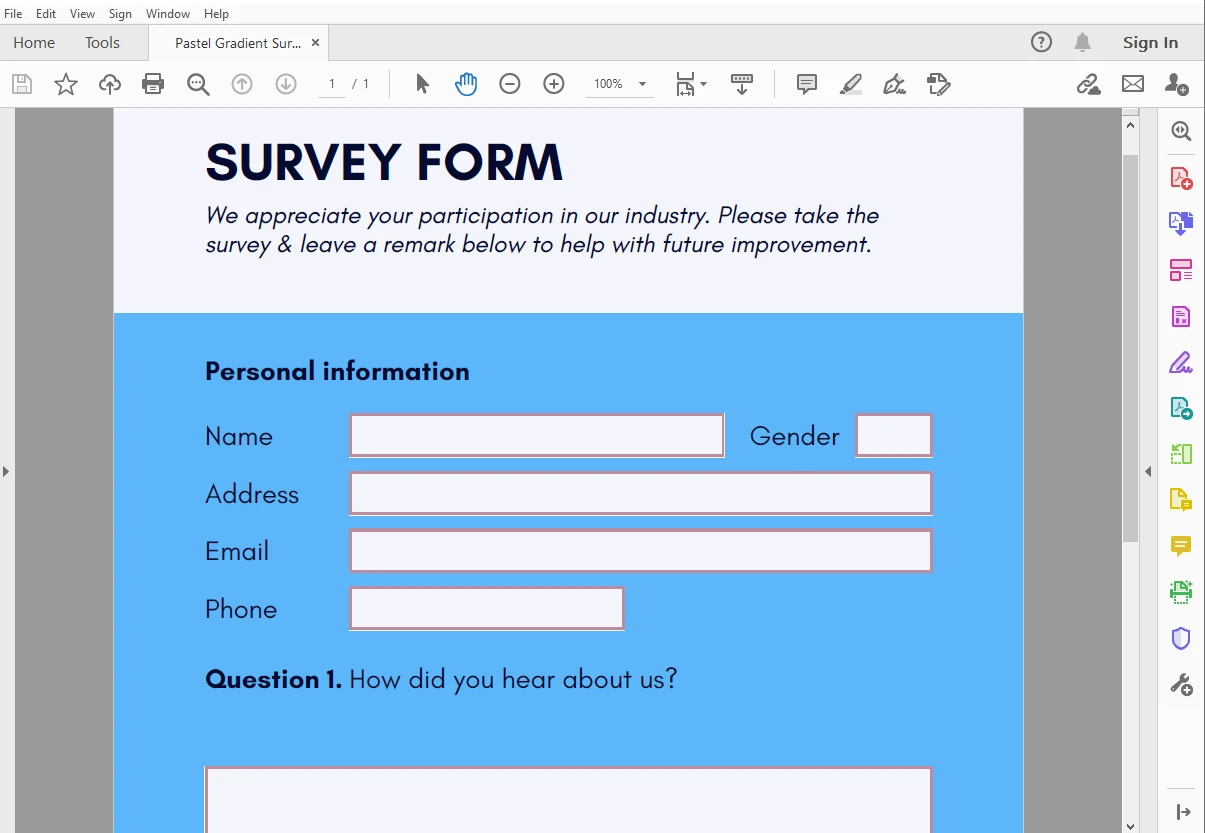
- Open the necessary PDF in Adobe Acrobat. To create a PDF document, you can use MS Word, Canva or some other design tool.
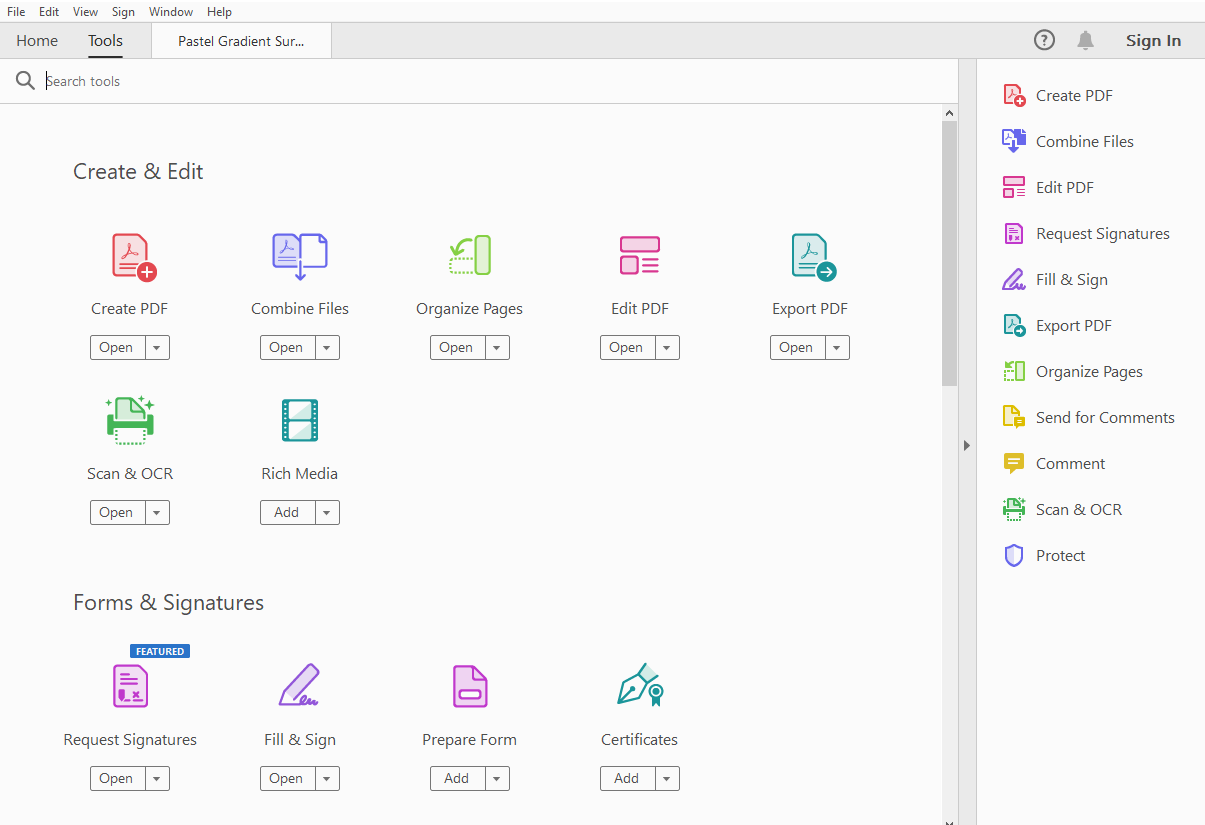
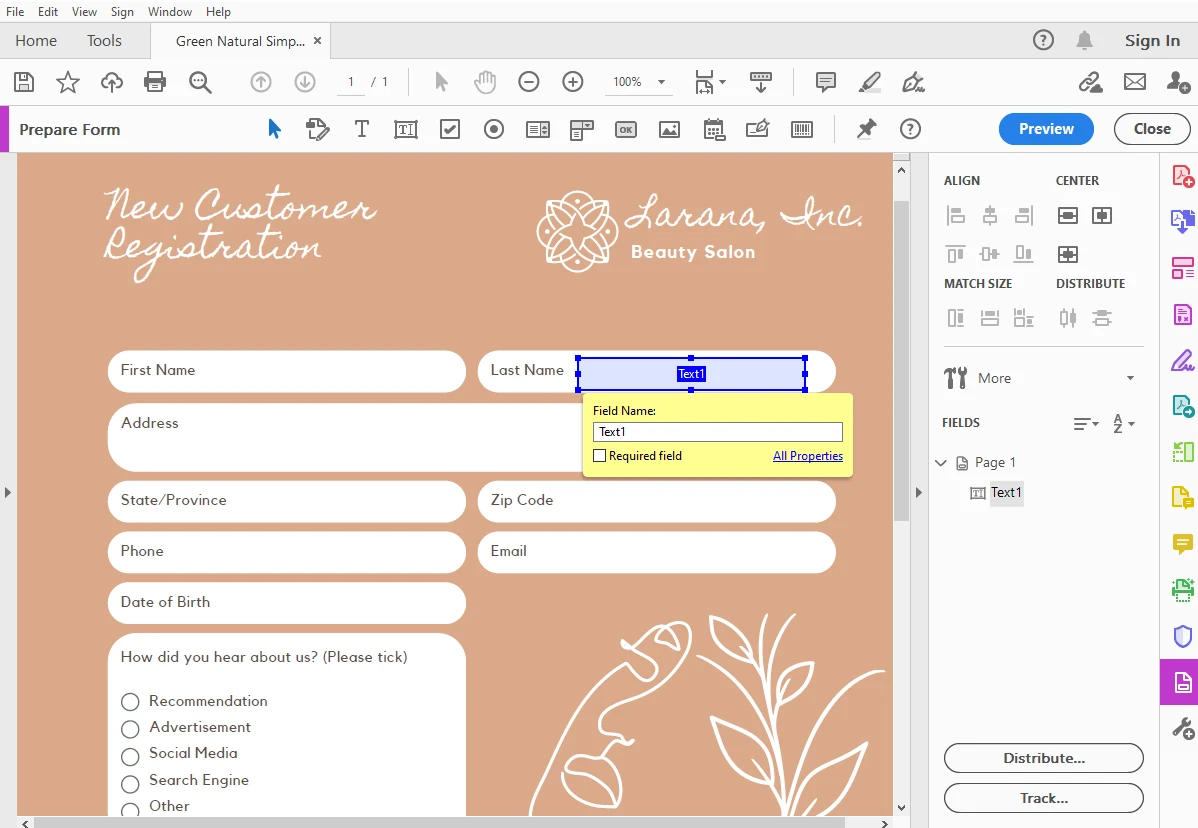
- Go to Tools > Prepare Form.
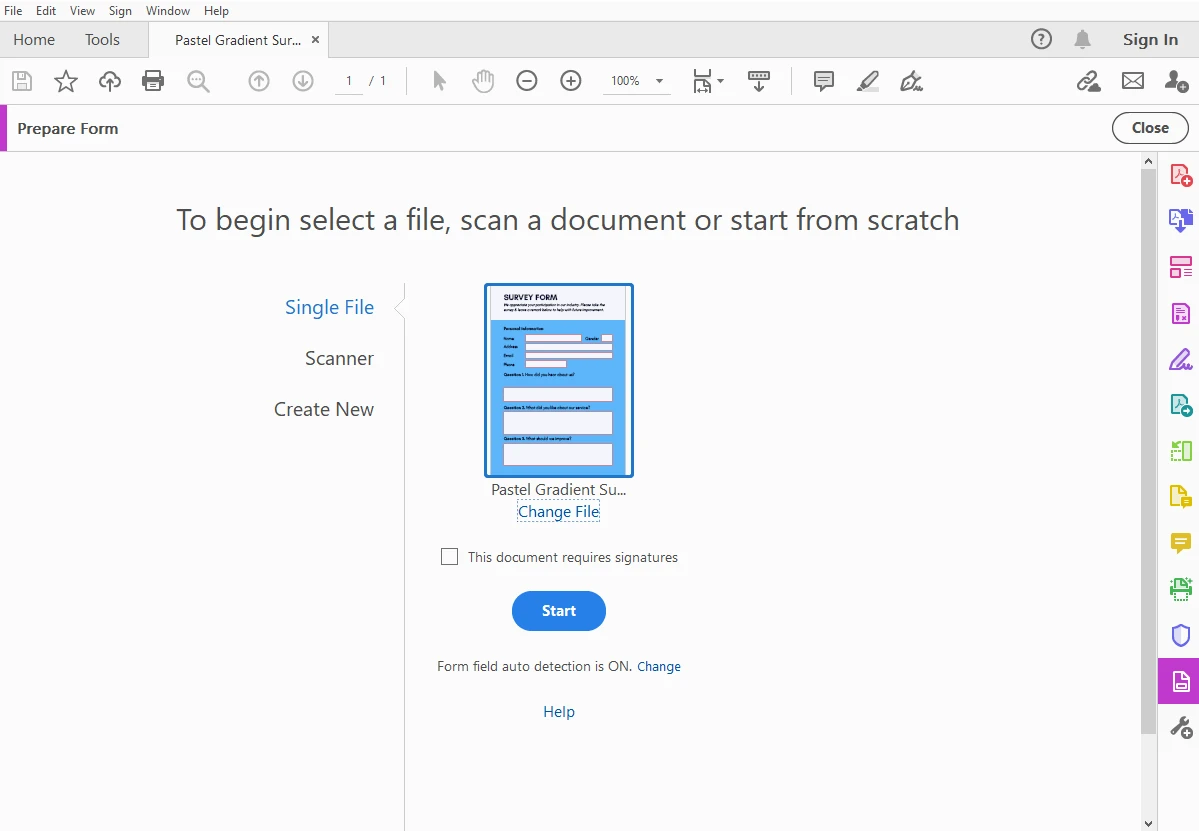
- Select the necessary options and click on Start.
- Adobe Acrobat will detect the form fields automatically and turn them into fillable ones.
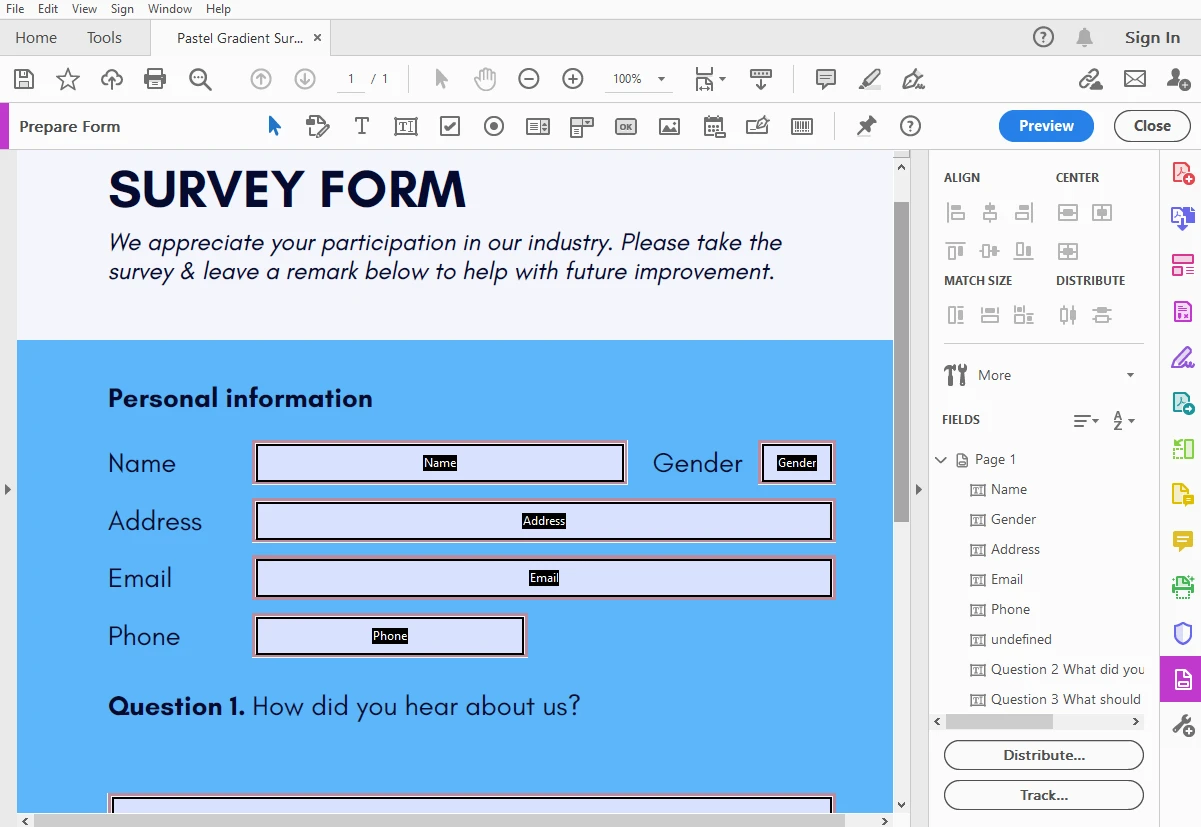
- You can also use the toolbar at the top to insert text fields, checkboxes, radio buttons, or signature lines manually.
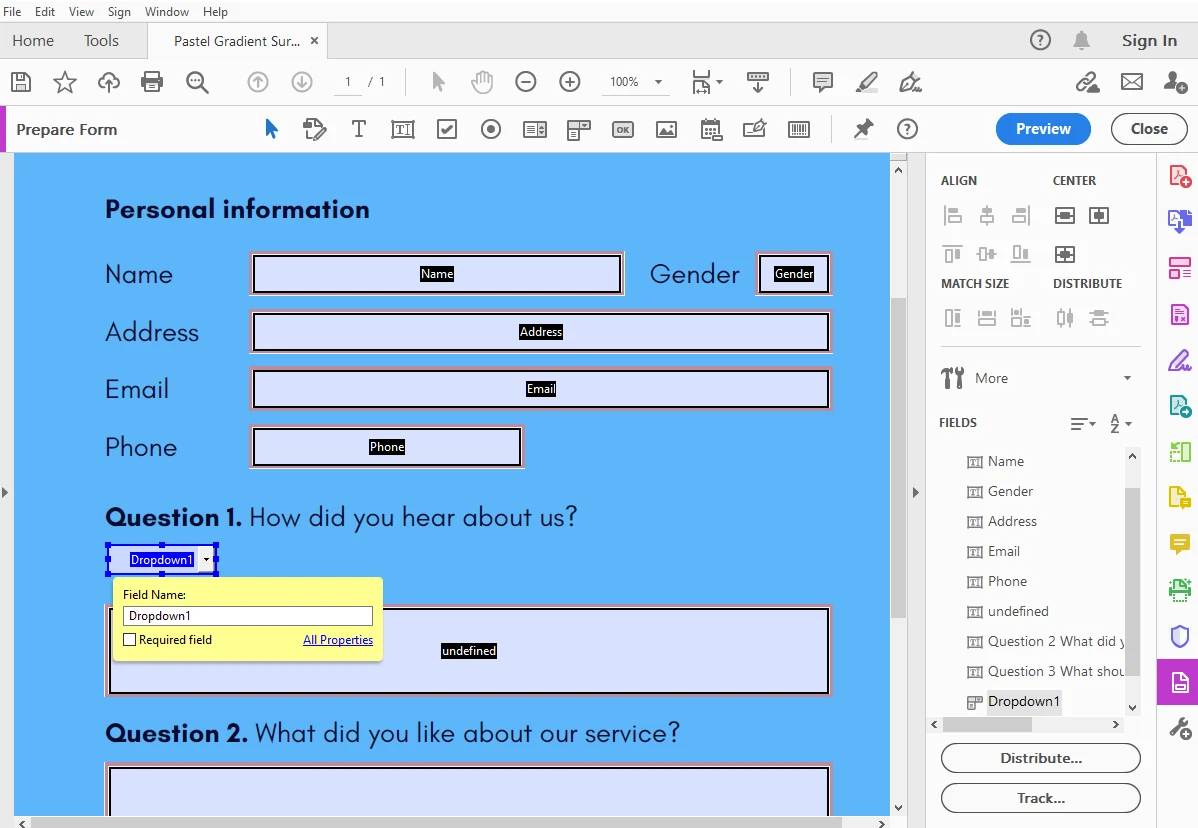
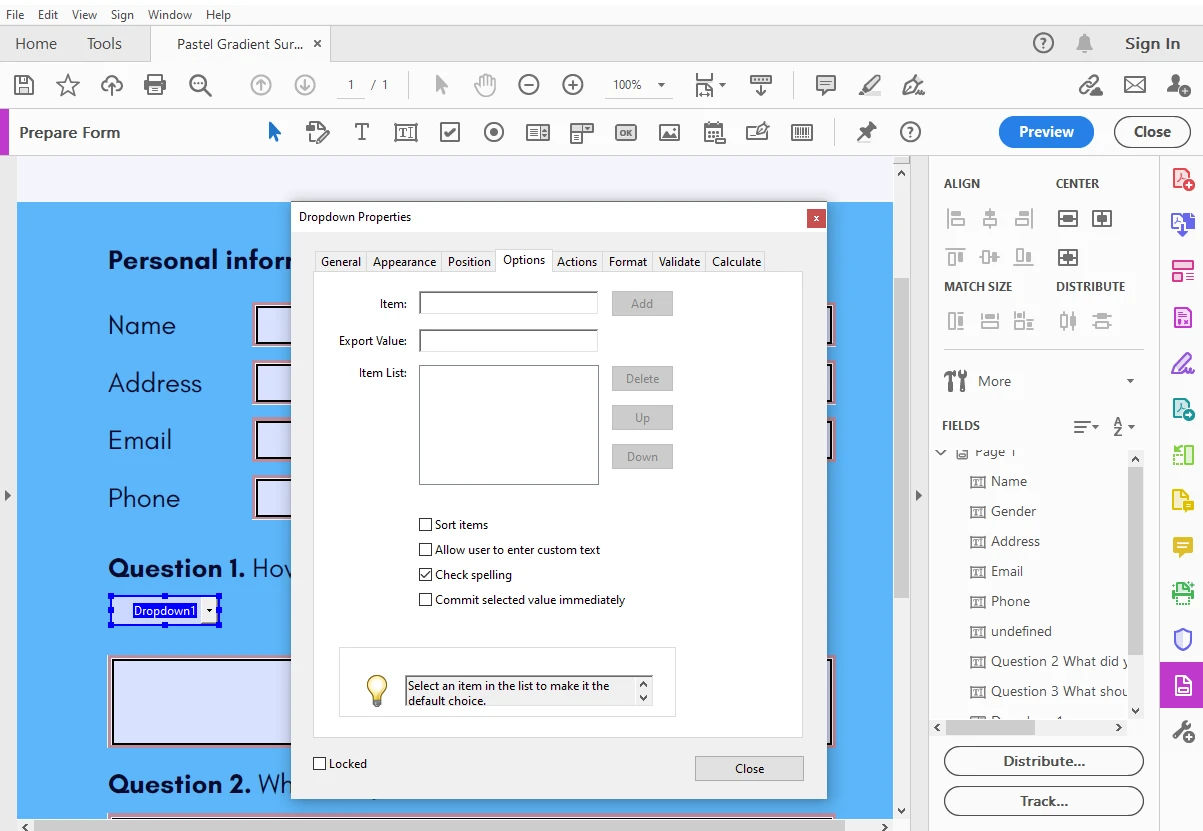
- Do you need to customize a field? Double-click on it to open the Properties window, then make the necessary adjustments.
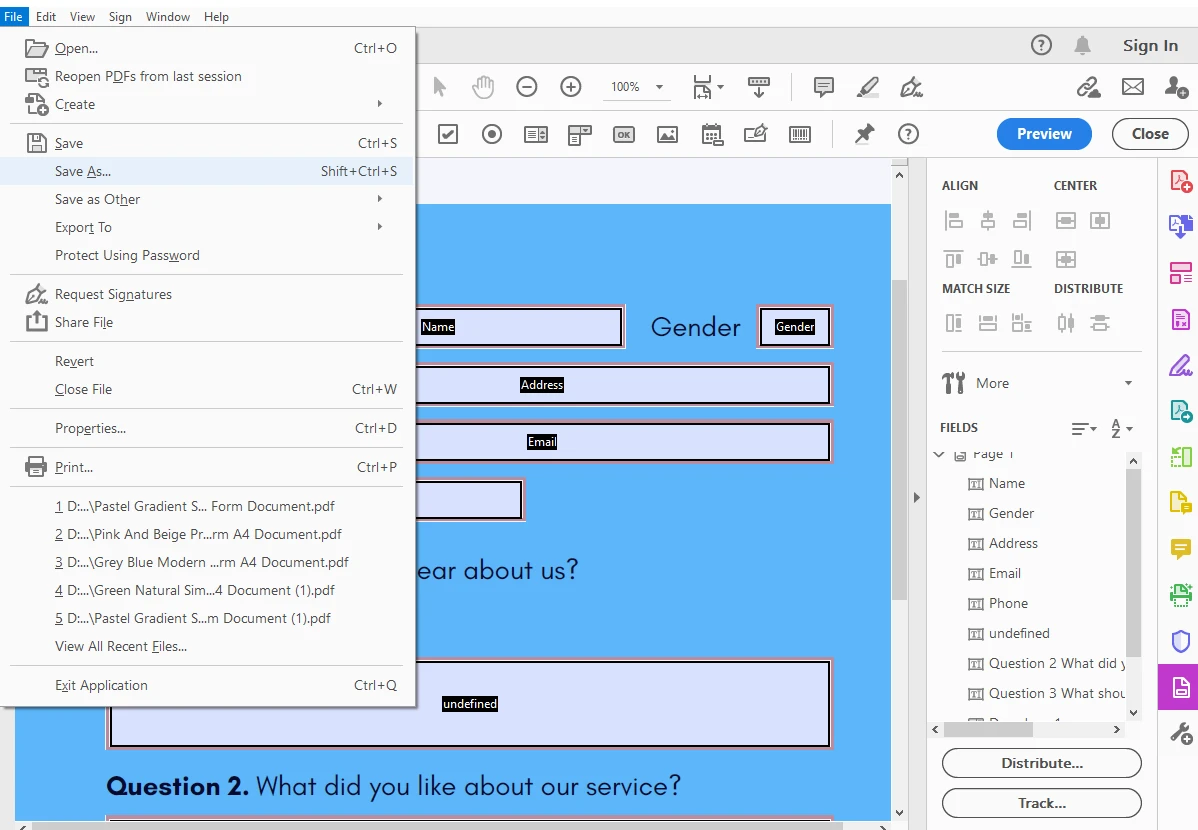
- When you’re ready for exporting, go to File > Save or Save As. You should choose the Save option only when you’re working with a copy of the original document. Because the Save option will apply the changes directly to the document. The Save As option allows you to save the modified document as a new file; just make sure to re-name it.
And you’re good to go!
Please note that, depending on your PDF, Adobe Acrobat might fail to detect forms and convert them to fillable ones automatically. Instead, you will get this error message:
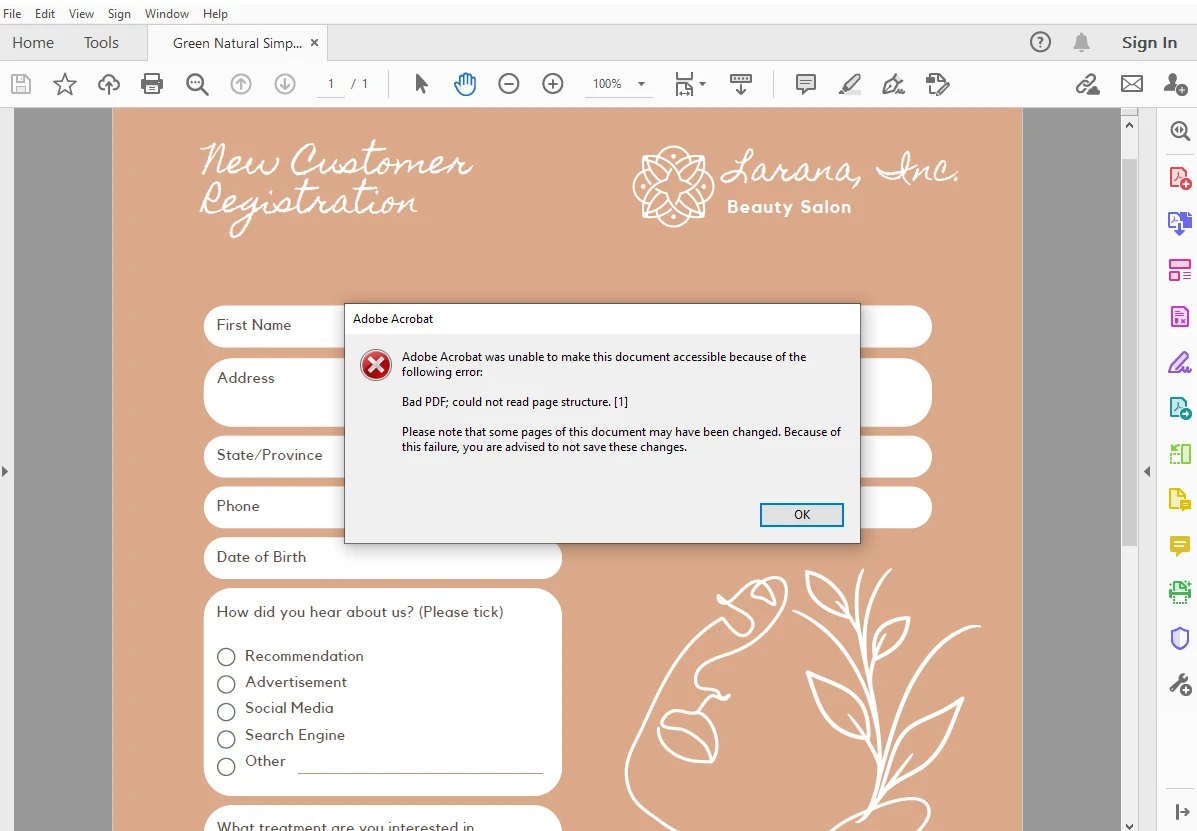
If that’s the case, then you will need to add interactive fields manually.
The main benefit of Adobe Acrobat is that you can use it for a variety of things:
- Optimizing the file size of your PDF
- Resizing the pages of your PDF
- Securing your PDF with a signature
- Adding a watermark to your PDF and many more.
How to Create a Fillable PDF Using Canva and Sejda
What if you don’t want to use Adobe Acrobat? You don’t have it and don’t want to install it on your device? On top of that, you don’t have a prepared document yet. Well, then, the next two methods are for you. Please note that they involve switching between two apps.
This method involves using Canva PDF editor and Sejda, both of which work online, so you will only need a browser. The whole process will require only a few minutes of your time.
First, you’ll need to design your PDF in Canva:
- Go to Canva and log in or create an account.
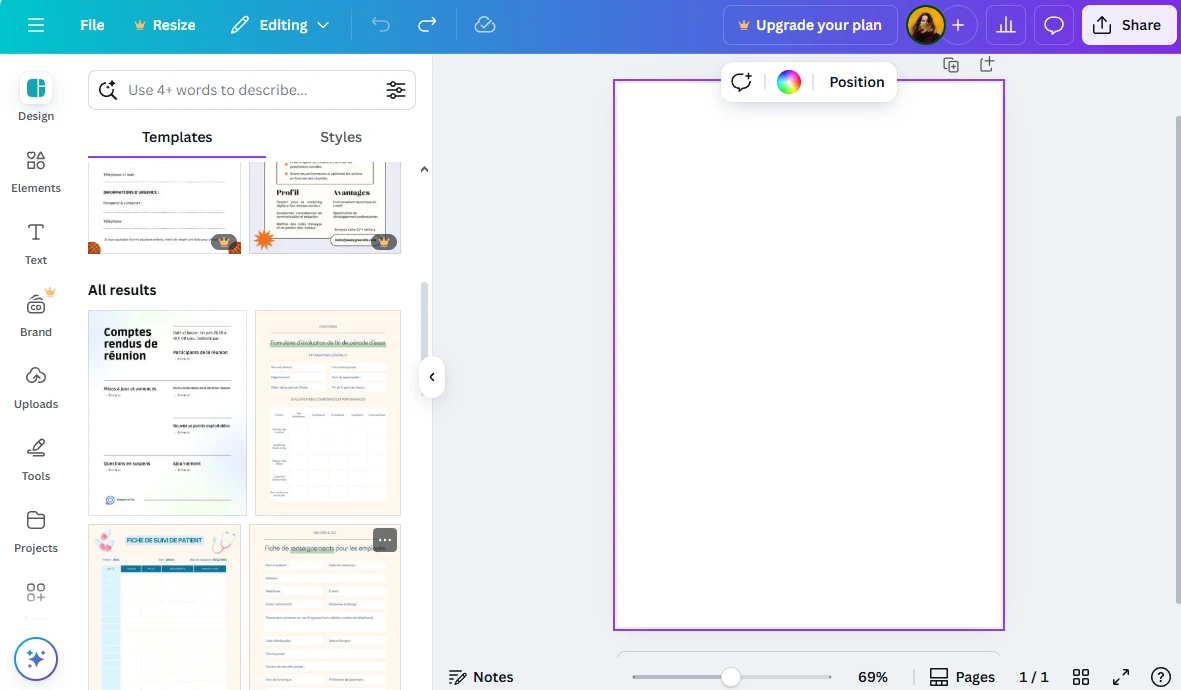
- Click on Create a design. Then you can search for A4 document or US letter or whatever else size you need. In this case, you will have a blank canvas of the necessary size. Alternatively, you can search for a template. For instance, you can look for a survey form. Once you found the necessary template, click on it, then click on Customize this template.
 Please note that templates or other elements with a crown budge are available only in Canva Pro.
 - If you have a blank canvass, design your form from scratch. Type in your text, insert text boxes, add lines or rectangles where users will enter their information. If you want to use a template to save some time, don’t go back to the dashboard. Instead, go to the Design section in the panel on the left, then search for the necessary template.
- If you already chose a template and opened it in Canva’s editor, then simply make the necessary changes to it – pick a different color scheme, enter your text, etc.
 Please note that if you want to add a drop-down list or radio buttons, make some space for them.
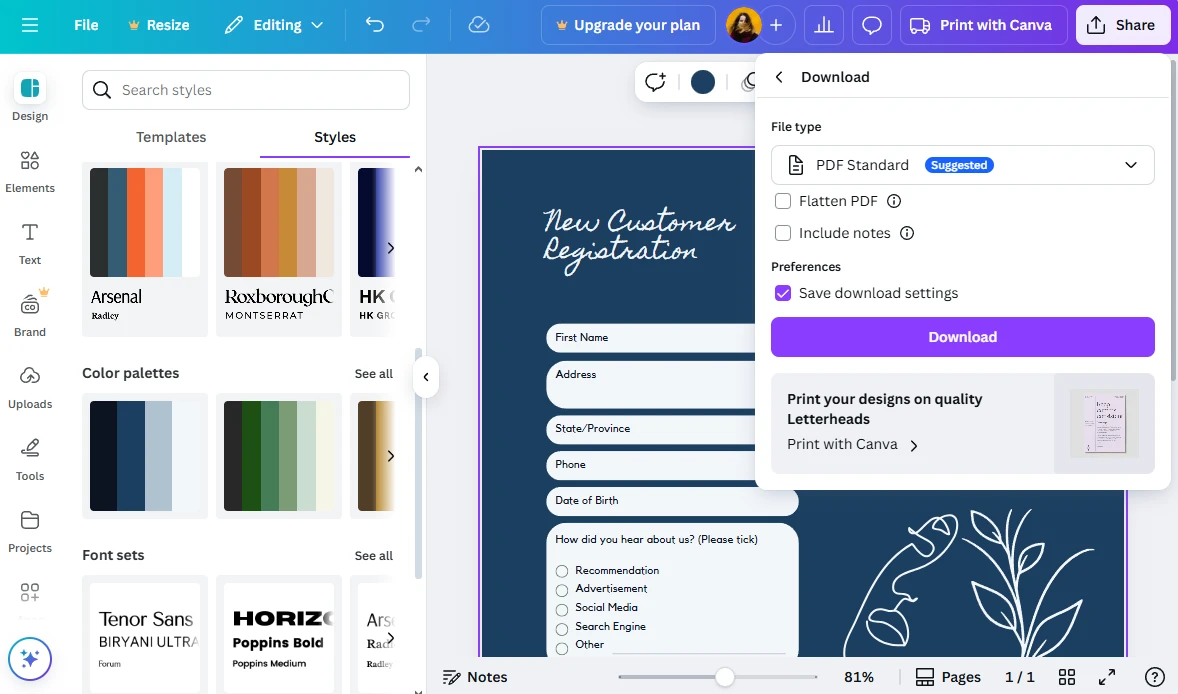
 - Have you designed your document? Go to Share > Download, then select PDF Standard and download your document onto your device.
Let’s move on to the second stage. You need to make your PDF fillable using Sejda.
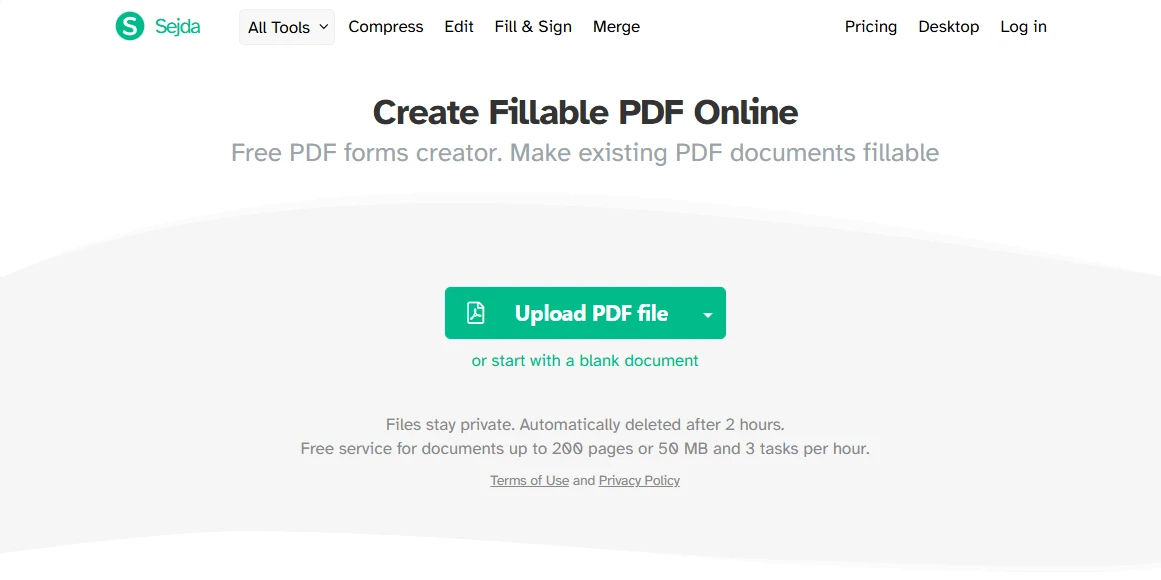
Sejda is a browser-based app which is completely safe. Any files that you process using their website will be deleted automatically within 2 hours. Moreover, their website offers lots of different tools for editing PDFs. This app can be used for free, but there are some limitations: your documents should be up to 200 pages or 50 MBs. Also, you will be able to process only 3 files per hour.
Here’s what you should do:
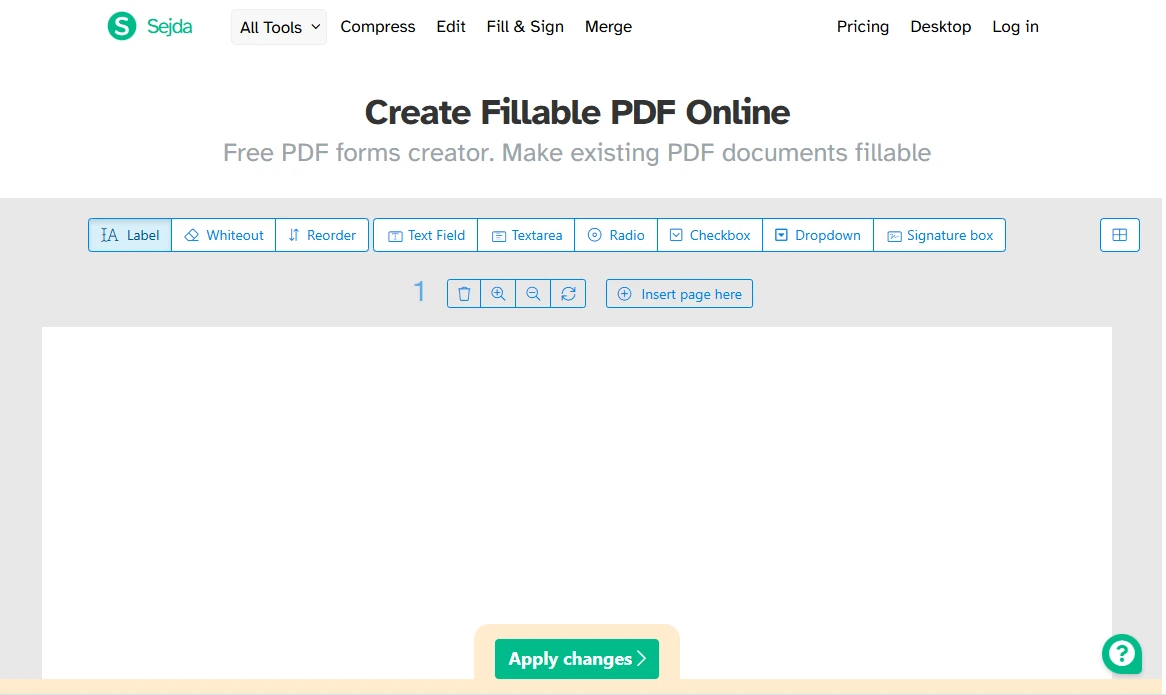
- Open Sejda’s Fillable PDF Form Creator and upload your PDF document that you’ve just created and downloaded from Canva.
- Unlike Adobe Acrobat, Sedja can’t automatically detect fields. So, you will need to add fillable form fields manually.
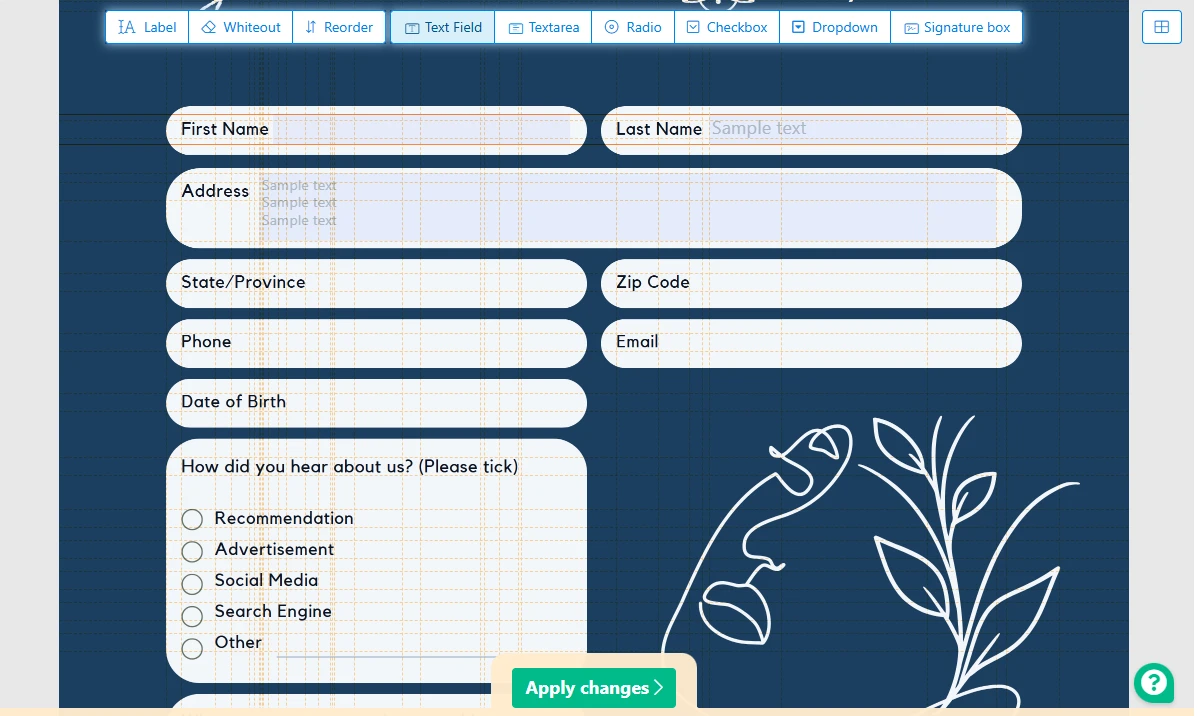 To add a field, click on the necessary option in the toolbox, then click on the page where the field should be inserted.
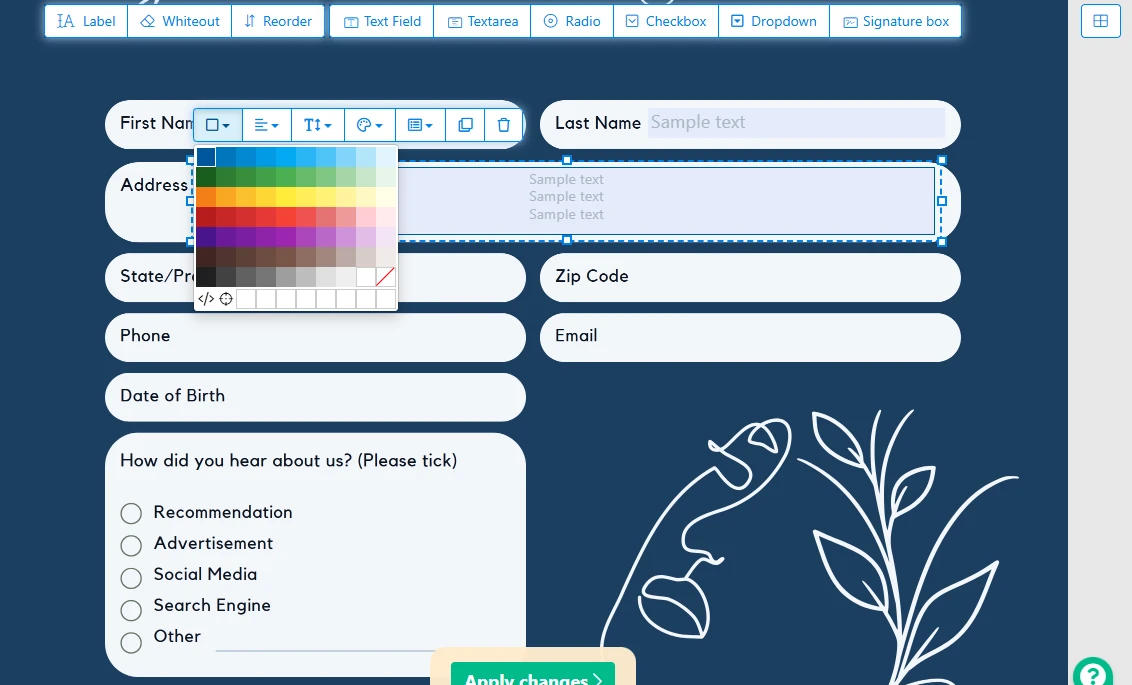
 - Use the cursor to reposition and resize your field.
- Click on the necessary field, then use the editing options to make changes to it. For instance, you can change the border color.
- If you want to duplicate a field, click on it, then select the Duplicate option.
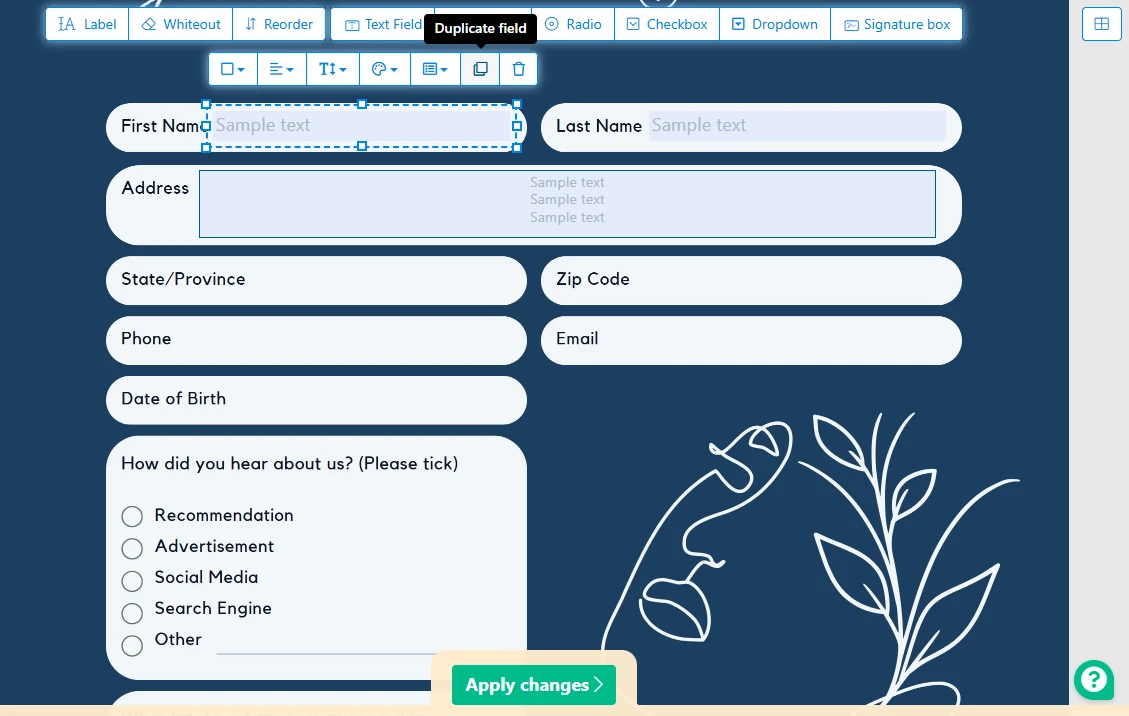
- Once you’re done, click on Apply changes, then download your fillable PDF to your device.
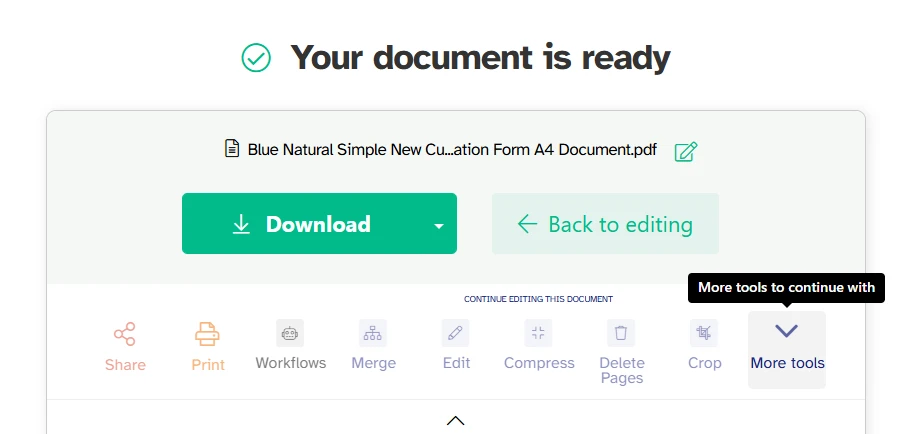
And now, your PDF has fillable fields!
Please note that Sejda actually offers a form creator, so if you don’t want to use Canva, you can create your document from scratch there. But you will need some basic designing skills for this. To access it, click on the Start with a blank document after you open the app.
This method is quite simple, but it does require some time, especially if you’re not particularly familiar with this type of PDF editing. Adding all the text fields and other elements manually can also be quite tedious for some users.
How to Create a Fillable PDF Using Microsoft Word and PDFgear
It is possible to create a document with fillable fields in Microsoft Word. But your will need to keep this document in the Word format. Because if you export it as a PDF, all the fields will no longer be interactive.
But you can switch between two apps just like in the previous method. In other words, you can use Microsoft Word to design your document and export it as a PDF, then use PDFgear or any other similar app to make the fields fillable.
First, let’s take a look at how you can create a document in MS Word:
- Open Microsoft Word. You might be surprised, but it actually offers some document templates. If you want to use a template, go to File > New, then search for the necessary template. Please note, though, that the template selection here is not as broad as in Canva.
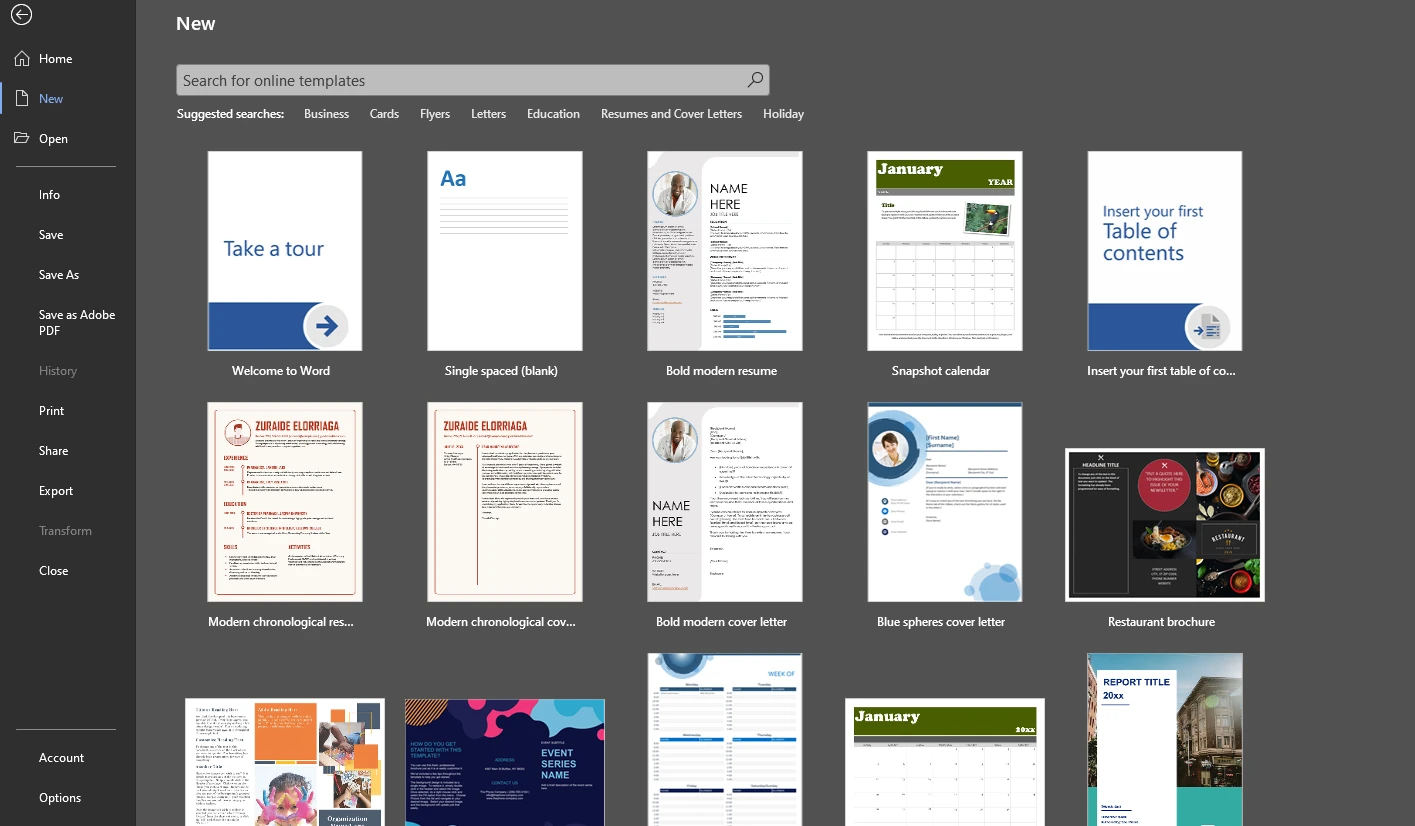
- Click on the desired template and it will be opened in a new window.
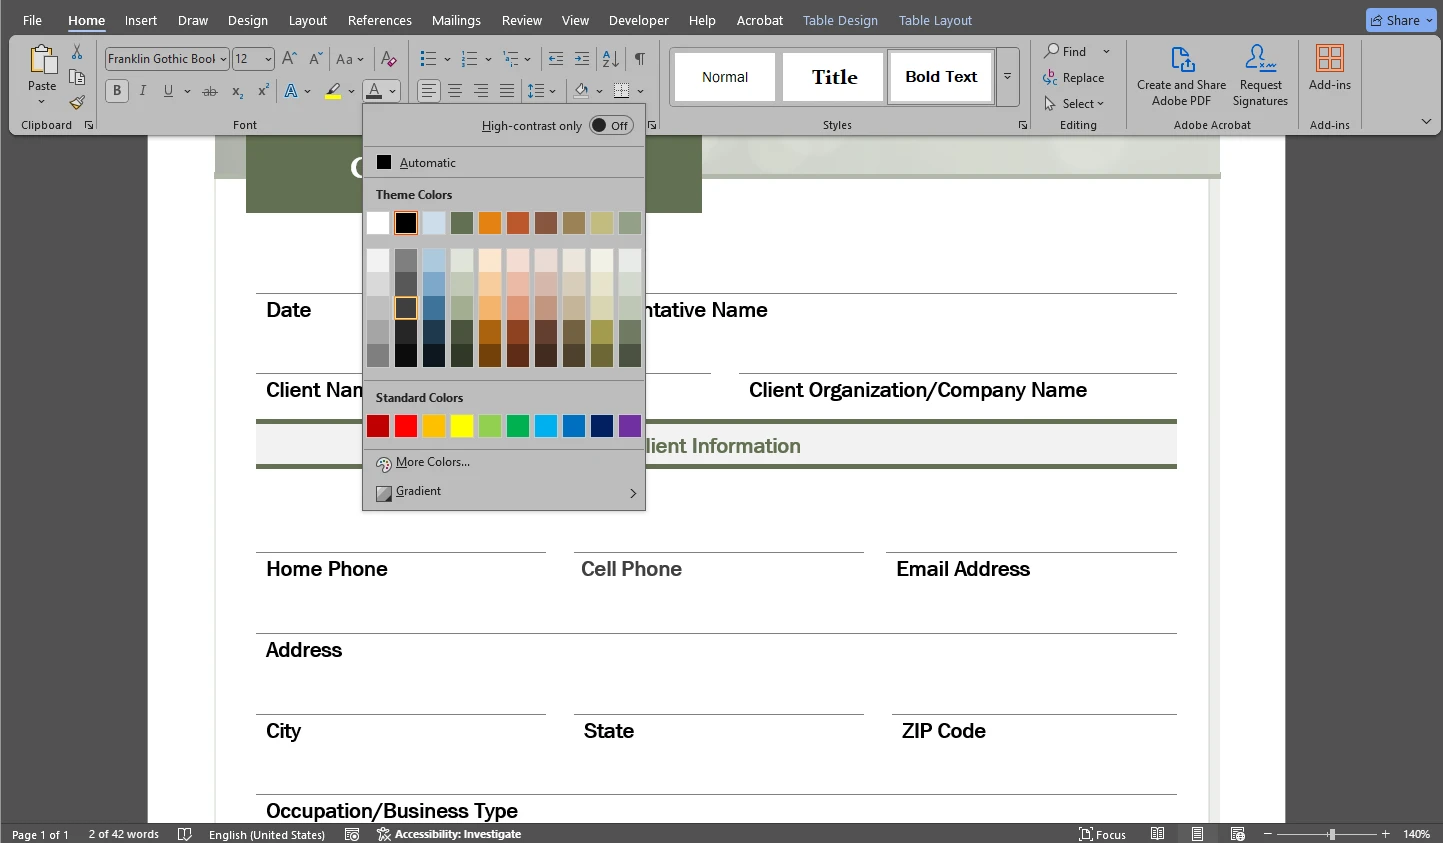
- Make the necessary adjustments using the editing tools in the ribbon – change the text, add new lines and tables, etc.
- What if you don’t want to use a template? Then you can create your document from scratch. To get more professional-looking results, you might need some tools from the Developer tab. Let’s enable it.
- Go to File > Options.
- Go to the Customize Ribbon section. In the right panel check the Developer option, then click OK.
 Please note that you might need to re-start MS Word to apply the changes.
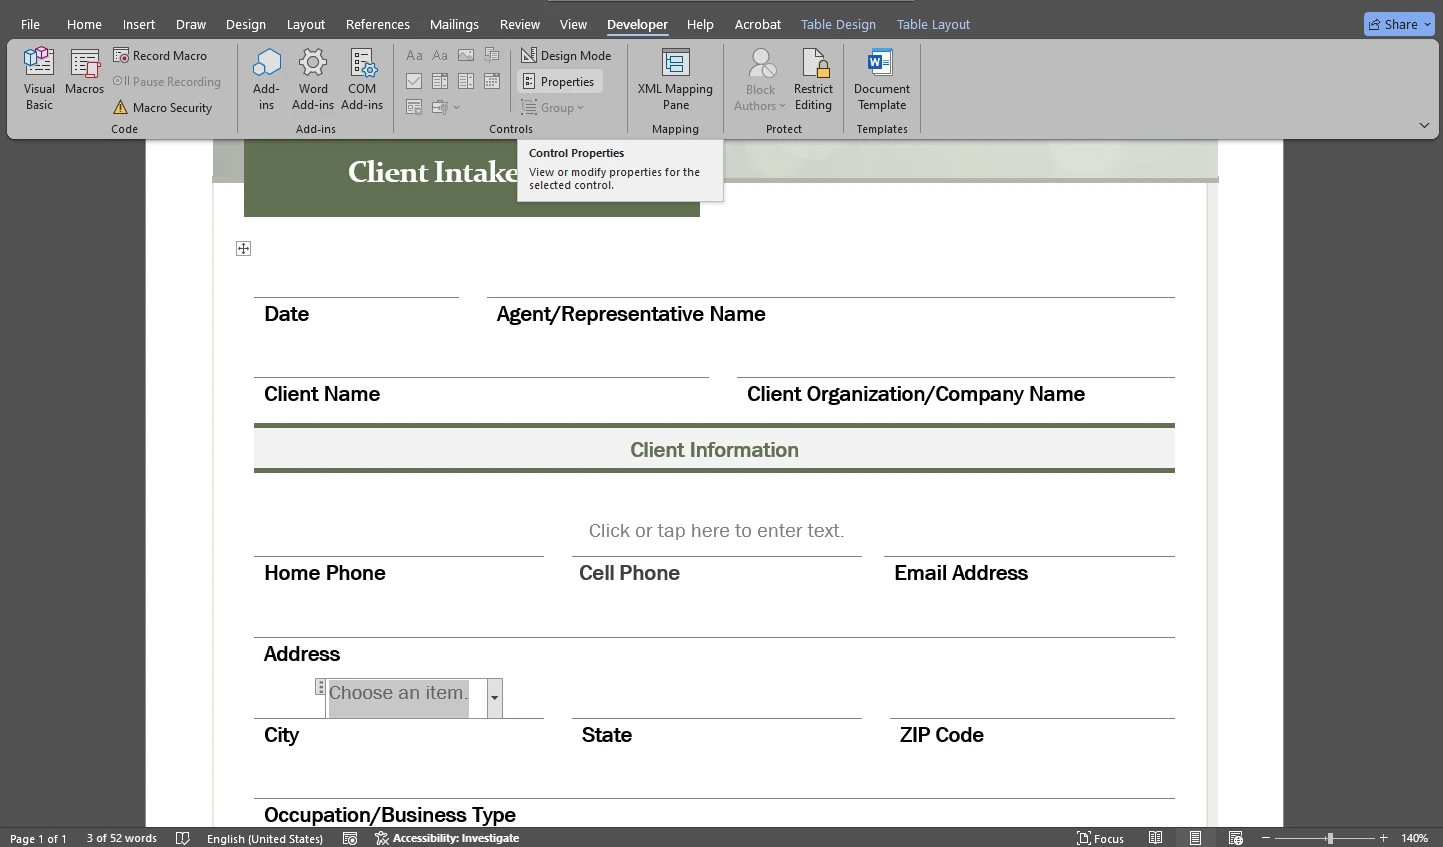
 - Go to the Developer tab in the ribbon. Here you can add various elements: ◦ Text boxes (which are called Rich Text Content Control) ◦ Checkboxes ◦ Drop-Down lists ◦ Radio buttons ◦ Date pickers All of these can be found in the Controls section.
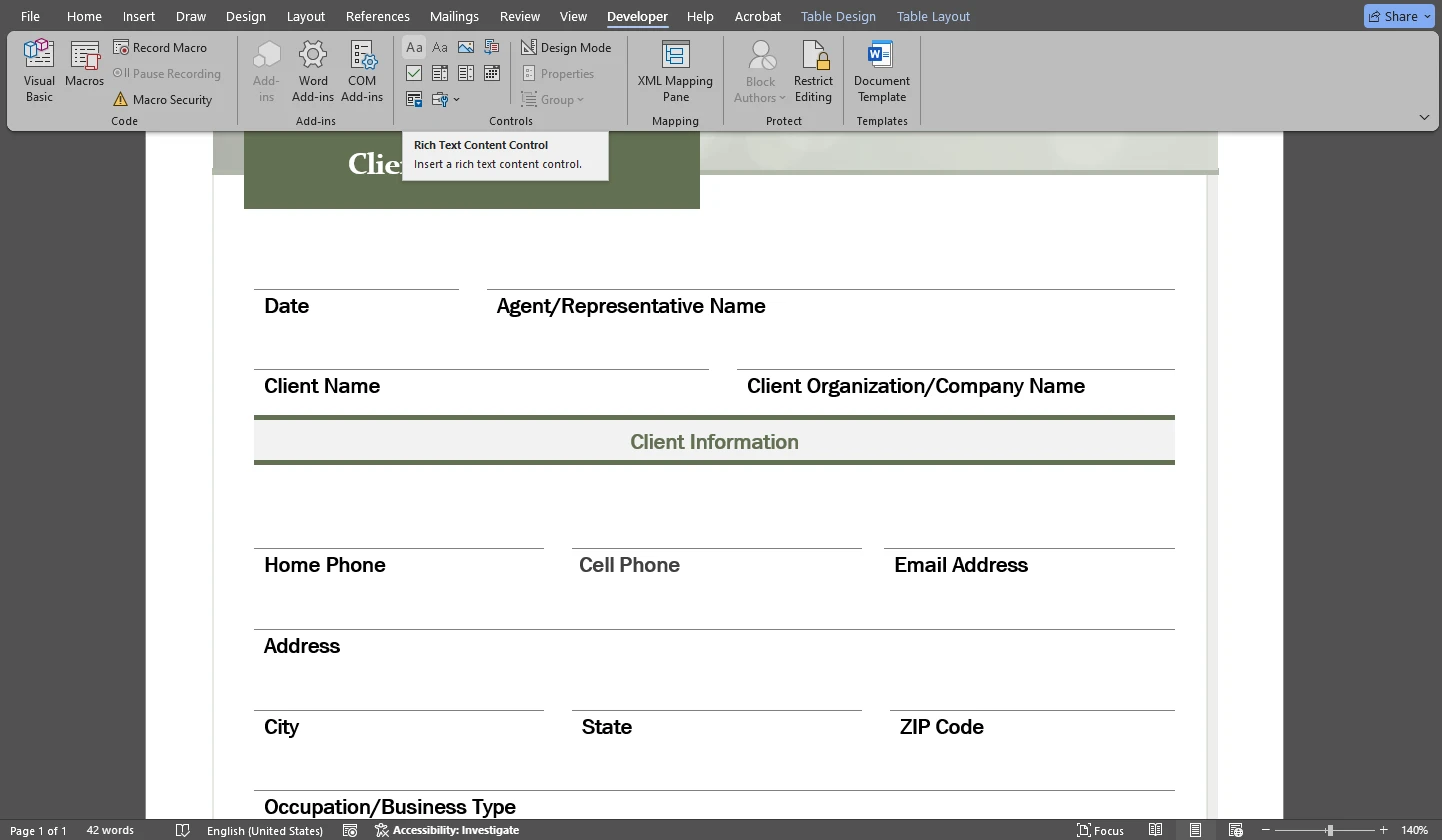
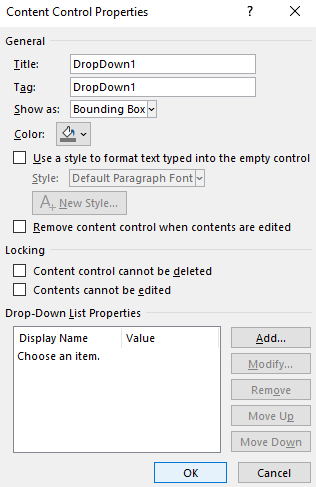
- To set properties, click on the necessary field, then click on the Properties button in the ribbon.
- Add labels or instructions for each field as needed.
Please note that creating a form from scratch – adding all the different boxes and editing them – can be quite time-consuming and tedious. So, if you are short on time, it might be a better idea to use a template. - When you’re ready, you’ll need to convert your Word document into a PDF. You can do it in two ways – either go to File > Save as Adobe PDF or go to File > Export > Create PDF/XPS.
Now, you’ve created your PDF document. Only the fillable fields are missing. This can be fixed using PDFgear’s fillable PDF form creator.
PDFgear is a website that offers a range of free, web-based tools that allow you to make changes to your PDFs. All of these tools are beginner-friendly and don’t require signing up. Moreover, the free version doesn’t add a watermark to your processed PDFs.
Here’s how it works:
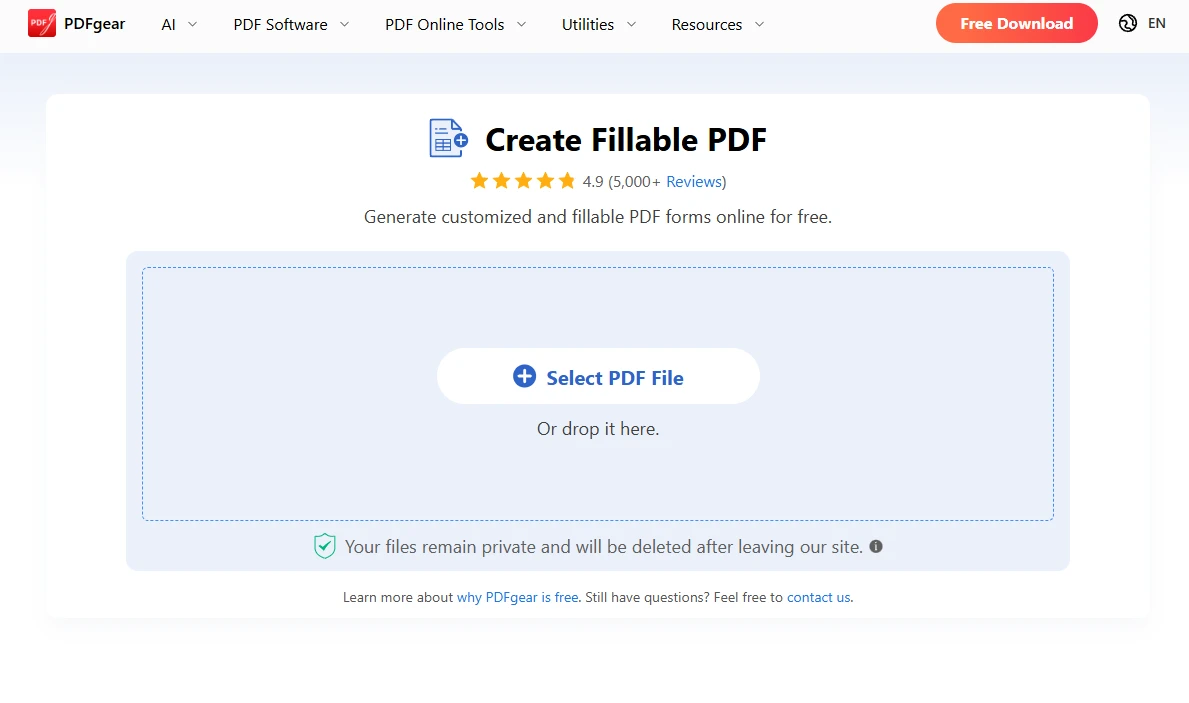
- Open PDFgear’s Online Fillable PDF Creator and import your PDF file.
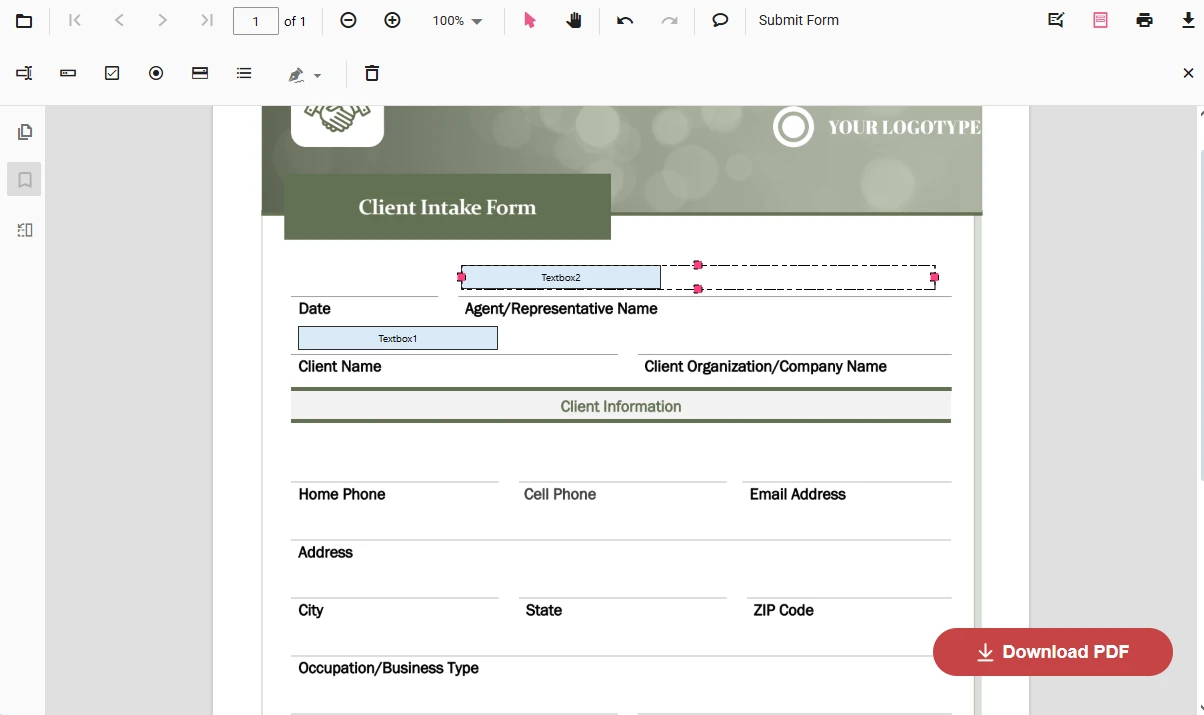
- Once your document is imported, you will need to add all the fillable fields manually. At the top, choose the field type, then click on the document to add a field. You can insert: ◦ Textbox ◦ Checkbox ◦ Dropdown ◦ Password ◦ List box ◦ Radio button.
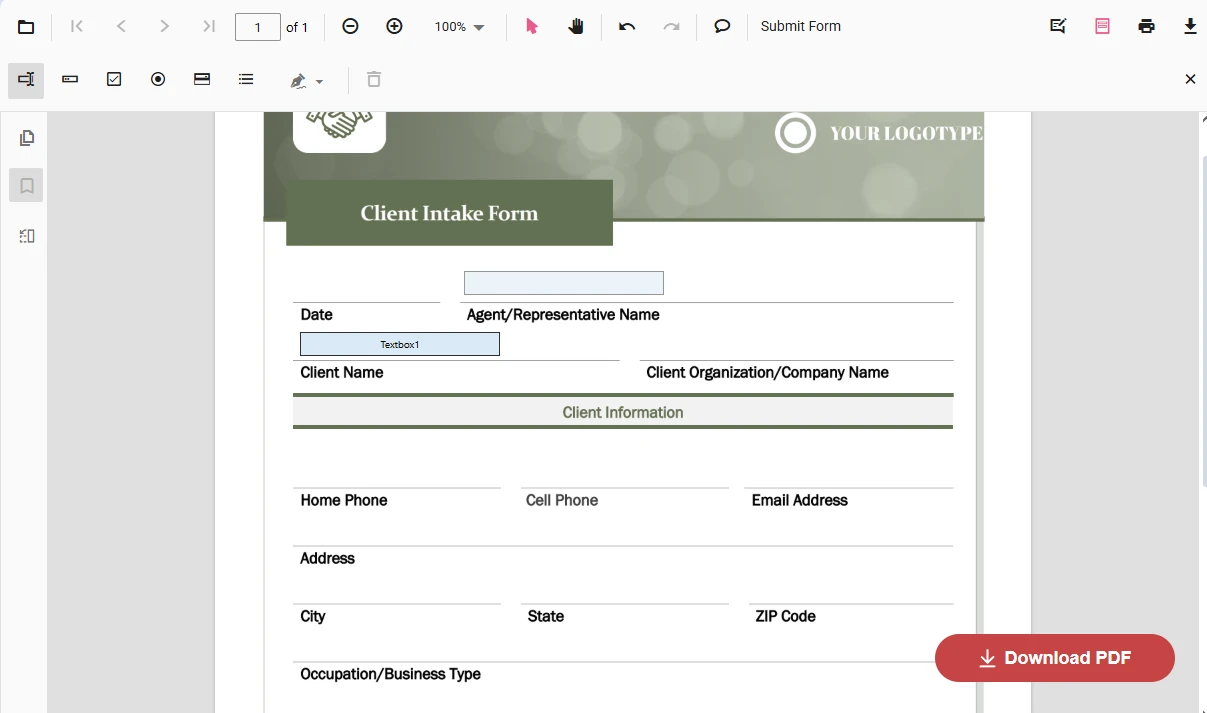
- If you need to adjust the size of the field, drag its handles. Use the cursor to reposition the field.
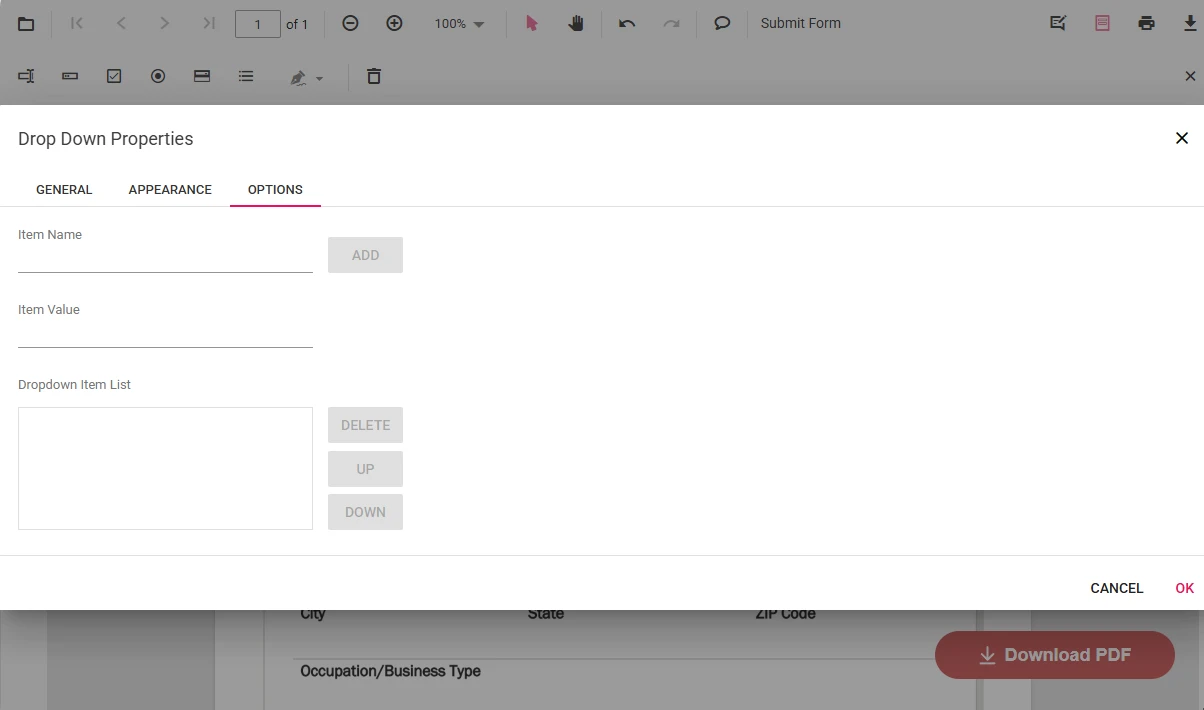
- To customize the properties of a form field, double-click on it. You can change the formatting, field name, list items, etc. Click OK to apply the changes.
- When you’re ready for export, click on the Download PDF button in the lower right corner.
And that’s how you can turn a Word document into a fillable PDF.
PDFgear has several advantages:
- It offers a desktop version which can process files of any size and as many of them as you need. The web-based app has the file size limit of 100MB.
- It’s safe and secure. Any files that you process will be deleted once you leave their website.
- There are no restrictions on how many files you can process.
- There are no hidden fees or subscriptions.
Final Thoughts
You might be under the impression that creating a fillable PDF is a complicated task. But it’s actually not. You don’t even need any advanced tools for it! If you need convenience and a broad toolkit, go for Adobe Acrobat. It can turn static fields into interactive ones automatically, which can save you lots of time. If you need to some beautiful and professional-look templates, use Canva, then make your PDF fillable in Sejda. And if you already have MS Word and need something simple design-wise, then using the combination of MS Word and PDFgear might be a good choice for you.