
How to Compress an Image on Mac in 6 Easy Ways
by  Lina Thorne • Updated · Posted in Compress Photo
Do you want to know how to compress an image on a Mac quickly and without paying a cent? Luckily, this guide features all the possible ways to do this using the built-in tools. Yep, everything you need is already on your device! No additional downloads or payments are needed. Each method requires only a little bit of time, yet guarantees high-quality compression results.
Are you unsure which method you should go for? Determine your requirements for image quality, file size and image format. That should help you with your choice.
Also, before we get started, there’s something you need to keep in mind. There are two main factors that affect the file size of an image: the image format and the pixel dimensions.
Image format mattes
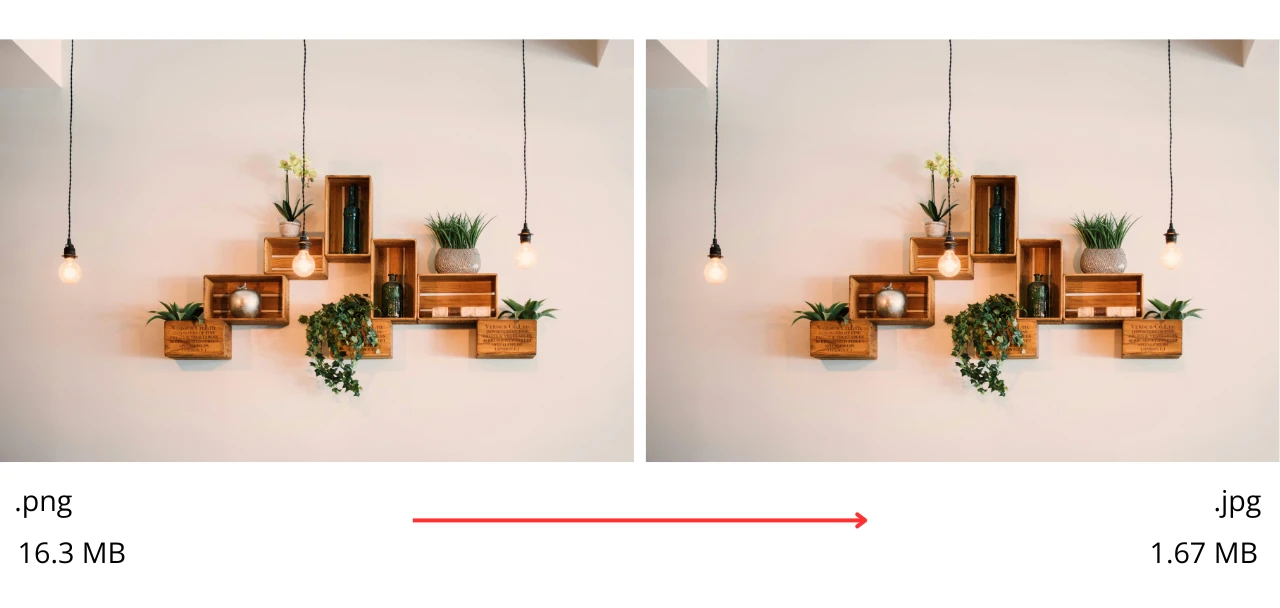
It may come as a surprise but changing the image format can actually reduce the file size. Remember, a PNG image is typically larger than a JPEG because it uses lossless compression and, thus, even if you compress it, all the original image data will remain in the compressed version. So, you need to convert your image from PNG to JPEG. For example, this photo in PNG format was originally 16.3 MB, but after converting it to JPG, its file size was reduced to only 1.67 MB. Quite a difference, isn’t it? MacOS has all the necessary tools to make a file smaller with the help of format conversion. Learn more about this below.
More pixels means a larger file size
All the information about each pixel’s color and brightness is stored in an image. So, the more pixels an image has, the bigger the overall file size will be. If you have two images in the same format (e.g., JPEG), but their pixel dimensions are different, the image with more pixels will inevitably a larger file size. Thus, changing the pixel dimensions of an image can also lead to a smaller file size. If you’re skeptical about this, take a look at the following example.
We took a photo with the pixel dimensions of 6000 × 4000 px and resized this image to 1080 × 720 px while maintaining its original aspect ratio and format. As a result, the file size was reduced to 856 KB.
As you can see, this is another excellent way to compress images, and you can easily do this on a Mac, as well!
How to Compress an Image on Mac By Changing Its Format
Let’s start with compressing an image on Mac by changing its format from PNG to JPG. There are three ways to do this using the built-in features on MacOS.
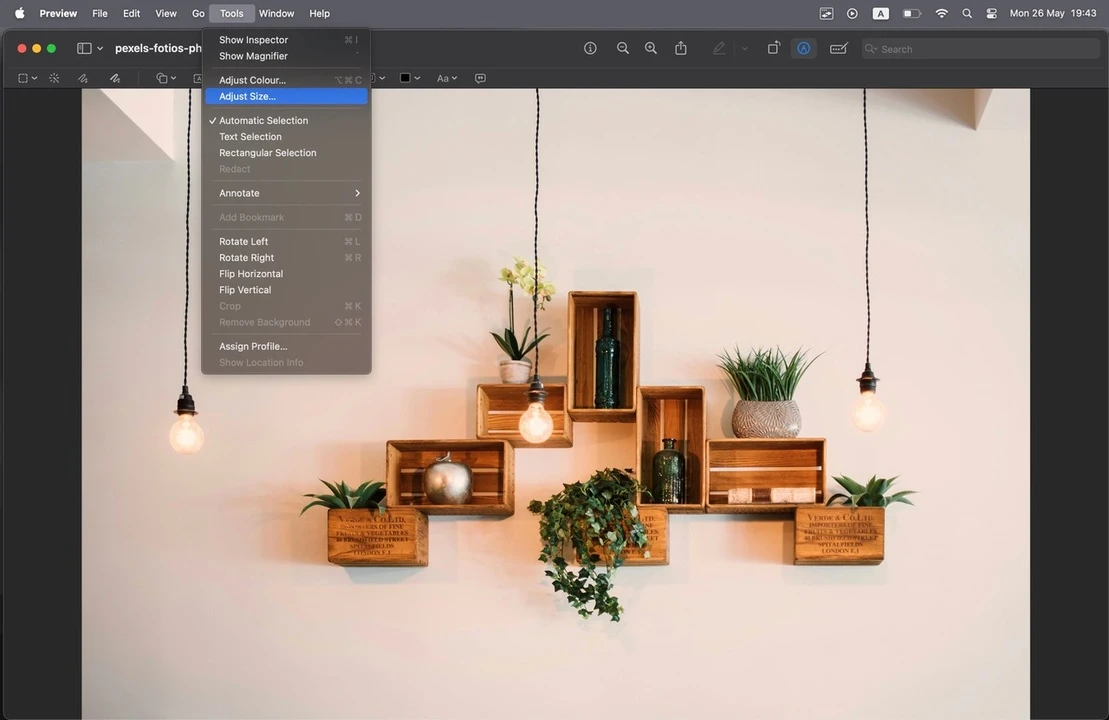
Method # 1. Using Preview
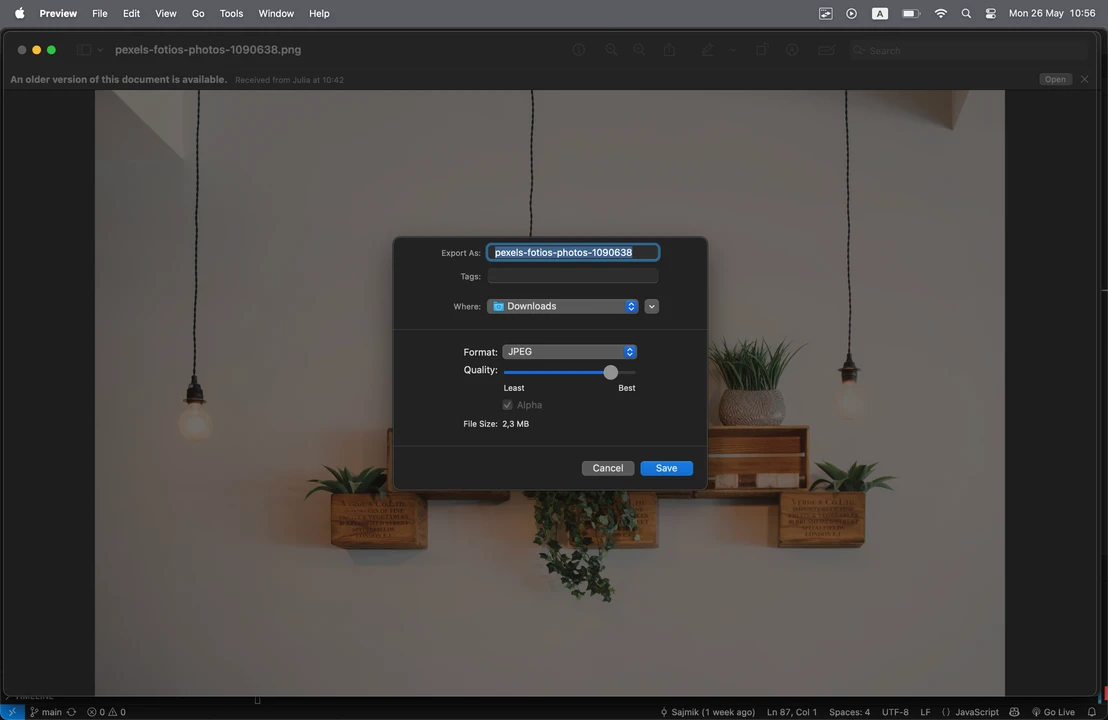
- Open the image in the Preview App.
- Go to File > Export. A window will appear with options to adjust file settings, including the image format.
- Select JPEG in the Format menu.
- Once you’re done making adjustments, click Save to export the image with the reduced file size.
There are a couple of vital things to note here.
JPEG vs JPEG-2000
In the Format drop-down menu, you’ll see not only JPEG, but also JPEG-2000. The latter was also developed by the Joint Photographic Experts Group as an improved version of the original JPEG format. Unlike its predecessor, JPEG-2000 supports both lossy and lossless compression. It does a better job of preserving details and avoiding compression artifacts, which naturally results in a larger file size compared to standard JPEG, but still significantly smaller than PNG.
Unlike JPEG, JPEG-2000 also supports transparency. That’s why you’ll see the Alpha checkbox enabled when you select this format.
What’s its downside? Limited compatibility. It’s not supported by most web browsers and many standard applications — including some Apple apps. You can choose this format when small file size and excellent image quality are priorities, and compatibility isn’t a concern.
File Size Preview
In the Export window, you will see the final file size. It will decrease or increase as soon as you change something in the settings – pick a different image quality or format.
For example, we chose JPEG and set the default quality in the export settings, and the file size of our image became 2.3 MB instead of the original 16.3 MB. But when we switched to JPEG-2000 format — the quality setting stayed the same — the file size changed to 4.8 MB.
You can adjust the image quality using the Quality slider. Drag it to the right for Best quality, or to the left for Least quality to find the optimal balance between image quality and file size.
Note that if you choose the Least quality, the level of compression will be high. A lot of image data will be discarded resulting in a smaller file size but visible artifacts. Best quality, on the other hand, means almost no compression – pretty much all the original details and data will be preserved, yet the file size will be larger.
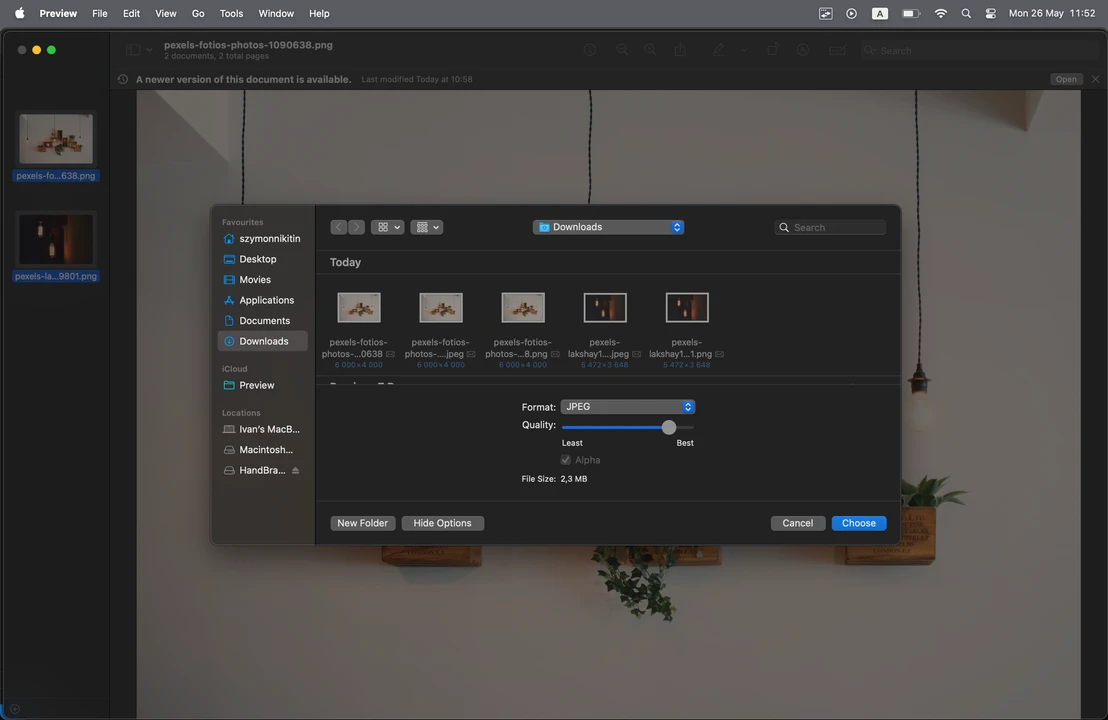
Batch Converting
If you need to compress several images on a Mac by converting them to JPEG, that won’t be a problem either:
- Launch the Preview app
- Select all the images you want to process. Make sure you can see all the image thumbnails in the left sidebar of the app window, then select them.

- Click File > Export Selected Images…
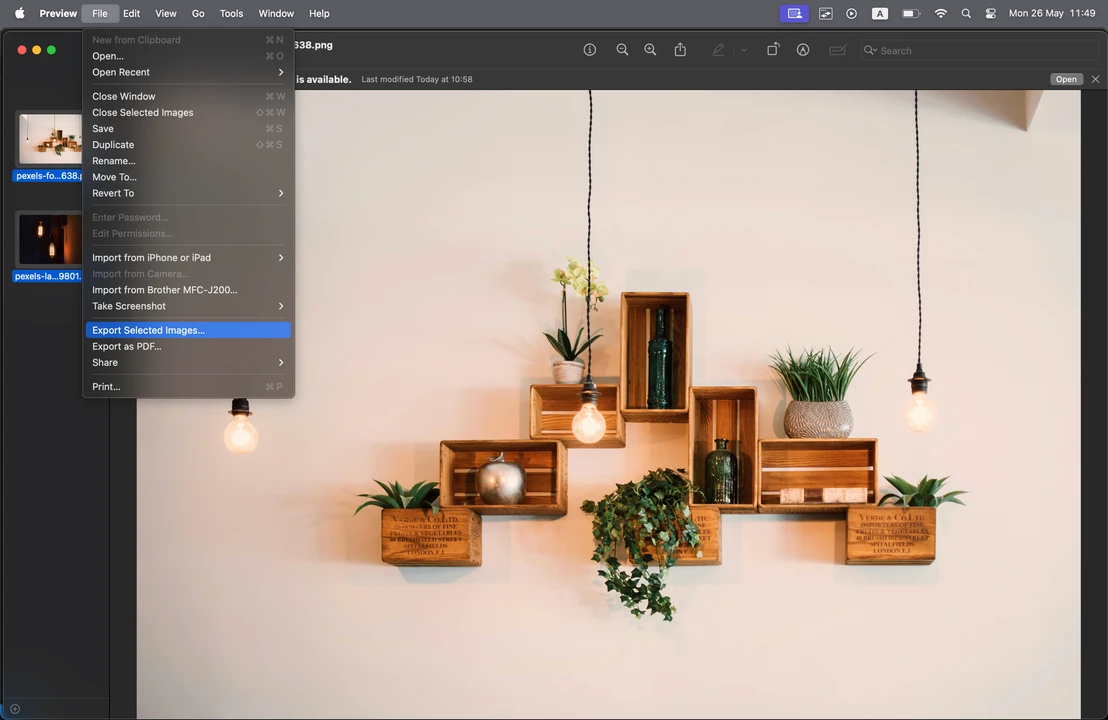
- Click the Show Options button at the bottom. Make sure the desired format is selected.
- Select the folder where your images will be exported to and click Choose.
Method # 2. Using Quick Actions
The second way to compress an image on a Mac that involves conversion is even easier and faster:
- Open Finder and select the image you want to compress.
- Right-click on it, then choose Quick Actions > Convert Image.
- If you see that the JPEG format is already selected, just click Convert to JPEG. The compressed image will be saved to the same folder as the original.
Using this method, the size of our image was reduced to 1.9 MB. Batch processing is also possible.
Method # 3. Using Photos App
This method is also quite simple. It’s especially convenient if your image is already in the Photos app and doesn’t need to be imported manually.
To compress an image on a Mac using the Photos app, do the following:
- Open your image in Photos.
- Go to File > Export > Export 1 Photo.
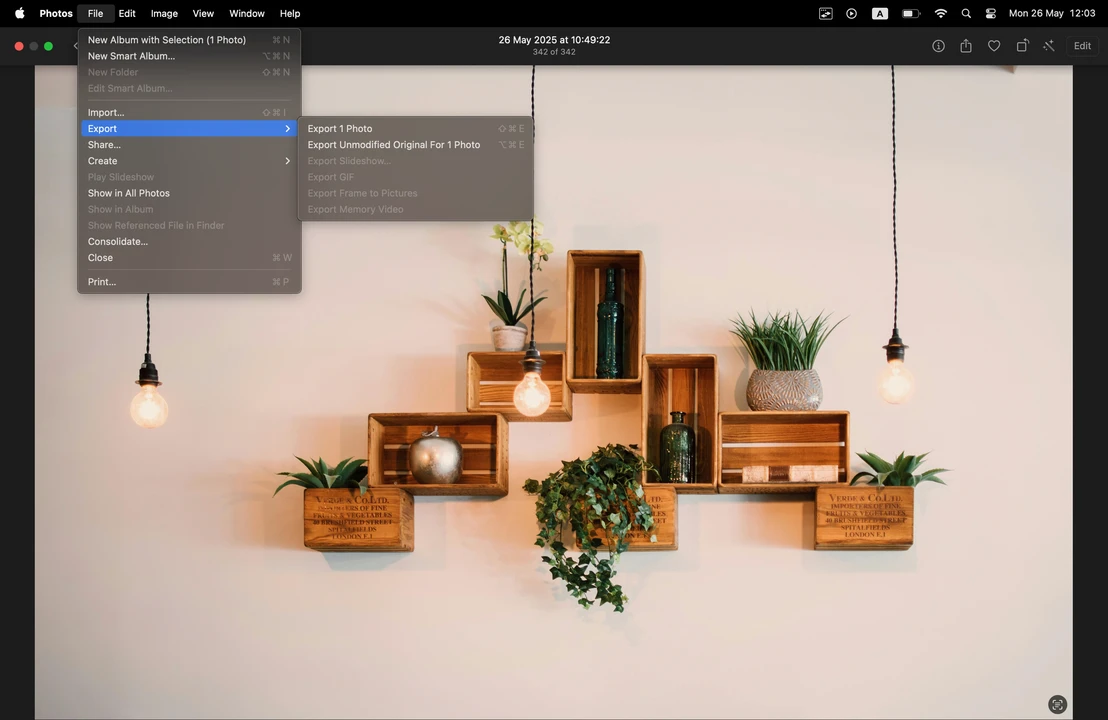
- In the Photo Kind drop-down menu, select JPEG.
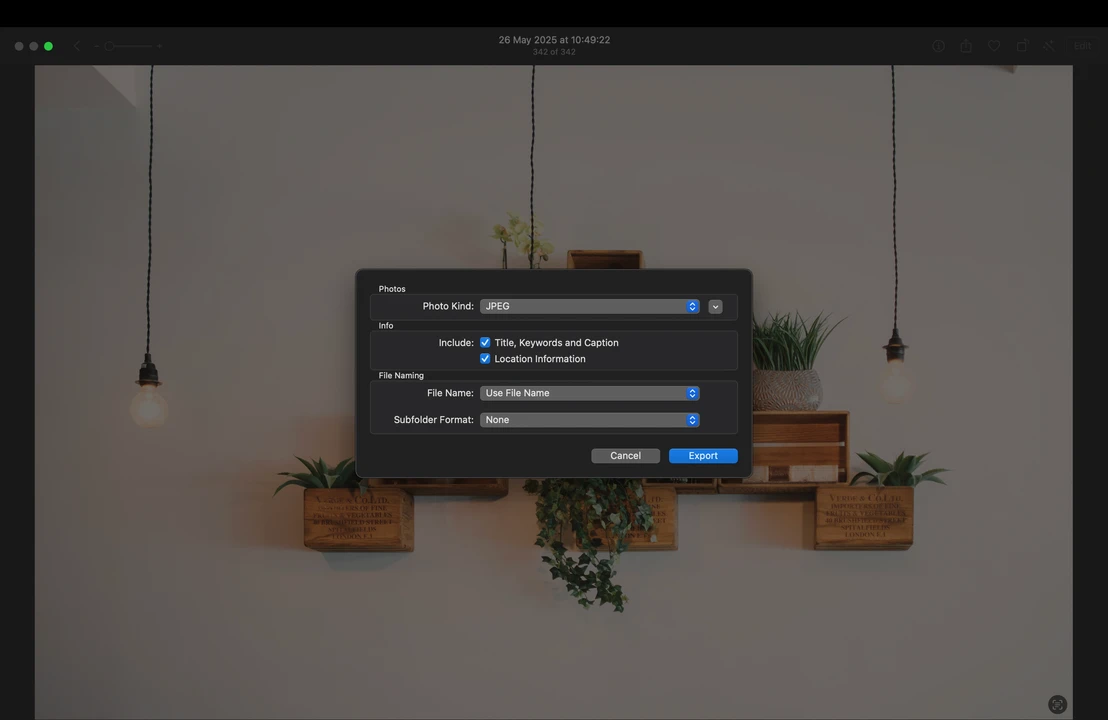
- Click Export to finish.
Using this method, our image was also compressed to 1.9 MB. In the Photos app, it’s possible to change the format of multiple images in one batch, as well.
How to Compress an Image on Mac By Resizing It
Now let’s take a look at how changing the pixel dimensions of an image can affect its file size. There are two main ways you can approach this.
Method # 1. Quick Actions > Convert
Similarly to one of the aforementioned methods, you’ll need to find the necessary image in Finder, then right-click on it and go to Quick Actions > Convert Image. This time, though, the format will remain unchanged.
Go to the Image Size option, instead. The image size actually refers to pixel dimensions (width × height in pixels), not the file size of an image.
Now, please note that here you won’t be able to enter the exact pixel dimensions you need. The Image Size dropdown menu offers the following options to choose from: Actual Size, Small, Medium, and Large.
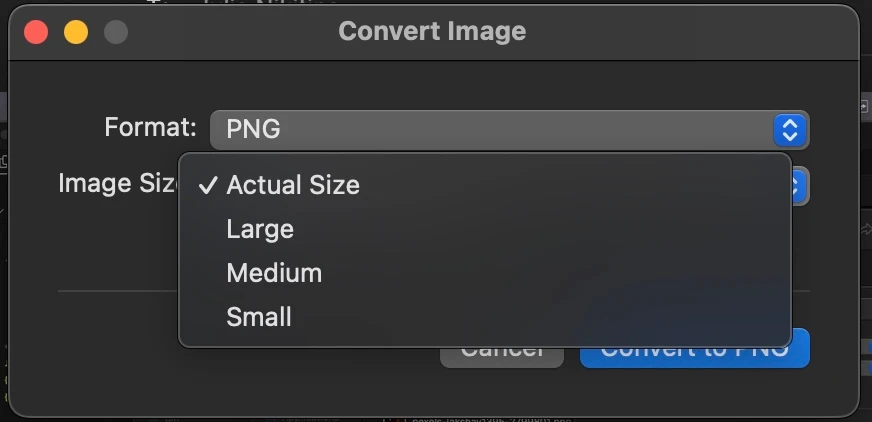
To help you understand the difference, below we’ll show the results of resizing our PNG image using each of these options.
The Actual Size option is useful only when you’re changing the image format and want to preserve the original pixel dimensions. If your goal is to reduce the file size by resizing rather than converting, you should avoid this option.
Here are the results:
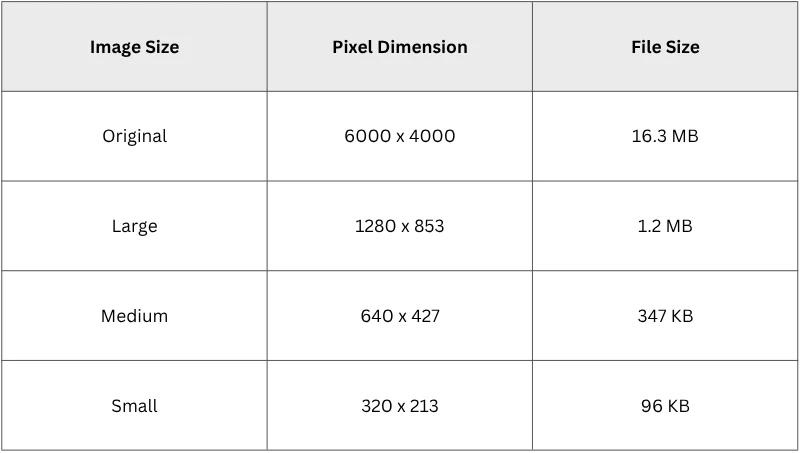
As you can see, simply resizing the image can lead to a significant reduction in file size. So, this is one of the available methods for compressing images on a Mac.
Method # 2. Preview
In addition to format conversion, the Preview app also offers a resizing tool. Unlike the previous method, this one allows you to enter the desired width and height manually. As you adjust the settings, you will see the estimated file size at the bottom of the window.
Here is what you should do:
- Open your image with the Preview app.
- Choose Tools > Adjust Size…
- If you want to scale the image proportionally, it’s enough to enter the value for one side. The other will change automatically.
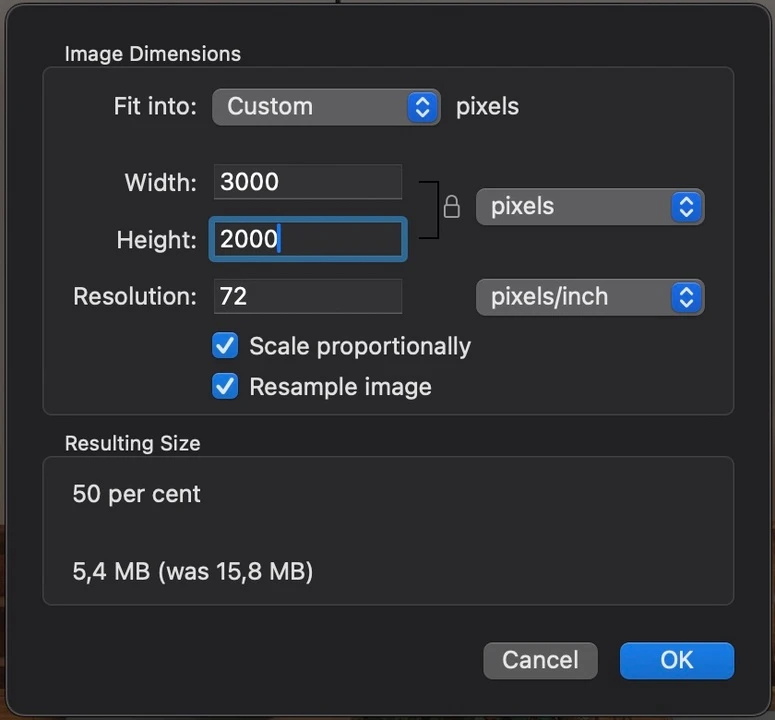
- Check whether the resulting file size is okay for you. If it is, click OK.
As you can see, this method allows you to easily compress PNG image on Mac by several times, making it more suitable for emailing or publishing online.
Read more – How to Resize an Image on Mac.
How to Compress an Image on Mac Online
But what if you need to compress images to a certain size without changing their format or pixel dimensions? There’s a great solution for that, too — the free online compressor Watermarkly. It’s available on Mac as well as any other device, and allows you to compress multiple photos in one go completely for free. Don’t worry, image quality won’t be compromised.
Importantly, you can upload photos in any format. For example, Watermarkly offers tools like Compress JPEG, Compress GIF, and others. You can either specify the desired file size in MB or KB, or simply choose one of these two options — Better Quality or Smaller Size.
Want to learn how to use this tool? Here’s a quick guide:
- Go to watermarkly.com > Tools > Compress Images.
- Drag and drop all your files.
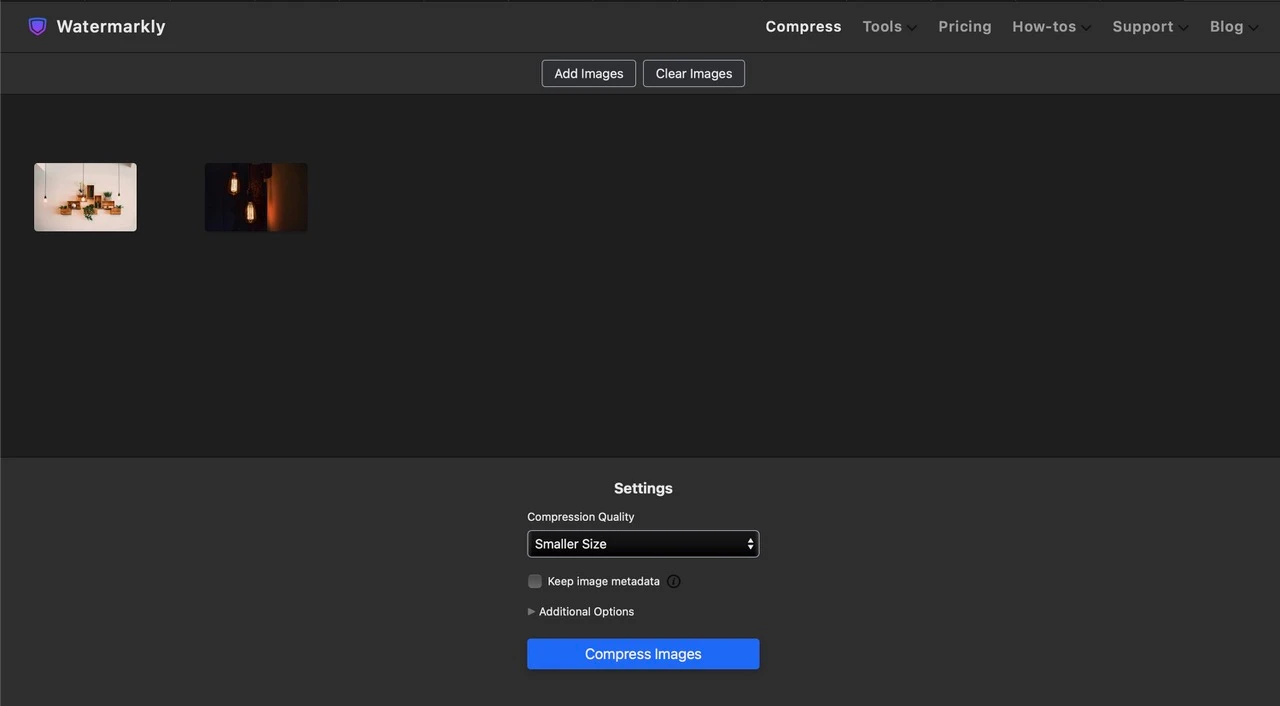
- Specify the settings and click Compress at the end.
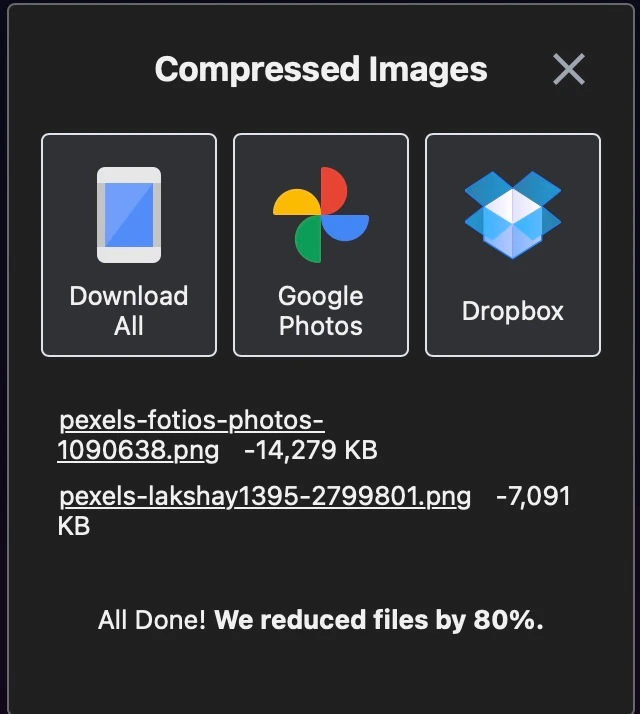
The results can be saved in the Downloads folder or one of the cloud storage services.
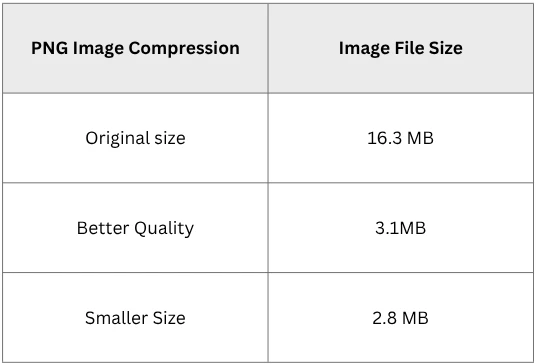
Want to know the difference between Better Quality and Smaller Size?
Better Quality = low level of compression.
Smaller Size = high level of compression.
Take a look at how our image was compressed on a Mac using an online compressor Watermarkly:
Similarly to the aforementioned image compression tools for Mac, the Watermarkly app is easy to use, doesn’t require any installation or payment, and offers a simple, intuitive way for reducing file size.
As a bonus, online tools like this often provide a wider range of features. For example, on the same website, you can also crop your photo or add a watermark if needed.
Final Thoughts
Compressing an image on a Mac is easier than you might think. With the help of macOS built-in tools, you can reduce the file size either by changing the format or by resizing the photo. But if you need the actual image compression, it’s better to use free online tools since there’s no built-in image compressor on Mac.
There are plenty of options available, and the best part is they’re all simple to use, no matter your level of technical experience.