
How to Blur a Face in a Video: 5 Easy Methods
by ![]() Lina Thorne • Updated · Posted in Video Editing
Lina Thorne • Updated · Posted in Video Editing
Say, you’ve filmed a great clip. Everything looks perfect… until you notice that in the background, there’s a person who didn’t give permission to appear on camera. Naturally, this is something you need to hide if you want to be ethically correct and avoid legal risks.
If the person is close to the edge of the frame, you can try to crop them out. But what if they are in the middle or constantly moving? Or maybe you just want to keep the composition intact? Then you have no other choice but to blur the person’s face in the video. It might seem like a complicated task. But it’s actually not.
Knowing how to blur a face is a simple skill that can save your video and protect someone’s privacy. Luckily, with modern tools, this process will require only a few minutes of your time. This comprehensive guide provides detailed instructions on how to blur faces in videos using YouTube Studio, CapCut, InShot, and Adobe Premiere Pro.
Why You Should Blur a Face in a Video
There are several key reasons why blurring faces in videos might be necessary:
- Complying with regulations. In many countries, a recognizable face is legally considered personal data. Under regulations like GDPR in the EU or the CCPA in California, you need to get permission from a person whose face is clearly visible in the footage before sharing it online. publishing the footage without consent can lead to complaints, fines, or legal disputes. So, it’s better to blur someone’s face in the video and make them unrecognizable.
- Protecting identity for safety reasons. Activists, whistleblowers, or victims of crime may be harmed if their identities are revealed. So, journalists, documentary makers, and vloggers often blur faces in their videos to avoid exposing these individuals to unwanted attention or threats.
- Protecting children’s identities. You need to be particularly careful when it comes to sharing content that involves minors. Many organizations have strict rules about publishing footage of children online. It’s better to err on the side of caution and blur a minor’s face.
- Respecting personal boundaries. Some of your friends or family members may prefer not to appear online. By blurring their faces, you show respect for their wishes and maintain positive relationships.
Blur a Face in a Video using YouTube Studio
Let’s begin with something simple. This method hardly requires any editing skills. But it does have a limitation – you can use it only for videos that have already been published on your YouTube channel.
Here’s how it works:
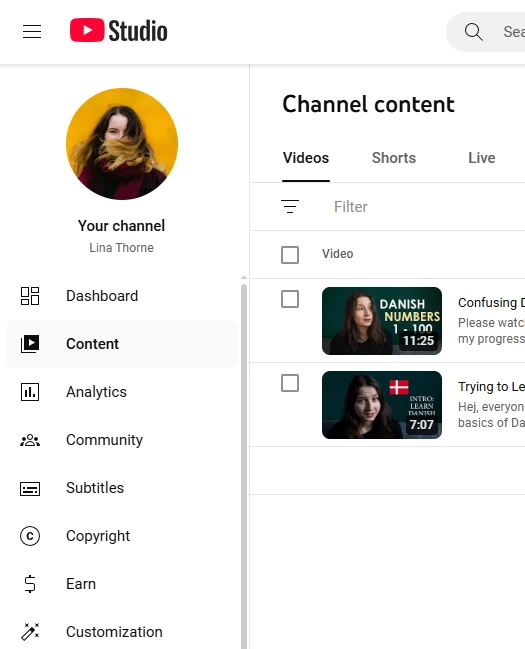
- Log in to your account and open YouTube Studio.
- Go to Content and select the video you want to edit.
- Then choose Editor in the menu on the left.
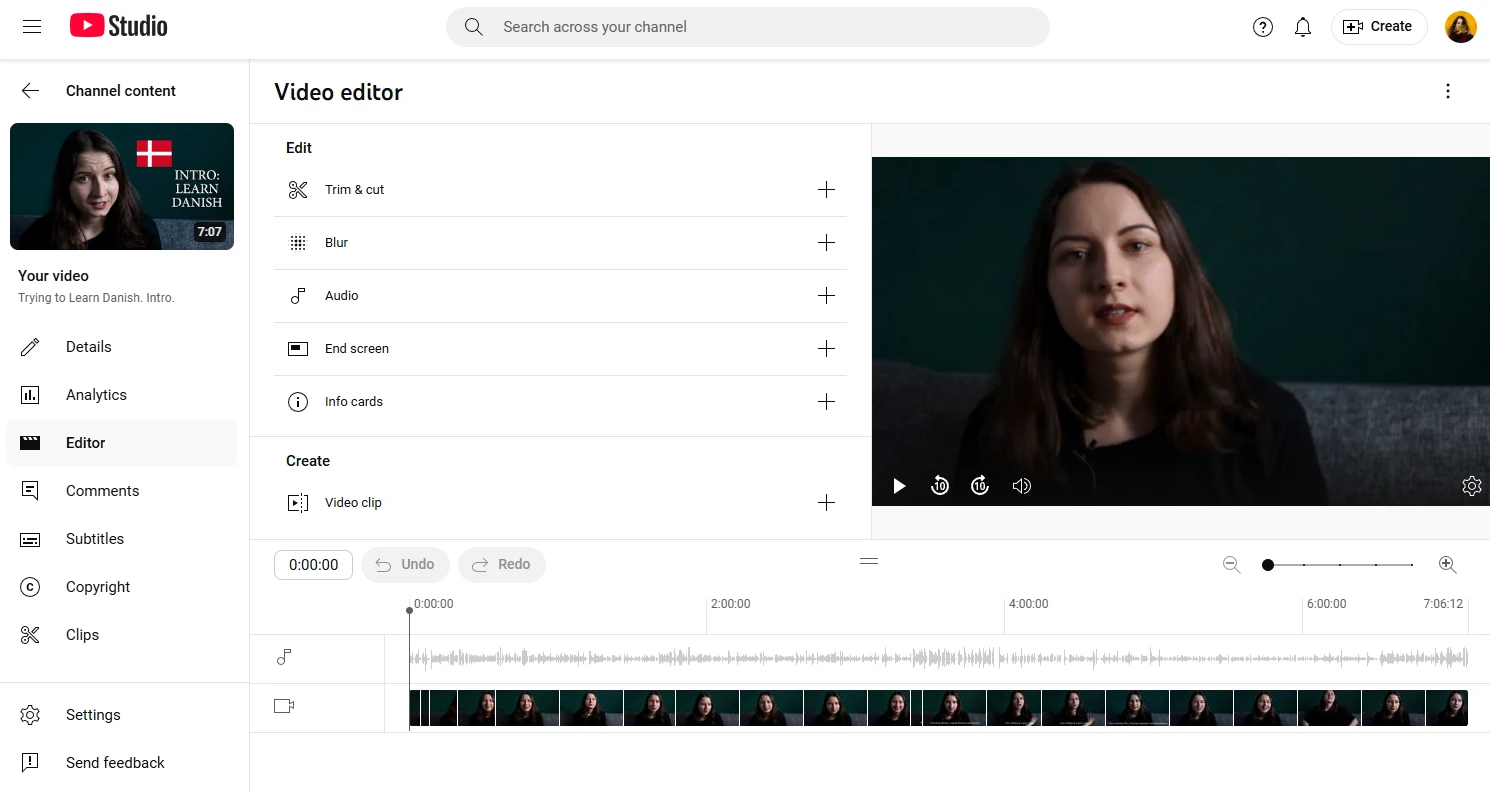
- Click on Blur and choose Face Blur or Custom Blur.
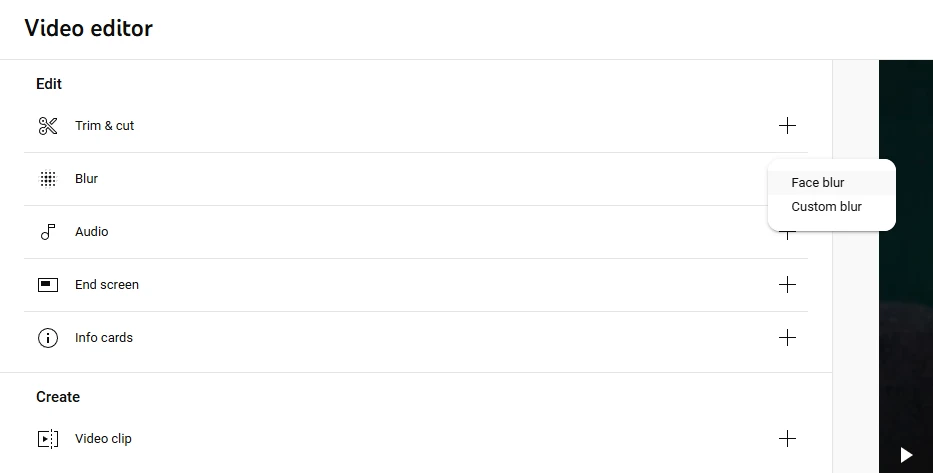
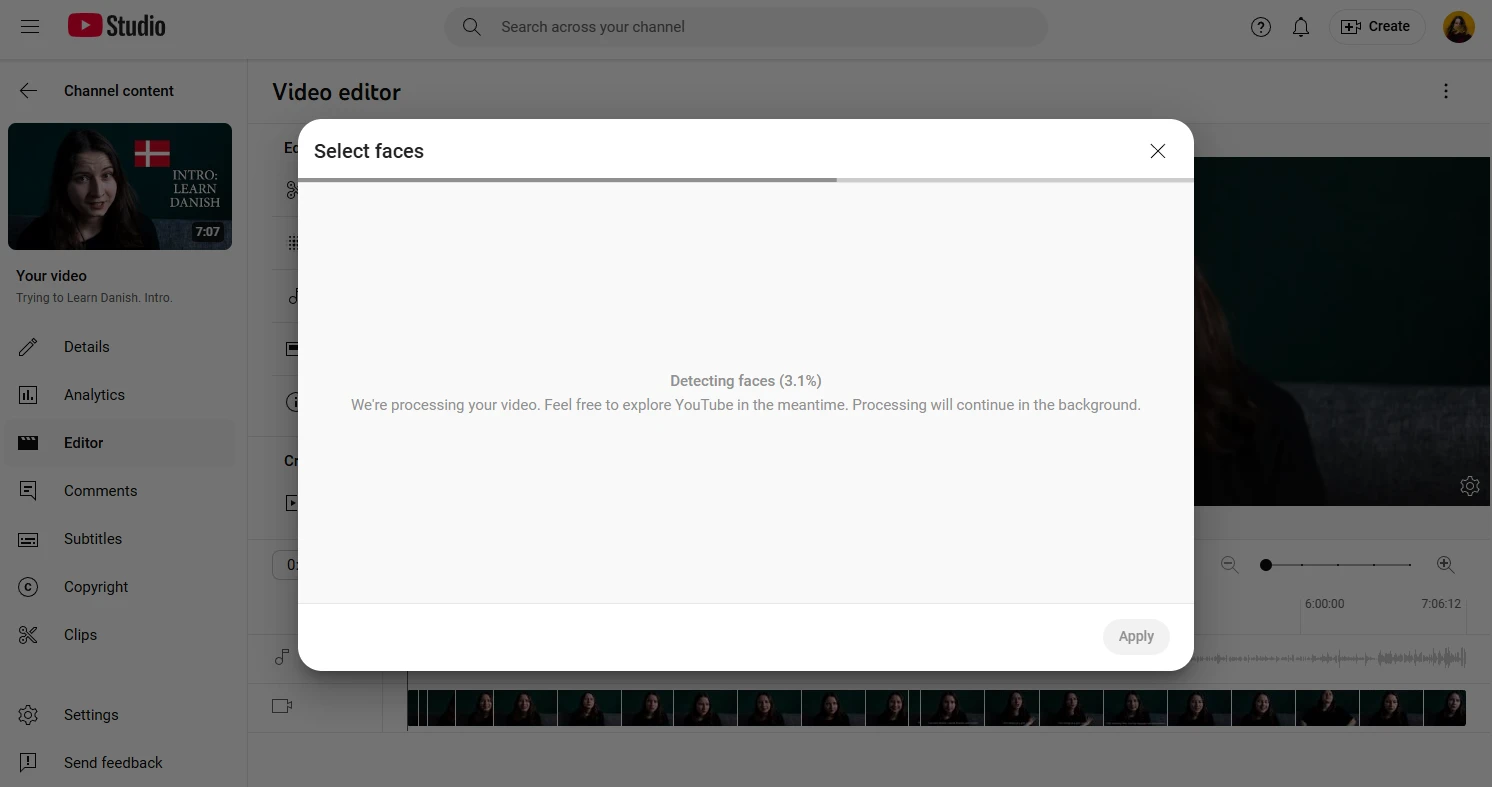
- If you opt for the Face Blur, YouTube will automatically detect faces in your video and blur them.
- If you go for the Custom Blur, you’ll need to edit the blur manually. Choose the shape. Reposition the blurred box using your cursor. Click and drag any corner of the blurred box to resize it. Adjust the duration of the blur on the timeline at the bottom.
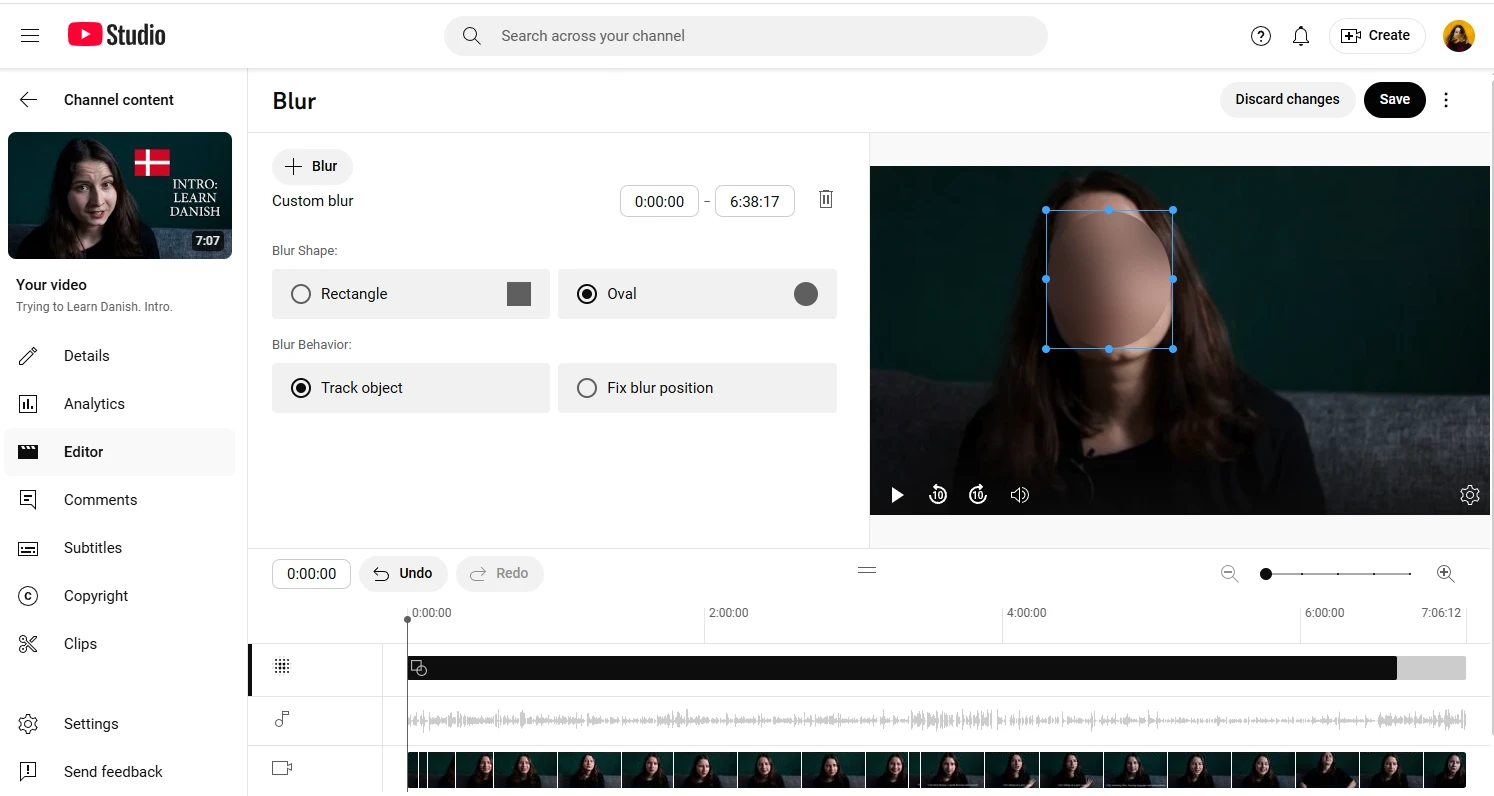
- If the person in the video is moving and you need the blur to move along with them, enable Track object. But if you want the blur to stay in the same place, enable Fix blur position.
- Are you ready to apply the changes? Click on Save.
Please note that, as of June 2025, once you apply the changes in the YouTube Studio Editor, you won’t be able to revert back to the original.
What’s great about this easy method is that you don’t have to pay a cent for it! You won’t need to re-upload your video, either – it’ll keep all the views and comments, its URL will stay the same. On top of all that, the automatic detection works surprisingly well for most videos.
Unfortunately, this method can be used only for YouTube videos. So, if you need to blur a face in a video for TikTok, you’ll need to opt for a different method. Also, the customization options are pretty limited compared to desktop and mobile video editors.
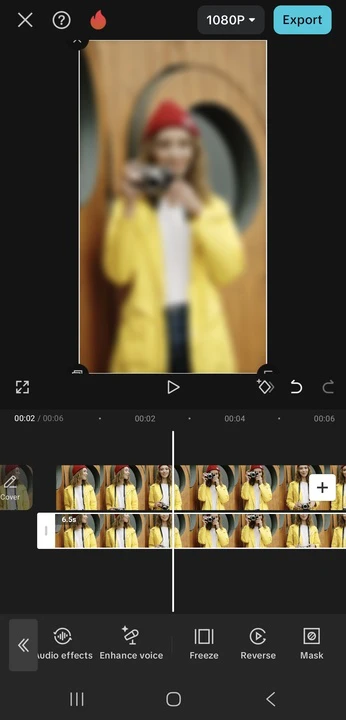
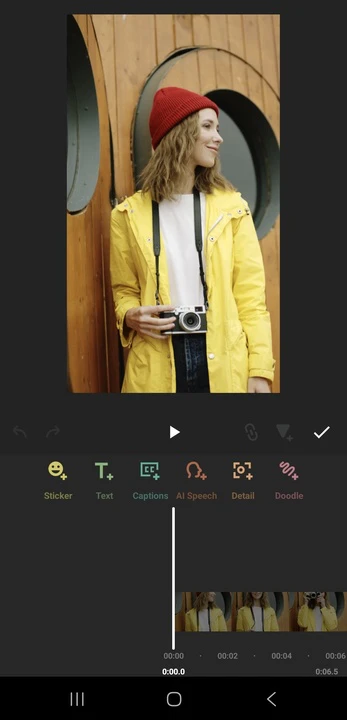
Blur a Face in a Video using CapCut
Probably the best way to blur someone’s face in a video – or blur any other part of a video, for that matter – is using CapCut. Why? This popular video editor can easily be used by total beginners, amateurs, and even professionals. On top of all that, CapCut is available on iOS, Android, PC, and Mac. Yep! It has a desktop version, which, frankly speaking, is more convenient since using a mouse rather than your fingers allows you to be more precise with video editing.
But since a lot of people tend to edit videos on their smartphones, we’ll use the mobile app in our tutorials.
So, download and install CapCut. Log in if you already have an account, or create one if this is your first time using the app.
Now, you can actually hide someone’s face in two ways using CapCut. Let’s take a look at the first one:
- Open the app and create a new project.
- Import your clip.
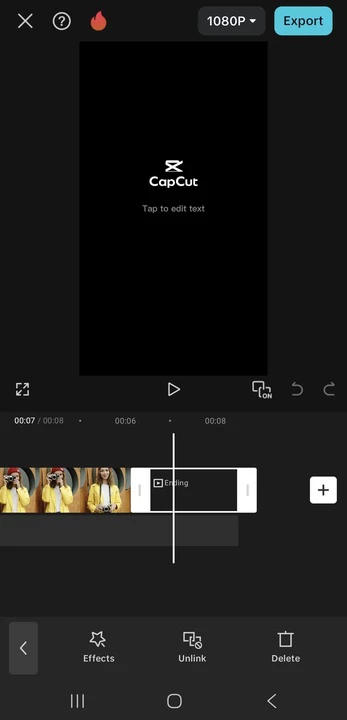
- Go to the very end of your video on the timeline. You’ll notice that CapCut’s ending was added automatically. Tap on the ending, then tap on Delete. Please note that CapCut’s ending is usually added only in the mobile app. So, if you’re using the desktop version, you can skip this step.
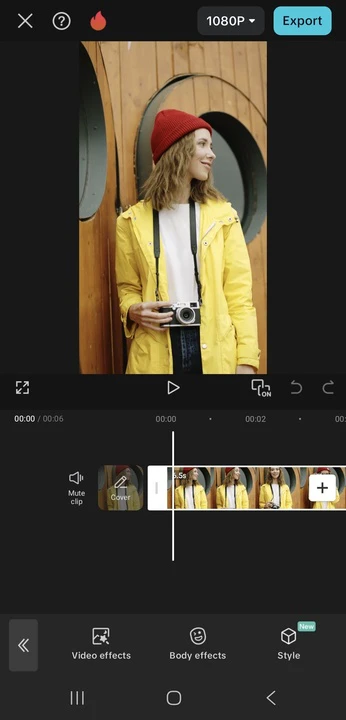
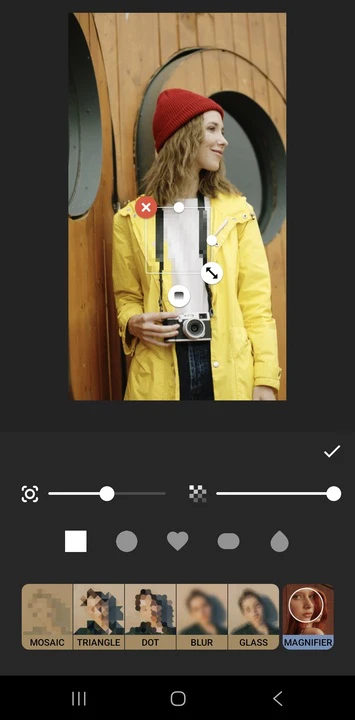
- Tap on the clip on the timeline to select it, then go to Effects > Body Effects.
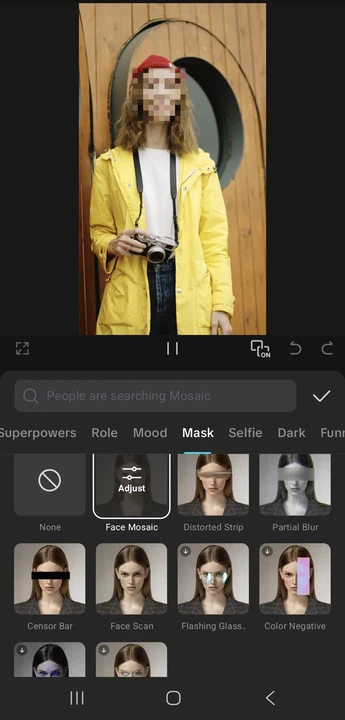
- Go to the Mask category and pick the Face Mosaic effect.
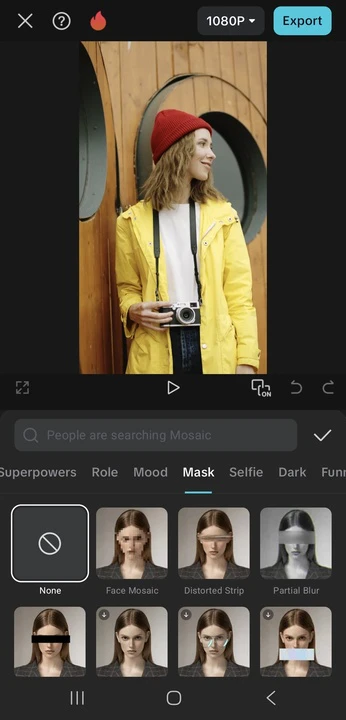
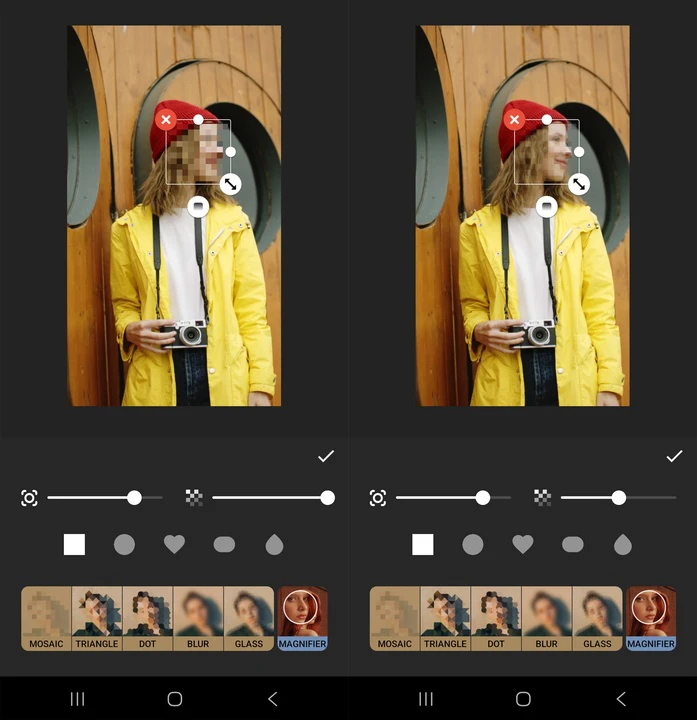
- If you don’t like the mosaic, choose a different effect. For instance, a censor bar or partial distortion. Both of these effects cover only the eyes, though.
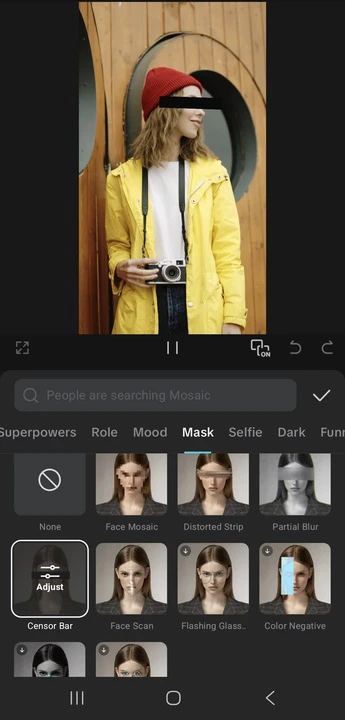
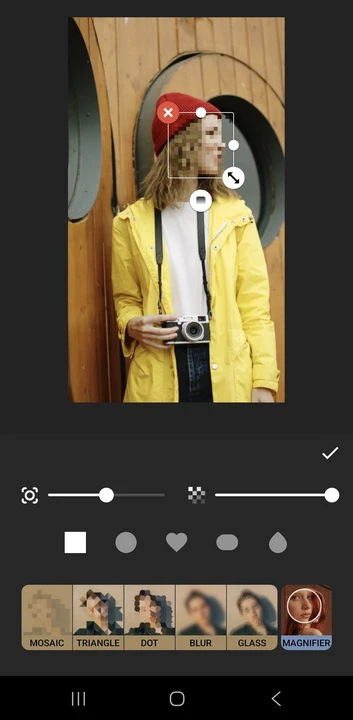
- The app will detect the face in the video and apply the effect to it automatically. Moreover, the effect will move along with the face. If there are several people in your video, CapCut will apply the effect to all of their faces. If you want one of the faces to be unblurred, tap on it.
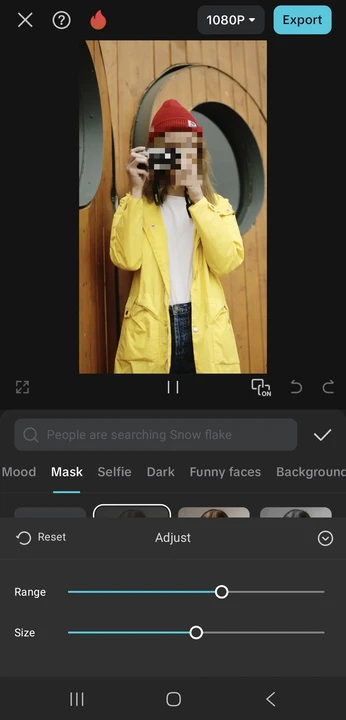
- Tap on the effect of your choice again to adjust its range and size using the sliders.
- When you’re ready to apply the changes, tap the checkmark.
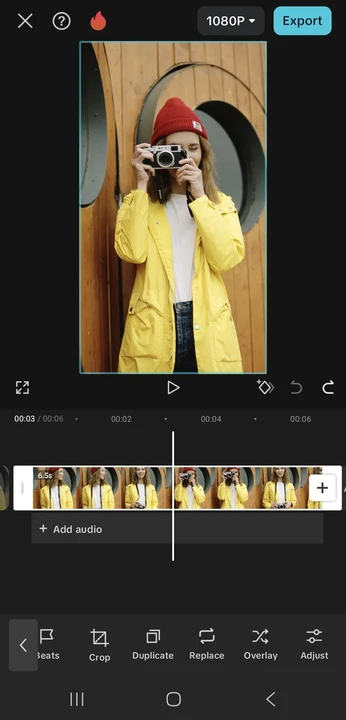
- Now, you can do some other editing. For instance, crop your video. Or you can proceed to exporting by tapping on Export.
That’s it! This method is perfect if you need to hide someone’s identity quickly and you’re okay with opting for the mosaic effect.
There’s a downside, though. The body effect can be glitchy. For instance, if the person turns to the side or holds a hand in front of their face, the effect might disappear for a moment.
So, if you need the face in the video to be blurred properly and if you generally want more flexibility, you’ll need to use the second method. It requires more steps and precision. But don’t worry, it’s not too complicated. And it does allow you to actually blur a face!
Here’s how you can blur someone’s face in a video:
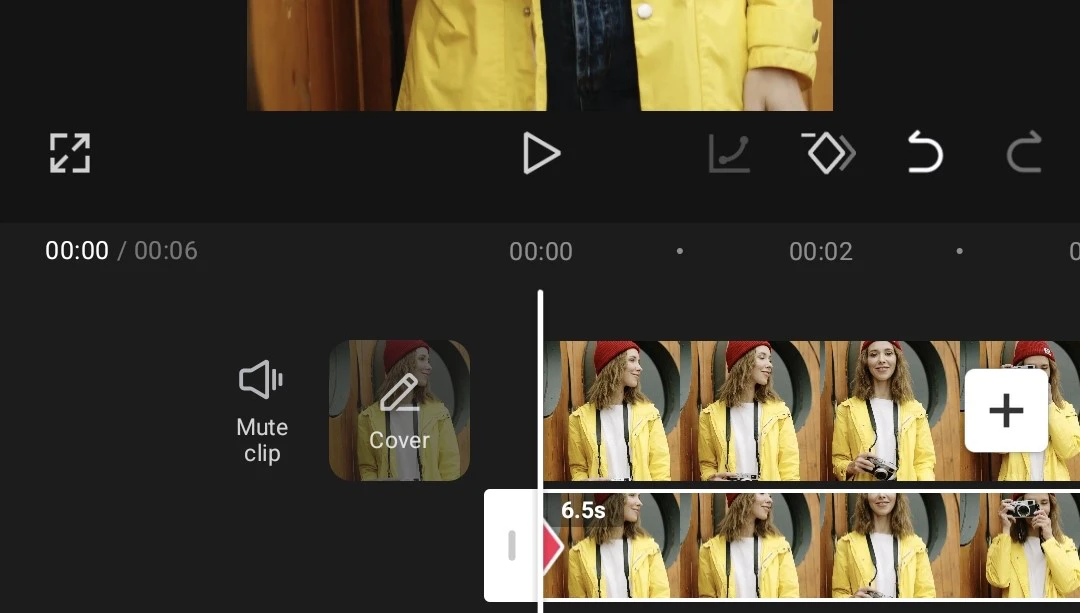
- Similarly to the previous method, open the app, create a new project, then import your video.
- Select your clip on the timeline, then tap the Duplicate option in the toolbar. Your clip will be copied.
- Select the duplicated clip and tap Overlay.
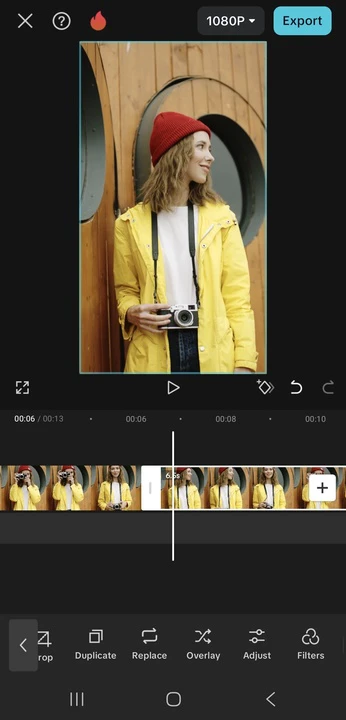
- Your duplicated clip will now be below the original. Select the duplicated clip and drag it to the beginning of the original one – both clips should be perfectly aligned.
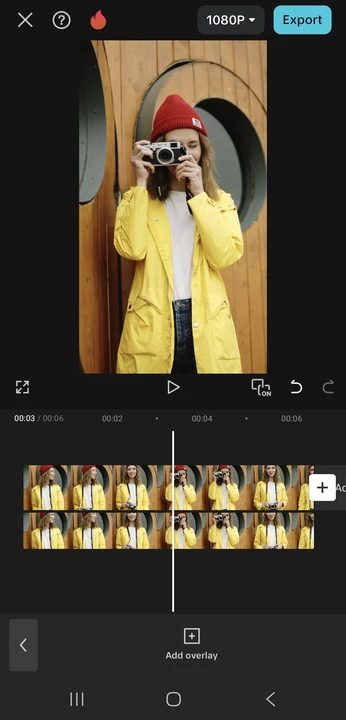
- Select the duplicated clip and go to Effects > Video Effects. In the search bar, enter Blur.
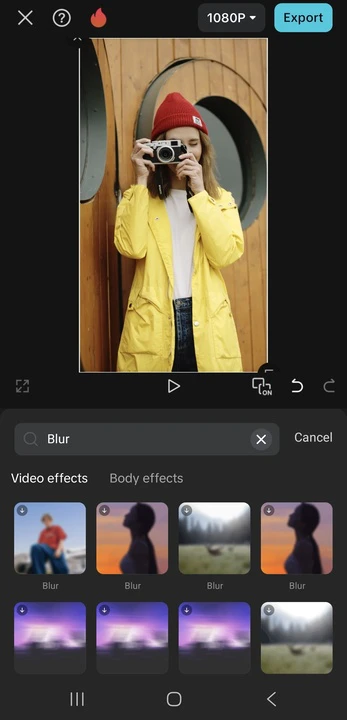
- Choose the blur effect that you like. Tap on the effect again to adjust the intensity, if necessary.
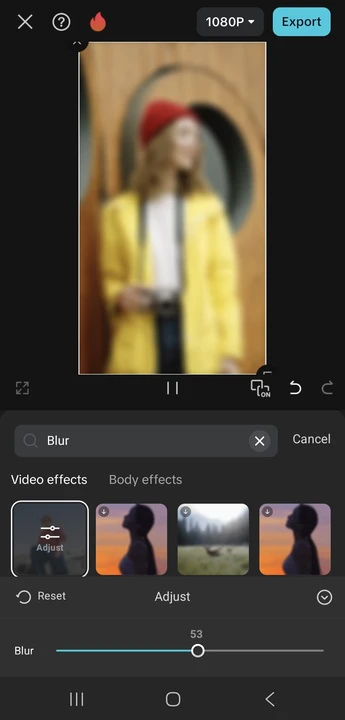
- Tap the checkmark, and the blur effect will be added to the duplicated clip. You’ll notice that the entire video is blurred. That’s okay.
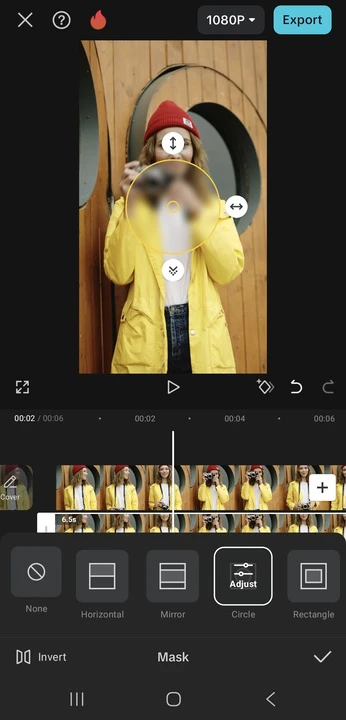
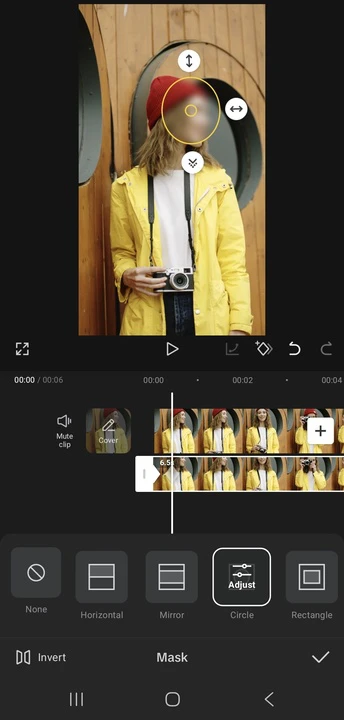
- Find and select the Mask option in the toolbar.
- Choose the shape of the mask. For instance, a circle.
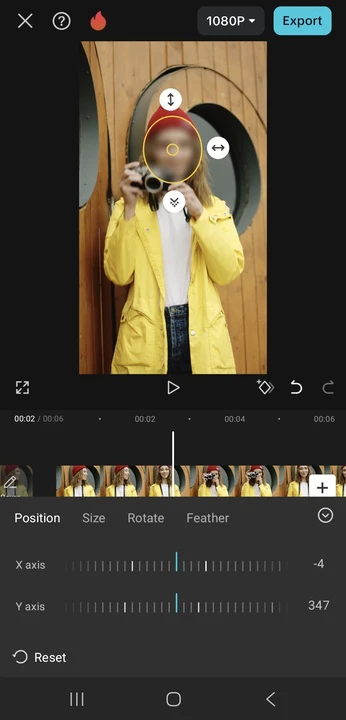
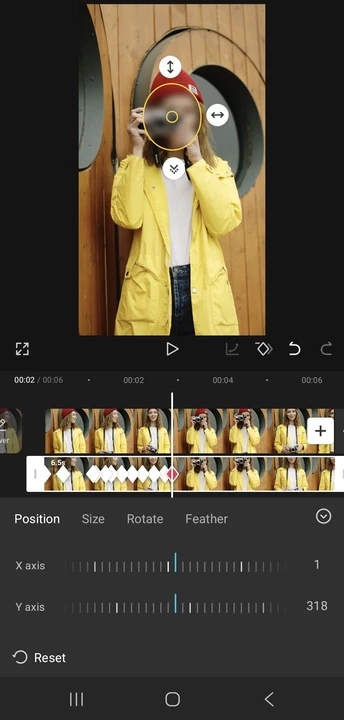
- Resize and reposition the blur using your fingers. If you want the adjustments to be more precise, tap on the Circle mask again. In the Position section, use the X axis and Y axis to adjust the position of your blur with more precision. Then, switch to other sections and make the necessary changes.
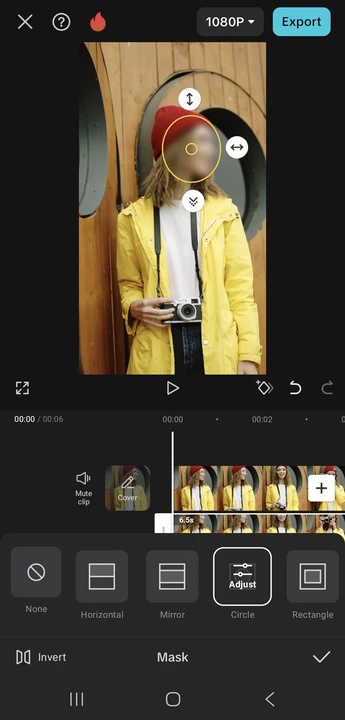
- And the face is now hidden! But if you play the video, you’ll notice that the blur stays in one place. That can be a problem if the person in the video keeps moving. Unfortunately, there’s no automatic mask tracking in CapCut. So, you’ll need to fix this issue manually.
- Make sure you’re at the beginning of both clips and the mask is positioned correctly. Tap on Mask again to enable editing.
- Tap on the small diamond icon. This will add a keyframe.
- Once you add the first keyframe, find the frame where the person moves and the position of the mask needs to be adjusted. Then, reposition the mask in the Mask menu. A new keyframe will be added automatically.
- Keep adding keyframes and manually changing the position of the blur throughout the entire clip.
- Play the video and check whether everything looks good. Tap the checkmark to apply the changes.
- Export your video.
That’s it!
The trickiest part is, of course, adding keyframes and adjusting the placement of the mask manually. If you are a total beginner, you might not get it completely right the first time, but with some practice, you’ll get the hang of it.
If you want to use the desktop version, the process is pretty much the same.
The main downside of the second method is that if there are several people in your video, you’ll need to create several masks then make the necessary adjustments to each of those masks separately. As you can imagine, this can be quite time-consuming.
Blur a Face in a Video using InShot
You might have heard of InShot as an app for image editing, but you can use it to edit videos, too. In fact, blurring faces is actually much easier in InShot than in CapCut.
So, once you download InShot from the AppStore or Google Play, follow these steps:
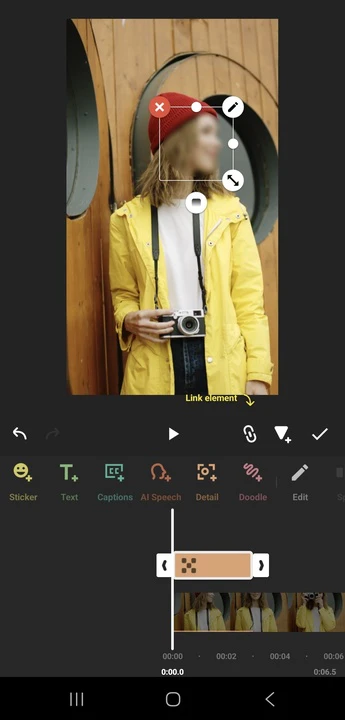
- Open the app and tap Video, then import your clip.
- Tap on the Sticker option in the toolbar.
- In the menu that opens, tap Detail.
- A part of your video is now blurred! Well, you can actually choose from several different effects. Here, you can also choose the shape of the blur.
- Drag the blur with your finger so that it covers the face.
- Adjust the size of the blur using your fingers.
- If you opt for the mosaic effect, you can use the slider on the bottom left to make the bits of the mosaic bigger or smaller. Meanwhile, you can adjust the transparency using the slider on the right. However, if you opt for the blur effect, either of the two sliders changes the intensity of the blur.
- To adjust the duration of the effect, drag the effect layer until the end of the clip.
- Make sure the blur layer is selected, then tap the Track option in the toolbar.
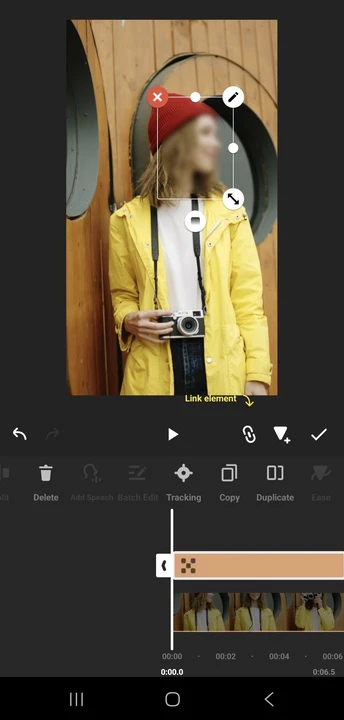
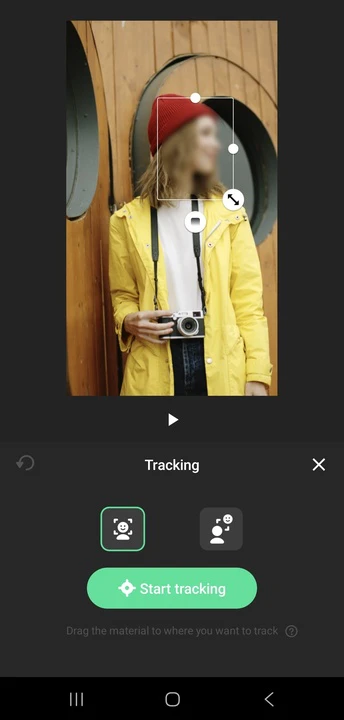
- Tap Start tracking. InShot offers auto-tracking, so there’s no need to add keyframes and adjust the position of the blurred area manually!
- Play the video and check whether everything looks right. Apply the changes by tapping the checkmark.
- Save your edited video.
All done! This method is perfect for quick edits, and the auto-tracking is accurate and seamless.
However, there’s a catch. InShot adds a watermark to video in the free version. And the only way to get rid of it is to purchase the Premium version.
Blur a Face in a Video using Adobe Premiere Pro
Adobe Premiere Pro is an advanced software that cannot be used for free. So, this method is more suitable for those who want to get better at video editing in general. If you simply need to blur a face in a couple of short clips, then go for one of the previous methods. But if you need to blur faces in videos pretty often and want professional results, this method is ideal for you.
Here’s what you need to do:
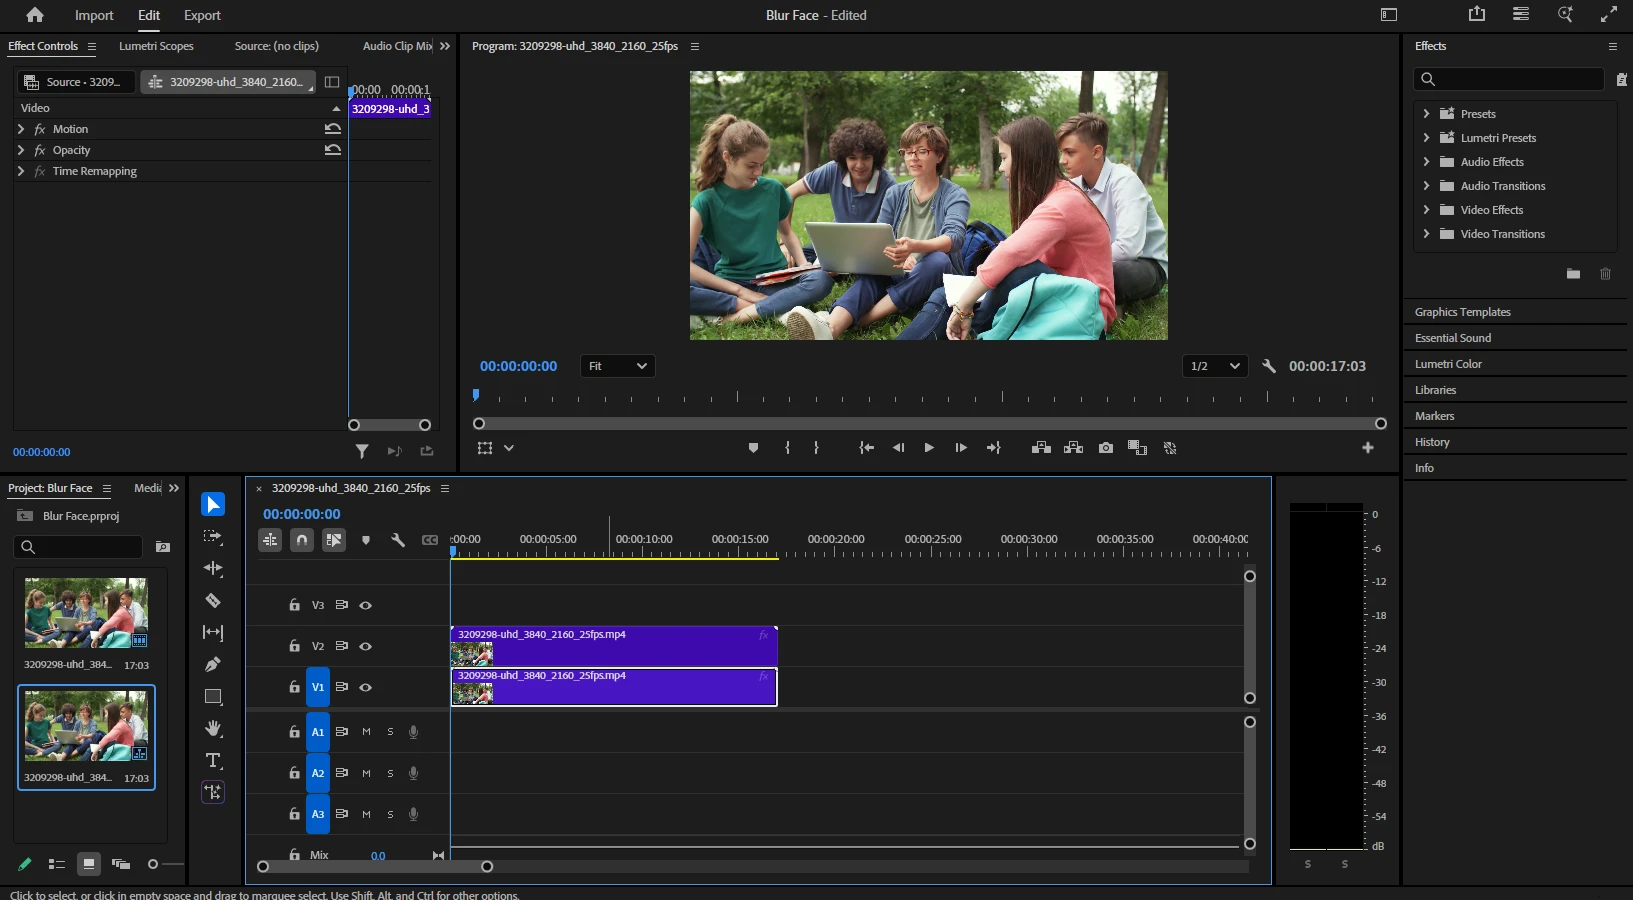
- Open Adobe Premiere Pro, create a new project, then drag the clip from the folder and drop it directly onto the timeline.
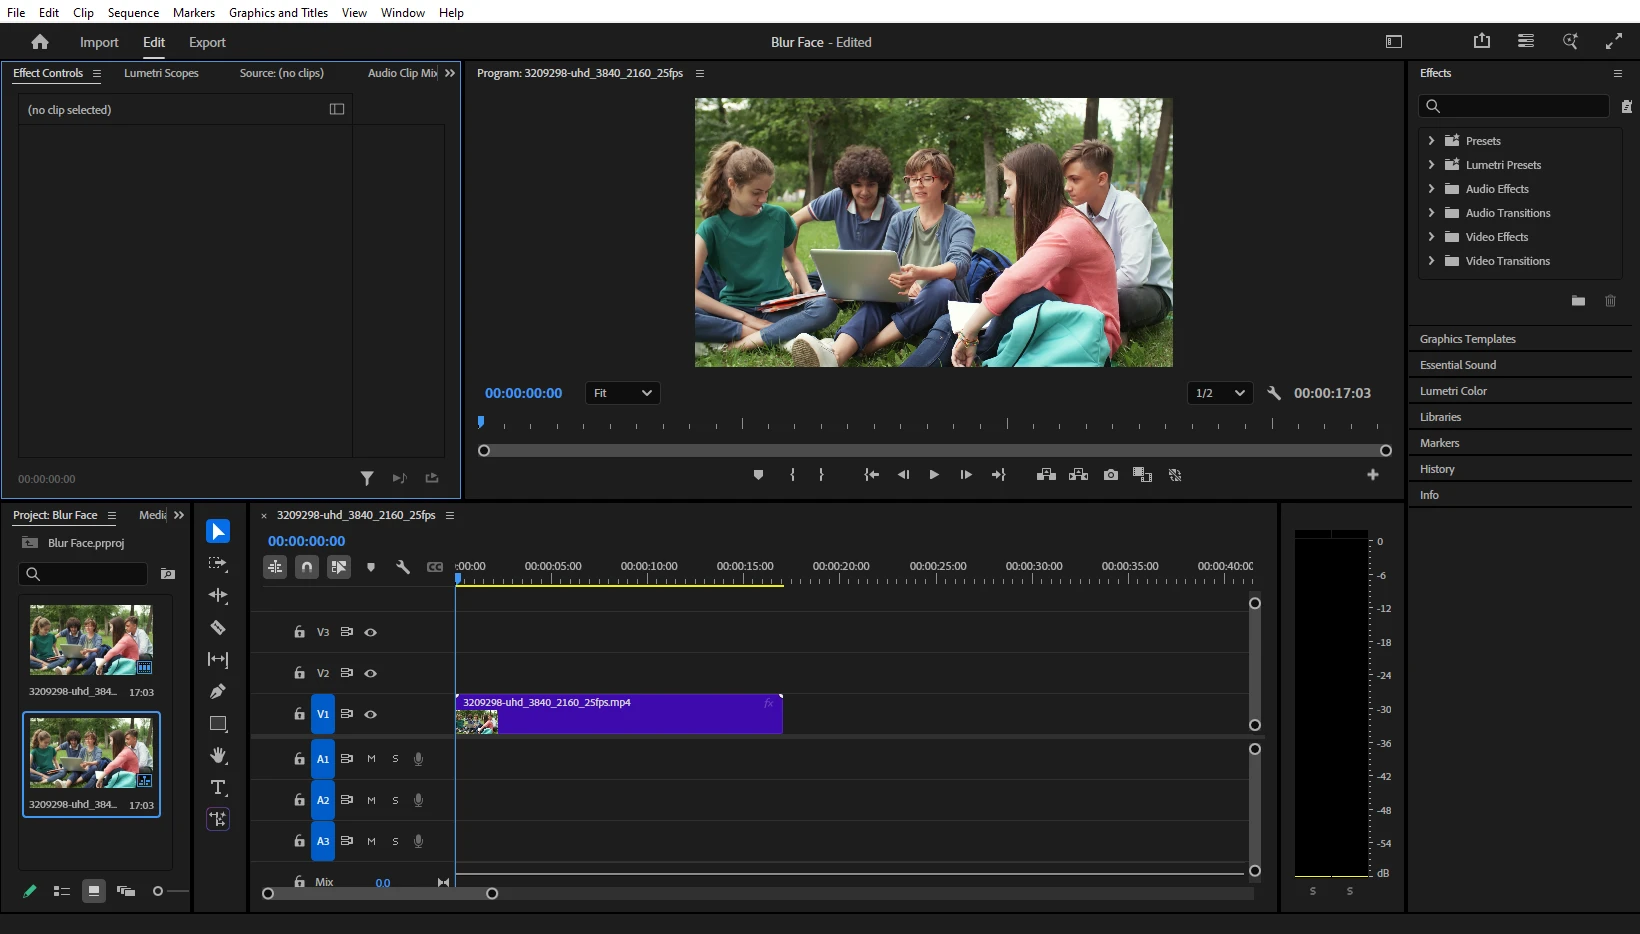
- Click on the video, then hold ALT / OPTION and drag the video to the line above it. This will duplicate the clip.
- Go to the Effects section and search for Gaussian Blur.
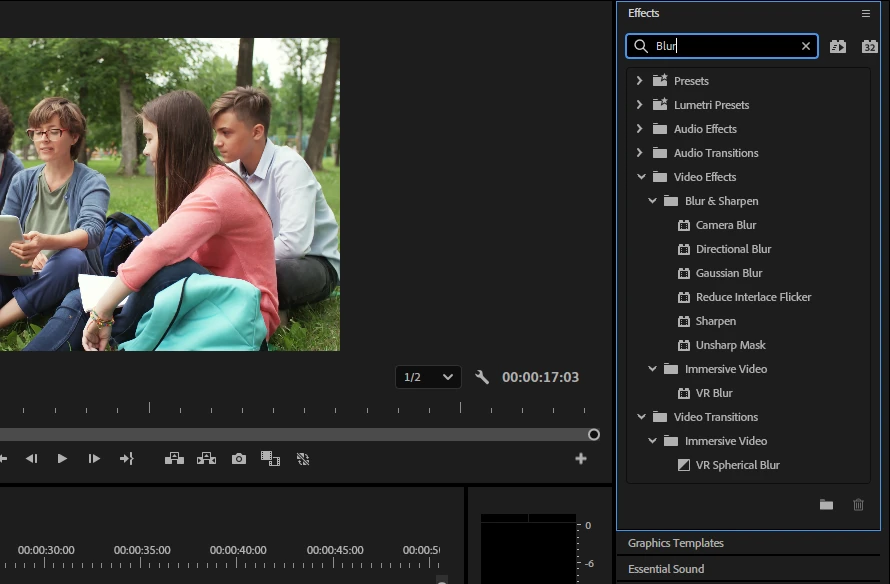
- Drag and drop the effect onto the duplicated video in the timeline.
- The Gaussian Blur section will appear in the Effect Controls. Increase the Blurriness to 50% or more.
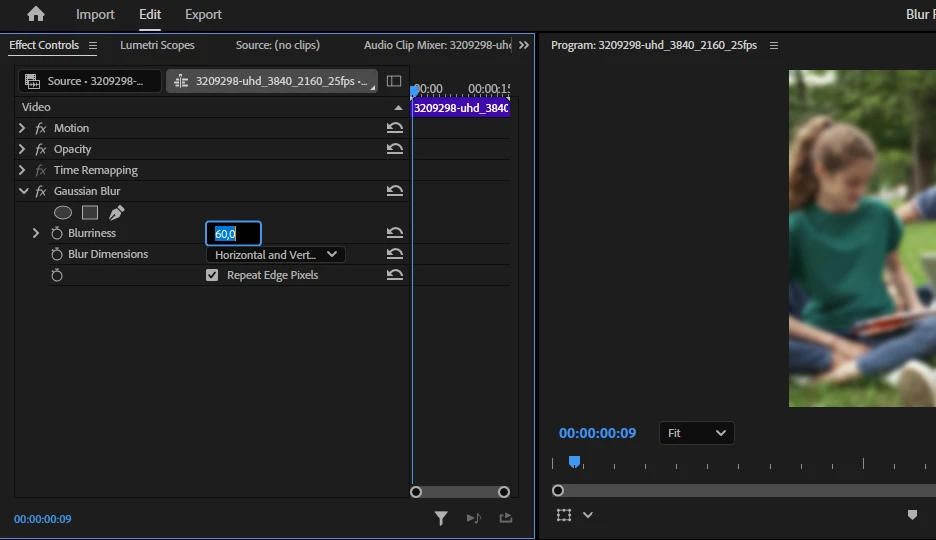
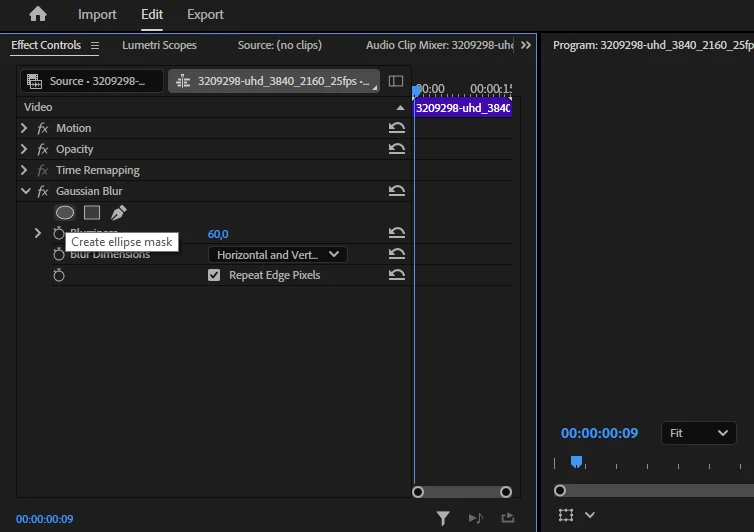
- In the Effect Controls, you’ll see mask options under the Gaussian Blur. Select Ellipse Mask or Four-point polygon Mask. If you want to create a custom mask, click on the Pen icon. Then, you’ll need to draw the custom mask manually. It might be tricky, so if you are a beginner, it’s better to stick to the ellipse or rectangle.
- Adjust the size and the position of the mask using the cursor.
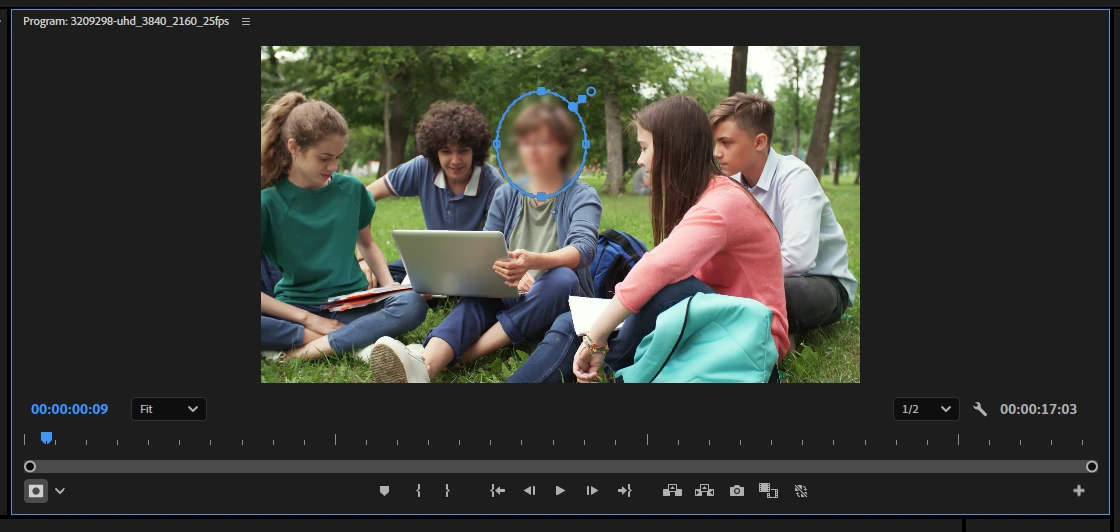
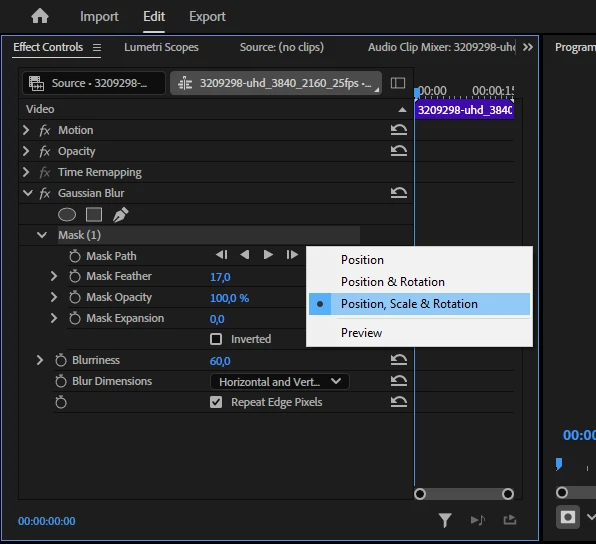
- If you want your mask to have a soft edge, you can set Mask Feather to around 10-30%.
- Similarly to CapCut, the blurred mask will stay in the same place unless you apply auto-tracking. But first, it’s a good idea to click on the Wrench icon and make sure that the Position, Scale & Rotation option is selected – this will produce the best tracking results.
- Go to the beginning of the video and make sure the mask is positioned correctly.
- In the Mask Path, click the Track Selected Mask Forward button and wait for the tracking to complete.
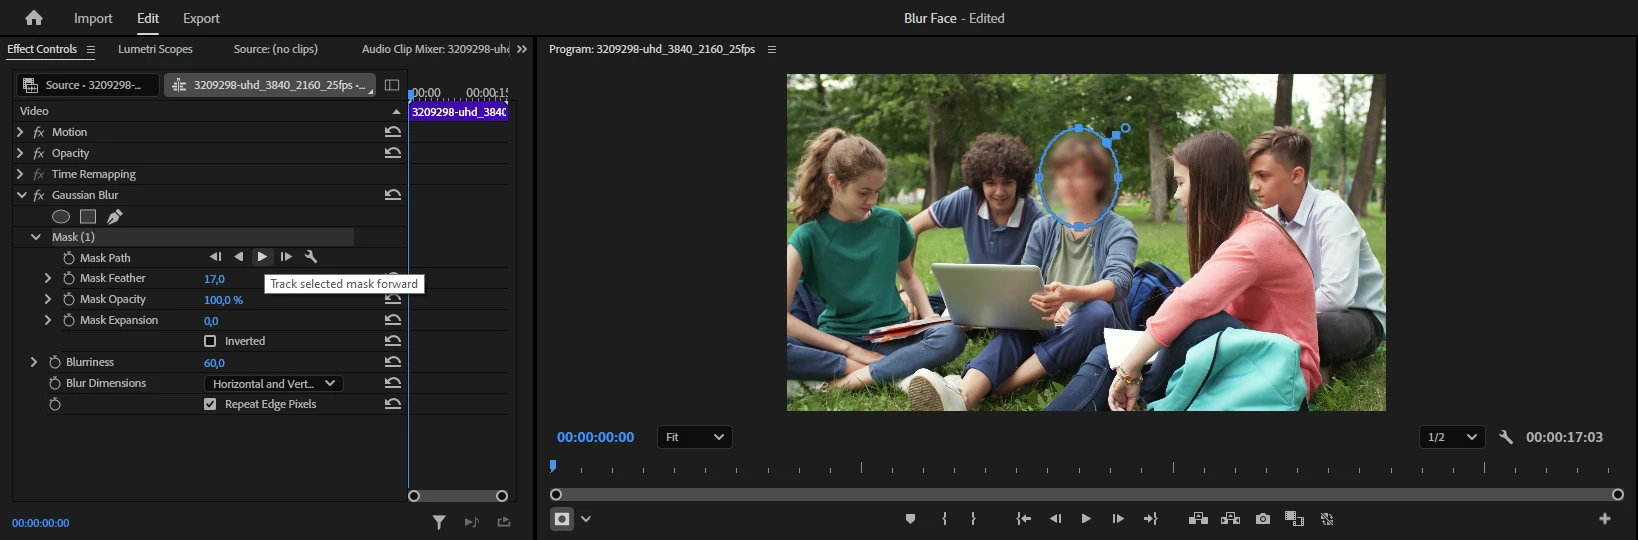
- Play the video to check if everything looks the way you want it to.
- In the Mask Path, you’ll see the automatically generated key frames. If you need to make some finetuning to the mask tracking, click on the necessary key frame, then reposition the mask.

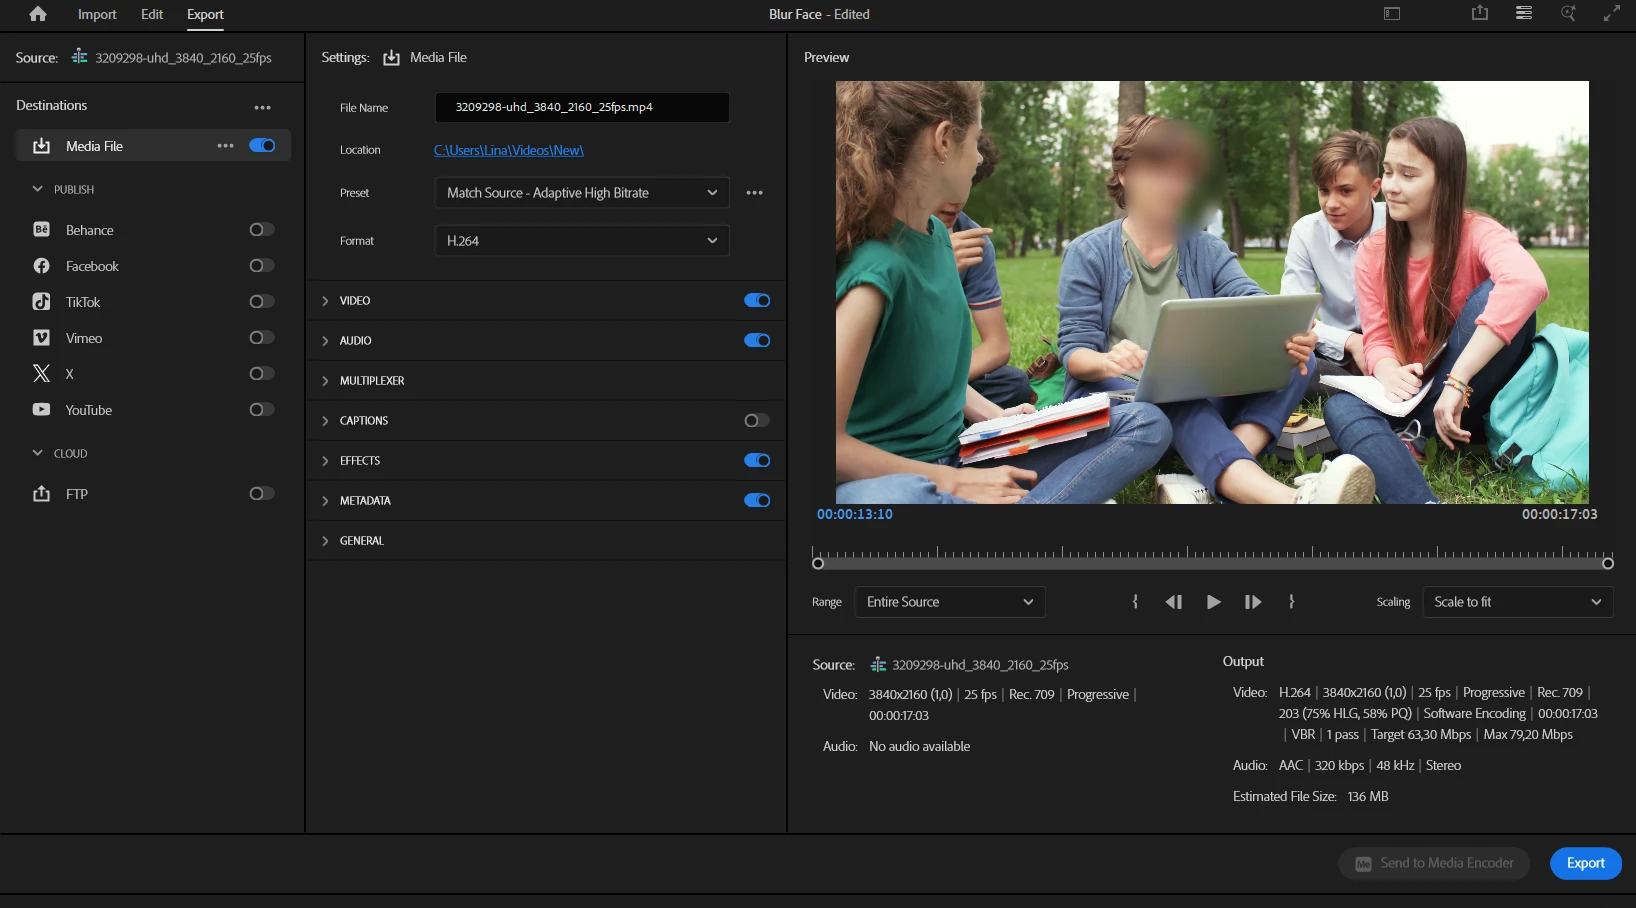
- When you’re ready to save your video, go to File > Export > Media. Make the necessary adjustments in the settings and export your video.
That’s it!
Adobe Premiere Pro does require a paid subscription and has a steeper learning curve for beginners, but with it, you’ll be able to get professional results thanks to precise auto-motion tracking.
Conclusion
Blurring a face might seem complicated, but as you’ve seen, it’s a skill anyone can learn. If you just need a quick fix, YouTube Studio, InShot, or CapCut would be perfect for the job, even if you are a total beginner. But if you’re working on a complex project, an advanced editor like Adobe Premiere Pro would be a better choice. It’ll give you more control and flexibility as well as help you produce professional-looking videos.
Try out the methods from our guide and choose the one that matches your needs, skill level, and budget.