
How to Add a Watermark in PowerPoint
by ![]() Lina Thorne • Updated · Posted in Watermarking Tips
Lina Thorne • Updated · Posted in Watermarking Tips
Adding a watermark in PowerPoint usually means placing text such as “Draft” or “Confidential,” a company logo, or another image in the background of your slides.
It is important to note that you can put a watermark only in the desktop version of the app with a paid monthly or annual Microsoft 365 subscription. You will not find this feature in the web version or in the free trial version.
Although the exact steps and tools used to add a watermark in PowerPoint may vary depending on the type of watermark, in all cases you can:
- put a watermark in all slides in your presentation,
- insert a watermark in one slide only,
- insert a watermark in selected slides,
- make the watermark semi-transparent,
- place the watermark behind the text.
Below, we explain these options in more detail.
How to Add a Text Watermark in PowerPoint
Let’s start with a text watermark. In PowerPoint, this is usually the easiest way to mark a presentation with Draft, Confidential, a company name, or another label. If you want the watermark to appear on every slide, the best way to add it is in Slide Master.
How to Insert a Text Watermark in PowerPoint
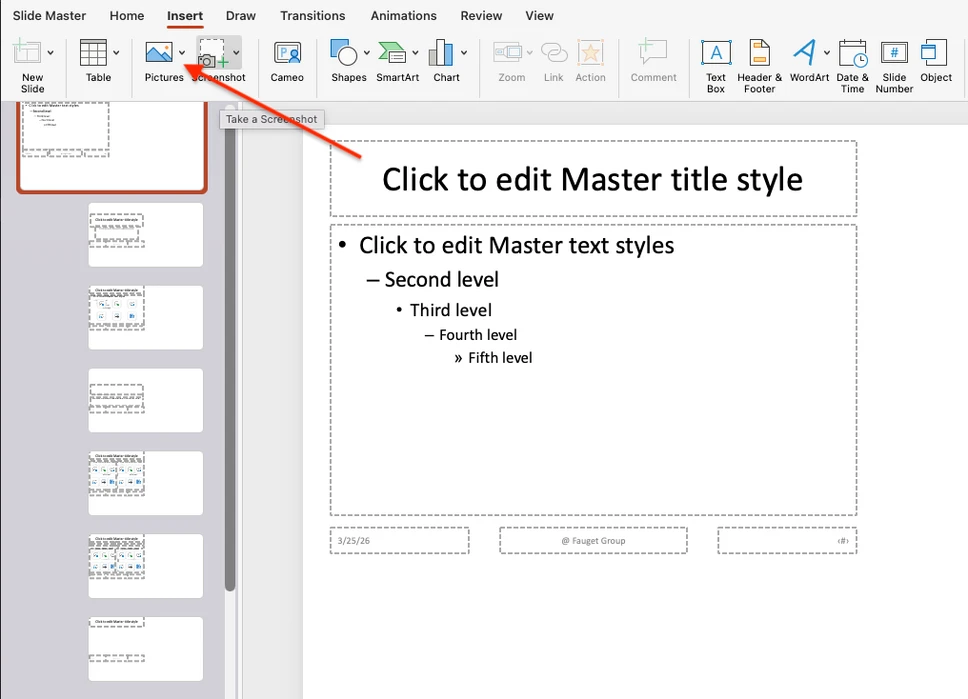
- Open your presentation and go to View > Slide Master.
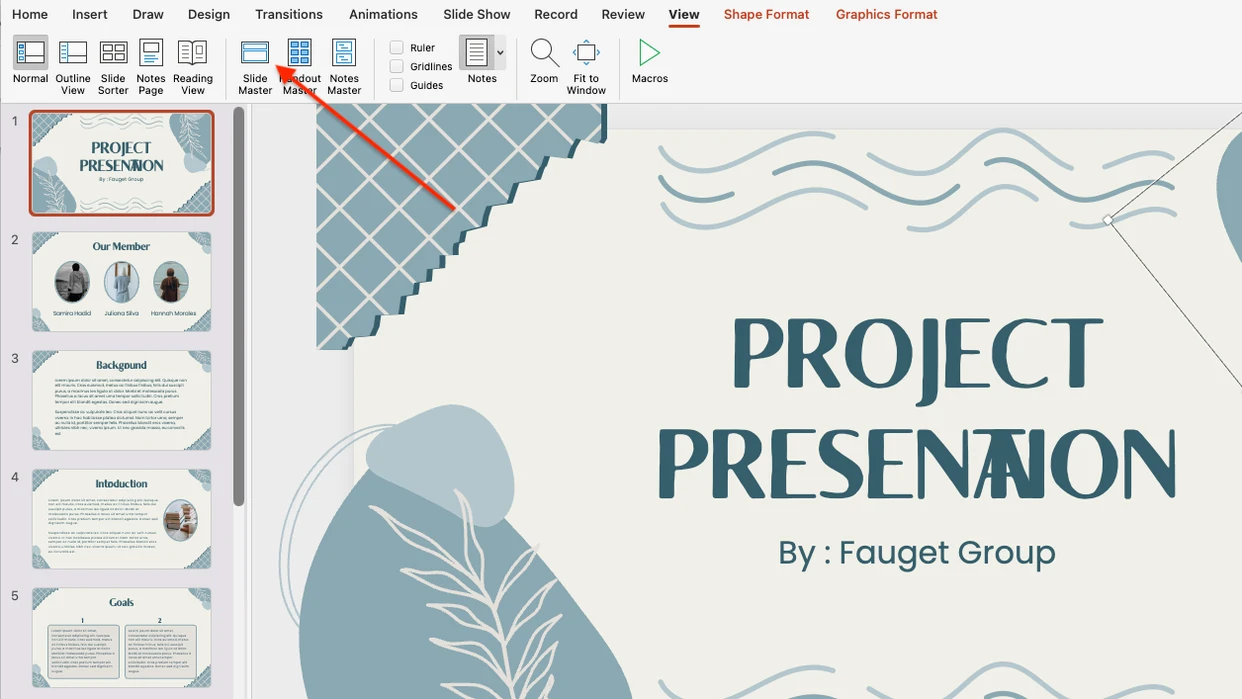
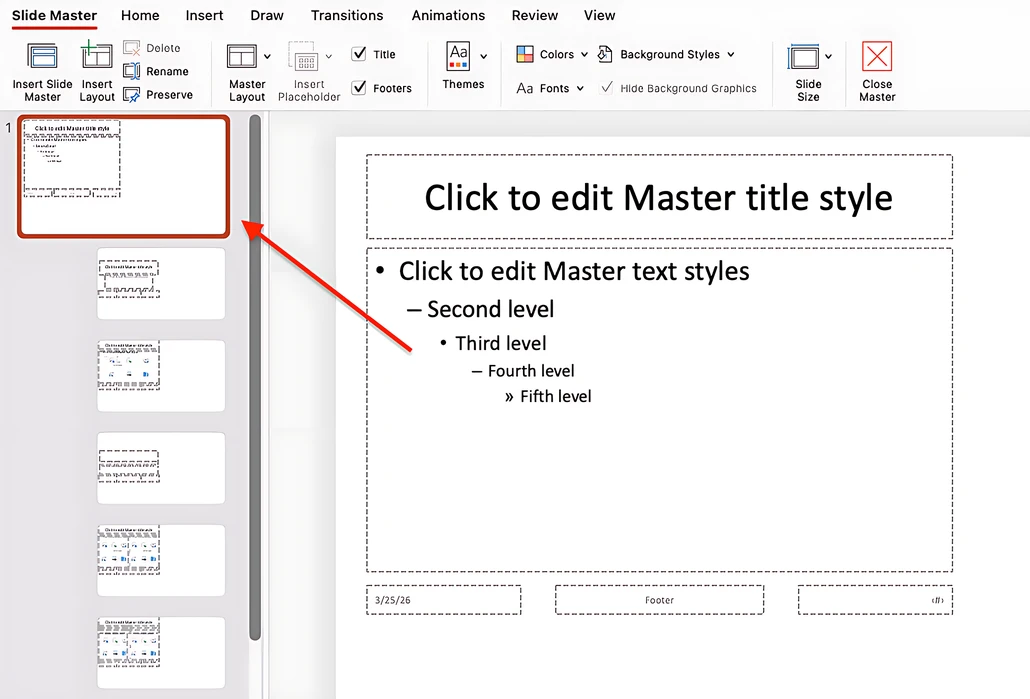
- In the thumbnail pane on the left, scroll to the very top and select the very first slide. This is important if you want the watermark to appear on every slide, including any new slides you create later.
- Go to Insert > Text Box.
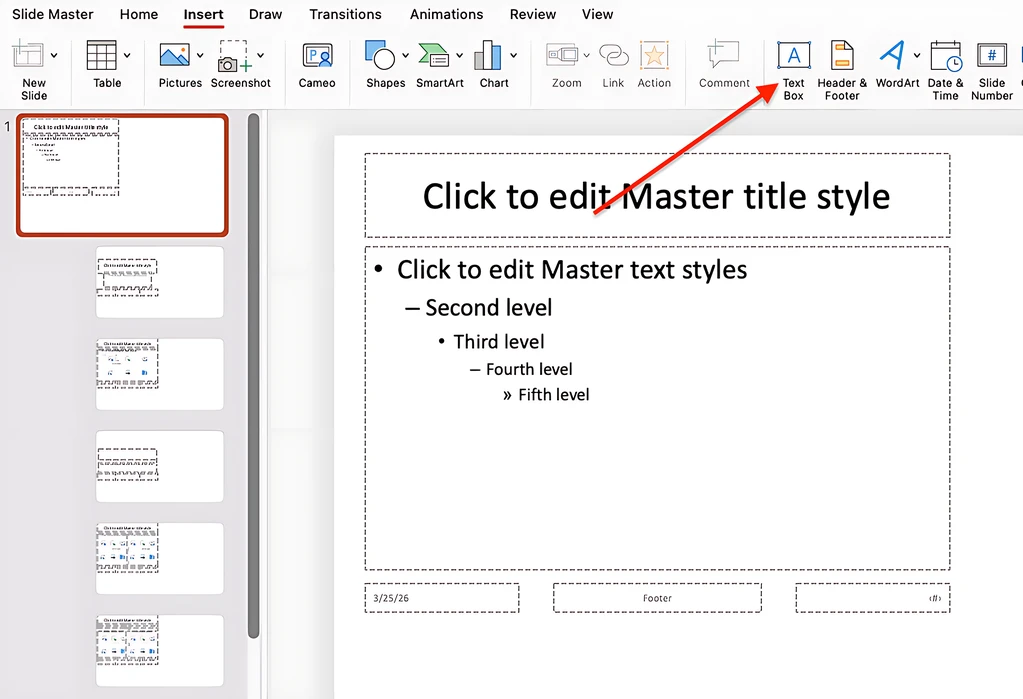
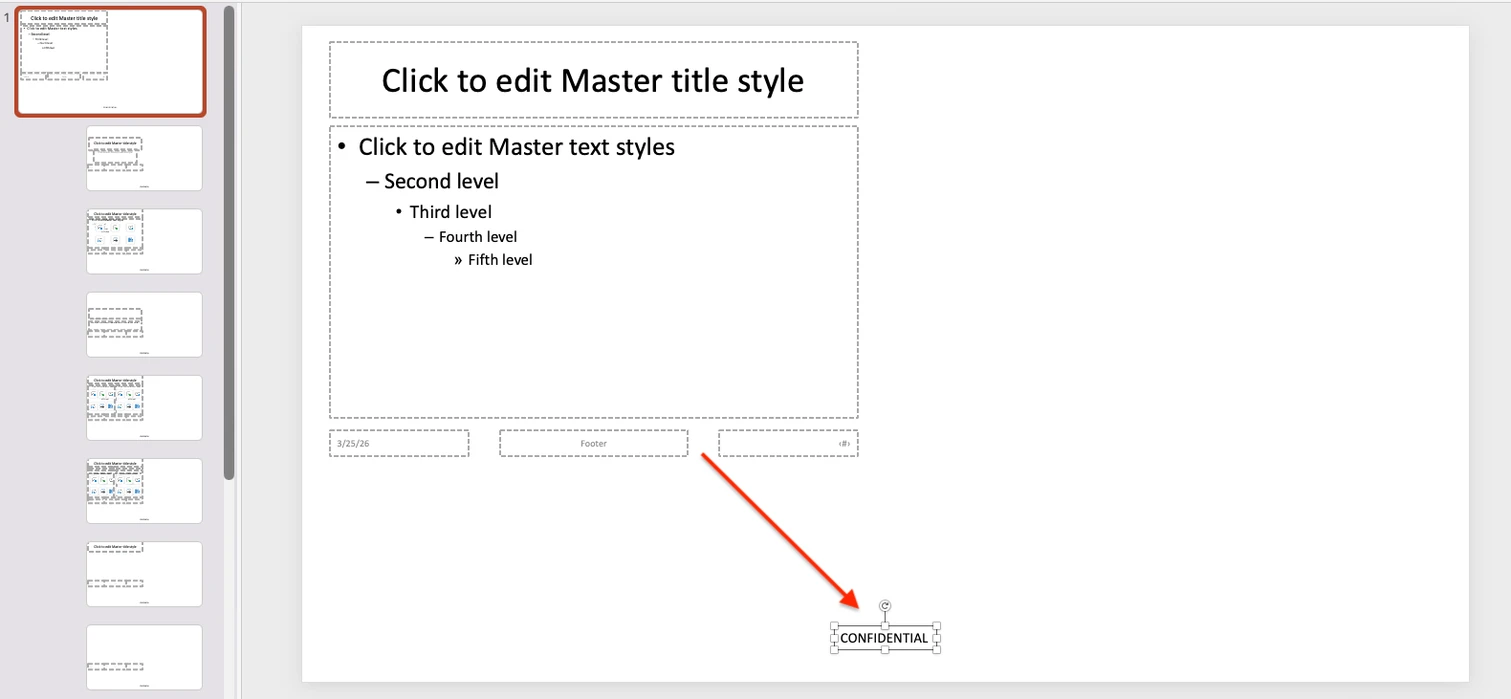
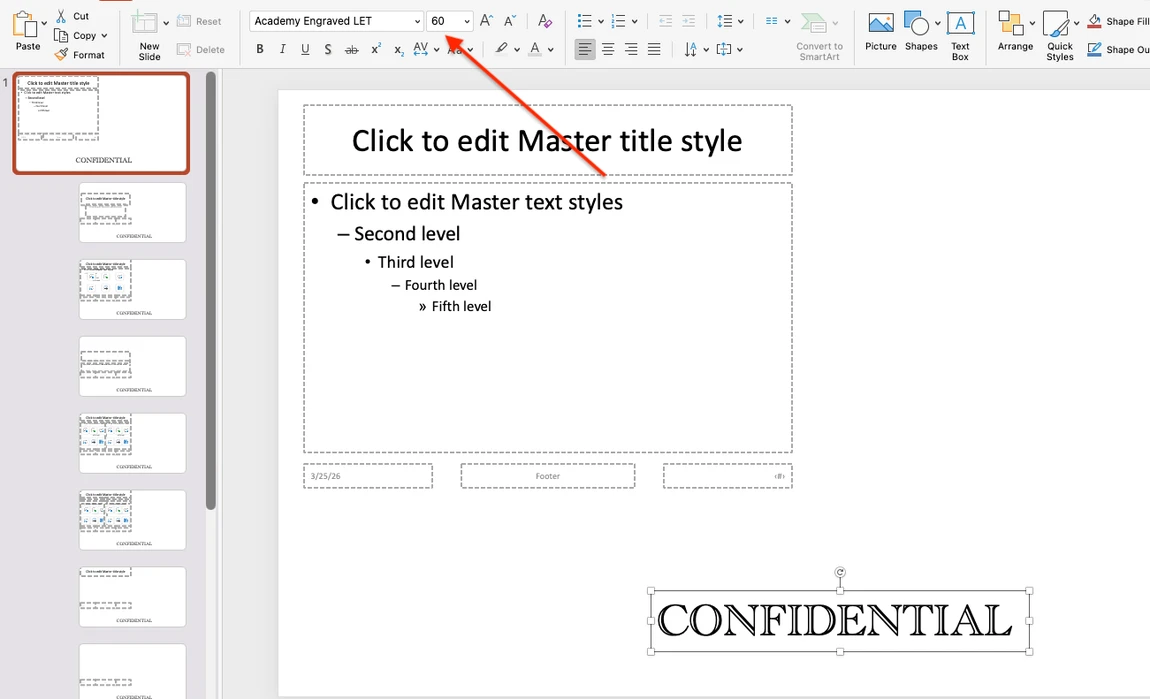
- Draw a text box on the slide and type the text you want to use as your watermark.
- To change the font type and its size, you need to switch from Shape Format to Home. Then use the font and font size drop-down menus to choose the options you want.
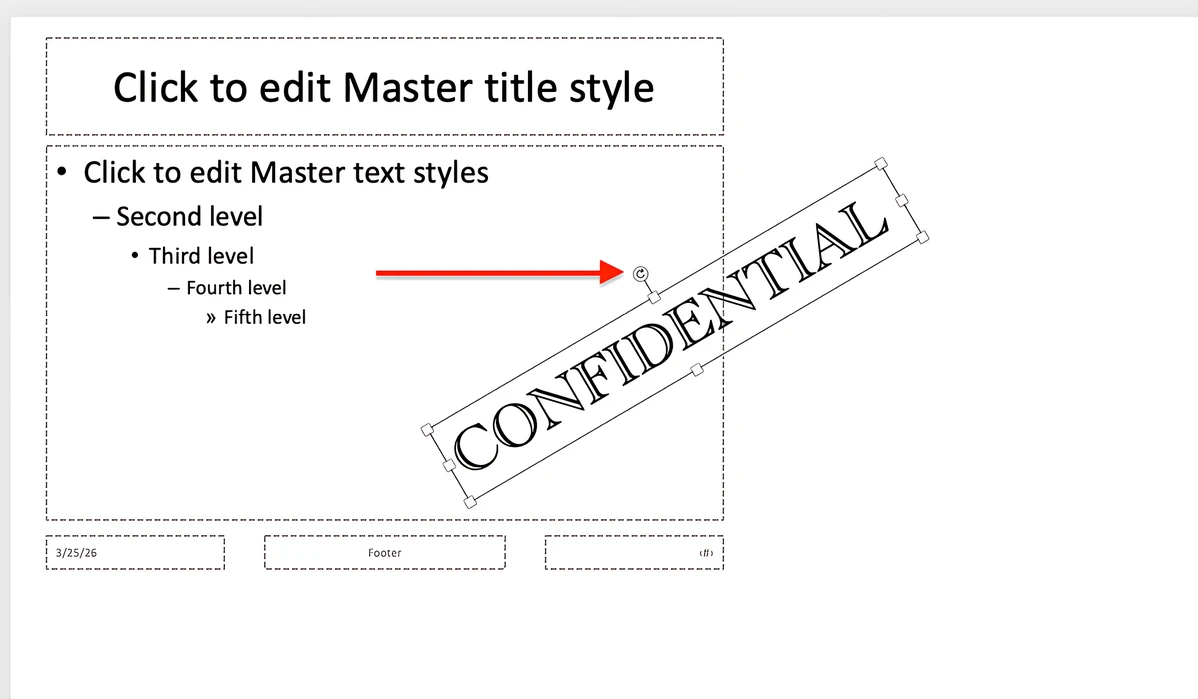
- Reposition the text box if needed. To do this, hover over its edge until the cursor turns into a four-headed arrow, then drag it into place.
- Use the rotation handle at the top of the text box to change the angle of the watermark.
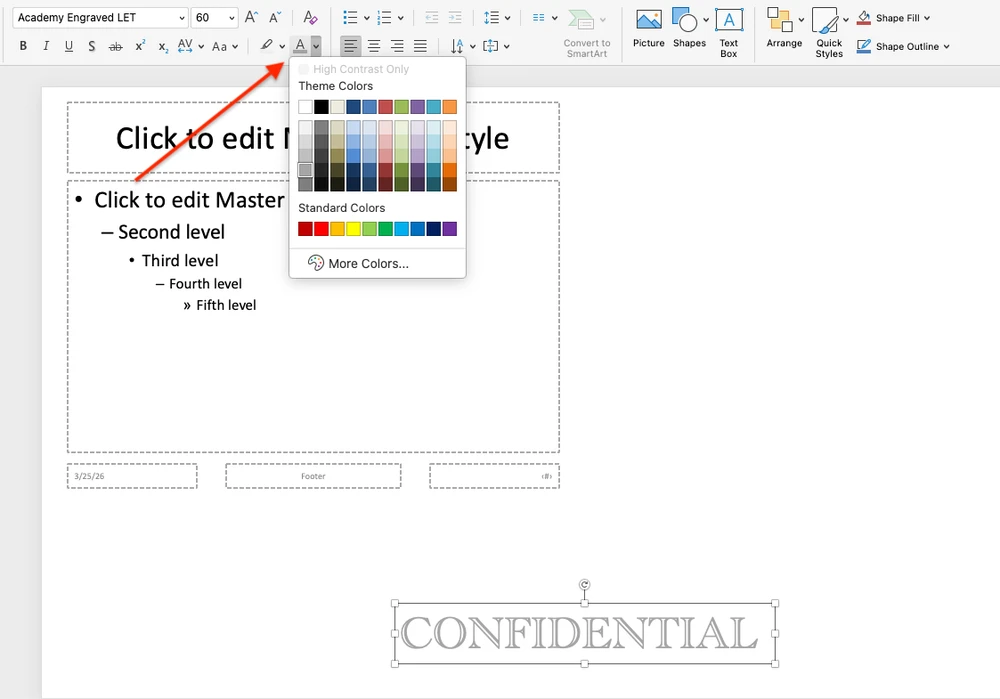
- If necessary, adjust the text color. A light shade usually works better if the slide background is white or otherwise light-colored.
How to Move the Watermark Behind Slide Content
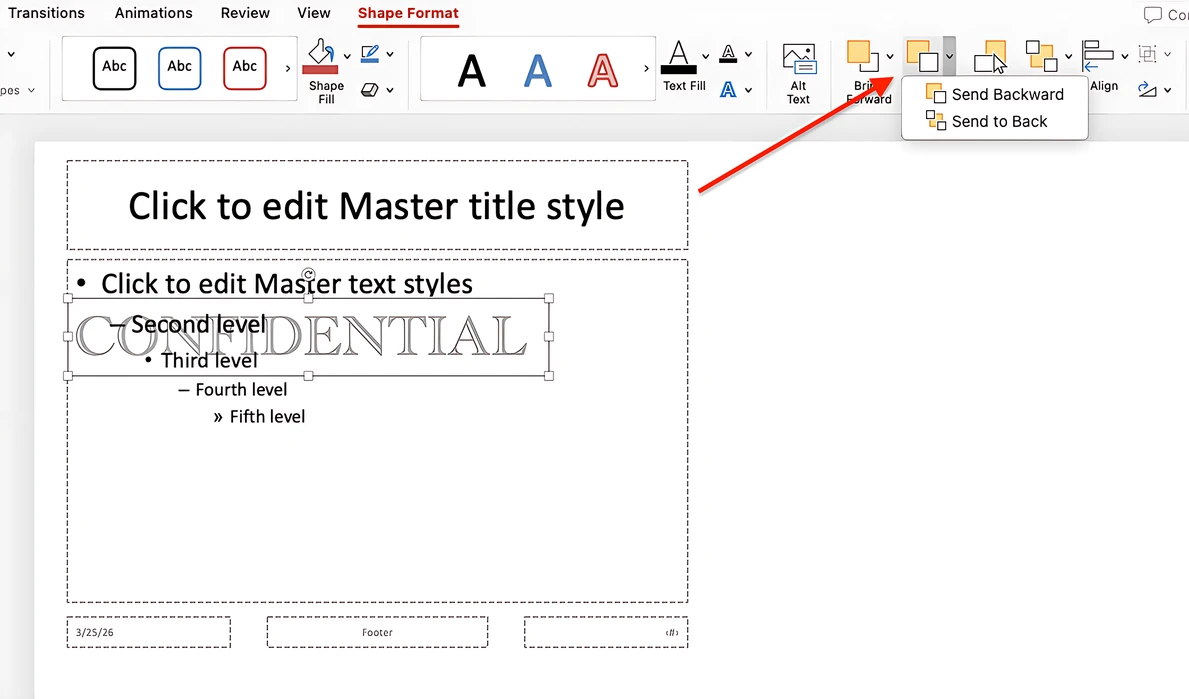
Once you place the text on the slide, it will initially sit on top of the slide content. To make it behave like a real watermark, you need to move it into the background.
- Select the text box.
- Open Shape Format in the ribbon.
- Go to Send Backward > Send to Back.
 Now the watermark in your PowerPoint presentation will sit behind the content instead of overlapping it.
How to Apply the Watermark to the Whole Presentation
When the watermark looks the way you want, go to Slide Master > Close Master.
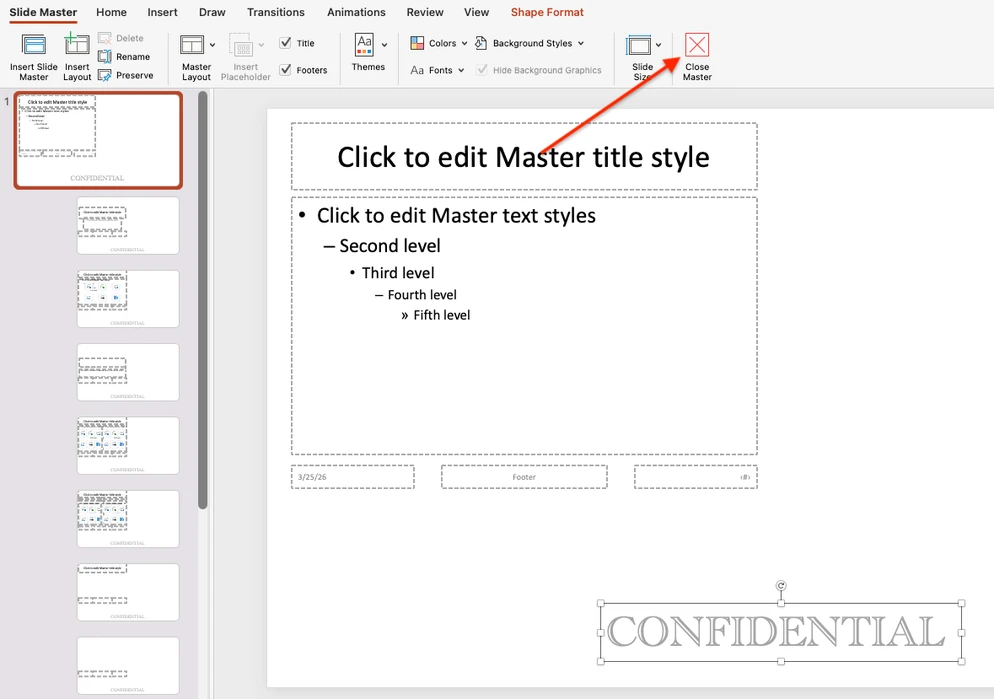
After that, the watermark will appear on every slide in the presentation. Any new slides you add will also contain it.
The same method can be used to create a Draft watermark in PowerPoint. Simply type DRAFT into the text box, then adjust the font size, angle, and color to make it look more like a background mark than regular slide text. Although the “DRAFT” label is commonly used in PowerPoint presentations, the app does not provide built-in templates for this type of watermark, so you need to create it from scratch each time.
If you are not satisfied with the result and want to remove the watermark, click the watermark text box so that the border handles appear, then press Delete on your keyboard.
There is another way to add a text watermark to all slides in a PowerPoint presentation: by using the Header & Footer tool. However, this method does not always work reliably. In addition, after adding the text, you may need to adjust its size and position manually on each slide, which is not very convenient.
To try this method, follow these steps:
- Select Insert > Header & Footer.
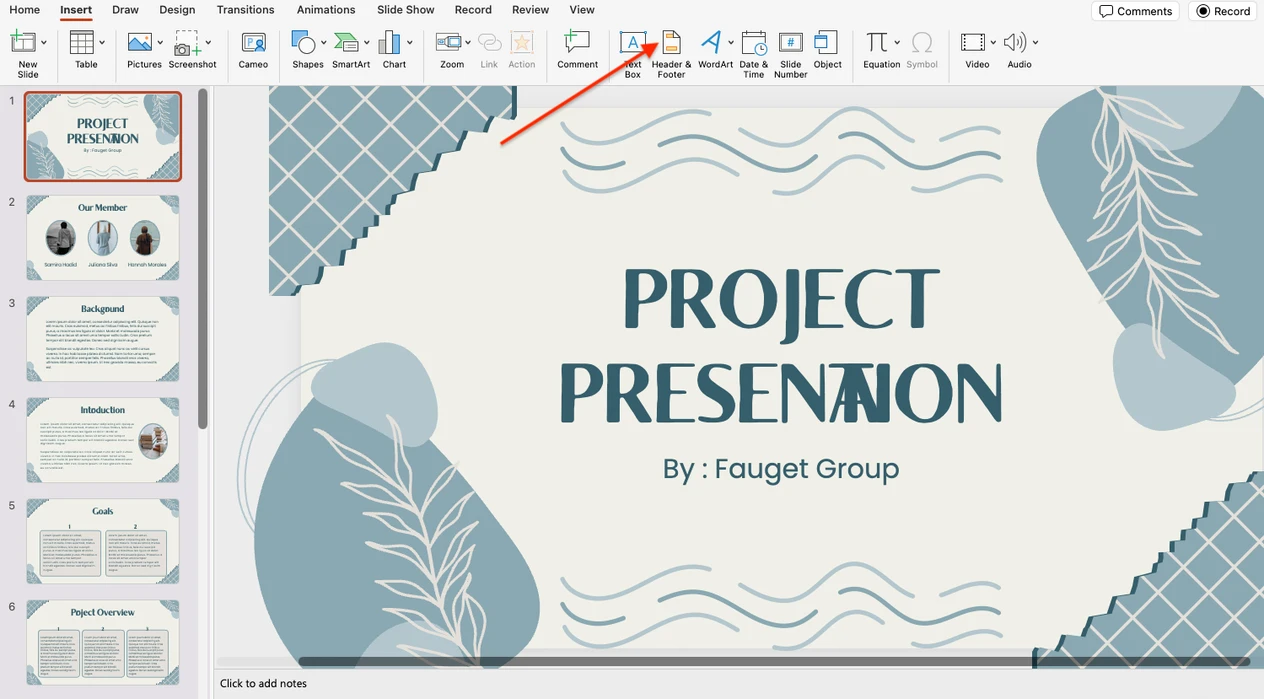
- Go to the Slide tab, check the Footer box, and enter your text.
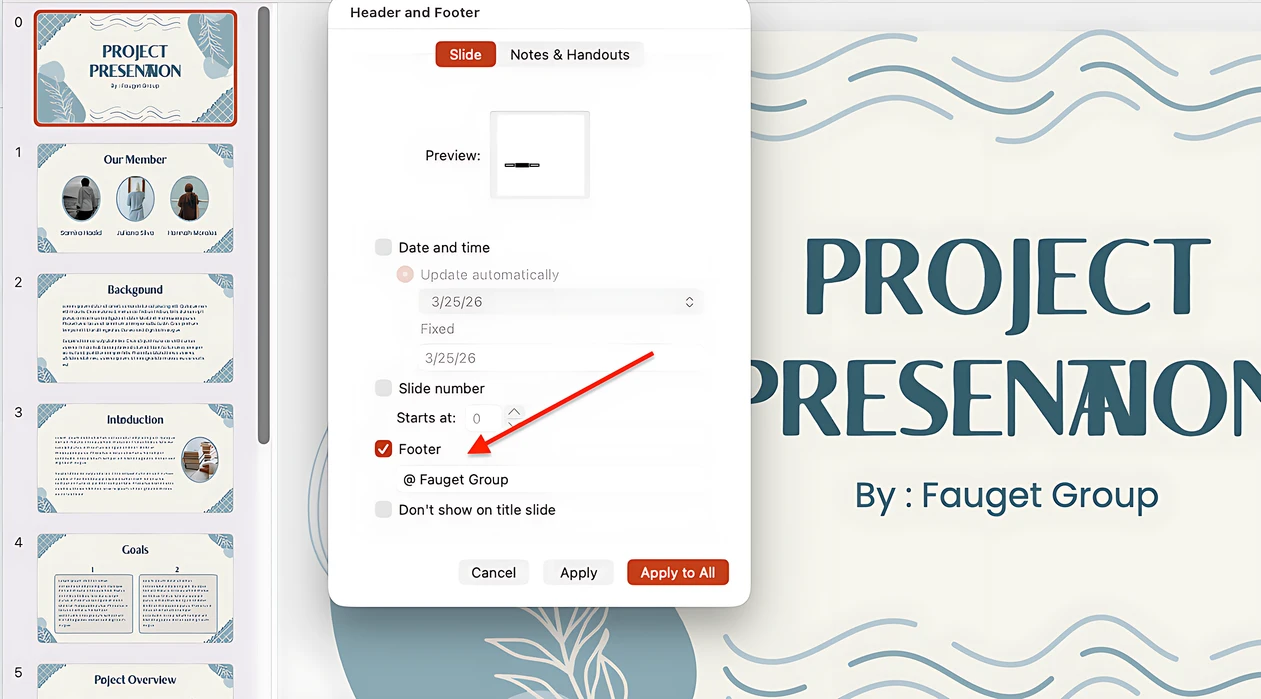
- Click Apply to All. The text watermark will appear on all the slides in your presentation.
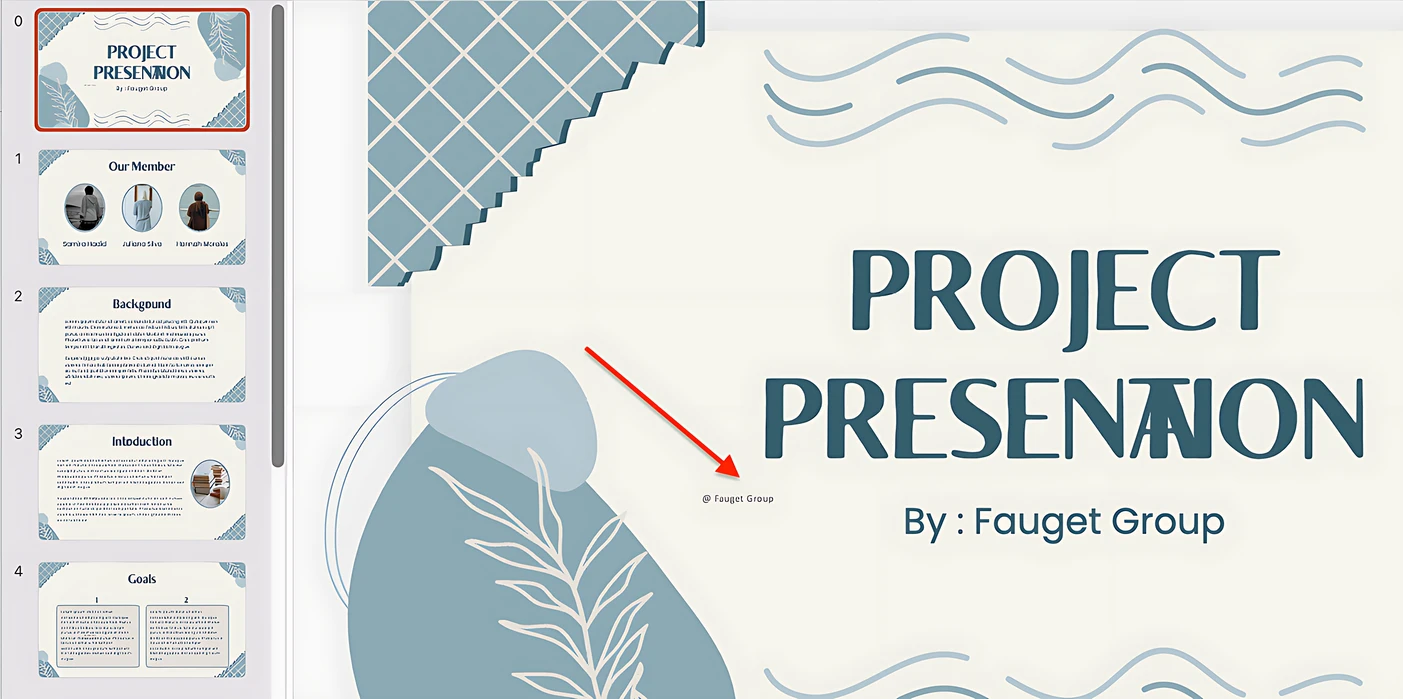
- Now you can move the watermark and adjust its font and size on each slide using the Home tab.

At the end, you can either save the presentation with your changes or remove this type of watermark by opening the Header & Footer tool again and deleting the text you entered.
How to Add a Logo Watermark in PowerPoint
If you want to place a brand logo as a watermark in the background of your slides, you can do that in Slide Master, too.
How to Insert a Logo as a Watermark
- Open your presentation and go to View > Slide Master.
- In the thumbnail pane on the left, select the very first slide.
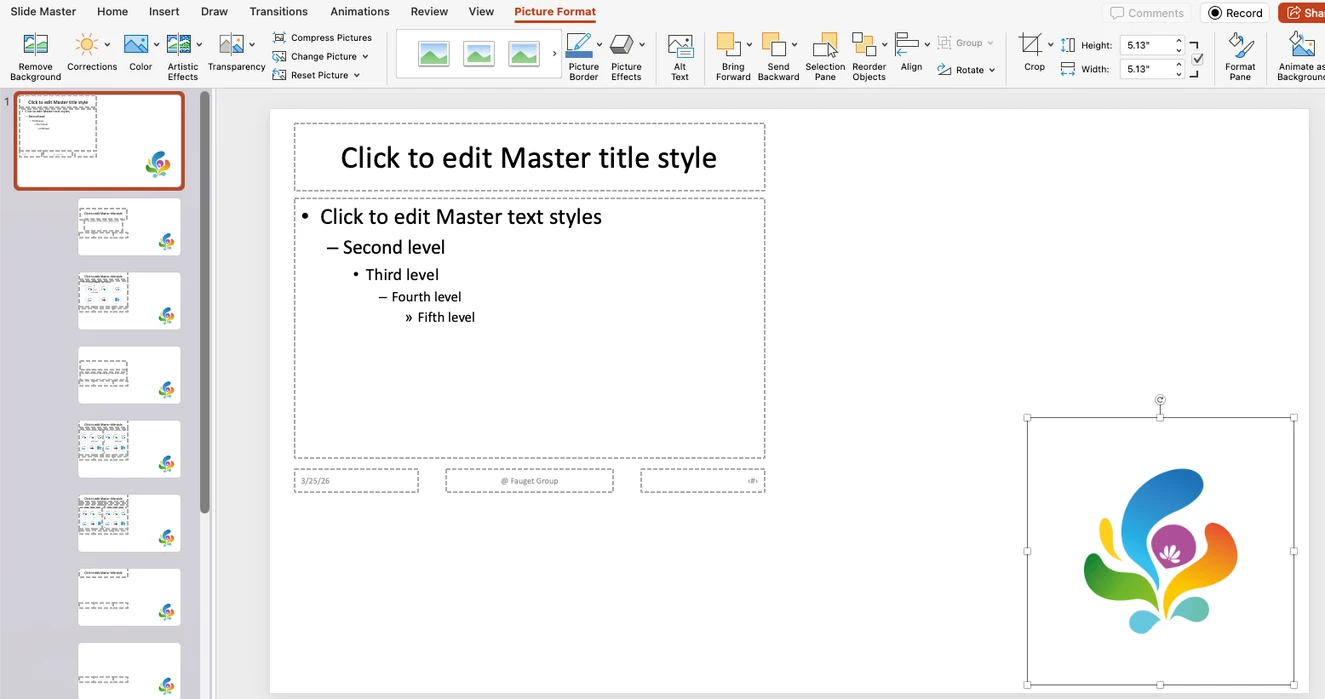
- Go to Insert > Pictures and choose where you want to upload the logo file from.
- To resize the image, select it and drag one of the corner handles. You can also move it to any position on the slide.
- If needed, place the watermark behind the text by selecting the image and clicking Send Backward.
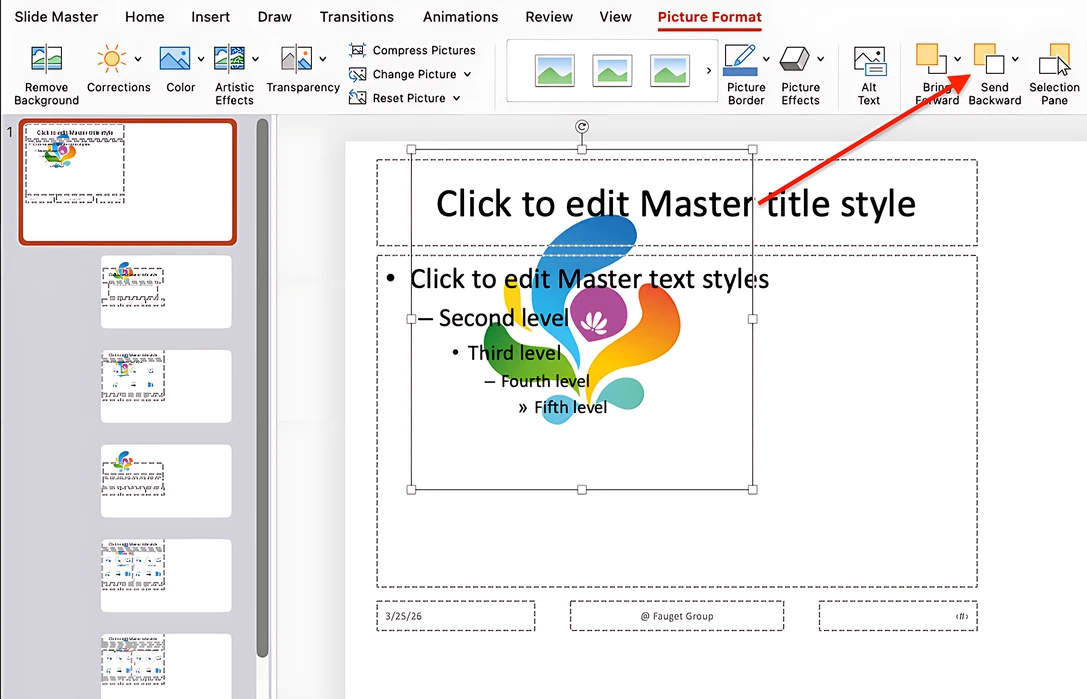
- Click Close Master View on the Slide Master tab to apply the watermark to all slides.
How to Make the Watermark Transparent in PowerPoint
Whether you use text or a logo as a watermark in PowerPoint, it is always best to increase its transparency so that it does not distract too much from the content of the presentation.
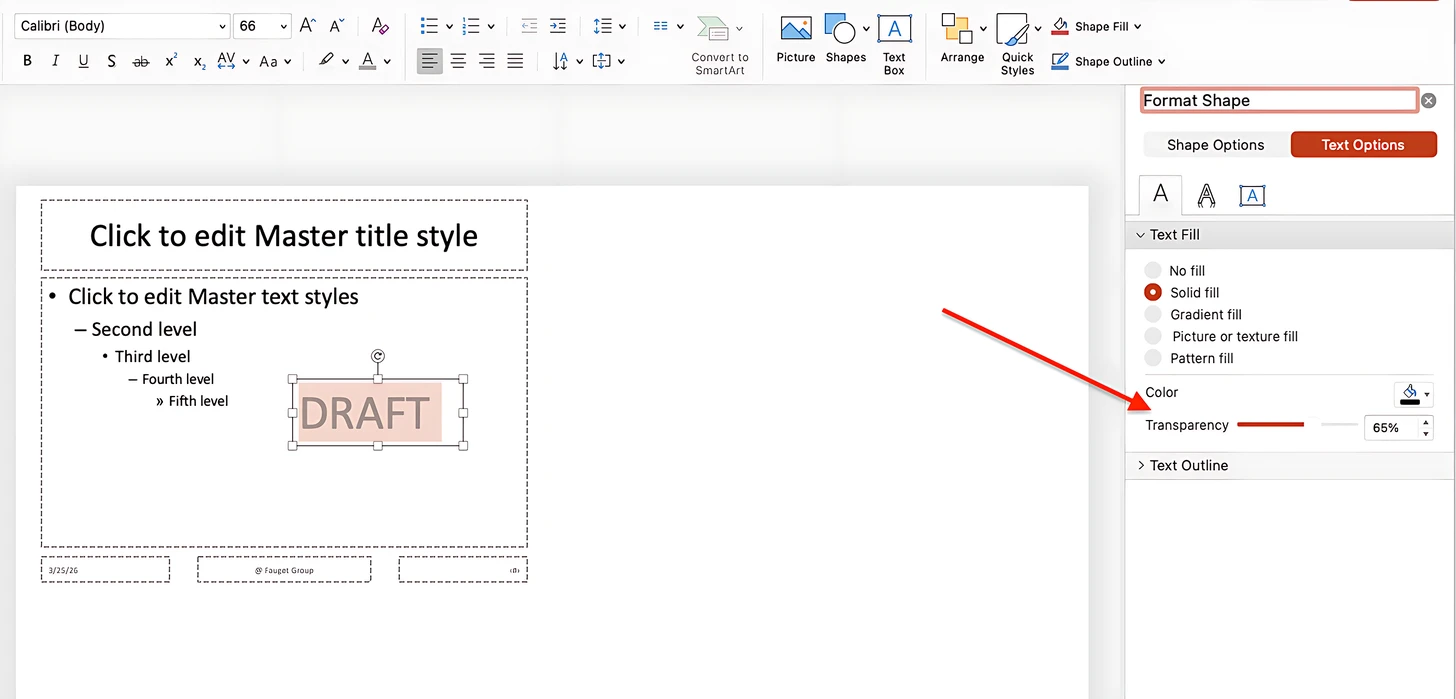
If you’ve added a DRAFT or CONFIDENTIAL watermark to your slides, do the following:
- Select the text inside the watermark.
- Right-click and choose Format Text Effects.
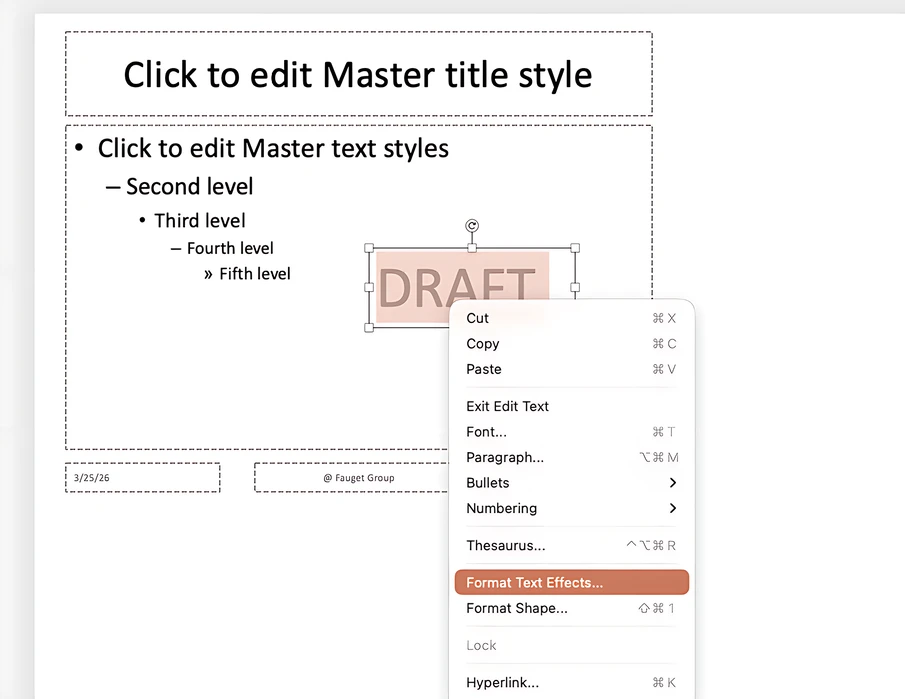
- The text formatting pane will open on the right.
- Go to Text Options > Text Fill > Transparency and adjust the transparency level.
If your watermark in PowerPoint is a logo or image, follow these steps:
- Select the watermark and choose Picture Format from the menu.
- Find the Transparency option on the left.
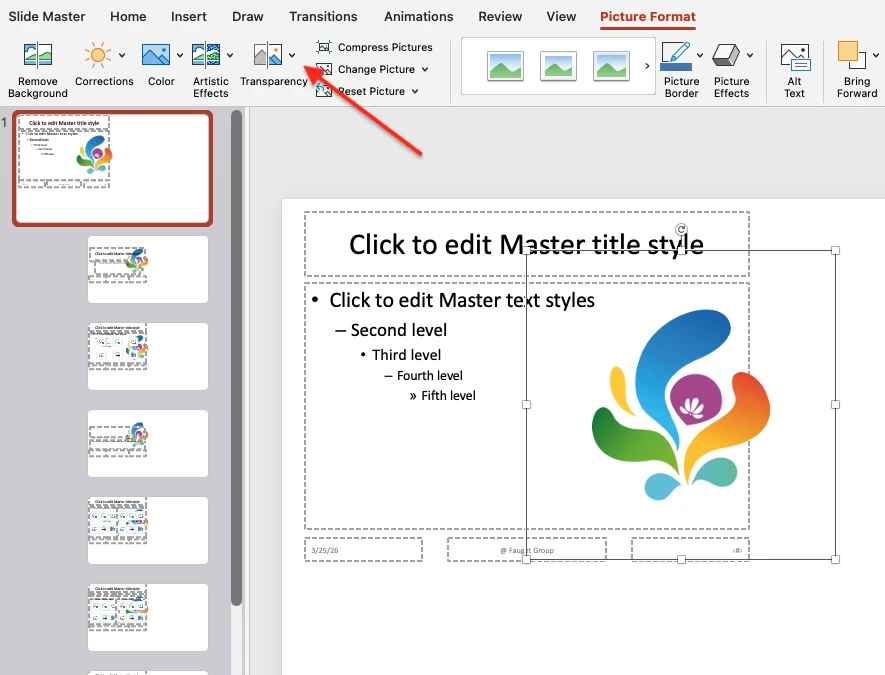
- Choose one of the preset options or adjust the transparency manually by clicking Picture Transparency Options.

How to Add a Watermark to One Slide in PowerPoint
A watermark does not have to appear on every slide. In PowerPoint, it is also possible to apply it only to selected slide types in Slide Master.
Here’s how to do it:
- In Slide Master, right-click on the watermark and copy it.
- Remove the watermark from the very first slide by pressing Delete.
- In the thumbnail pane, select the slide layout where you want the watermark to appear.
- Paste the copied watermark into that layout.
- Repeat this on other layouts if needed.
- When you are done, exit Slide Master.
Now only selected slide types will include the watermark, while the rest of the PowerPoint presentation will remain unchanged. With this approach, you can adjust the watermark’s size, position, and appearance on each slide individually.
The Best Way to Add Watermark to PowerPoint Presentation
Although Microsoft PowerPoint offers several built-in tools for adding different types of watermarks to one or more slides, the methods described above have a number of drawbacks.
Here are just a few of them:
- The interface can be challenging for less experienced users.
- Watermarks are often edited in preview mode rather than in the context of the actual presentation, so the final result may not match your expectations.
- There is no built-in option for repeating watermarks for better protection.
- There are no built-in watermark templates.
- Anyone can easily open your presentation, edit the watermark, or remove it altogether.
If you already have a finished presentation and all you need to do is insert a watermark, there is little point in doing it in PowerPoint. Instead, you can convert your presentation to a PDF and upload it to Watermarkly’s Add Watermark to PDF tool. The interface is much simpler and more intuitive, while still allowing you to add text, a logo, or an image as a watermark, apply it to all or selected pages, make it transparent, or place it behind the text.
What’s more, you get additional benefits such as reusable watermark templates, tiled watermarks, and live editing directly on the pages of the presentation itself.
The main advantages of this tool are:
- It is free, works online, and does not require installation or registration.
- It allows you to create a non-editable watermark that is harder to remove.
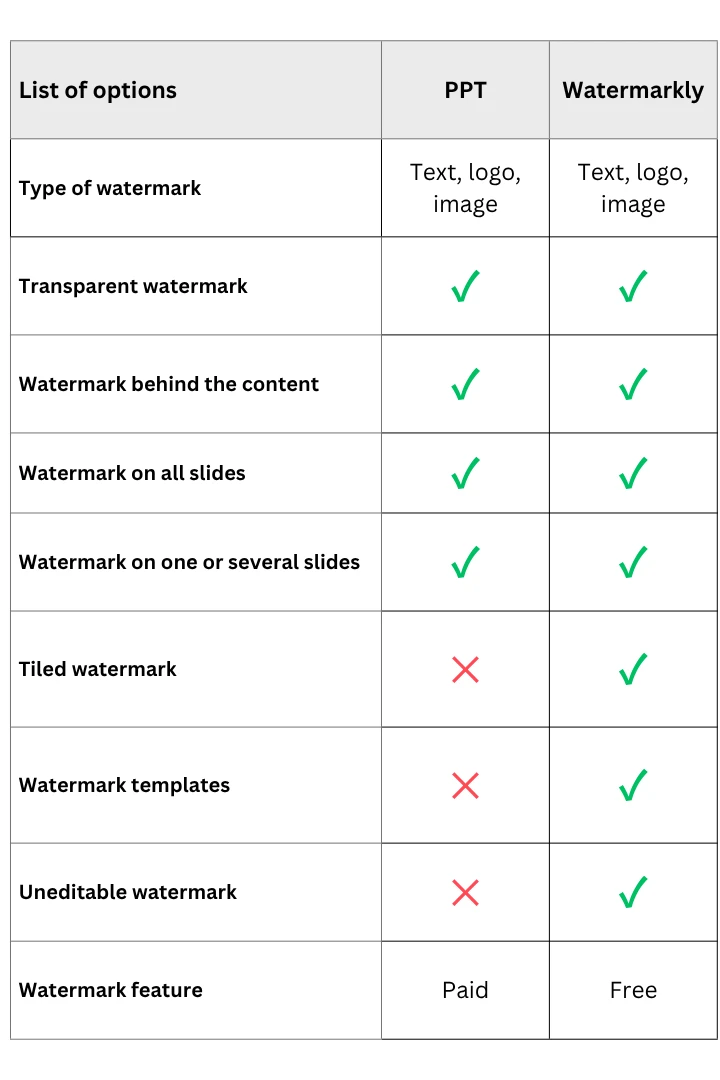
Here is a comparison table showing the pros and cons of these two apps for watermarking presentations:
FAQ
How to add a Draft watermark in PowerPoint?
To add a Draft watermark in PowerPoint, open View > Slide Master, insert a Text Box, type DRAFT, then adjust the font, size, and color. Rotate it if necessary. Don’t forget to reduce the opacity and place it behind the slide content so that it looks like a watermark rather than a regular text element.
How to watermark a picture in PowerPoint?
To watermark a picture in PowerPoint, insert the image onto a blank slide, then add a text watermark using Insert > WordArt. Customize the text, adjust its transparency in Format Shape, and position it over the image. Once everything looks right, select both the image and the watermark, group them, and save the result as a picture. This way, you get a single watermarked image that you can reuse in your presentation or export to your device.
How to insert a logo in a PowerPoint without the background?
If your logo has a solid background, remove it before importing the image so the watermark looks cleaner on the slide. You can do this with a background removal tool. Then insert it in Slide Master, adjust the transparency if needed, and send it to the back so it appears as a watermark in PowerPoint.
How to add a background image to a PPT slide?
To add a background image to a PowerPoint slide, open Slide Master, insert the image, resize it to fit the slide, and use Send to Back to place it behind the content. If needed, reduce the transparency so the slide text remains easy to read.
Conclusion
In PowerPoint, you can add a watermark in several ways, whether you want to use text, a logo, or an image. The built-in tools make it possible to put a watermark in all slides, selected slides, or even a single image, as well as adjust its transparency and placement.
At the same time, these methods can be somewhat limited and not always convenient, especially if you need more control or stronger protection.
If your goal is simply to add a clear, professional-looking watermark to a finished presentation, converting it to PDF and using a dedicated free watermarking tool may be a faster and more practical solution.
More articles
How to Crop a Picture into a Circle in PowerPoint
How to Blur a Part of an Image in PowerPoint
How to Compress Images in PowerPoint