
How to Add a Sticker to a Photo on iPhone: the Complete Guide
by ![]() Lina Thorne • Updated · Posted in Photo Editing
Lina Thorne • Updated · Posted in Photo Editing
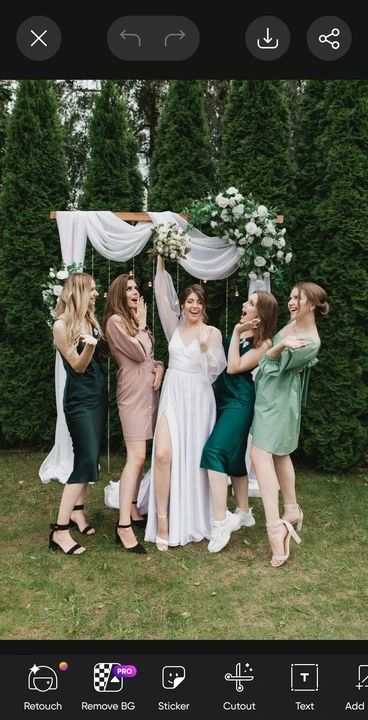
Have you ever looked at a photo and felt it needed a little extra pop? Maybe you want to jazz up a selfie, add a personal touch, highlight a special moment or your emotions, or make your social media posts stand out. Maybe you want to hide some sensitive info or, vice versa, draw the attention to an important detail. Well, adding a sticker is a quick and easy way to make any photo more engaging and visually appealing.
We’ll walk you through all the why’s and how’s. You’ll learn how to add a sticker to a photo on iPhone using native and third-party apps. Moreover, we’ll show you how you can easily and quickly create custom stickers, so you’ll be able to get really creative! This guide will provide you with everything you need to know and help you achieve your goals.
Why Add a Sticker to a Photo?
Stickers aren’t just for kids. With them, you can personalize your photos or hide some sensitive information in a fun way. Here are the main reasons to add a sticker to your iPhone photos:
- Express Yourself. A sticker can instantly show your mood or add a touch of personality to your images. Feeling playful? Go for a funny emoji. Feeling artsy? Add a silly doodle or a sticker that complements your vibe.
- Hide Sensitive Info. Say, you took a selfie at a public place and now want to conceal the identities of people in the background. Or maybe you want to share a screenshot without revealing some personal info. Cover it up with a sticker!
- Highlight Details. Stickers can also help you achieve the opposite result – draw attention to important parts of your photo. For example, you can use an arrow sticker or a frame sticker to point out a landmark in the background or a particular person in a group shot.
- Boost Engagement. On social media, adding a sticker can make your post more eye-catching, encouraging more likes, comments, and shares. This is also how you can tie your photos to particular occasions – imagine adding hearts and pink sparkles for Valentine’s Day or pumpkins for Halloween.
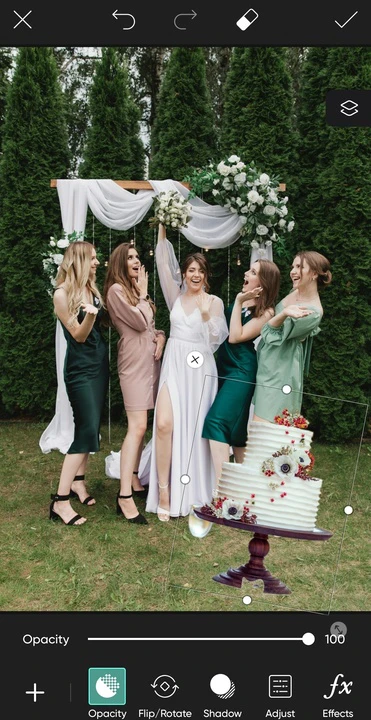
How to Add a Sticker to a Photo on iPhone using the Markup Tool
Fortunately, this is super easy! And there’s a built-in feature in the Photos app for this, so you won’t have to download or install anything.
Here’s what you need to add a sticker to a photo on an iPhone:
- Open the Photos app and select the photo you want to edit.
- Tap the Edit icon at the bottom of the screen.
- Tap the icon that looks like a pen tip inside a circle – this is the Markup tool.
- To access the additional tools, tap the + button in the bottom right corner.
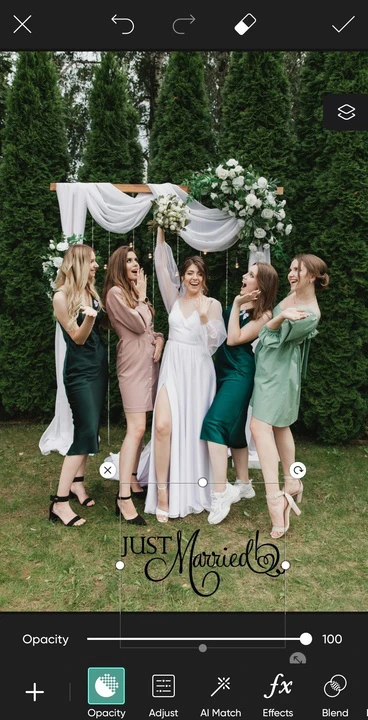
- Choose the Add Sticker option.
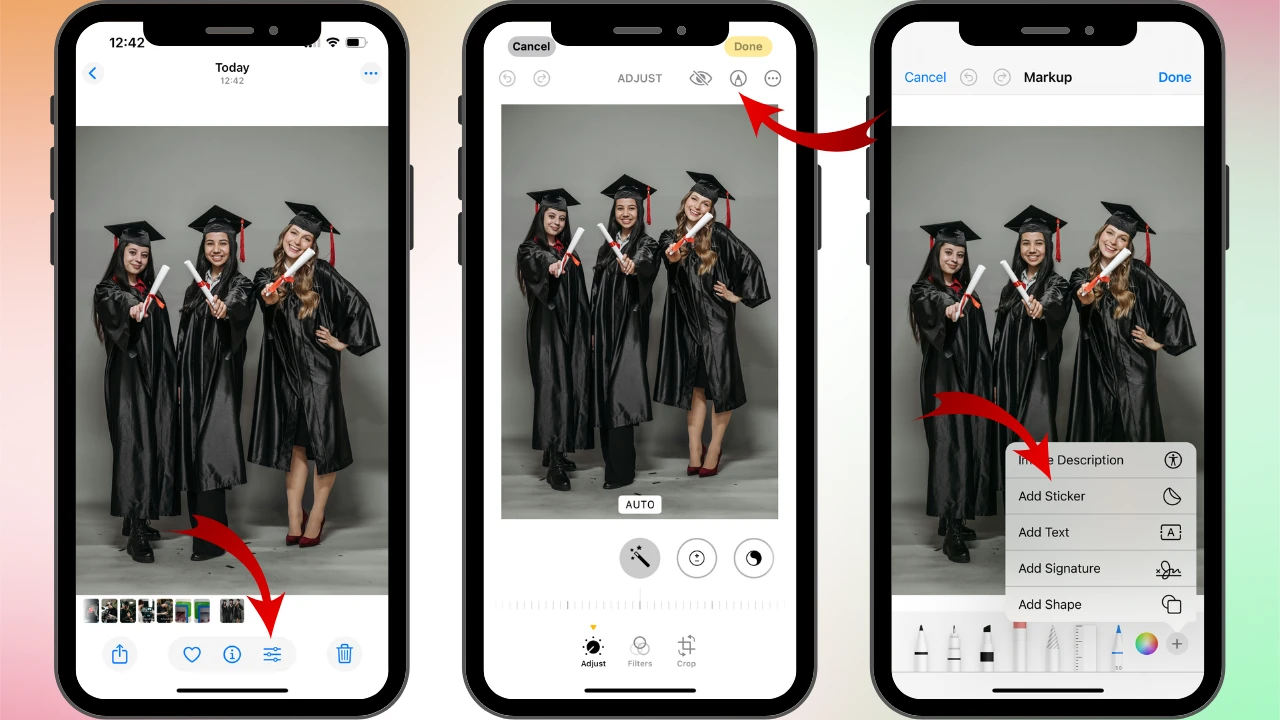
- Browse through the available stickers, and once you find the one that you like, tap on it. It will appear on your photo.
- Reposition the sticker by dragging it.
- Pinch and spread with two fingers to adjust the size of your sticker. You can rotate it with your fingers, as well.
- Tap Done to save your changes, then tap Done again to finish editing.
The edited image will be saved to your gallery. Doesn’t take much time and effort, right?
What if you changed your mind after you added a sticker? Luckily, it’s not that hard to remove it:
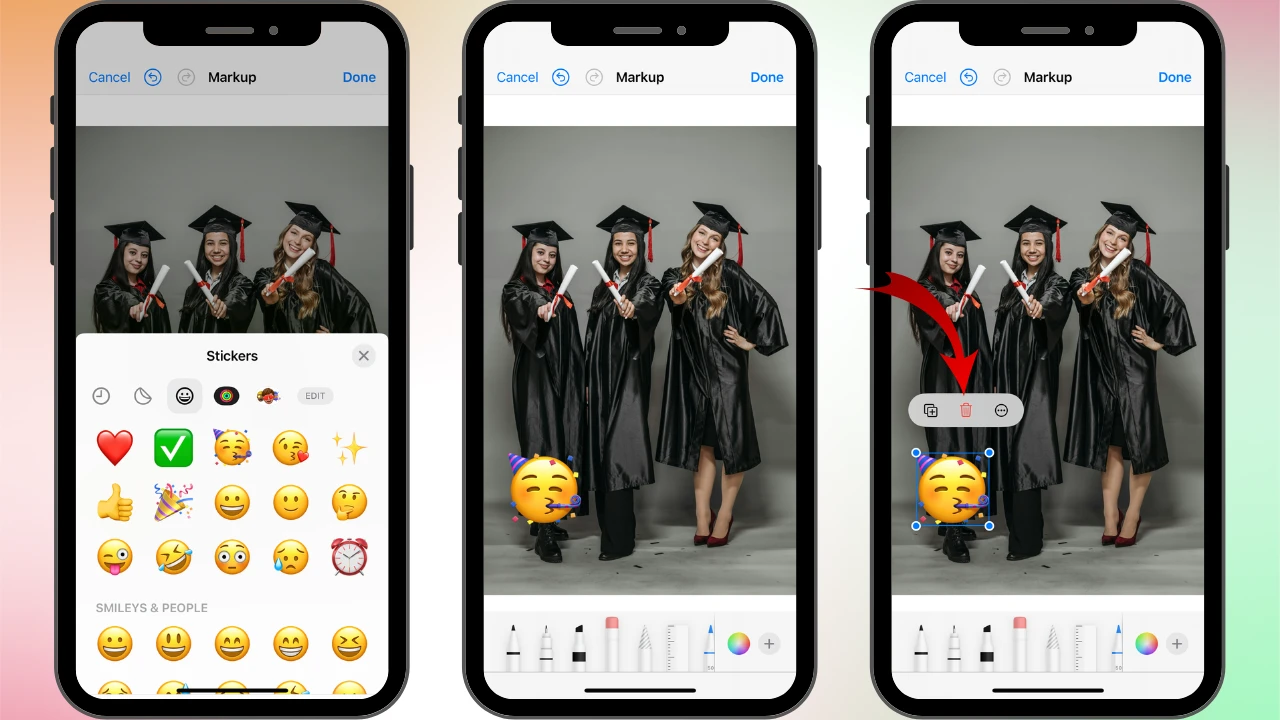
- Open the photo with the sticker in the Photos app.
- Tap on Edit > the Markup icon.
- Tap the + button, then tap on Add Sticker.
- Tap the sticker that you want to remove and hold your finger for a bit. Once you see the Remove button, tap on it. And your sticker will be removed!
Here’s a tip:
You can also use the Markup tool to add text to photos on your iPhone as well as shapes and even signatures, so feel free to get creative!
How to Create Your Own Stickers on iPhone
Starting with iOS 16, you can turn any photo from your iPhone’s photo library into a custom sticker, and even make animated stickers from Live Photos. It can be very useful if you want to make your content even more personal and unique!
Here’s how you can do this:
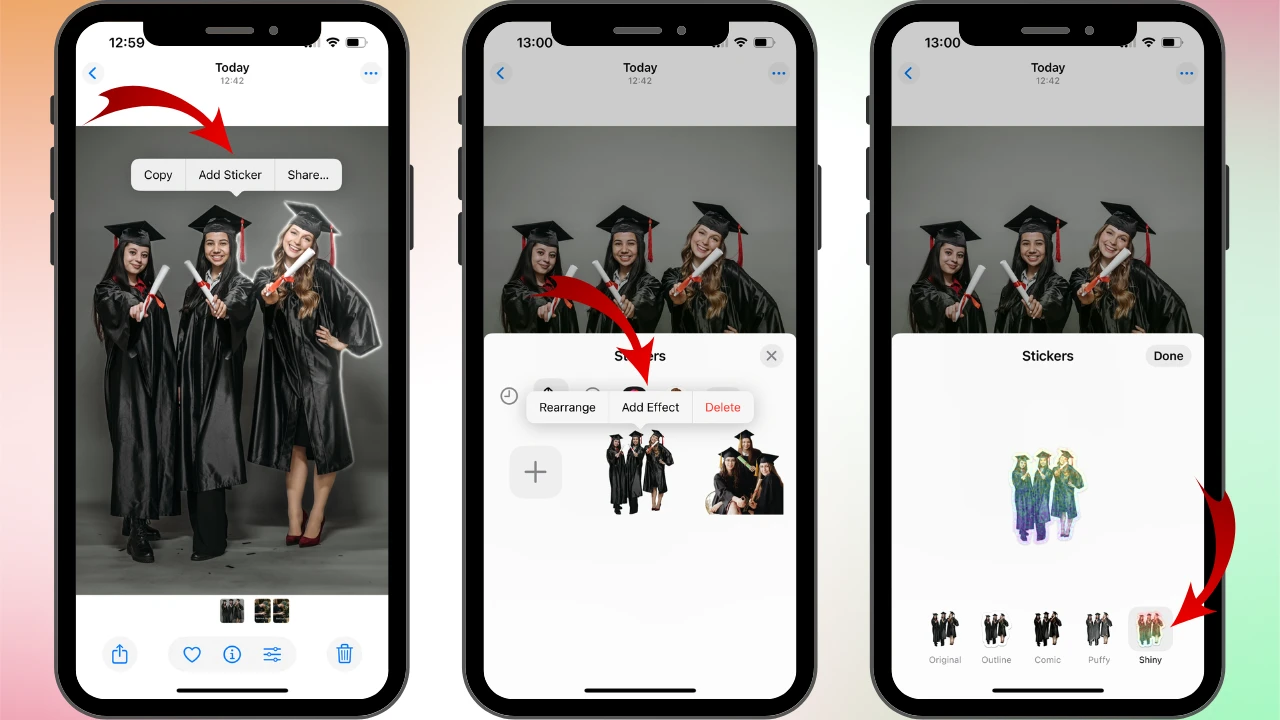
- Open the Photos app on your iPhone, then find and tap on the photo with the subject that you want to make into a sticker.
- Press and hold your finger on the main subject. You’ll see a white glow outline the object.
- Lift your finger when the pop-up menu appears.
- Tap Add Sticker. Your new sticker will be saved to your sticker library.
- Do you want to make your sticker stand out? In your sticker library, long-press the new sticker and select Add Effect. You can choose from styles like Outline, Comic, or Puffy.
- You’ll notice that if you long-press a sticker in the sticker library, two more options appear. Rearrange allows you to organize stickers in the library, while by tapping on Delete, you can remove a sticker that you no longer need.
That’s all there is to it! Now you have the power to create a limitless collection of unique stickers.
Your sticker library is accessible from the emoji keyboard – remember to tap the sticker icon! – in apps like Messages, Mail, and Notes, as well as in the Markup tool.
Note!
This built-in feature allows you to create custom stickers on iPhone quickly and easily. However, you won’t always get the results you want. For example, only a part of your subject might get selected. This is because the auto-selection feature works best when the subject is clear and has strong contrast. And, unfortunately, you won’t be able to do much fine-tuning to the selected area. If that’s what you need, you’ll have to opt for a third-party app.
How to Add a Sticker to a Photo on iPhone Using PicsArt
What if you can’t find a sticker that you like in the built-in app? What if you want a broader library as well as more flexibility and creative freedom?
You can use a third-party app instead. For instance, PicsArt, an AI-powered image editor, can be a good choice. It’s incredibly easy to use and available for iOS.
Here’s how it works:
- Go to the AppStore and download PicsArt.
- Open the app and tap the Edit a photo button, then select the necessary image.
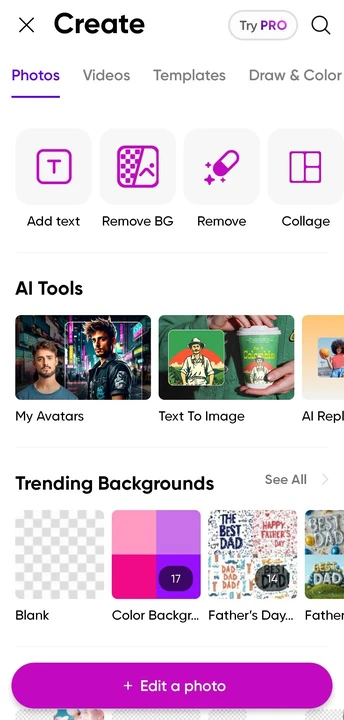
- Select the Sticker option in the toolbar at the bottom.
- PicsArt offers a huge library of stickers. To speed things up, you can type in the keyword in the search bar.
- Tap on the sticker of your choice. It’ll be added to your photo.
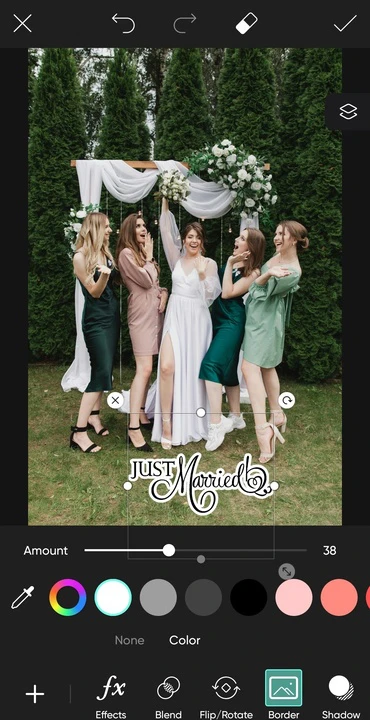
- You can add a border or a shadow to your sticker if you want. Reposition, resize, and rotate it.
- Tap the checkmark icon to save and apply the changes.
- Export your edited photo by tapping on the Download button at the top.
All done! The process is very similar to using a built-in gallery app, but the choice is much broader!
Luckily, it’s also possible to create a custom sticker from your photos in PicsArt. Moreover, unlike the iPhone’s built-in cutout feature, this app allows you to select your subject manually, which will give you more control and flexibility.
The steps are pretty simple:
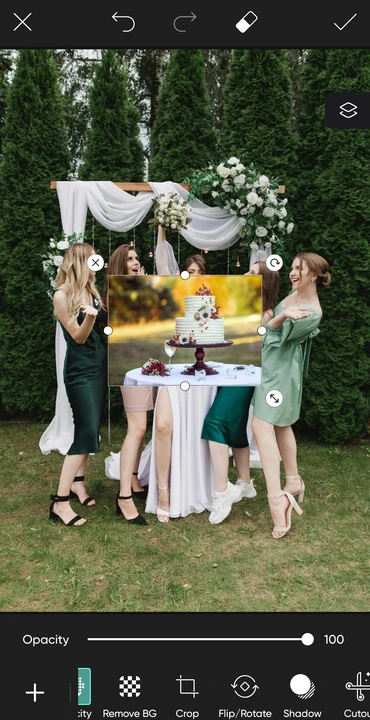
- Import the main image.
- Select the Add Photo option at the bottom.
- Upload the necessary photo, then scroll to the left until you see the Cutout option. Tap on it.
- You need to select the subject. If it is a person, simply tap on Select. But if it’s an object, use the Outline to create an outline around the object that should be selected. You can also give a try to the Shape or the Brush options. Fine-tune the selection with the Erase, if needed.

- Tap the checkmark icon.
- Voila! The background is removed.
- Resize and reposition your sticker using your finger. Make any other adjustments if necessary.
- Tap the checkmark icon when you’re finished with the editing.
And now, a custom sticker is added to your photo!
Please note that PicsArt is an amazing app, but its free version does have some limitations. So, to unlock its full potential, you might need to purchase the paid version.
Here’s a tip
If you don’t like PicsArt, you can opt for a different image editing app. PhotoDirector or Canva allows you to add a sticker to a photo on iPhone, as well. Their vast libraries include free and premium stickers – from emojis to shapes to seasonal designs.
How to Add a Sticker to a Photo on iPhone Using Instagram
If you want to hide some sensitive info in a photo – e.g. your home address or someone’s face – then share it online safely, you might not need a third-party image editor. Like many social media platforms, Instagram has a built-in editor that offers a vast library of stickers. So, you can easily add a sticker to your photo right in the app.
It’s worth noting, though, that stickers are only available if you want to share an image as a Story.
Follow these simple steps:
- Open Instagram and tap the + icon, then choose Story.
- Tap on the Gallery button in the bottom left corner, then select and import the necessary image.

- Tap on the Sticker icon at the top of the screen.
- Enter the keyword in the Search bar.
- Choose the sticker that you like, then tap on it.

- Reposition the sticker by dragging it. Pinch to resize the sticker. Rotate it using your fingers.

- You can also add text to a photo, if you want.
- You can go ahead and post your image with the sticker to your stories. But if you want to save it, tap on the three dots in the upper right corner, then tap on the Save button.
It’s not difficult at all, right?
How to Add an Emoji to Your iPhone Photos Using Watermarkly
Unfortunately, it’s not possible to add stickers to your photos on iPhone using Watermarkly. But what if you need to add an emoji? This can be done!
The previous methods allow you to add a sticker to a single photo. But in Watermarkly, you can actually add one and the same emoji to a batch of photos – quickly and easily!
Follow these steps:
- Open Watermarkly’s iOS app for watermarking photos and import the necessary images from your device.
- Tap on Add Text.
- Delete the Your Text words, then insert your emoji of choice into the text input area.
- Adjust the placement and the size of your emoji as well as rotate it or add an effect.
- Go to the export settings by tapping the Next Step button.
- In the export settings, tap Preview & Adjust. In this section, you can adjust the size and position of your emoji on each image in the batch.
- Return to the export settings, then start the watermarking process and wait a bit. The processed copies will be saved to your gallery.

Add a Blur Instead of a Sticker on iPhone
Say, you need to conceal some sensitive information. Adding a sticker on iPhone can help you with that in a fun and creative way. However, stickers might not be suitable for some business purposes.
If you need to hide something in your images, yet you want them to still look neat and professional, go for the alternative option – cover the sensitive information with a blur. If you are a newbie at image editing, don’t worry – you will be able to do this within just a few taps using Watermarkly:
- Download Watermarkly’s Blur Tool from the App Store.
- Open the app and import one or several images.
- The app will detect faces and license plates, then blur them automatically. If there’s some other object that you need to blur, you can do this manually. Tap on the Add Blur button.
- Tap the Intensity button, then adjust the slider to make the blur more intense.
- The Objects section allows you to unselect some of the automatically detected objects.
- Using your fingers, reposition, resize, and rotate the blur. It’s possible to pick an oval or rectangular shape, too.
- Adjust the export settings, then start the blurring process. When it’s finished, the blurred copies will be saved to your gallery.
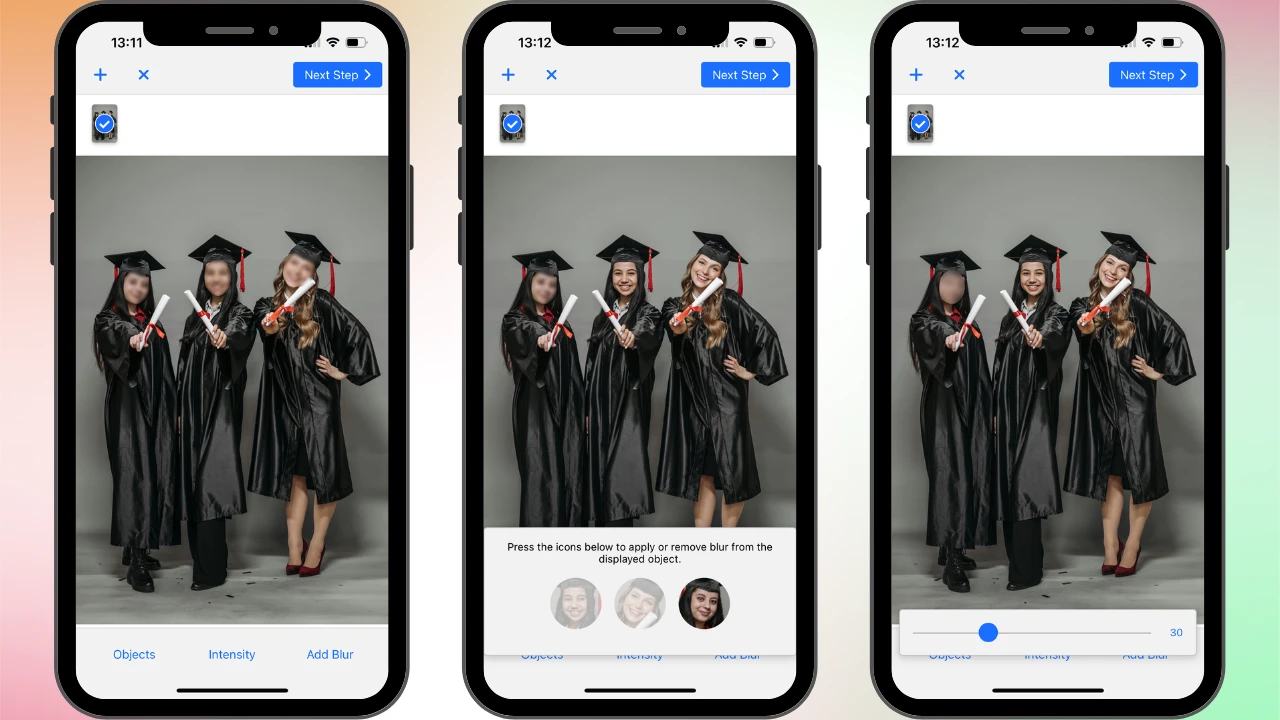
That’s it! The blurred areas will fit into your photo unobtrusively, yet all the sensitive information will be hidden.
Conclusion
Adding a sticker to an iPhone photo is an easy and creative way to express your personality, highlight key details, hide sensitive information, or simply give your social media posts that extra wow factor. You can do this using a built-in app or a third-party app on iPhone.
Now that you have the step-by-step instructions and know all about the necessary tools, you will surely get great results, even if you’re new to this. So go ahead – let your creativity shine, and make every photo a little more you.