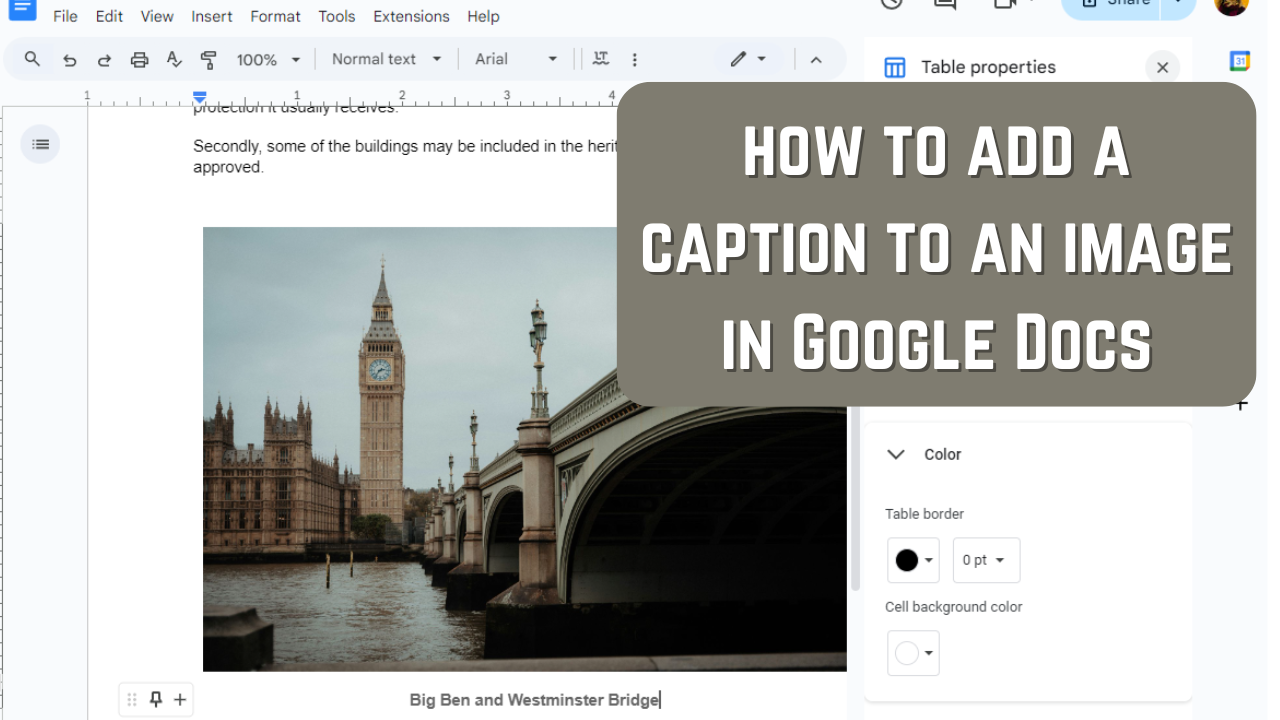
How to Add a Caption to an Image in Google Docs
by  Lina Thorne • Updated · Posted in Watermarking Tips
An image can say a lot. It can even tell a whole story. But naturally, not every image is capable of that. You need to compose it properly. It should be clear to the audience what the main subject is. And even then, people might see something entirely different from what you originally had in mind. Fortunately, by adding a caption, you can make things much clearer.
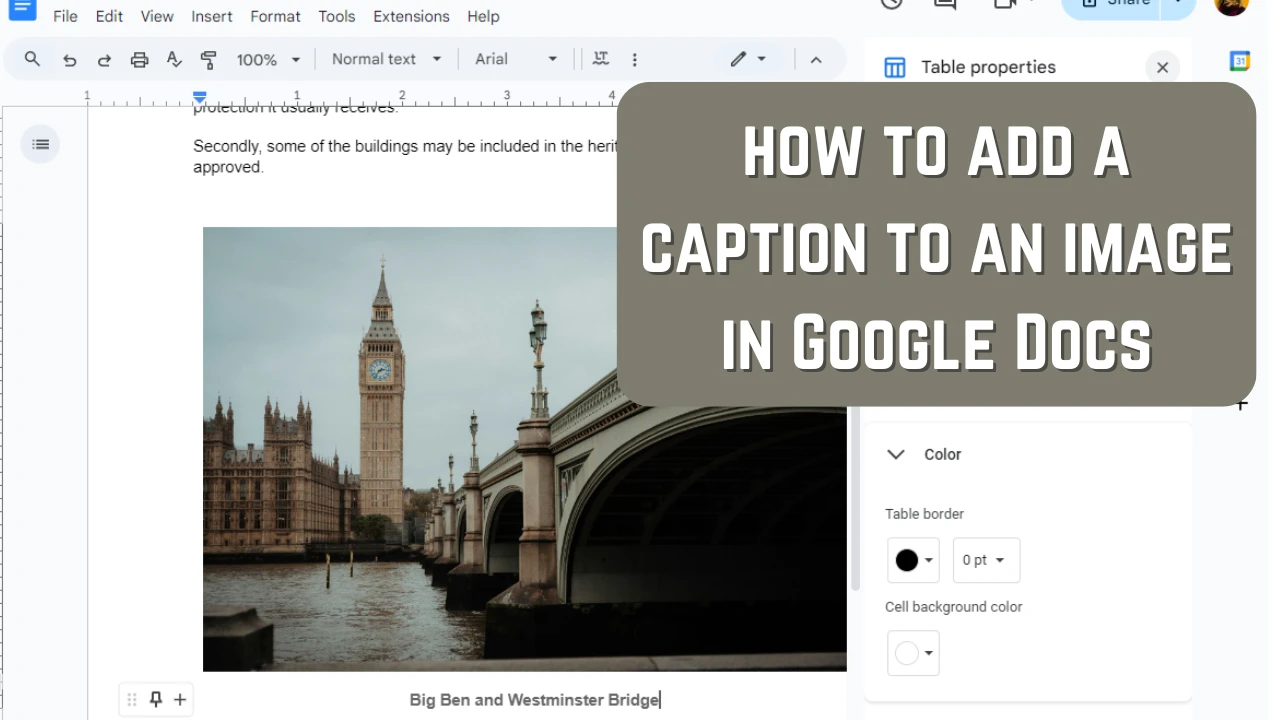
Captioning your images can be highly beneficial since it can not only provide some extra information, but also make them more emotionally impactful.
What if you have some text or a presentation with images and you’d like to add some captions to them? Well, it’s not as hard as you might think. And you won’t even need some special software for this. In fact, you can caption your images in Google Docs.
Of course, inserting an image into a document is pretty straightforward. You just click a couple of buttons and that’s it! Captioning an image is a bit more complicated since there’s no tool designed specifically for creating captions. But don’t worry, there are some workarounds which don’t require any special skills or a lot of effort. Even if you are not very familiar with text or image editing, you will still be able to do this.
This article features detailed instructions on how to add a caption to an image in Google Docs. In fact, it’s possible to do this in three different ways. All of them are uncomplicated and pretty quick. The results will slightly differ, though. Once you’ve learn about all the available methods, you will be able to choose the one that suits you best.
Why You Might Need to Add Image Captions
A caption is a description that accompanies an image. It can describe what exactly is depicted in a photo, where it was taken. Alternatively, it can tell a story behind an image, how it was created, what its creator felt in that particular moment and so on.
You might need to add captions to your images to:
- Help the audience understand your image better. Captions can help you provide more context and information about an image. For instance, they might say where a photo was taken, what camera settings were used. You can also write why exactly a particular landmark in your photo is so significant.
- Make your image more emotionally impactful. If you can tell a story not only visually, but also with words, you can opt for a more emotionally-charged caption. You can be funny and witty, throw in a little bit of humor. You can be a bit dramatic or tell a sad story. For example, if you photographed a whale that died recently, you can tell about it in your caption. Emotionally charged captions can prompt your audience to engage with you.
- Add a citation. If you want to add an image that doesn’t belong to you, it’s better to give credit to its actual creator. You can do so by adding a caption with a citation.
- Structure your content better. Say, you are describing something in your text, and you want to show examples. Maybe your images show a process in progress. So, you can add captions like “Image 1” or “Image 3” to make it clearer for people what stage of the process is depicted.
- Improve your SEO. If you want to make your content more visible and show up higher in search, then it should be accessible to your audience and the search engine. Image captions can really help you with that. For instance, your captions can include relevant keywords.
As you can see, image captions can be extremely useful. If you were a bit skeptical about them before, hopefully, now you have a better understanding of why you should use them.
Now, let’s see how you can add captions to images in Google Docs.
How to Add a Caption to an Image in Google Docs Using In-line
This is probably the quickest and most uncomplicated way to caption an image in Google Docs. You’ll be able to do it within just a couple of minutes. So, once your document is open in Google Docs, you’ll need to do the following:
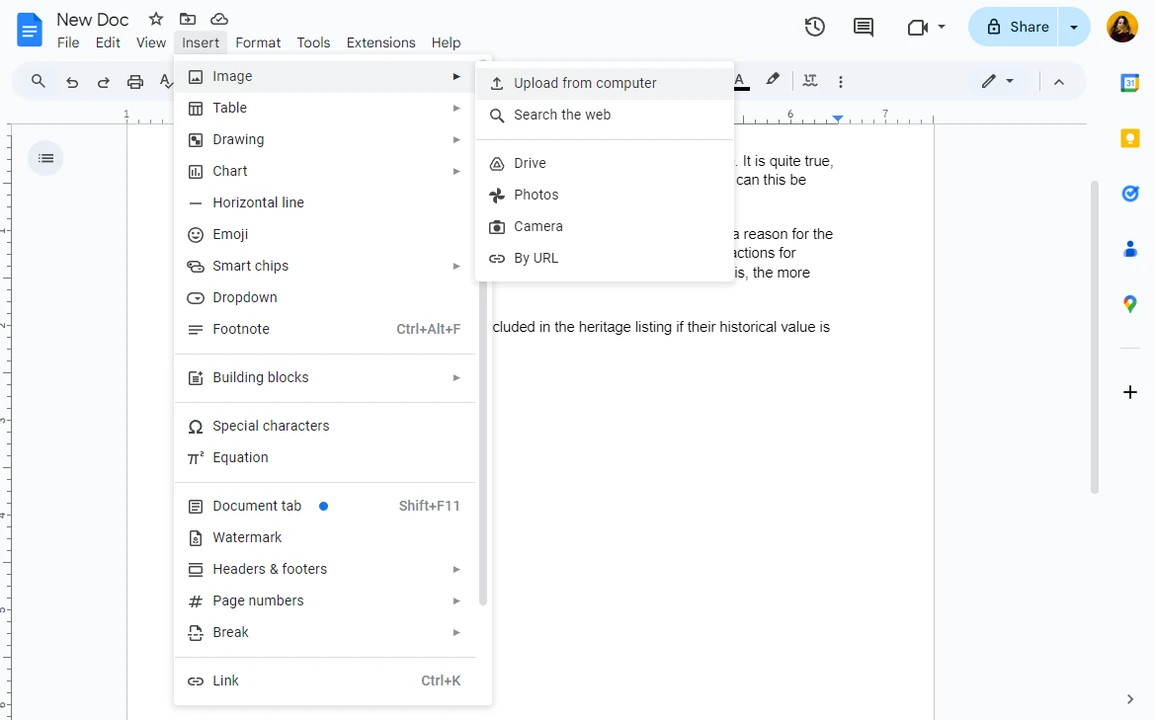
- Insert the necessary image into your document. To do this, go to Insert > Image, then select where you want your image to be imported from.
- Once the image is imported, click on it and select “In Line” option.
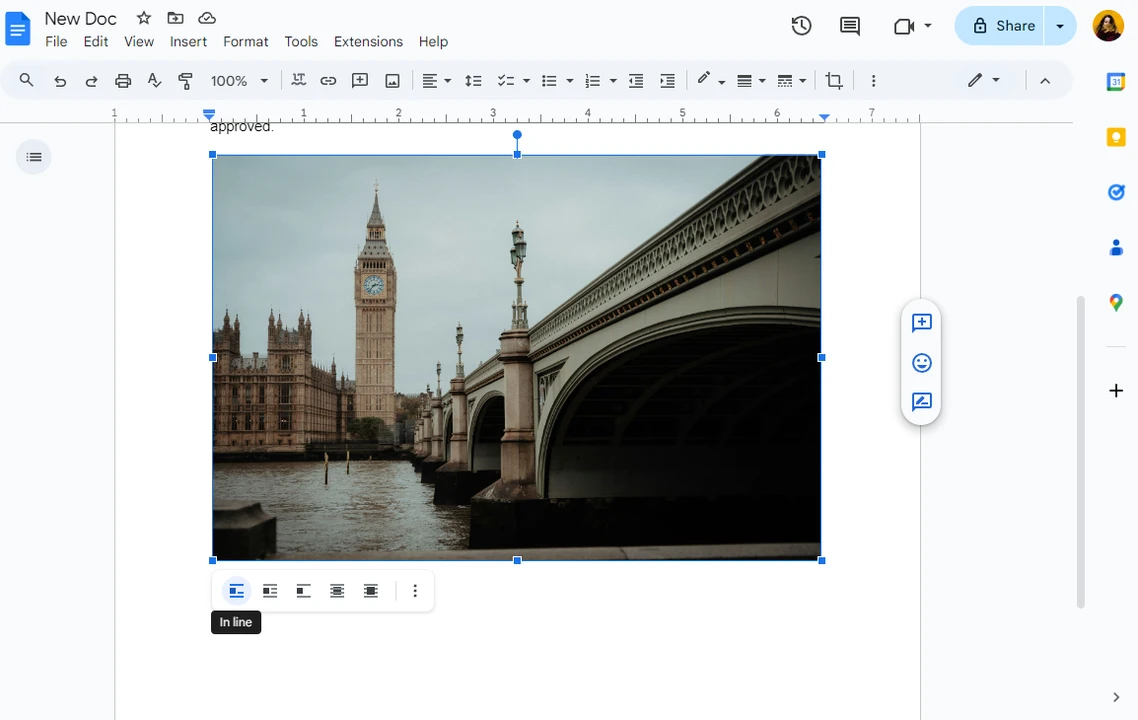
- Place your cursor underneath the image, then enter your caption.
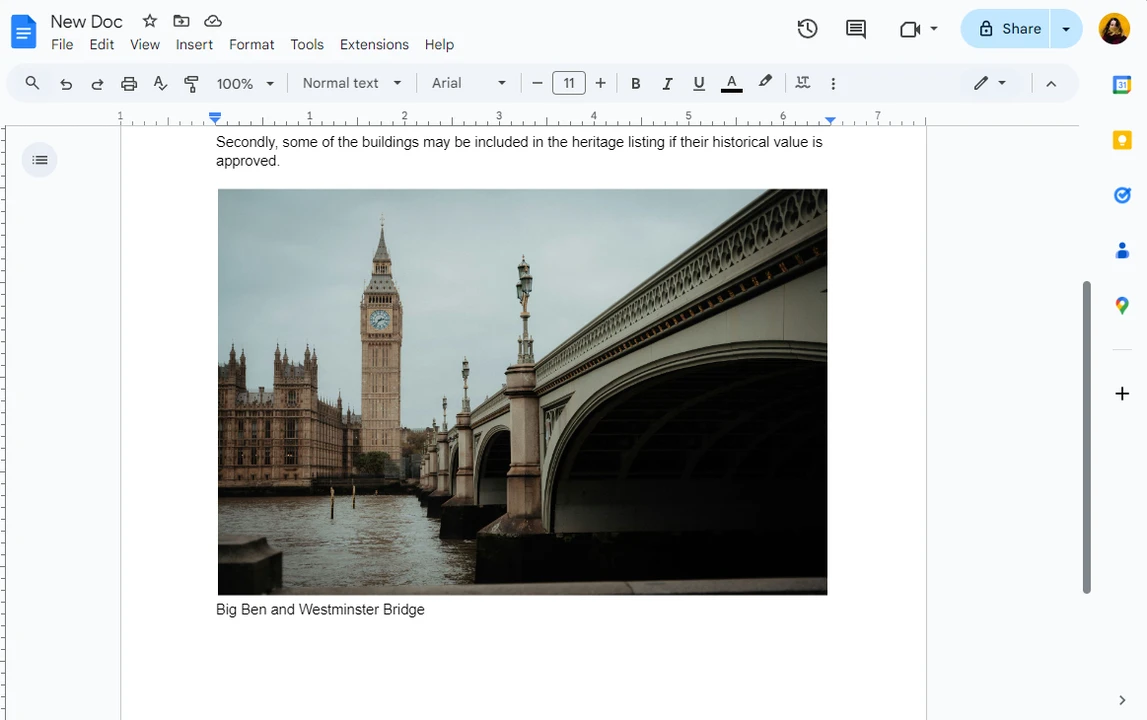
- You can use the spacebar to align your caption with the image more precisely.
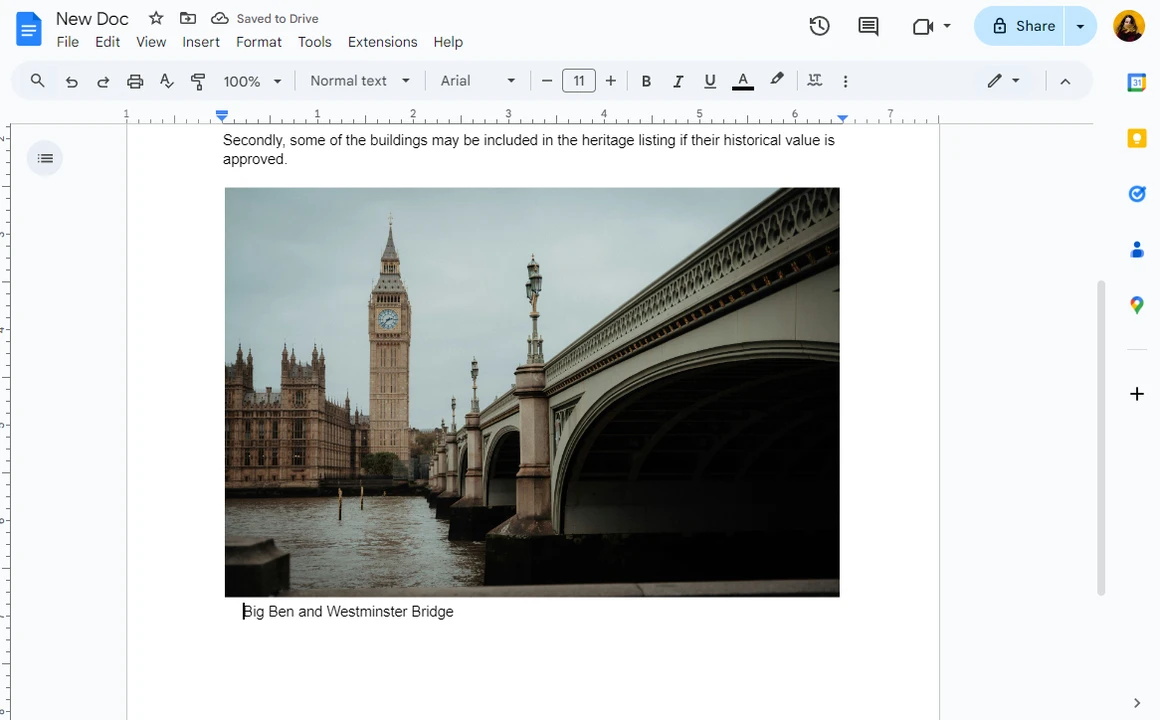
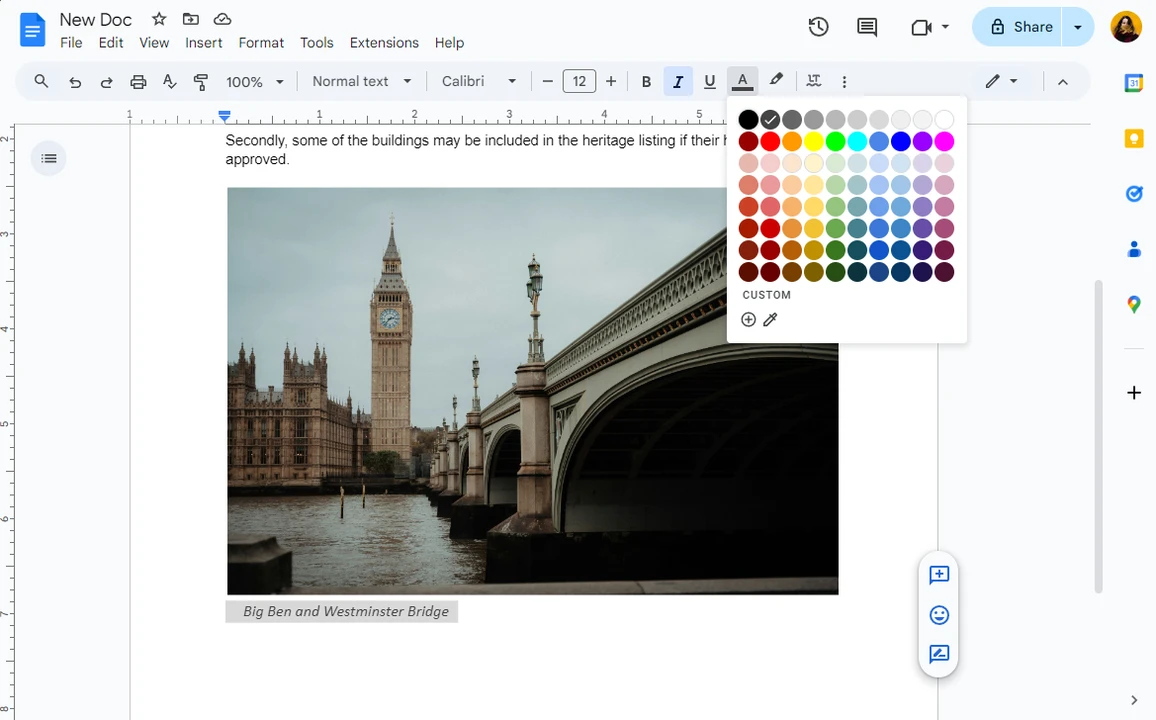
- Use the toolbar at the top to edit the style of your caption. You can make the text bigger or smaller, change the font and color as well as adjust alignment. But please, remember to select your text before making any changes.
And now you have a caption under your image in Google Doc. That was pretty easy, right?
This option is perfect for adding a caption quickly. You can actually use it to add captions to multiple images. It might be a bit tedious, but it shouldn’t be extremely time-consuming.
But there’s a downside. Your caption and your image will be two separate items. They won’t be attached to each other. In other words, if you change the position of your image in your Google Doc, you will need to reposition the caption as well. And do so separately.
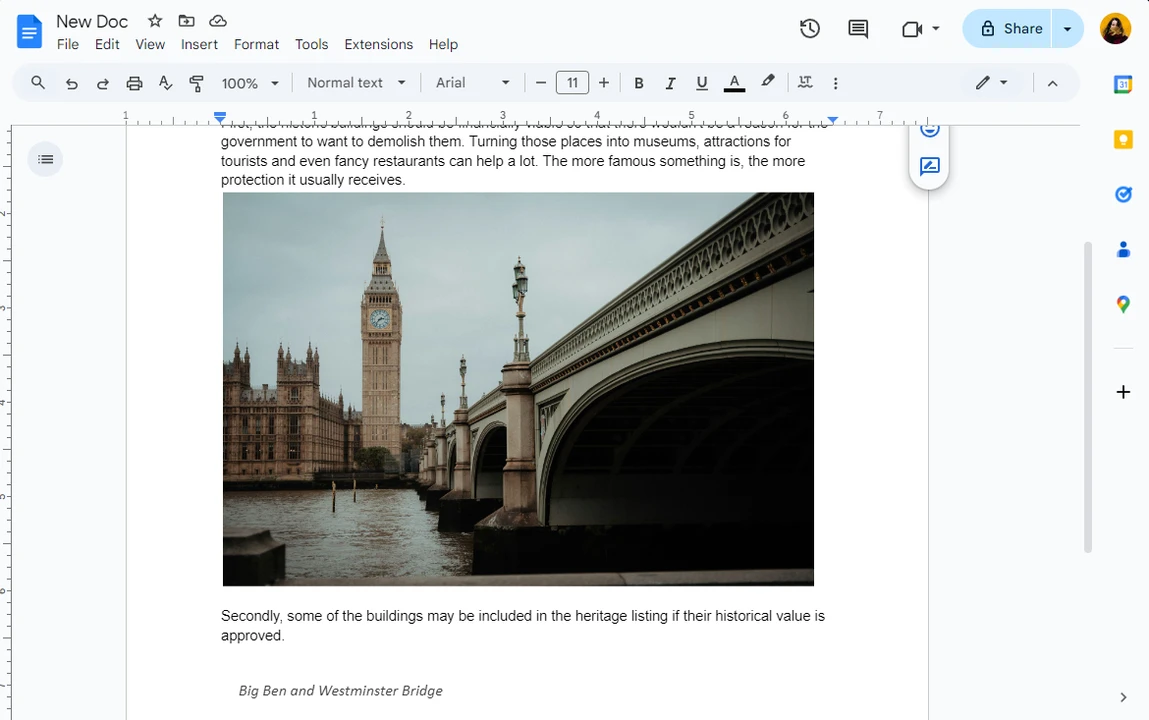
How to Add a Caption to an Image in Google Docs Using Drawing
Do you want to add an image caption in Google Docs that will actually be attached to your image? Then this is the perfect method for you. It will take you a couple of extra steps, but it’s easy and straightforward, too.
Please note, though, that unlike the previous method you don’t need to import an image into your document first.
Just open the necessary document in Google Docs, then follow these steps:
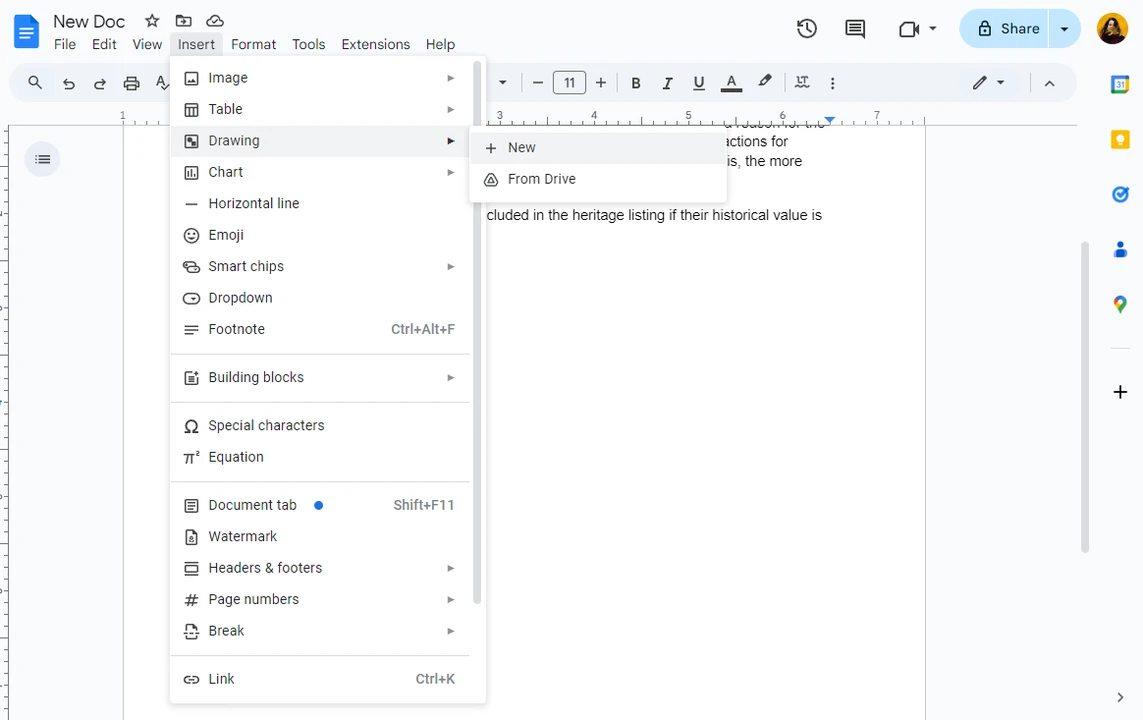
- Find the place where you want to insert your image and caption, then put your cursor there and go to Insert > Drawing > New.
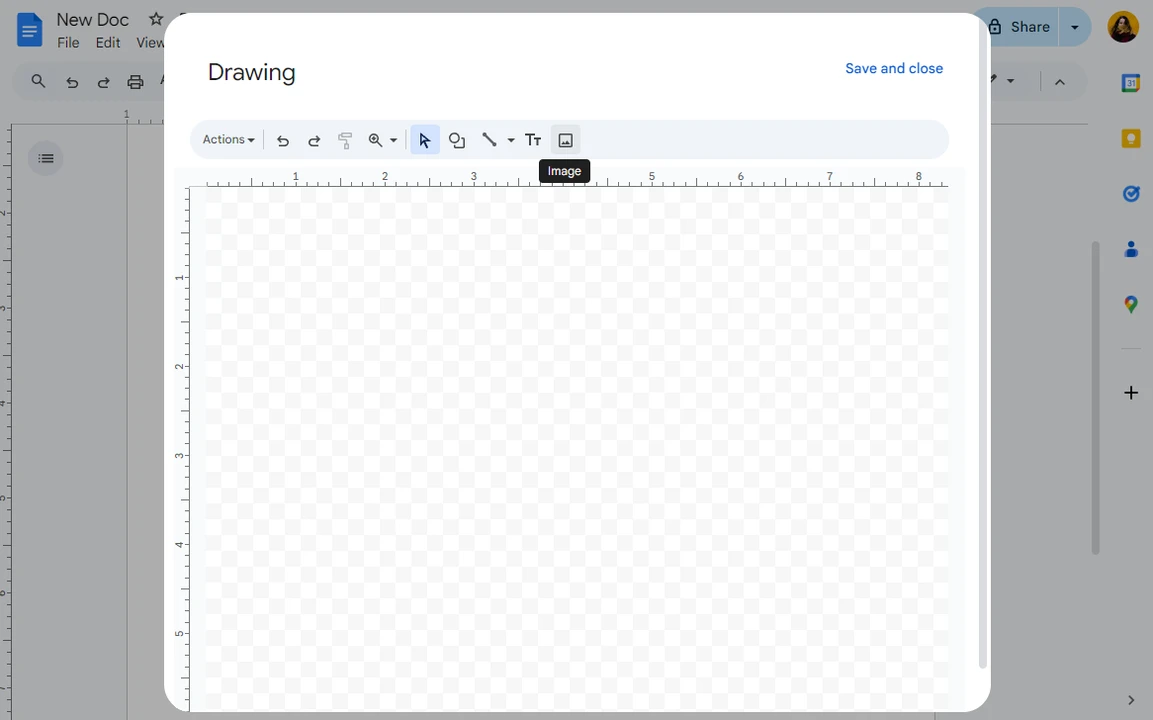
- This will open the Drawing window with a blank canvas. In the toolbar at the top click on the Image icon.
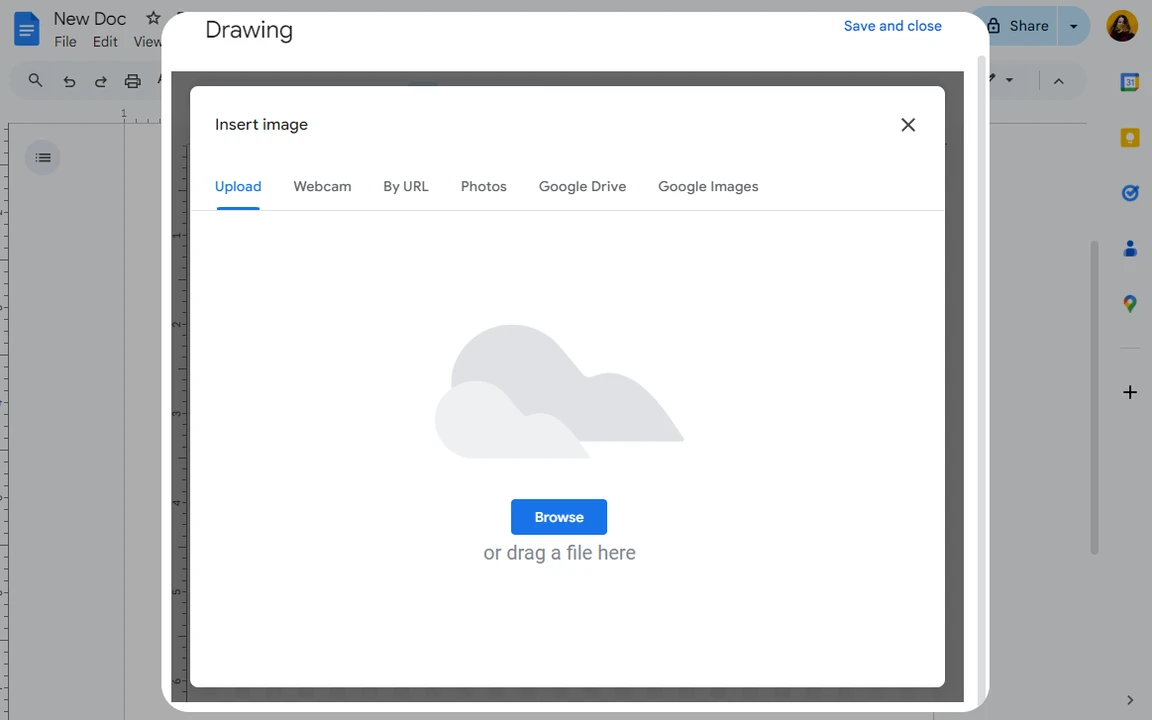
- Choose the necessary option for import, then find and upload your image.
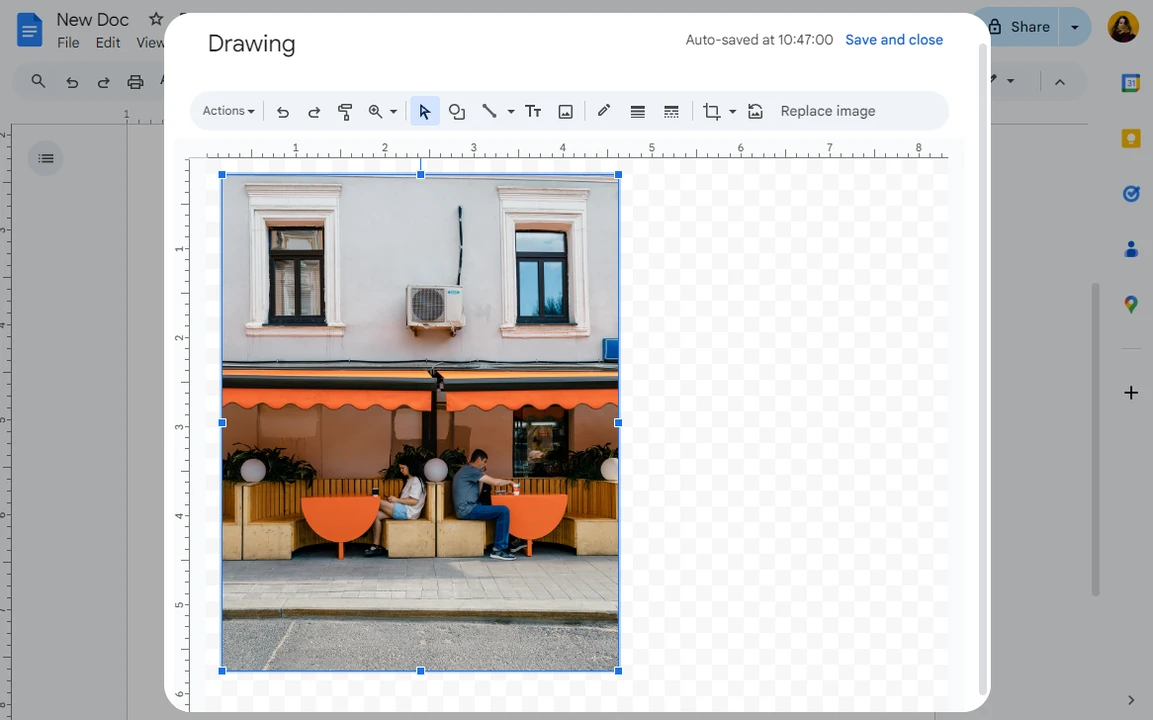
- Your image will appear on the canvas. You can change its size or reposition it with the cursor, if necessary.
- Next, click on the Text icon, then click under the image.
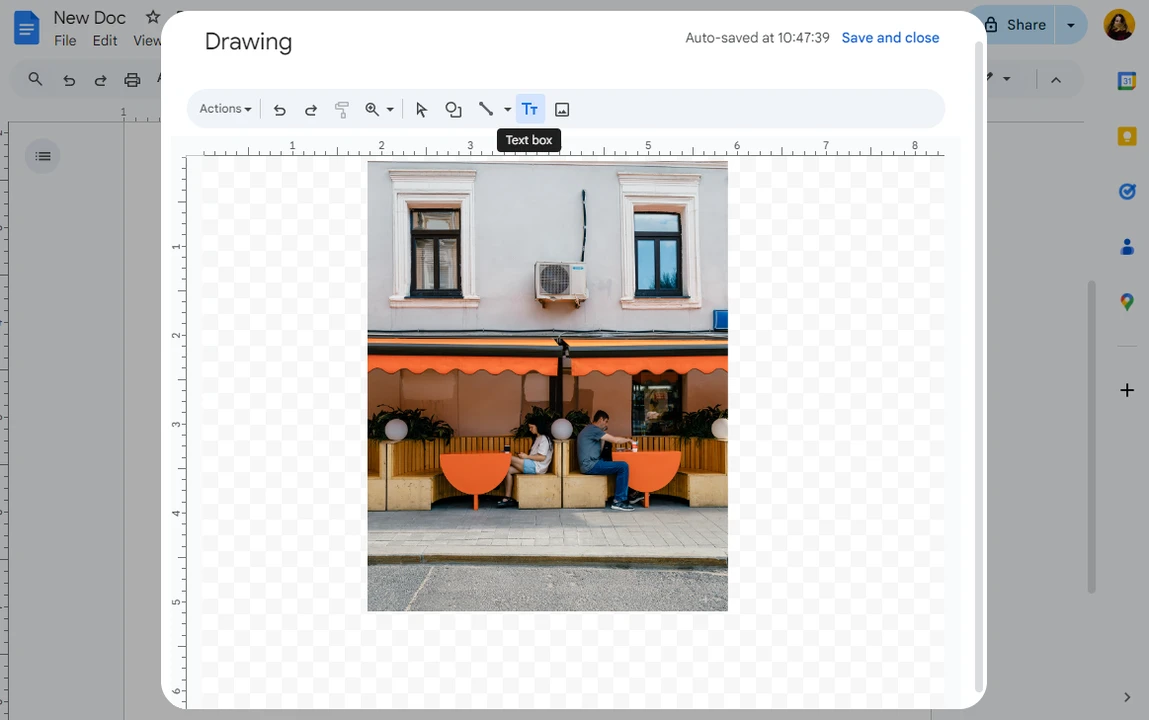
- An empty text box will appear. You can reposition your textbox using your cursor. There are smart guides to help you align the text box with the image.
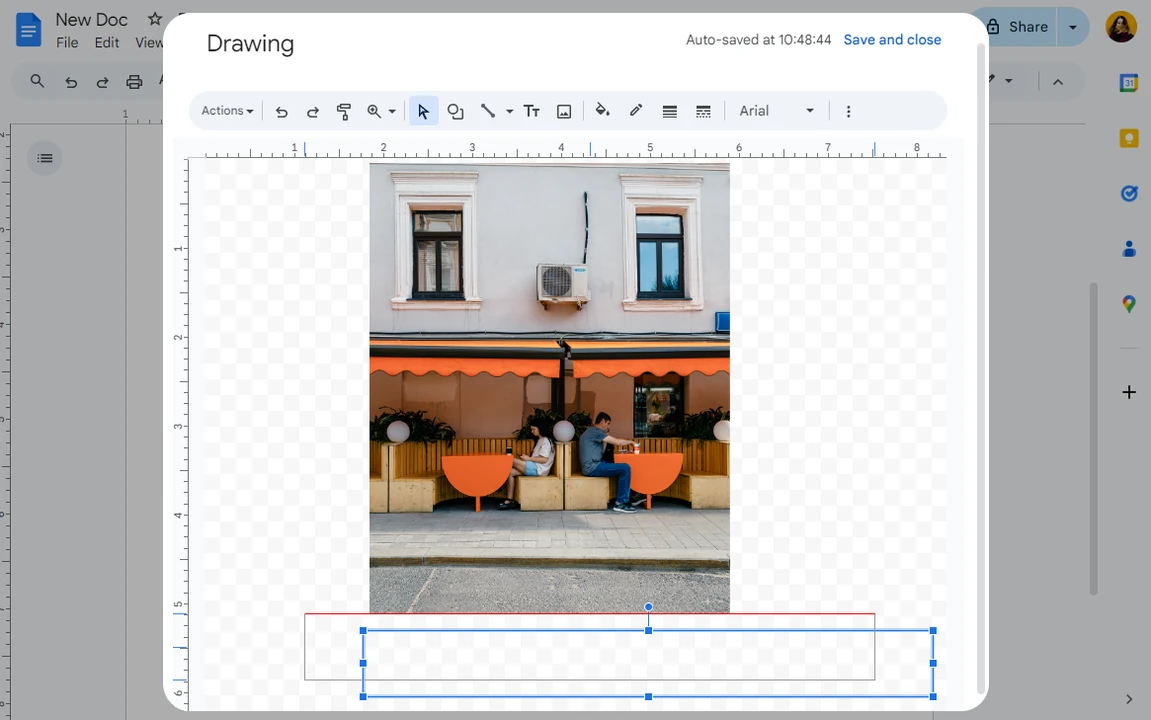
- Type in your caption into the text box.
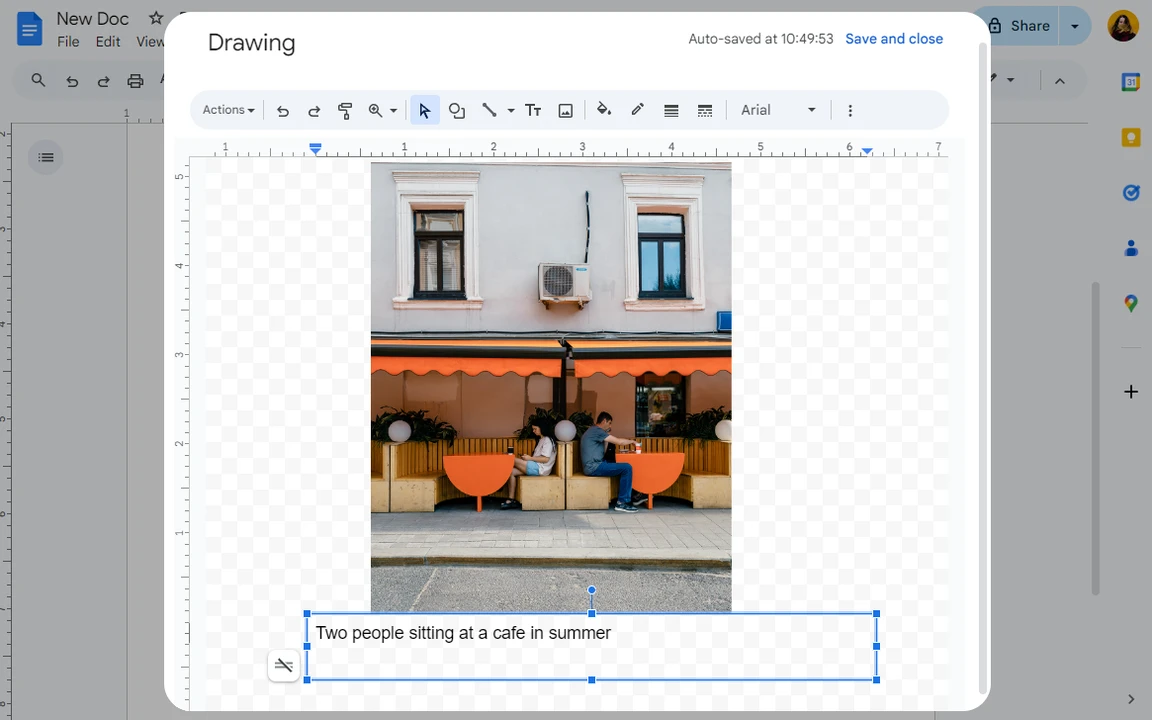
- Use the toolbar at the top to edit the style of your text. You will need to select your text first, otherwise no changes will be applied to it.
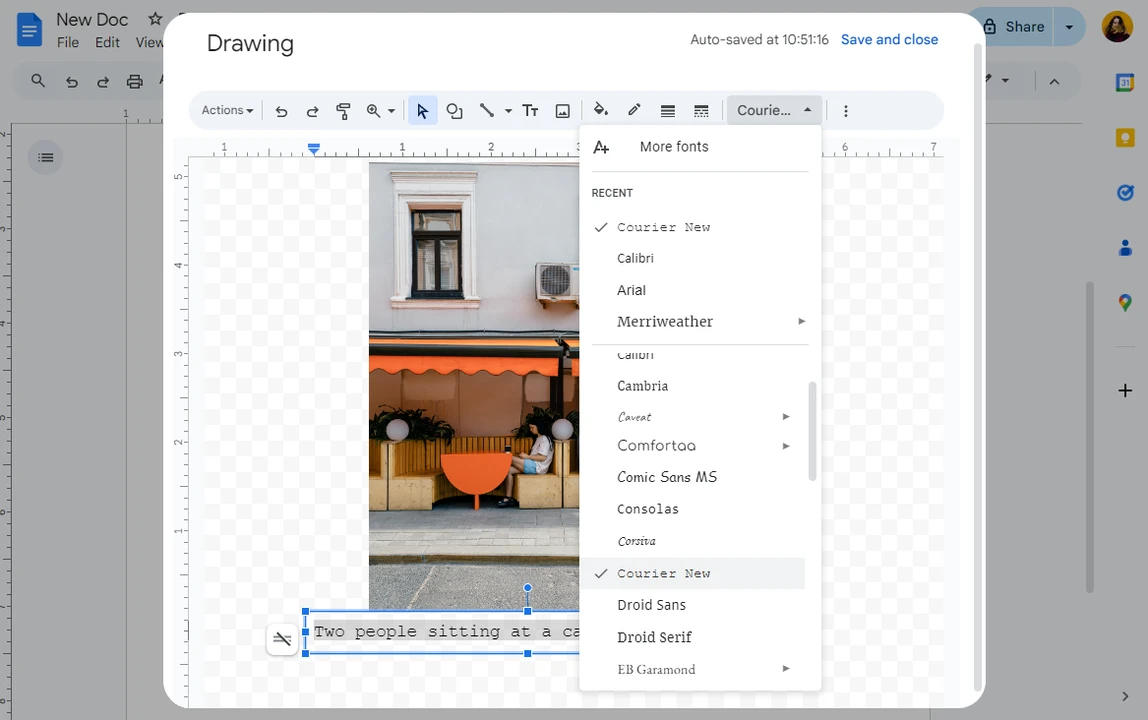
- Click on the three vertical dots, if you want to change the text alignment, add a numbered list or use some other editing options. Use the size handles to make the text box bigger or smaller. Please note that it won’t affect the size of your text.
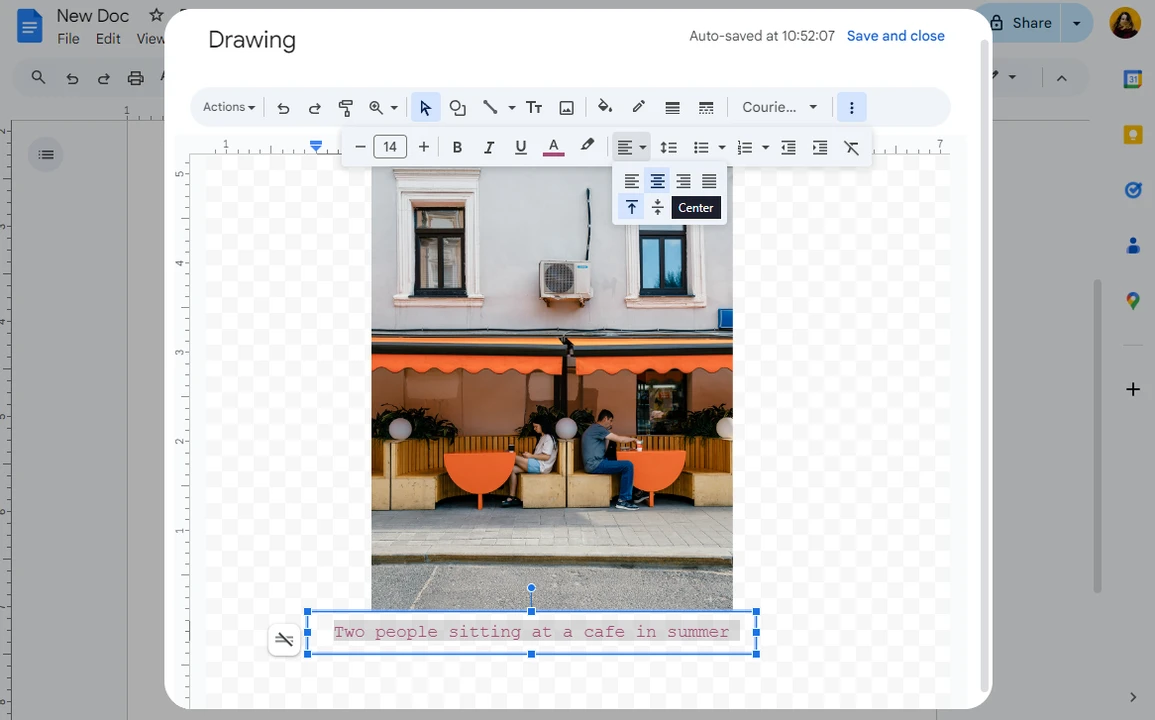
- When you are ready, click on Save and Close.
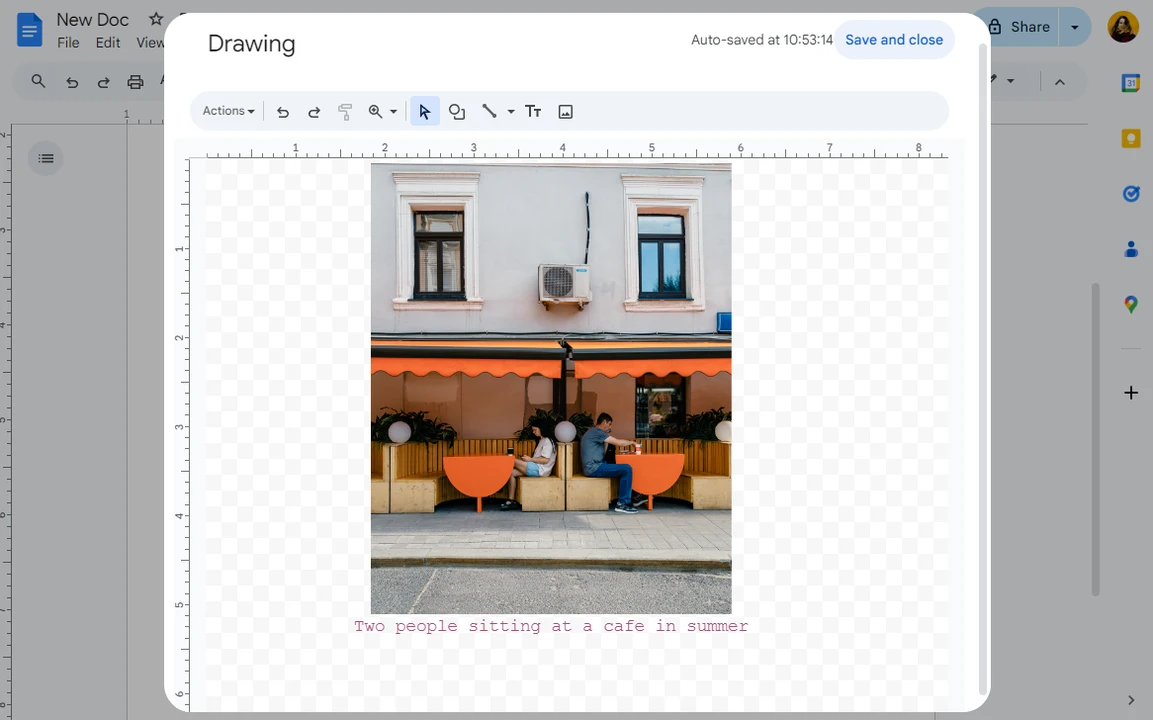
- Your image and your caption will be inserted into your document as a single item.
- If you want to make some new changes to the caption or the image, double-click on your drawing. This will open the Drawing window again and you will be able to make the necessary edits.
You’re done!
The main advantage of this method is that since your caption and your image are one and the same item, you will be able to move them around your text easily. You won’t have to reposition them one by one.
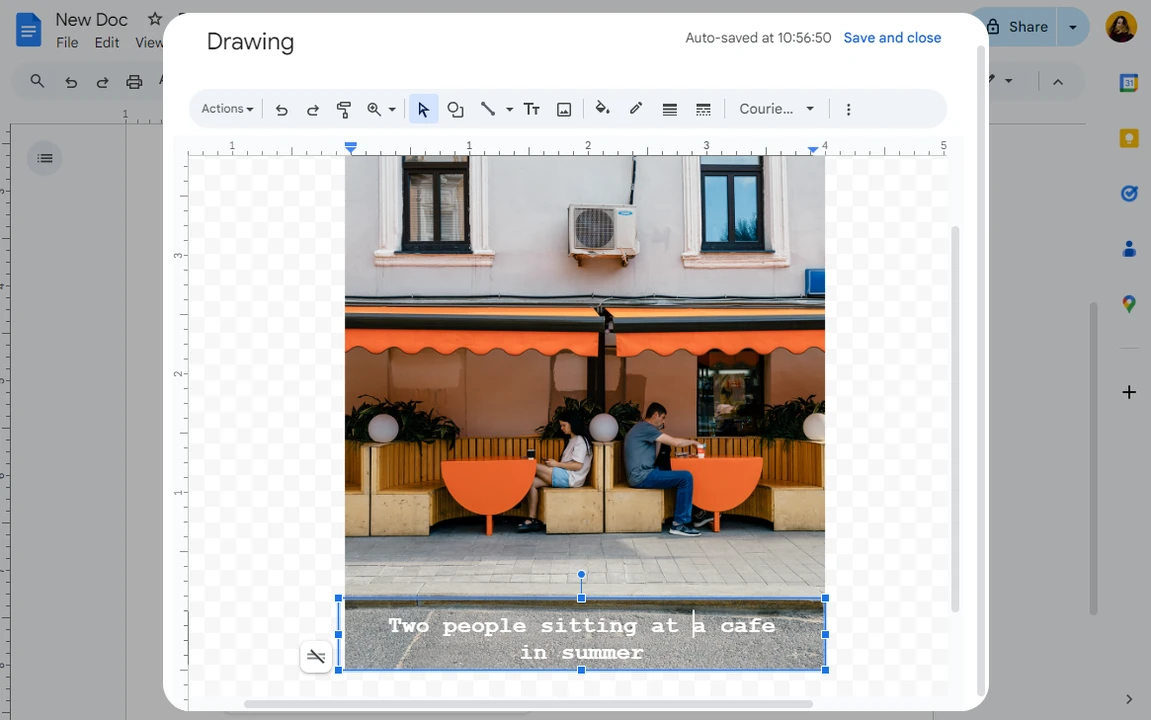
You can use this method to add captions to multiple images in Google Docs. It will take some time, but it won’t be too complicated. Also, here, your caption doesn’t have to be under your image. If you want to, you can actually place it on top of your image, like this:

How to Add a Caption to an Image in Google Docs Using Tables
Surely, the drawing method is pretty easy and convenient. Nevertheless, here’s the third method that you can use to add captions to images in Google Docs. Here’s what you need to do:
- Once your document is open, find where your image and caption should be, then place your cursor there.
- Now, you need to create a table that consists of one column and two cells. So, go to Insert > Table and choose a 1x2 table.
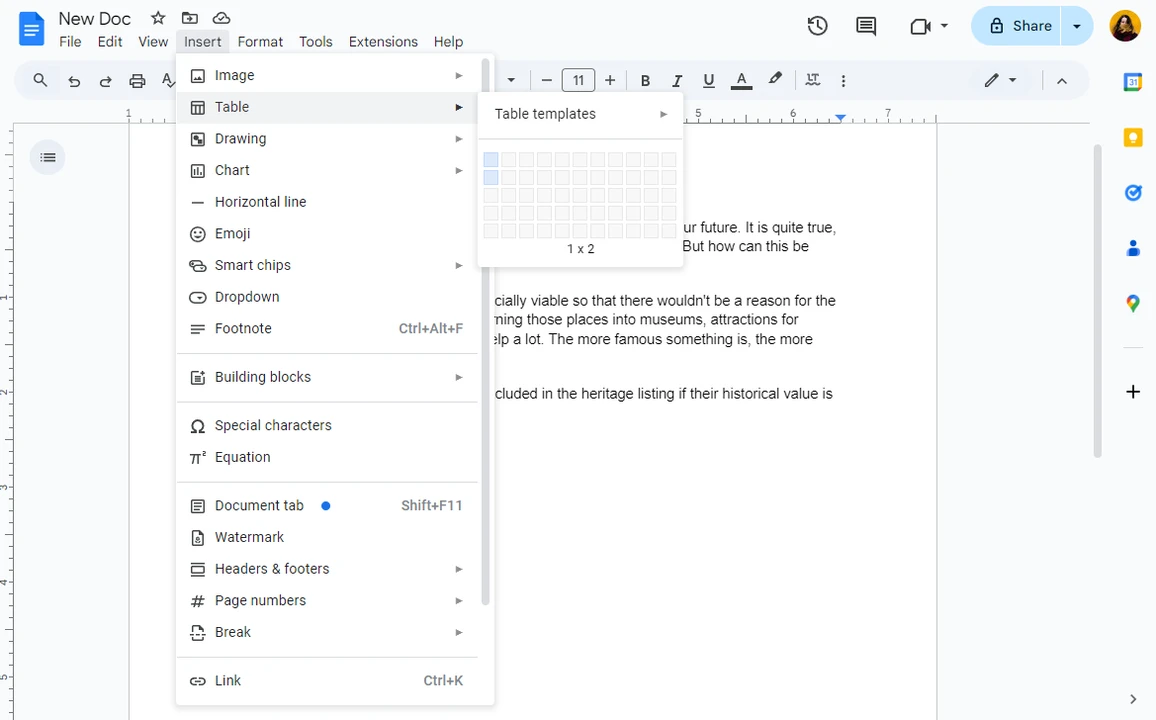
- Click inside the top cell, then go to Insert > Image and import your image. If your image is already inserted into the document, drag it into the top cell using the cursor.
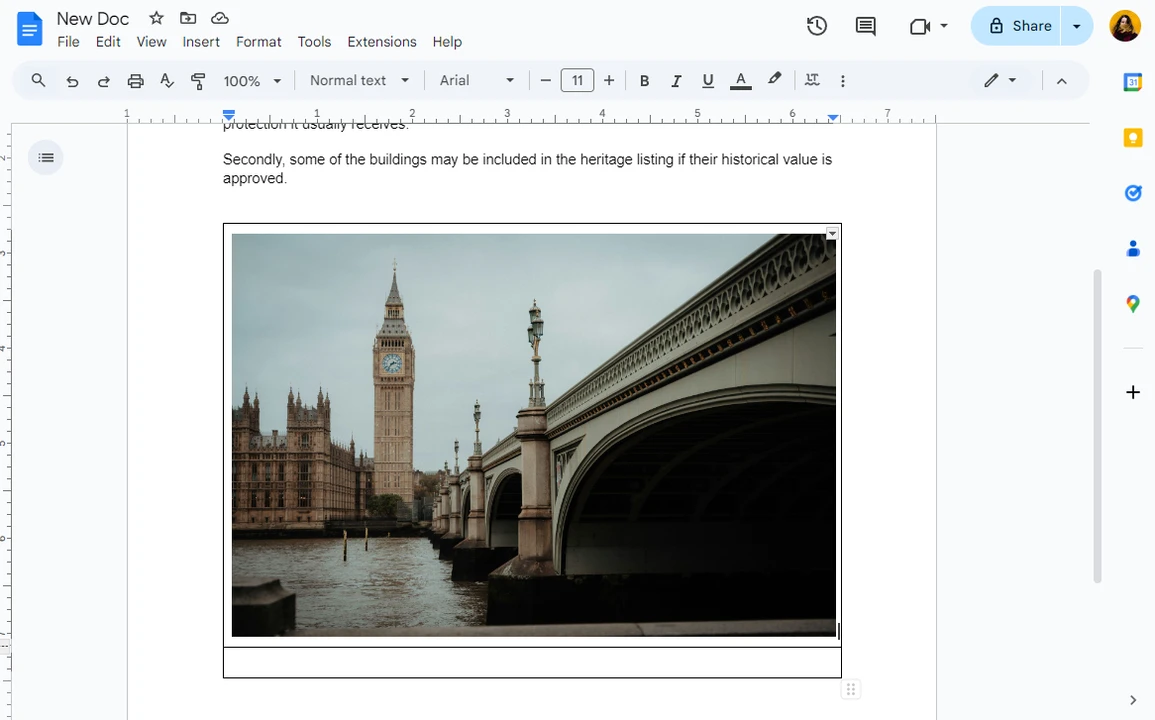
- Click inside the bottom cell and type in your caption. Use the toolbar to adjust the size and alignment of your text as well as make any other edits to its style.
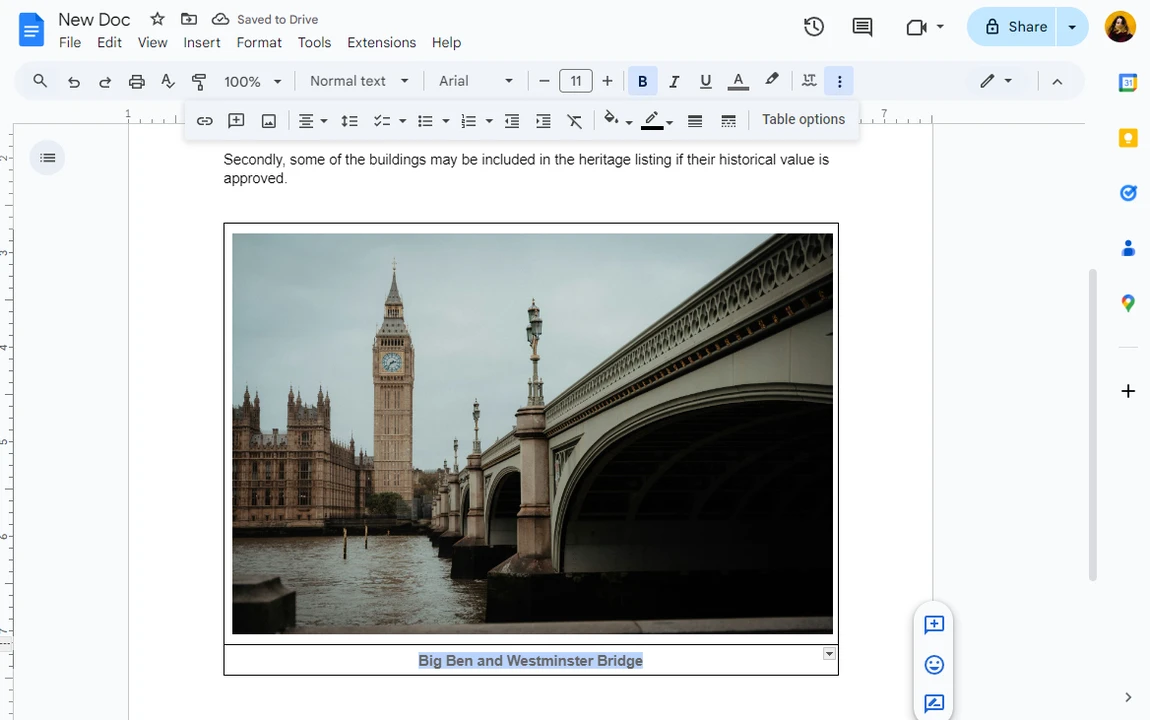
- Go to Format > Table> Table Properties.
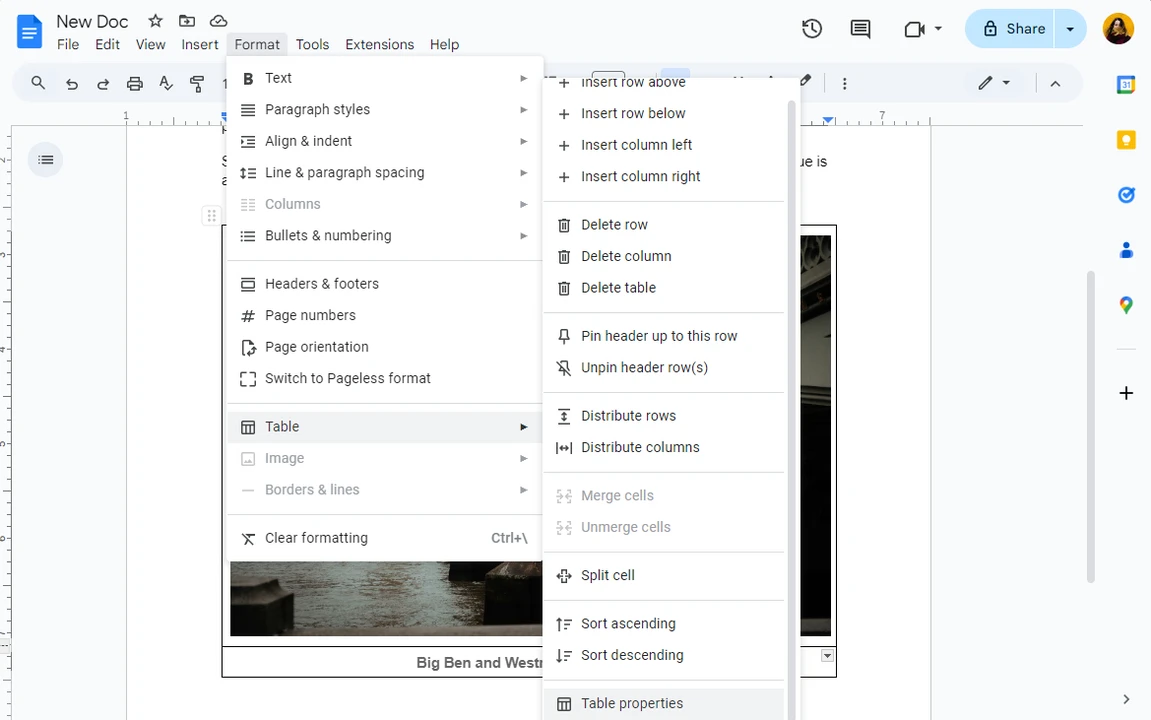
- Navigate to the Color section.
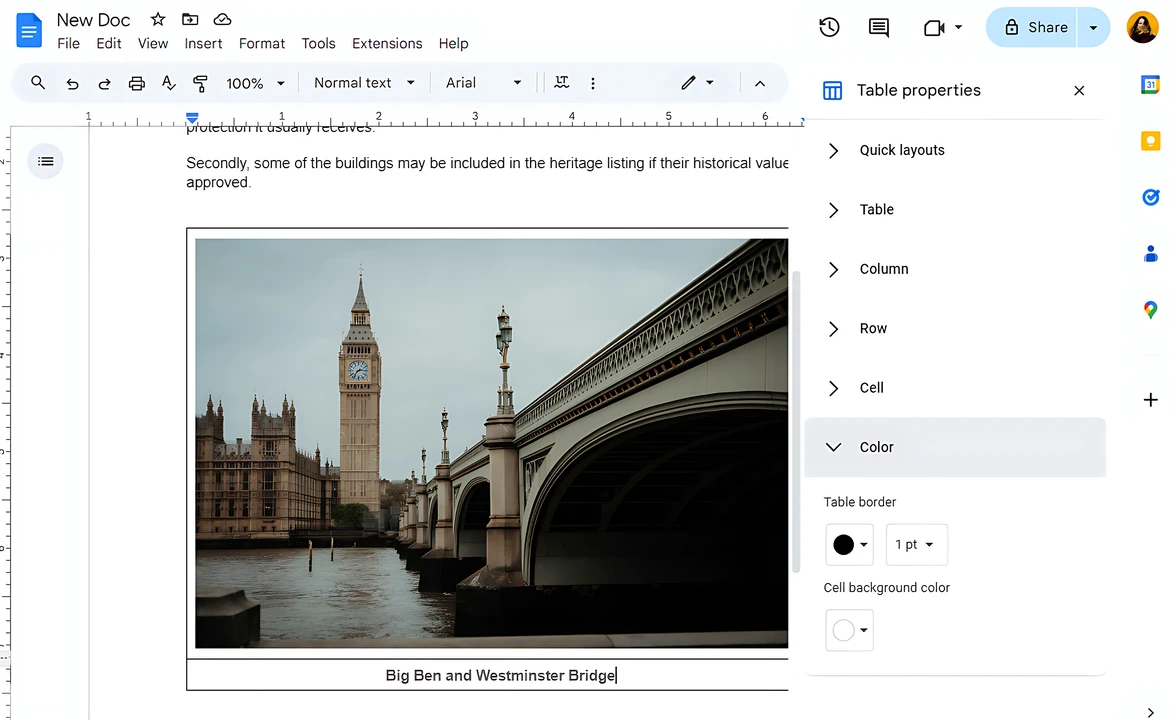
- Set the border size to 0 pt. Your table will become invisible!
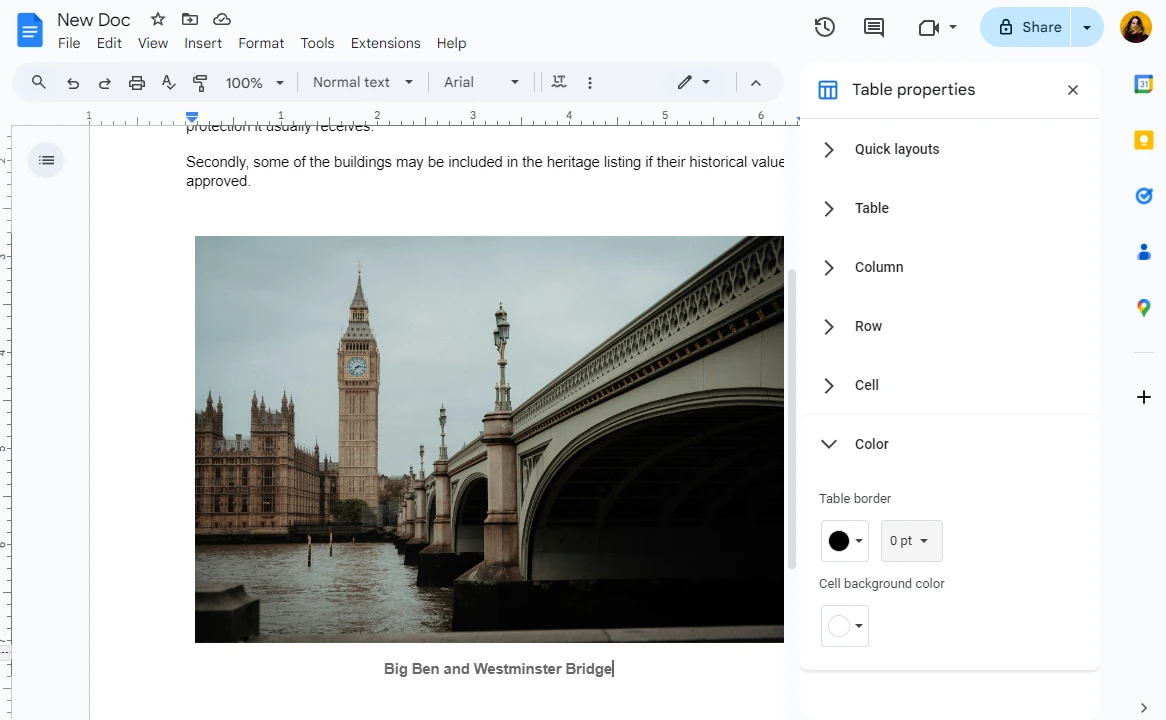
- Close the Table Properties to apply the changes.
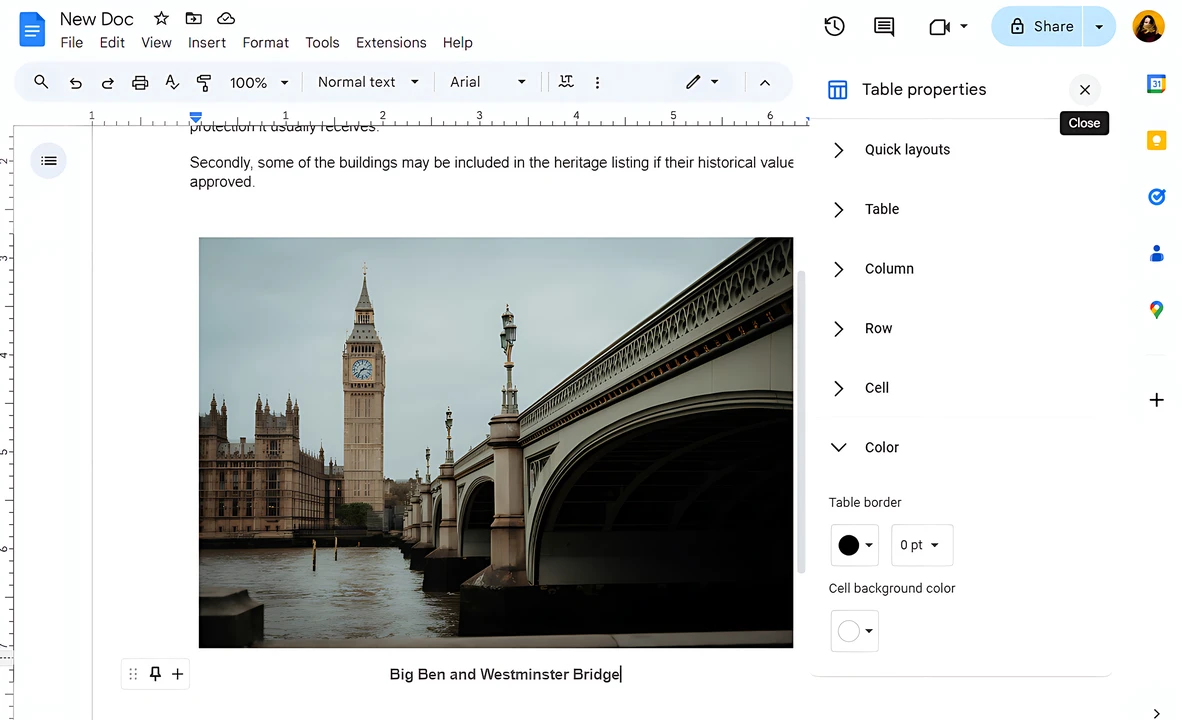 If you need to change the position of your image and caption, make sure that you are repositioning the entire invisible table. But similarly to the drawing method, you will be able to change the position of both the image and the caption at the same time since they are inside a single table. It’s also possible to make new changes to the caption whenever you want.
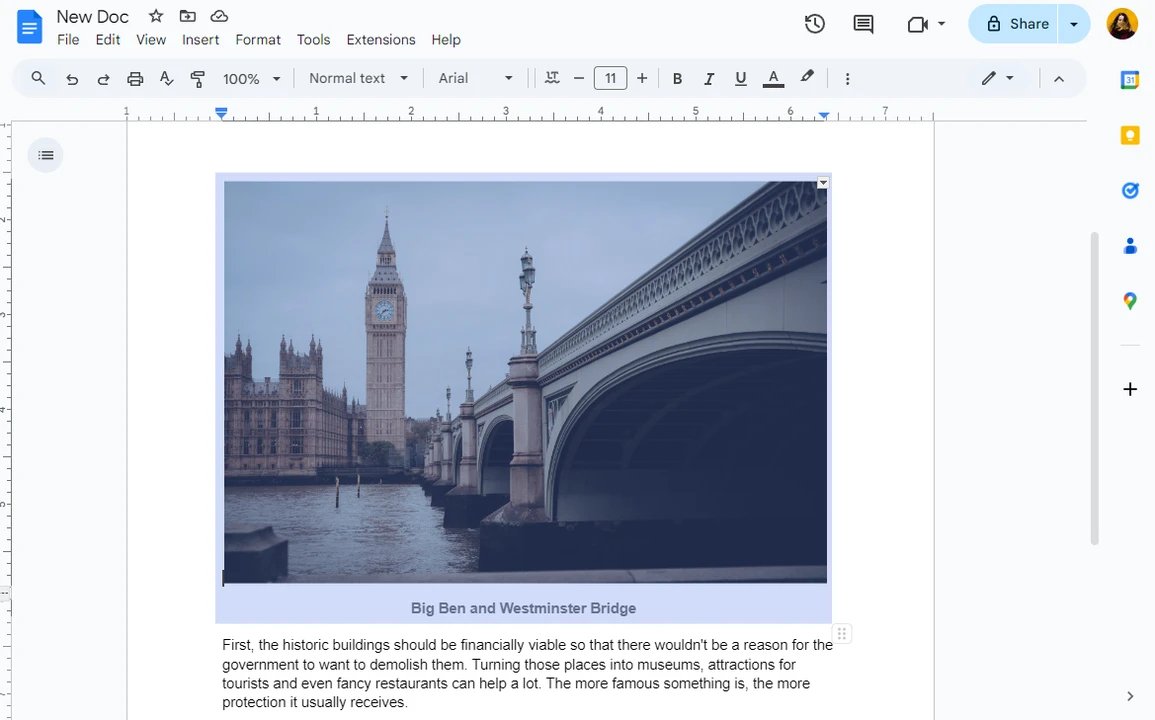
How to Add a Caption to an Image Itself
As it has already been mentioned, a caption is a description that accompanies an image. In most cases, it sits under an image. Sometimes, it might be placed to the left or to the right. It’s rarely placed above an image as it might confuse some people. But what if you think outside the box and make your caption a part of your image? In other words, what if you add text to your image?
Of course, your text will obscure some bits of your image. But you will be able to place your text anywhere within the frame you want. There won’t be any confusion. What’s more, if you add a caption to an image itself, you won’t have to worry about your caption getting detached from your image. And it will be much easier to move your picture around your document.
This can be done in Google Docs using the drawing method. Alternatively, you can do this in Watermarkly.
You can add text to your images using Watermarkly first, then insert your modified pictures right into your document. And you won’t need to go through the whole process of adding captions in Google Docs.
Fortunately, adding text to an image is much easier in Watermarkly. All you will need to do is to upload your picture into the app, enter your text, make some adjustments to the style of your text, then export your image. Pretty quick and straightforward!
Watermarkly’s website offers two apps. One of them can add text to a single image. You can use it to caption each image separately.
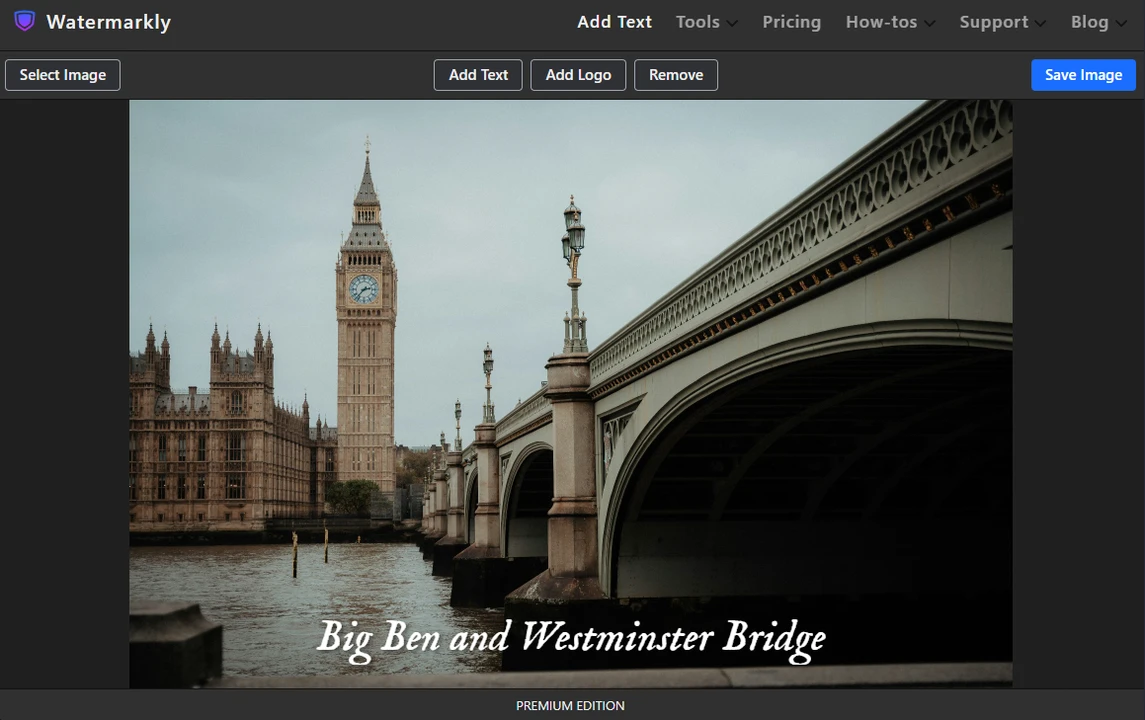
There’s also a batch-watermarking app. It can add one and the same text to multiple images. What’s more, you can add sequential numbers to your text. Which is why you can easily upload a batch of images, type in “Figure” into the text input area, then click on “+ Image Number”.
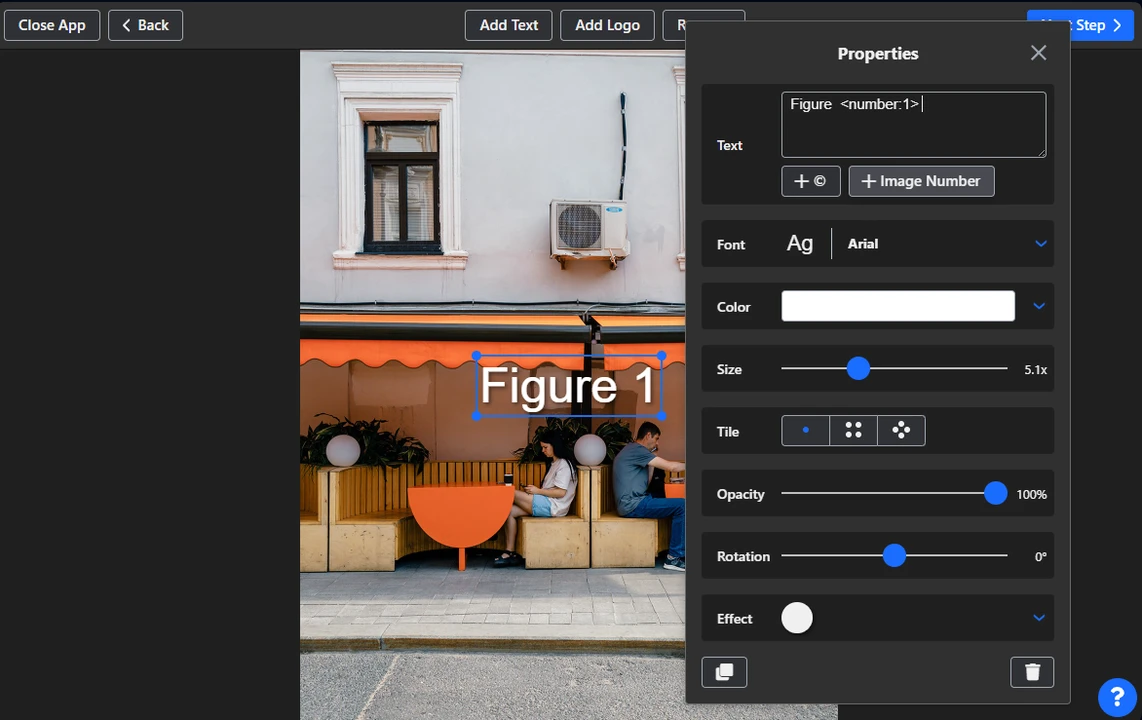
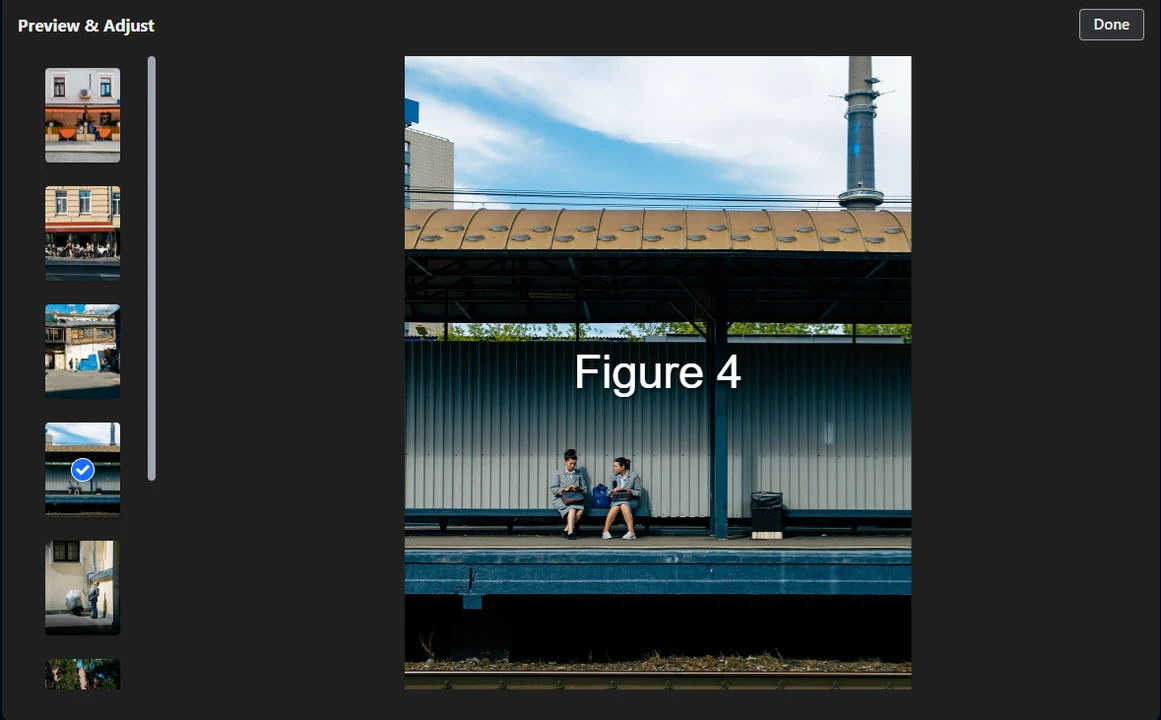
The numbers will be generated automatically, according to the order that your images were imported into the app. If you need to add image captions to make your document more structured, it’s an easy and fast way to do so.
If you want to protect your images from being stolen, you can also use Watermarkly to watermark your images before inserting them into your document. In addition to this, you can blur faces, crop photos, compress images and perform some other basic image editing tasks on Watermarkly’s website. It can be incredibly helpful to make some minor tweaks to your images before inserting them into your document in Google Docs.
Conclusion
You can benefit greatly from captioning your images. It can make your image more impactful or provide more information and create a better emotional connection with your audience. It’s also great for improving the search engine visibility and organizing the content of your document better so people won’t get lost.
Thanks to the instructions in this guide, now you know how to add a caption to an image in Google Docs in three different ways. It might be a good idea to give each of these methods a try to see which one suits you best and will give you the desired results. And if you want to stand out from the crowd and add captions to images themselves, you can use Watermarkly for that.